This easy cabbage kimchi recipe is easy to make and takes only 30 minutes of hands-on time before Mother Nature takes over! Video.
We are never in as much joy as when we are engaged in the well-being of others. ~ Adyashanti
With over 100 5-star reviews, this Kimchi Recipe is one of the most popular recipes on the blog. As a chef and caterer, I've made this kimchi dozens of times and have spent years simplifying this easy process so anyone can make it at home; it's practically foolproof!
Many years ago now, we catered a Korean wedding. I remember meeting with the bride and groom and listening very carefully about the importance of the kimchi being served. It had to be “just right”.
The bride’s mother was kind enough to give me her family’s secret kimchi recipe, handed down for generations! After several attempts, I anxiously awaited her feedback.
Her reaction blew me out of the water. She loved it so much that she got teary and allowed me to share her family’s recipe here!
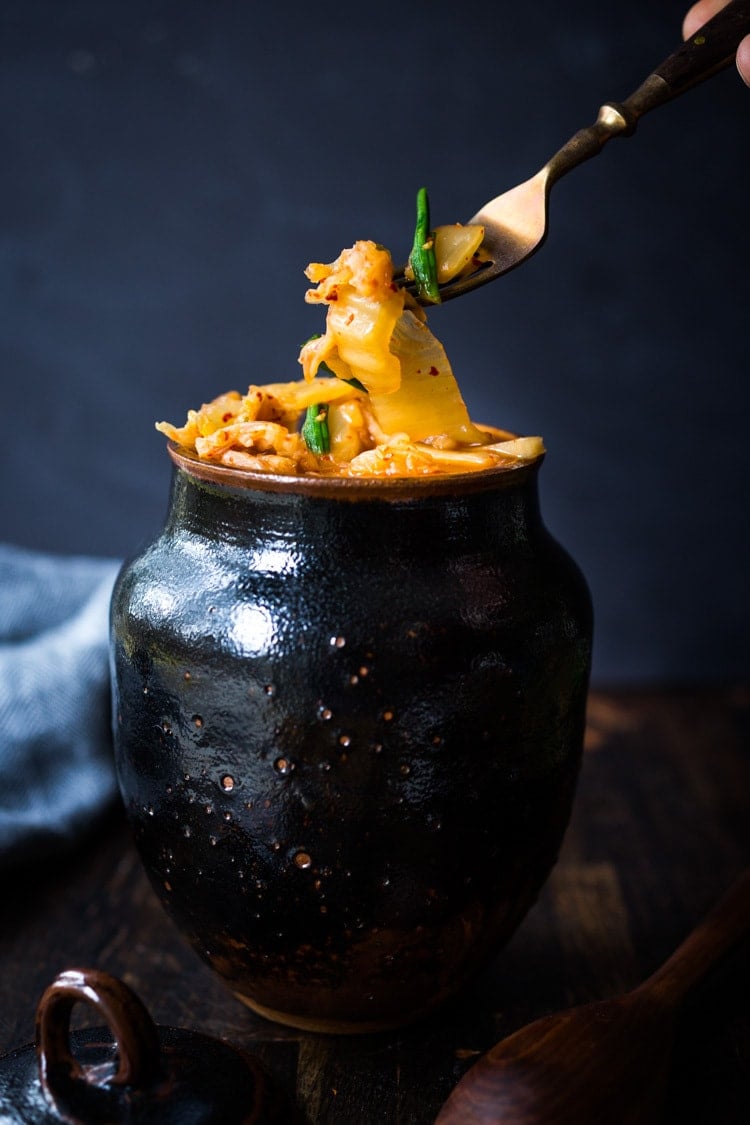
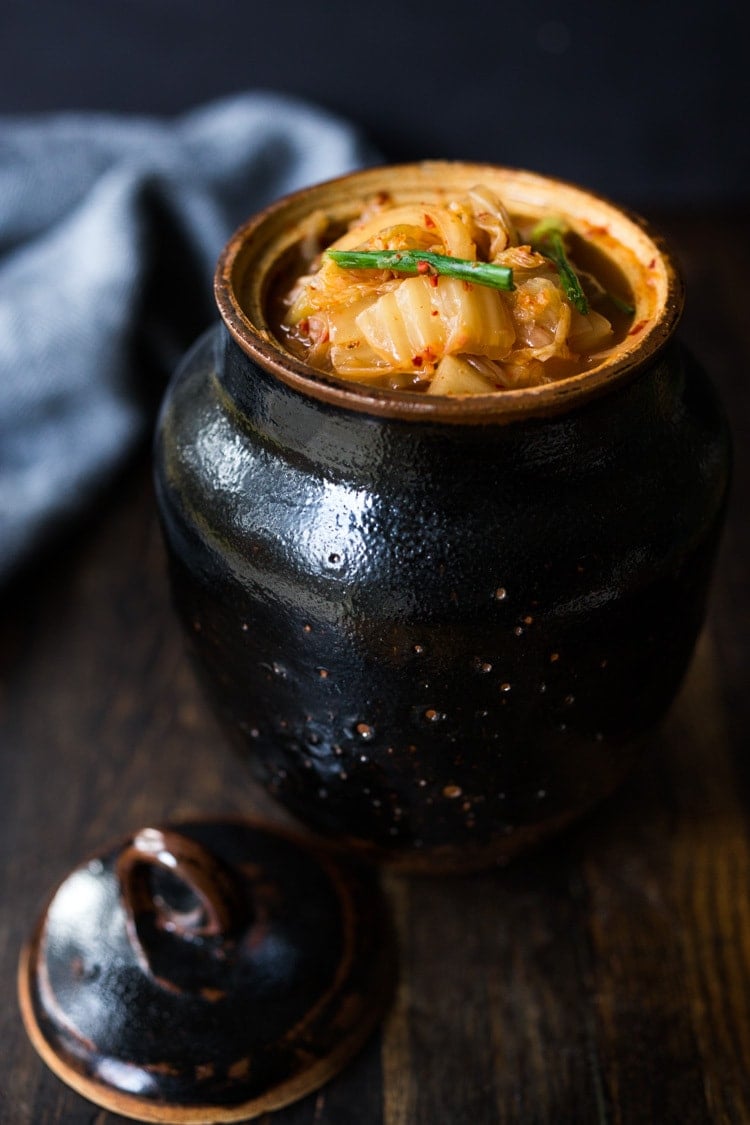
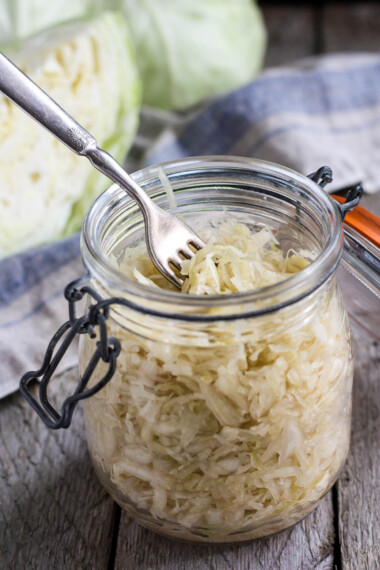
Kimchi is essentially fermented cabbage -similar to sauerkraut in how it is made, but using napa cabbage and seasoned with Korean spices: garlic, fish sauce, ginger & Korean chilies. Kimchi is the heart and soul of Korean cooking, and delicious with so many things!
Want to know the best thing about Kimchi? Kimchi is alive! Full of living, healthy, good bacteria or probiotics that support the gut, boost immunity, energize the body, and aid digestion, it is believed to fight cancer, lower cholesterol, and regulate blood sugar.
Why you’ll love this Easy Kimchi Recipe
- Simple ingredients. Familiar, whole-food ingredients like cabbage, spices, optional fish sauce, salt, dried Korean chilies, and sugar are called for here. Nothing processed!
- Vegan-adaptable. This recipe calls for fish sauce but can easily be made vegan. You can also leave out the sugar if you prefer.
- Incredibly nutritious! Kimchi is full of gut-healthy probiotics (specifically lactobacillus bacteria) that support a diverse gut microbiome. It also boosts the immune system, energizes the body, lowers cholesterol, and regulates blood sugar- along with so many other benefits!
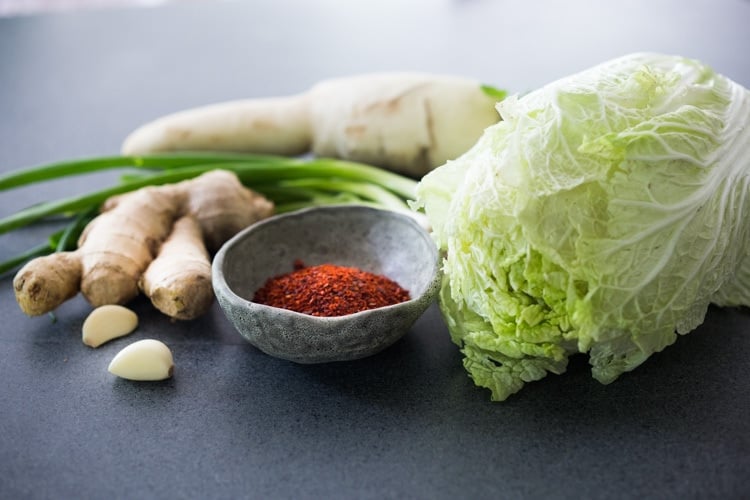
Kimchi Recipe Ingredients
- Napa Cabbage: This is the main ingredient and the heart of the recipe. Opt for organic or locally grown. Yes, you can substitute other cabbage, but Napa Cabbage is traditional.
- Fine Sea Salt– salt is key to fermenting, inhibiting bad bacteria growth while promoting good bacteria.
- Ginger: Adds a fragrant and subtly spicy taste.
- Garlic: Aromatic and pungent, garlic is key to enriching the flavor.
- Scallions (green onions): Brings in a bit of onion-like flavor, crunchy texture and color!
- Daikon: Subtly sweet and crunchy, daikon radish adds substance and texture.
- Fish Sauce, Shrimp paste, or Miso paste: Adds salt, umami, and depth of flavor. Shrimp paste is traditional, but fish sauce and miso (vegan option) both work too.
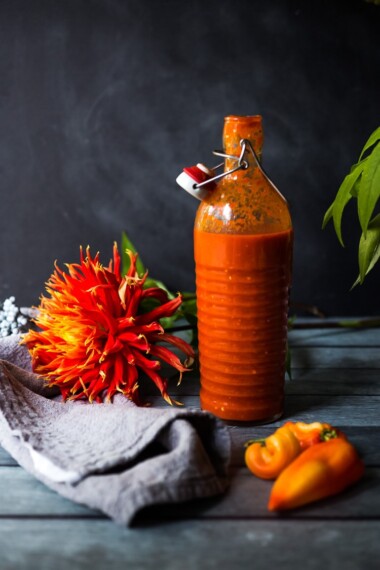
- Korean Chili Flakes: We use dried chili flakes (called Gochugaru)here for the purest, cleanest flavor(no preservatives, oils, or flavorings). Feel free to sub Gochujang paste if you prefer.
- Optional: Glutenous rice flour can be added to thicken.
- Equipment: An 8-cup mason jar and a fermentation weight are handy.
This easy kimchi recipe makes enough to fill a large two-quart jar (about 8 cups).
How to make Kimchi
*See the recipe card and video below!
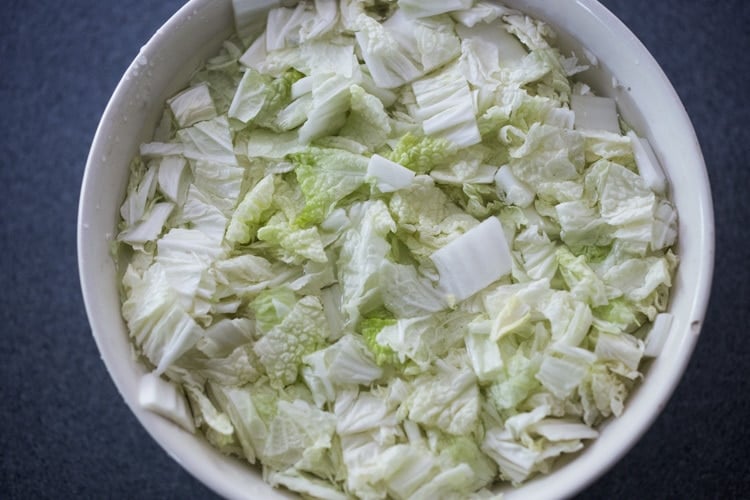
Step one: Save 1-2 outer leaves of napa cabbage and place them in the fridge while you prep the recipe. (You will use these later). Using a cutting board, cut the napa cabbage into 1-inch cubes with a sharp knife.
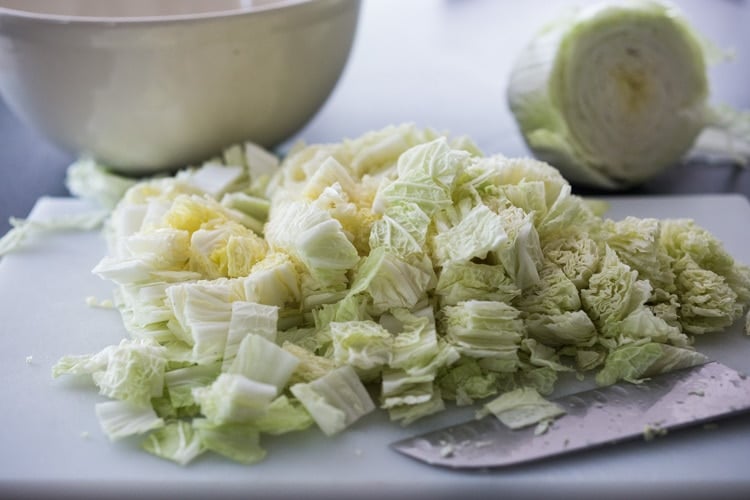
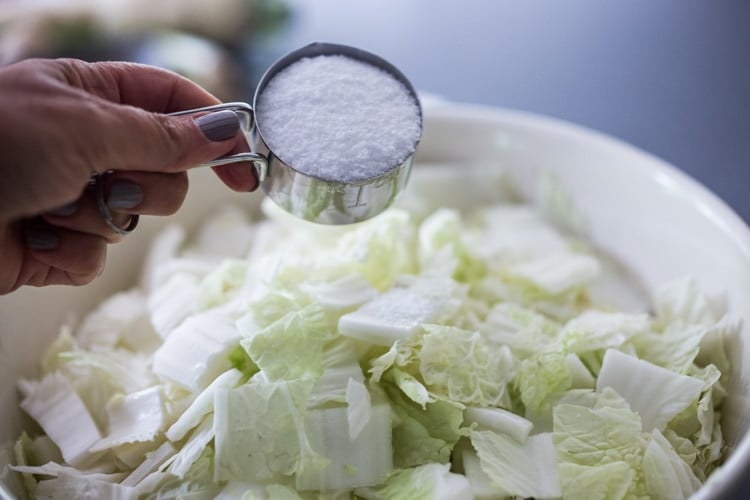
Step two: Place the chopped napa cabbage in a bowl and toss with 1/4 cup sea salt.
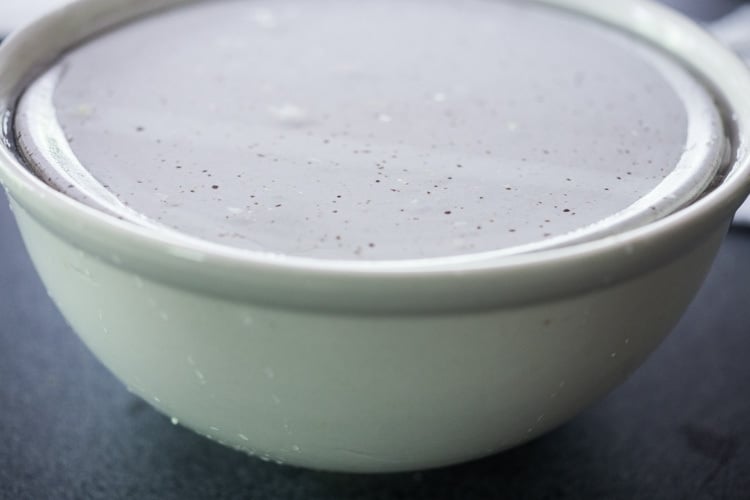
Step three: Fill the bowl with filtered water and stir, and soak the napa cabbage for 6-8 hours, stirring every couple hours.
Place plate over the napa cabbage to keep it submerged.
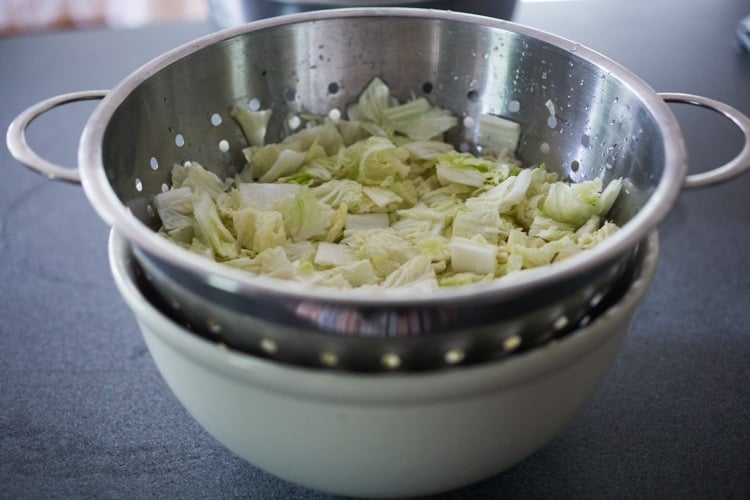
Step Four: After 6-8 hours, drain (making sure to save the brine) and rinse, pressing the liquid out.
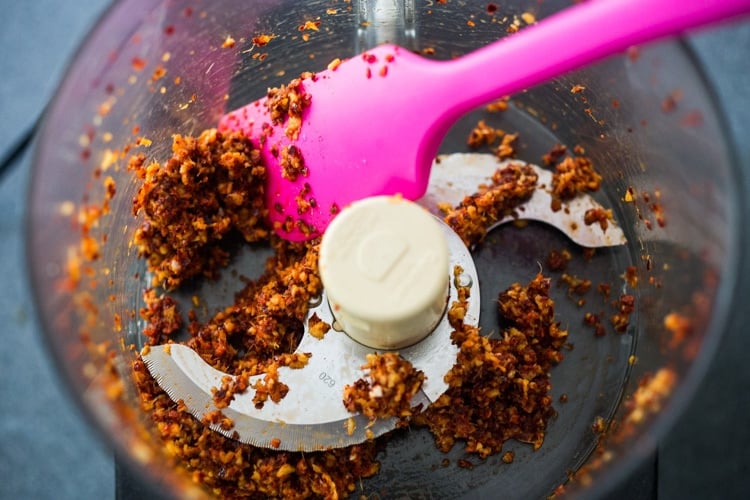
Step Five: Make the Kimchi Paste
As I stated earlier, I prefer to use Korean Chili Flakes called “Gochugaru” vs. the Korean fermented Chili Paste called “Gochujang”. Feel free to use Gochujang if you please. Totally up to you. Either way, you will make the paste below.
Many people ask if they can use regular old chili flakes- yes, but they are much spicier!!! Gochugaru is fruitier and less spicy, so you can use more and get more flavor. You could try subbing dried Arbol Chilies if you absolutely can’t get the Korean Chili flakes – or even use fresh red chilies to make the paste.
In a food processor, make a paste with garlic, ginger, shallot, Korean chili flakes (or Gochujang) and optional fish sauce (or miso) and sugar. If you want a mild version, use half the chili flakes. The fish sauce really adds a delicious complexity and depth, but you can, of course, keep it vegan with miso paste.
Step Six: Peel and cut the daikon radish (or carrots) into match sticks, about 2-3 inches long. Cut the scallions.

Step Seven: Cut the scallions into 1-2 inch pieces.

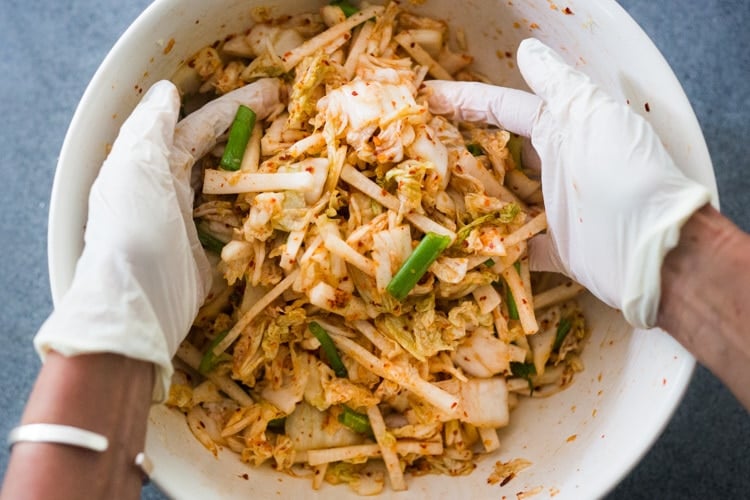
Step Eight: Combine the Kimchi. Place the drained cabbage along with the daikon, scallions and chili paste into the bowl. Massage the cabbage with gloved hands.
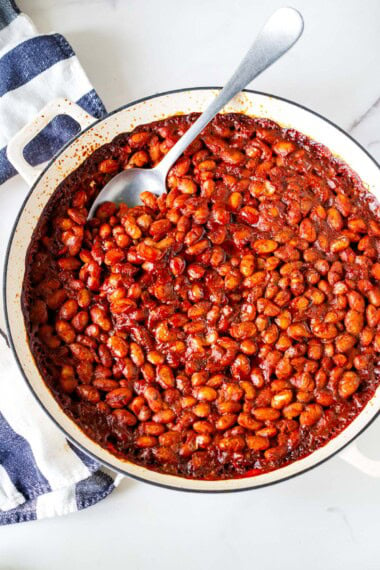
FYI: This is a very mild version shown below, so not very red in color, (2 tablespoons chili flakes). You can add more chili flakes if you want it spicier – I normally add 4-6 tablespoons.
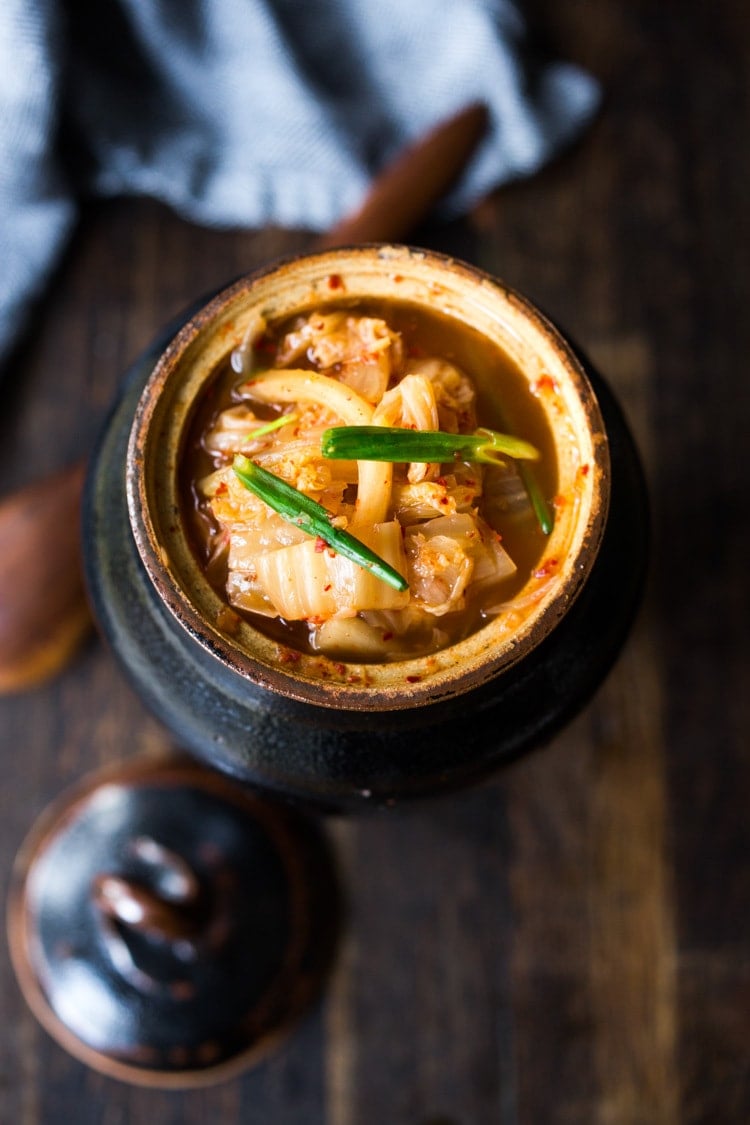
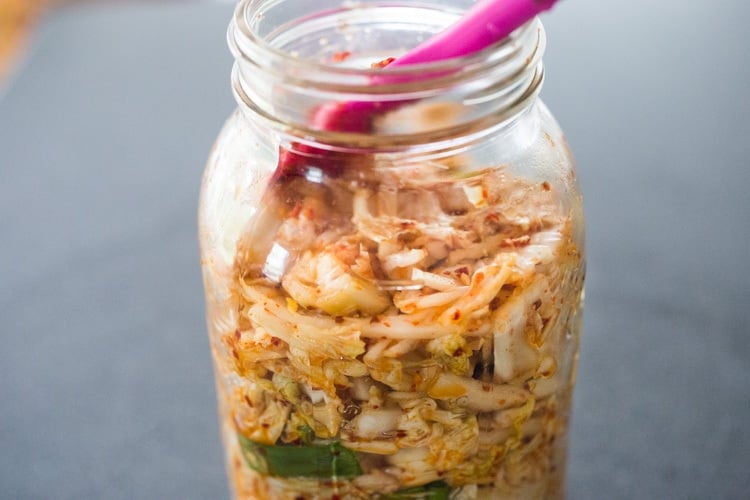
Step Nine: Pack the Kimchi.
Pack tightly into a large two-quart jar (half-gallon, 64 oz) or large crock. (Or use two, quart-sized mason jars.) You want a good two inches of space at the top to catch the flavorful liquid that will release.
TIP: I have had great success with this Fermentation Kit that has crystal weights that fit perfectly in a wide-mouth mason jar. It is so convenient for small-batch ferments. This fermentation kit includes the jars which is a great option too!
Cover with the cabbage leaf you saved in the fridge, and press down. Pour a little of the brine into the jar, just enough to cover the cabbage.
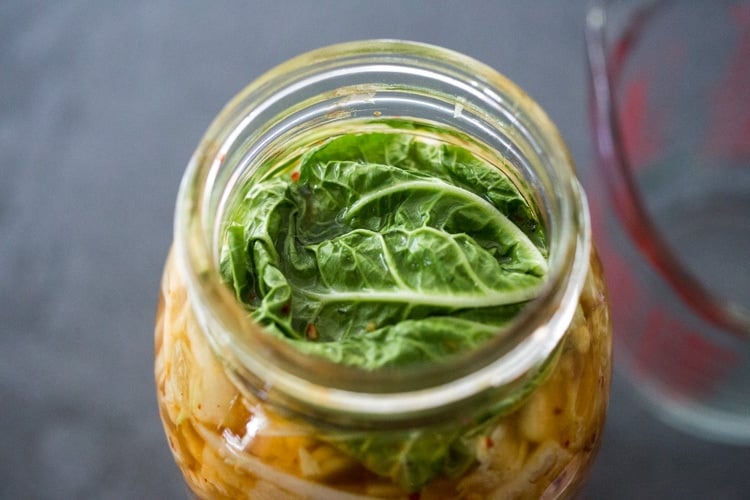
The cabbage leaf will help keep the chopped pieces of cabbage contained and submerged. Add a fermentation weight, pressing down to keep the cabbage leaf submerged under the brine. Anything that floats to the top and touches air can mold. So remove with a slotted spoon. Cover lightly with a lid (do not screw on tight) and place on a rimmed pan or bowl ( to collect any overflow).
Step Ten: Lacto-Fermentation
Set the jar somewhere dark and cool like the basement for 3-5 days. 60F-70F is ideal. Use a thermometer! A lower kitchen cabinet away from the stove or appliances can also be a cool spot. Fermentation happens faster in warmer climates and slows in cooler climates.
Check daily, pushing down the cabbage under the brine if need be and removing floaters. Remember, anything that touches air can mold.
After 2 days, the salt will have inhibited the bad bacteria enough to make more room for the good bacteria to feed on the cabbage and grow. As they “eat” the cabbage, they create gas and a tangy byproduct. This is how you know it is fermenting!
Kimchi Variations
Like so many things, there are so many variations to kimchi, and people have their own personal preferences. I just wanted to provide you with a starting point, and I’m sure you will adapt to your own tastes!
- Sugar is optional- some people add it, some don’t!
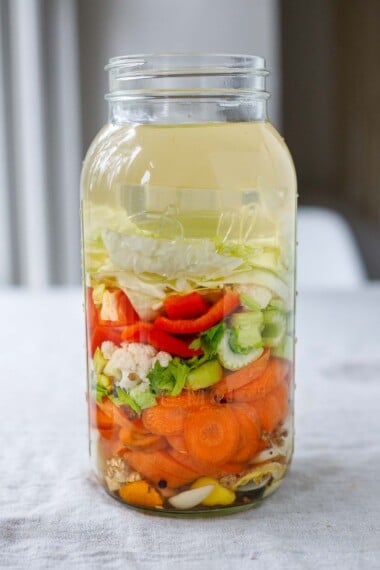
- Matchstick carrots would make a nice addition if you want more vegetables.
Probiotic Benefits of Kimchi!
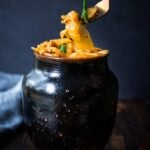
There are so many reasons to consume fermented foods and probiotics daily, like this gut shot that contains strains of live probiotic cultures. Here are the benefits of consuming live active cultures:
- Improved Digestion: Probiotics can help maintain a healthy balance of gut bacteria, preventing dysbiosis or leaky gut. Probiotics aid in digestion and nutrient absorption. Read more.
- Enhanced Immunity: A healthy gut contributes to a strong immune system, and probiotics can help support this by promoting a balanced gut microbiome. Further information.
- Mental Health Support: Some studies suggest that probiotics may have a positive impact on mental health, potentially helping to reduce symptoms of anxiety and depression. Explore the study.
- Metabolic Health. Adding fermented foods to the diet can play a role in preventing and managing metabolic conditions, such as obesity and diabetes. The metabolites produced during fermentation can help regulate appetite and improve insulin sensitivity. Some fermented foods have been associated with better weight management.
- Cardiovascular Health. The bioactive peptides produced during the fermentation process have been recognized for their role in cardiovascular health. These substances can lower blood pressure and have anti-thrombotic properties, which are important in the prevention of heart disease. Check out the research.
How to use this Kimchi Recipe
We add napa cabbage kimchi to so many things! It is a huge flavor booster, and FULL of natural, gut-healing bacteria that support your microbiome, boost your mood, and bolster your immune system!
Here are a few of our favorite ways to use kimchi!
- Kimchi Fried Rice
- Kimchi Noodles
- Kimchi Burritos
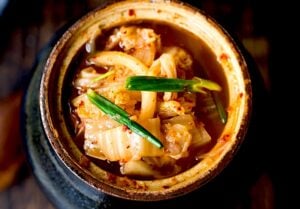
- Kimchi Soup Recipe
- Seoul Bowl!
- Top it on our Gochujang Sweet Potatoes!
- On Buddha Bowls or with any of our Asian recipes!
- As a side dish with dinner, simply drizzled with toasted sesame oil and with a sprinkle of sesame seeds!
Storing Kimchi
Keep fermented kimchi in the refrigerator. Kimchi can not be made shelf-stable without killing the probiotics. Store in a 2-quart jar or crock with the lid on, pressing it down under the brine after each use. It will keep for months on end in the fridge when the kimchi is submerged below the brine….getting better and more flavorful with time!
Popular Ways to Serve Kimchi
- Make Kimchi Chili Mac and Cheese
- Try our Kimchi Noodles
- Kimchi Burritos!
- Kimchi Fried Rice
- Make our Vegan Bulgogi Bowl
- Serve with Korean Tofu Rice Bowls or Sticky Tempeh
- Alongside our Korean BBQ Chicken
- Serve on top of our Garlic Noodles
Homemade Kimchi FAQs
The ideal temperature for fermenting kimchi is 65 degrees. 65 F is perfect! The cooler it is, the slower it will take to ferment. The warmer, the faster. The longer you ferment the tangier and softer the kimchi will get. I prefer slightly crunchy kimchi, so ideally, 3-5 days at 65F is my favorite! Going too much over 70 degrees can actually have negative effects on the flavor.
If your kimchi is too watery for your taste, you can thicken it. To thicken kimchi, stir in a little glutenous rice powder. Some traditional recipes also use soybean powder.
Kimchi tastes sour, tangy, salty, spicy, and pungent! It’s similar to sauerkraut in that it is fermented cabbage, but kimchi is packed with flavor, umami and a little (or a lot) of heat! The fermentation process is what gives kimchi its sour flavor.
Because kimchi is naturally fermented, it is full of healthy bacteria, good for the gut and good for immunity. But besides being a healthy thing to incorporate into our diets, Kimchi adds so much flavor to things we are already making at home!
1. After 3 days, tap the jar to see if any bubbles rise to the top; bubbles indicating that it is fermenting. If there is any overflow, this is also a good sign of fermentation.
2. Smell, or taste the kimchi for tanginess. If it tastes sour or tangy, this is a sign of fermentation. If it just tastes salty, it is not fermented. Let it it sit a few more days.
3. Continue to ferment for 2 to 3 more days. If you want it tangier or softer, ferment longer, and when satisfied, place it the fridge, keeping in mind it will continue to ferment and create lactic acid, albeit more slowly. It will develop more flavor and complexity over the next two weeks in the fridge, and the spice level will mellow with time!
More Favorite Fermented Foods!
Enjoy the process of making Kimchi! Please ⭐️ rate the recipe (always appreciated) and tell us how it goes in the comments below.
If you like getting creative in the kitchen, try our Ginger Turmeric Shots Recipe or DIY all-purpose cleaning solution! Or, explore all of our Wellness Recipes!
xoxo
How to make Kimchi | step-by-step video
Kimchi Recipe
- Prep Time: 30 minutes
- Cook Time: 4 days
- Total Time: 72 hours 30 minutes
- Yield: 8 cups 1x
- Category: fermented, preserved, sides
- Method: fermented
- Cuisine: Korean
- Diet: Vegan
Description
This easy Kimchi recipe is simple to make and takes only 30 minutes of hands-on time before Mother Nature takes over! Full of healthy, gut-healthy probiotics, this authentic kimchi is vegan-adaptable, gluten-free, and can be made as spicy or as mild as you like! Includes a video.
Ingredients
- 2 pounds napa cabbage, (large napa cabbage)
- 1/4 cup sea salt (60 grams)
- 2 cups daikon radish, cut into matchstick strips (optional, or use carrots)
- 1 bunch scallions, trimmed and cut into 1-inch pieces
- 1 tablespoon fresh ginger, sliced ( 2-3 disks, peels ok)
- 6 cloves garlic, whole
- 1 shallot, quartered (optional)
- 2–6 tablespoons Korean-style red pepper flakes (gochugaru) or sub gochujang – see notes!
- 2 tablespoons fish sauce (or use vegan fish sauce, shrimp paste, miso paste, or soy sauce), more to taste
- 2 teaspoons sugar ( or an alternative like honey, brown rice syrup)
- OPTIONAL:1 tablespoon glutenous rice powder (see notes)
Instructions
- SALT THE CABBAGE (6-8 hours): *Reserve 1-2 outer leaves of the napa cabbage and refrigerate for later use. Core and cut the remaining cabbage into 1-inch pieces and place in a large bowl with the salt and toss well. Add enough cool water to cover the cabbage and stir until salt is dissolved. Keep the cabbage submerged with a plate over the bowl and let this stand at room temperature 6-8 hours (giving a stir midway through if possible) or overnight.
- Drain the cabbage, saving the brine. Rinse the cabbage (not excessively, just a little quick rinse), drain, squeeze out any excess water, or blot with paper towels, and place it back in the bowl, adding the daikon radish and scallions.
- Make the PASTE: Place the ginger, garlic, shallot, red pepper flakes, fish sauce (or alternatives) and sugar in your food processor. Add optional rice powder (see notes!) Process until well combined, pulsing, until it becomes a thick paste.
- MASSAGE: Scoop the paste over the cabbage and using tongs or gloves, mix and massage the vegetables and the red pepper mixture together really well, until well coated.
- PACK the cabbage into a large, two-quart jar (or two, quart jars) or a crock, leaving 1-2 inches room at the top for juices to release. Add a little of the reserved brine to just cover the vegetables, pressing them down a bit ( so they are submerged) Place the whole cabbage leaf over top, pressing down- this should help keep the kimchi submerged under the brine. You can also use a fermentation weight placed over top of the whole leaf to keep it submerged. Or a small zip lock filled with water. Basically anything that touches air may mold – but no worries if this happens (see notes) it is not ruined.
- FERMENT (3-4 days) Cover loosely with a lid (allowing air to escape) and place the jar in a baking dish (or big bowl) to collect any juices that may escape. (The idea though, is to keep as much of the flavorful juice in the jar, so don’t overfill.) Leave this somewhere dark and cool (55F-65F is ideal) for 3 days. A basement or lower cooler cabinet in the pantry or kitchen away from appliances works best.
- EVENING OF DAY 3: Check for fermentation action or bubbles. Tap the jar and see if tiny bubbles rise to the top. Check for overflow (which also indicates fermentation). If you see bubbles, it is ready to store in the refrigerator where it will continue to ferment and develop more flavor slowly. For a softer tangier kimchi, you can continue to ferment for 3 more days or longer. If no action, give it another day or two. If you don’t see bubbles when tapping the jar, it just may need a couple more days- especially in cooler climates. Be patient. See the troubleshooting section below.
- REFRIGERATE: After you see bubbles (usually 3-5 days) the kimchi is ready, but it won’t achieve its full flavor and complexity, until about 2 weeks (in the fridge) slowly fermenting. The longer you ferment, the more complex and tangy the taste. If you like a fizzy brine, tighten the lid, burping every week or so. If you don’t want to think about it, give the lid one loose twist, so it’s on there, but gases can escape.
- Maintenance: This will keep for months on end in the fridge (as long as it is submerged in the brine) and will continue to ferment very slowly, getting more and more flavorful. Feel free to remove the cabbage leaf and just press kimchi down under the brine, after each use. ( See notes for adding more brine.)
- SERVE: Serve it as side dish: scoop it out using a slotted spoon, place in a small bowl, drizzle with sesame oil , toasted sesame seeds, and fresh scallions. Or Use it in Kimchi Fried Rice, Kimchi Burritos, Seoul Bowls, Kimchi Soup!
Notes
For milder kimchi, start with 2 tablespoons Korean chili flakes ( you can always stir in more). I like a spicy version with 6 tablespoons. 4 tablespoons is medium spicy.
If substituting with gochujang paste, add 2-6 tablespoons. You can always start conservatively and add more to taste after fermentation.
If you like your kimchi, thick, and less watery, you can use sweet glutenous rice powder to thicken. This is not the same as rice flour! Cook 1 tablespoon glutenous rice powder with ½ cup water, in a small pot over medium heat, stirring constantly until it boils. Let cool, still whisking occasionally. Add to the chili paste in the food processor. Continue with recipe.
BRINE If you need or want to add more salt brine to the kimchi, to keep it submerged, mix water and salt at this ratio: 1 cup water and 1 1/4 teaspoon fine sea salt. Stir it together first, pour over the kimchi.
TROUBLESHOOTING:
- MOLD If your cabbage leaf that is holding the kimchi down, happens to mold, just remove it, wipe out the rim of the jar as best you can, and replace it with a fresh one. Basically, if cabbage touches air here, it will mold, so after each use, press the kimchi down under the brine.
- NO BUBBLES: Check the temp of the kimchi using a kitchen thermometer. Ideally, you want this between 50-70F. 60-65 is best.
Nutrition
- Serving Size: ¼ cup
- Calories: 20
- Sugar: 1.6 g
- Sodium: 822.5 mg
- Fat: 0.2 g
- Saturated Fat: 0 g
- Carbohydrates: 3.9 g
- Fiber: 0.4 g
- Protein: 1.3 g
- Cholesterol: 0 mg


Can it be made without the sugar, honey etc or is that needed to cause the fermentation
You don’t need it for fermentation, only for flavor.
I am confused and apologise if this is a stupid question.
Don’t you have to put the probiotics/starter in at some point like you do when you make yogurt or sourdough bread?
If now, where do the probiotics all come from?
Hi Glen, as the cabbage ferments it naturally creates healthy bacteria- aka, probiotics. The salt prevents bad or unhealthy bacteria from growing here. No starter needed. 🙂
Hmmm. Concerned about “too much salt may kill it”. Is it possible to get a weight for the amount of salt?
Yes, I added it to the recipe card. 🙂
This is the first time I’ve made kimchi. I didn’t have access to Korean pepper, and used the Allepo that I had. Bad choice. Way too hot, even in a small amount!! I’m making it again soon so I don’t run out of it.
Thank you so much for introducing me to fermented foods, particularly in these days when building immunity is at the top of my list! Fresh air and health for me!
I did that, and a little more on most things. Ended up with 7 quarts. I’ll let you know how it turns out. Thanks again for your great recipe!
Made this earlier this week and it’s gone. If making a double batch, do you double the salt as well?
Great recipe!
Yes, I would double everything. 🙂
Can we you a plastic jar to pack it?
Plastic may leach into the Kimchi.
Hi, I’m on a vegan diet so are there any alternatives to using fish sauce
Hi- you could use soy sauce or miso paste- and I have a vegan fish sauce on the blog too.:)
Made this twice now, the second time I was more careful with the amount of brine in the final mix and used more paste mix which produced a denser result. Really yummy, thank you for the recipe..
Just an aside, as you eat further down the container you end up with more and more juice, use some of it to make a goumet Bloody Mary or 2, you wont regret it !!!
Great idea Leon!
Fantastic suggestion. I always have kimchi around, but never thought of using the juice in bloody mary’s. Thank you so much for the suggestion. I am going to try when this new batch gets low. Never made it with my kimchi pot before.
Can the leaf thats used to weigh down the kimchi be out of the brine?
Better if not- so try to push it down, maybe using a muddler or your fingers because the cabbage underneath may rise a bit. You can push it down several times daily if that helps to make it stay.
Glad i found this. I had made kimchee off and on over the years. I lived in Korea from feb 1975 to may 1978 while in the AirForce. I never ate anything in country without Kimchee. I like the yellow radish(takwon i think) but i buy so much nowadays i just as soon start making it again. Lost my best recipes for different kinds. With an American diet i love it gor breakfast with eggs and bacon of course, but i put it on hamburgers, hot dogs, good with corn chips in lue of salsa, and just about any meal whatsoever. Thanks a bunch!😁
Hi There, I can only locate the paste gochujung near me – how much paste would you suggest i use comparative to your tablespoons of flakes?
thank you!
I would add at least one to one. If you like spicy, then perhaps more.
Is the nutrition 39 calories for the whole recipe?
39 Calories per serving.
This is an excellent recipe! Thank you 🙂
Any chance of you sharing the recipe you received at the wedding?
I was basically this, plus shrimp paste. 🙂
Hi, can I ask how much shrimp paste to add and when to add ? Thank you.
Hi, it is quite strong- so go light. You can always add more. Will you use the shrimp paste in place of the fish sauce or in addition? If in place of fish sauce, maybe 1 tablespoon? If in addition, then maybe 1 teaspoon?
what do you think of using the juices from the last batch in the next?
Great question Tom! So I’ve heard that some people do this- and I think it could work, but have not personally tried. So not 100% sure…will you let me know if you try?
It is like sourdough starter. Use some from the previous to continue on with the new. I have done this several times without any problems. As long as the juice is still good and has not gone rancid or metal tasting.
I’ll have to try that! Great idea Gayle!
Thanks for a great recipe! I have made this a few times now and it is always perfect. I have started to take a bit of leftover juice from the last batch and add it in as a starter. Seems to ferment faster. Cheers!
Oh perfect! Good to know!
So far so good. My problem is my mix only filled like 2/3 of the jar. Lots of space left. Is that ok? I just filled the gap with a ziplock of some water to weight it down. Also I think my shallot was too big… Sure wish everything had weights or amounts but I guess trial and error works
That is ok, just make sure the brine covers. Should be fine Scott. 😉
It looks like a good recipe and I get why a person would want to stay away from too many nitrates, but MSG? It’s a completely natural substance. Do you need it? No, but damning it just adds to the myth that it’s a chemical or bad for a person when it’s anything but.
It can actually lower the amount of sodium in a dish. Glutamate is glutamate and your body doesn’t distinguish between the various forms. So unless you’re going to remove all the great umami rich foods from diet, you’re eating it daily. At least with msg you can get great flavors out of food while lowering your sodium intake of usually regular salt.
I hear you, and I don’t “damn” it. It gives some people headaches… just presenting another option.
I want to try your recipe, I live in Ecuador and can’t find the korean chili, is there an alternative I can use?
I would just use an Ecuadoran chili? You could reconstitute a dried one or two? Or if you have a spice grinder, grind them dry. It would be different, but still tasty!
You should be able to buy it Amazon. Try https://www.amazon.com/s?k=korean+chili&ref=nb_sb_noss
Excellent recipe. I’ve tried a few and this one is great, others were to salty and didn’t ferment well.
I made this 3 weeks ago and it’s all gone! Tomorrow I’m making a double batch. Great recipe, thanks
I’m making this and so excited!! And then making a kimchi burrito and kimchi soup and kimchi everything. If I don’t have a “fermentation weight” do you recommend an alternative…?
Thank you
Use small zip lock filled with water, or just keep pressing the cabbage leaf down every 12 hours or so.
Thank you. It’s made. Waiting for the magic. If I added 1 tablespoon too many fish sauce…..do you think it’ll still be good?
I think it will be fine!
I bought a inexpensive container that helps with everything on Amazon. This recipe was the first i tried and I’m on my third batch! This time I’m using the rice flour to try to get the same consistency the restaurant down the road had before they closed….
Easy and great instructions and explanations!
First time making and came out better than any store bought I’ve ever tried. Thank you!
Can I use “New Mexico Red Chile Powder” instead of Korean chile flakes? Can’t find something locally….
Thank you for sharing this recipe online!
Korean chili powder (gochugaru) has a different flavor than other chili powders. Your kimchee will not taste right without it. You can get Korean chili powder on Amazon.