

Learn how to make sourdough starter from scratch with just flour and water! This easy, chef-tested guide walks you through the process day by day, with step-by-step photos, a helpful video, and troubleshooting tips. No special equipment needed!
When you understand one thing through and through, you understand everything. ~Shunryu Suzuki
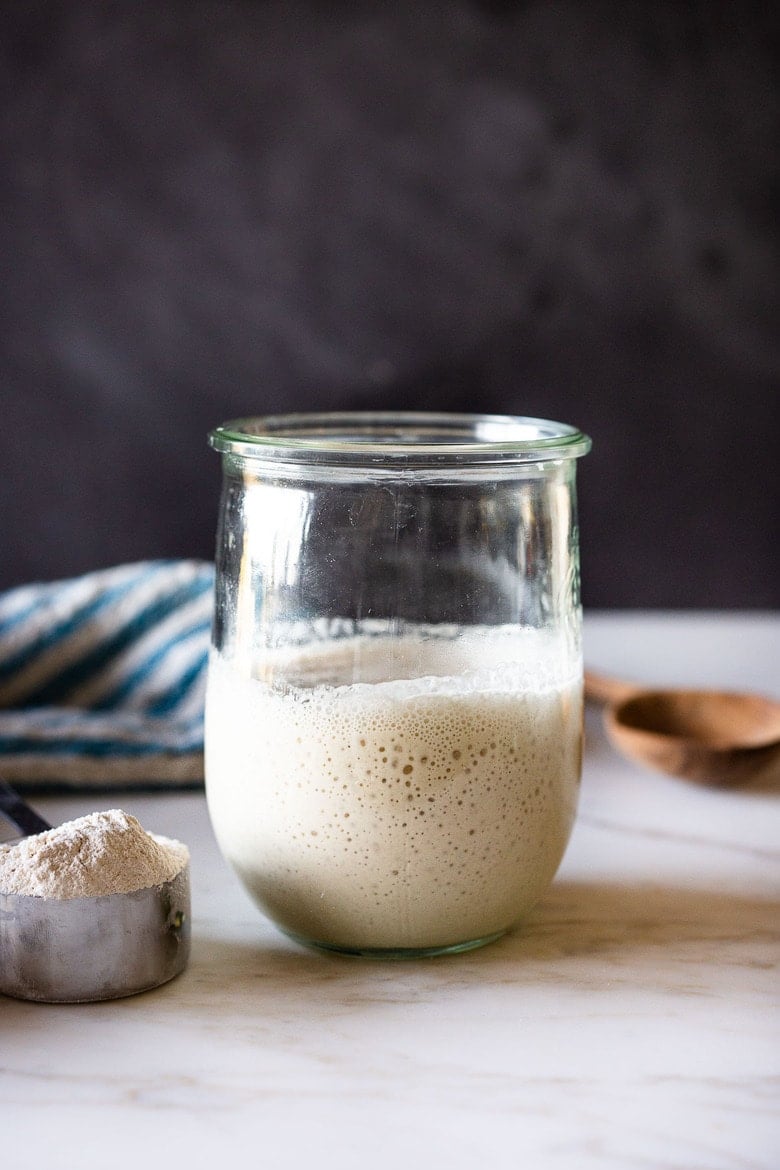
With over 500 ⭐️ five-star reviews and hundreds of success stories, this chef-tested sourdough starter recipe will teach you how to make your own bubbly, active starter from scratch! Using just flour and water, I’ll walk you through the process step by step, sharing everything I’ve learned over years of testing. It’s easier than you think, and once you get the hang of it, you’ll wonder, why didn’t I do this sooner? In as little as six days, you could be baking your own beautiful sourdough bread!
Success Stories
Bianca Says: “Thanks to your detailed instructions I could save my sourdough starter, it was bubbling in no time even with the very cold temperatures in our house.”
Nicky says: “I have tried and failed with so many other recipes but yours are so easy to follow, thank you.”
Kelly says: “Absolutely phenomenal… made the best loaf yet!”
But first, what is sourdough starter?
Sourdough starter is a living culture of wild yeast and beneficial bacteria, created by fermenting just flour and water. With a little care and patience, it becomes bubbly and active, naturally leavening your bread without commercial yeast. The fermentation process also helps break down some of the flour’s components, which may make sourdough bread easier to digest. No store-bought yeast needed!
Download our sourdough starter cheatsheet below!

How long does it take to make a starter?
It takes 6-7 days to make sourdough starter from scratch. In colder climates, it can take up to 12 days, and in warmer climates, it may only take 5 days. Once you have a bubbling active starter that consistently rises and falls, you can bake sourdough bread, typically on day 7. For a primer, watch the 20-minute Sourdough Video at the bottom of the post, where I personally walk you through each day.
Sourdough Starter Ingredients
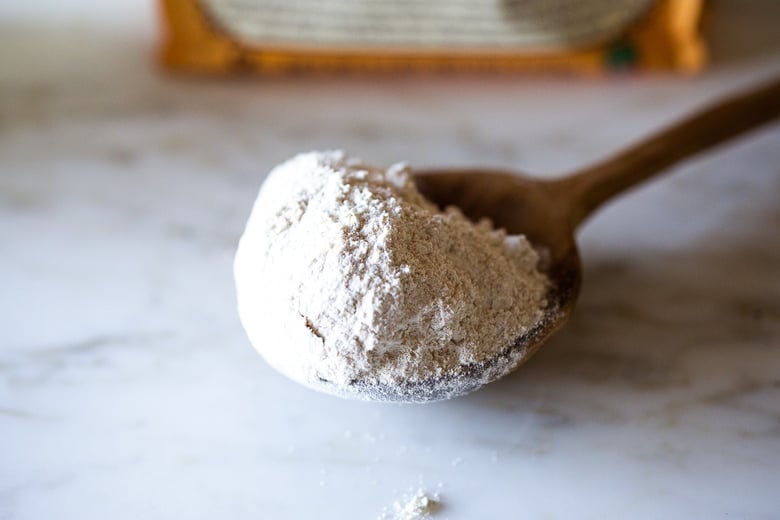
- Flour – I prefer organic bread flour for regular feedings and whole-grain rye flour to jump-start fermentation, but unbleached all-purpose flour can also work. You’ll need a 5 lb bag of organic bread flour (plus 1-2 cups organic whole grain flour like rye flour or whole wheat flour). Organic, whole-grain flour has more wild yeast and will help jump-start your starter; I prefer organic rye flour.
- Water: use filtered water, tap water, or mineral water (specifically San Pellegrino for the correct mineral ratio). Distilled water lacks sufficient minerals.
Sourdough Starter Equipment
- Jar – A wide-mouth, quart jar or a Weck’s 1-liter tulip jar.
- Kitchen Scale – using a kitchen scale helps measure the flour and water more accurately – optional but handy.
- Thermometer – Knowing the starter’s temperature with a thermometer gives you valuable information!
Understanding Your Sourdough Starter
The secret to making sourdough starter is understanding the process, your environment, and your starter’s needs. Each starter is different and unique. Here, we’ll show you what to look for and, most importantly, why.
- Think of sourdough starter as a yeast. Only in this case, instead of buying a packet of yeast from the store, you are making your own living “wild yeast” by fermenting flour and water. Once it’s bubbly and happy, it is very much like a very low-maintenance pet. Yes, you can even name it. Mine is called Vita.
- You must feed it (stir in a mixture of flour and water) once a week to keep your pet active and strong. We will show you how to tell when it is hungry and when to feed it.
- Some people believe that bread made with sourdough starter is actually better for you than bread made with yeast. Here and here are a few articles to get you started on your own research. While I’m not sure if this is scientifically proven, I do know that bread made with sourdough starter tastes infinitely better, feels easier to digest, and has more complexity and better texture than bread made with commercial yeast. So if you are a bread lover, this is absolutely the way to go, as far as the quality of your finished bread.
How to Make Sourdough Starter
*See the recipe card for detailed instructions.
Before you begin: Sourdough starter typically takes 6-7 days to become active, but it can take up to 2 weeks or longer, especially in a cool kitchen. For best results, keep your starter around 70-75°F and watch for signs of activity rather than relying on the calendar. Your starter is ready to bake with when it reliably doubles in size within 6-8 hours of feeding.
For your first measurement, weigh the flour using a kitchen scale so you can get an idea of how the mixture should feel. Do not weigh the measuring cup! It should be like a thick paste, like peanut butter. If you need to add a little more water to incorporate the flour, that is OK too.
Day 1: Starting in the morning or at night, using a wide-mouth quart jar or a tulip jar, mix 1 cup whole-grain flour (120 grams) with 1/2 cup filtered water (120 grams) using a fork, making sure you’ve incorporated all the dry flour.
Place the lid lightly on top (using the Weck jar lid is really handy here) or a wet towel to keep moisture in, or plastic wrap- and let sit at room temperature (70-ish degrees) on the kitchen counter for 24-48 hours. If you are unsure how warm it is, use a kitchen thermometer and check it a few hours later. It is best at 70-75°F.
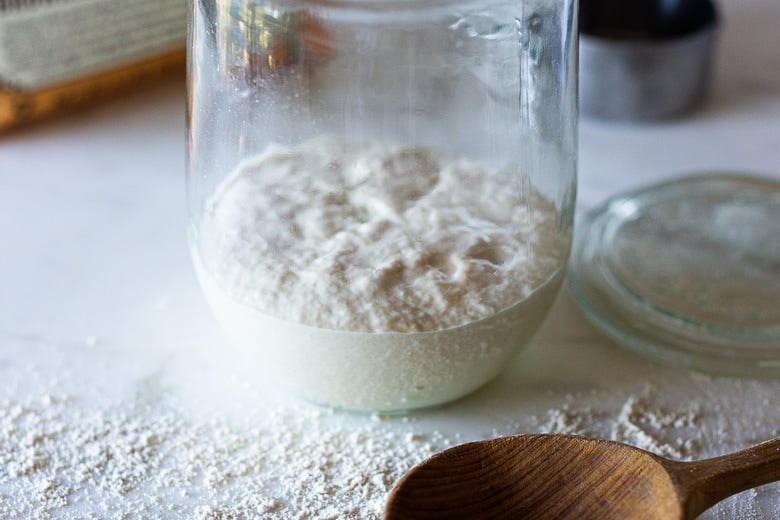
Day 2: After the first 24 hours, there may or may not be a bit of bubbling. Let the mixture rest until you see activity (bubbles or rising). Sometimes this takes 36 hours or even 48 hours, especially if the weather is very cold. When you see active bubbling, discard all but 1/2 cup (4 ounces) of the starter.
To the remaining ½ cup of starter, stir in 1/2 cup lukewarm water (120 grams), and mix well with a fork. Add 1 cup of organic bread flour (120 grams) spooned and leveled. Stir until combined. Again, it should feel like a thick paste. If overly dry, feel free to add a bit more water. Cover again and allow the mixture to sit at room temperature for another 24 hours.
Day 3: After 24 hours, you should see some bubbling or rising; if not, let it go longer until you see some activity. Be patient. Depending on how warm your house is and how active your starter, you may need to feed it less often or more often, depending on when it gets “hungry”.
How to Know when to Feed your sourdough starter
Only feed your starter after it has peaked or looks “hungry”. Feeding it when it is “not hungry” will basically dilute all the growing yeast and make it lethargic. Better to underfeed than overfeed. How to tell if it is hungry?
- Look for “slide marks” (be sure to use a clean jar so you can see these clearly-see photo below).
- Thin and runny. The starter is liquid enough to pour out of the jar (when at room temperature).
- There is liquid at the top of the starter- a clear sign of hunger!
- Smells like acetone. The starter has processed all of the previous flour and needs to be fed again.
In the photo below, the starter “peaked” at the top line before sliding down. I call these slide marks- indicating the starter is hungry.

This might be 12 hours, 14, 18, or 24, depending on the temp in your house. In very warm climates, it may only be 6-8 hours. In winter, this may take 36 hours. It is better to underfeed rather than overfeed.
For each feeding, discard all but 1/2 cup of the starter (keeping roughly ½-cup of starter in the jar). Add 1/2 cup water and 1 cup of bread flour (spooned and leveled). Mix well, cover, and let it rest at room temperature for 12-24 hours, or until the starter looks “hungry” again, before repeating.
Day 4: Feed 1-2 times a day (only feeding when hungry), discarding all but 1/2 cup of starter each time. Feed 1 cup of bread flour and 1/2 cup of water.
NOTE: It is typical for the starter to slow down and stall a bit on day 4. This is totally normal. Just keep going, be patient, look for the hunger signs, and only feed when clearly hungry. Read through the troubleshooting section below. Hopefully, you’ll begin to see some rising and falling. It’s helpful to put the starter in a clean jar each day and mark the beginning level (with a sharpie, string or rubber band) so you can easily see this.
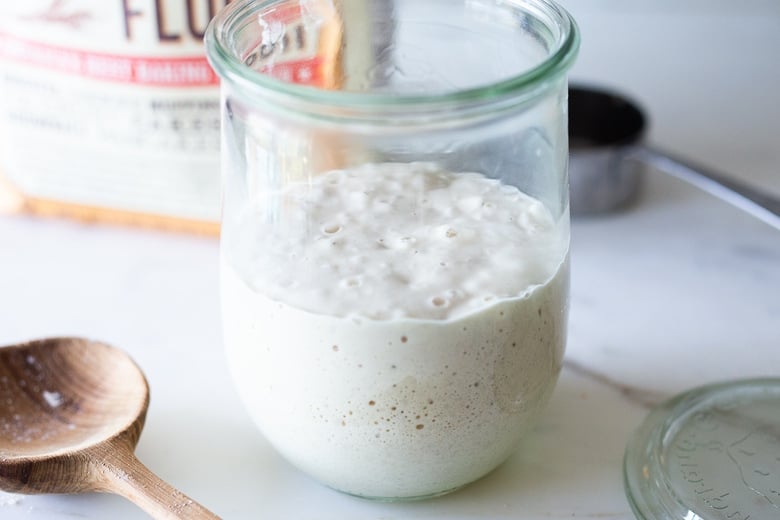
Above, you’ll see it peak, and below, you’ll see it deflate and get “hungry.” There may not be too much difference in the beginning, so look closely.
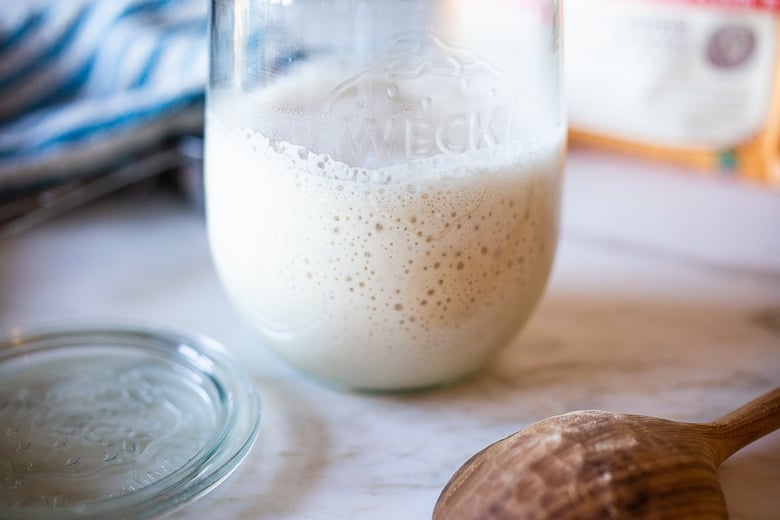
Understand that your starter has a schedule of its own; it is a living thing, so watch it and pay attention.
If your starter is not rising and falling, look at its consistency. As it metabolizes the flour and gets hungry, it will get runny and liquidy, like to the point where you can pour it right out of the jar. If it is still thick like paste, it’s not done metabolizing (eating) the flour.
Day 5: Feed again, 1-2 times, discarding all but a 1/2 cup of the starter each time. Add 1 cup of bread flour and 1/2 cup of lukewarm water. The starter should look visibly active, bubbling, rising, hopefully, close to doubling in size.
*Repeat day 5 until the starter is rising and falling predictably and is close to doubling in size within 6-8 hours.
If your starter is not rising but there is evidence of hunger (runny or liquid at the top), try these three things:
- Substitute 1/4 cup whole grain flour (add to ¾ cup white bread flour) on your next feeding.
- Use mineral water like San Pellegrino instead of water.
- Stir the starter a few times after feeding to allow more wild yeast from the kitchen to get inside.
DAY 6 Morning: Baking day! Give it one last feeding in the morning: this time discard all but a 1/3 cup. (The reason we are changing this to 1/3 cup is to feed it a little bit more.) Add 1 cup flour (120 grams) and 1/2 cup water, stir, and place it in a clean jar so you can see the activity clearly. You can use a Sharpie or place a rubber band around the jar to mark the beginning level.
How to Know When Your sourdough Starter is Ready to Bake Bread
The starter should double in volume within 6-8 hours of feeding.
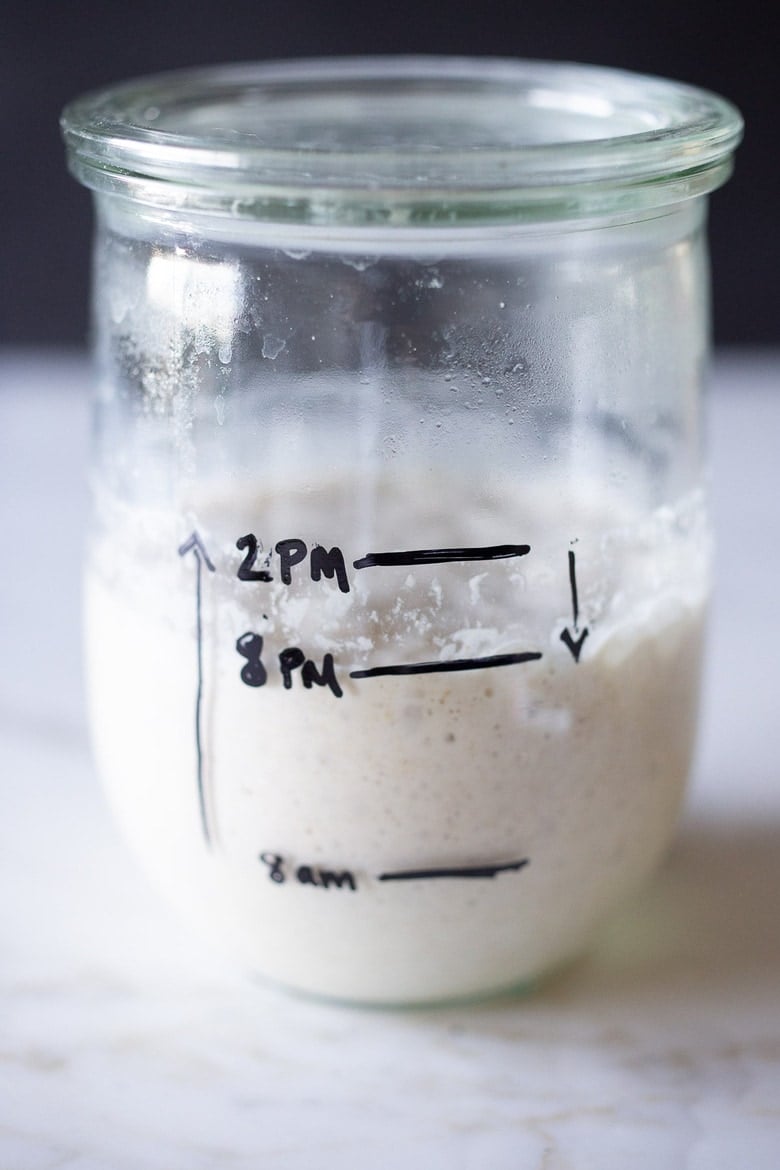
In the photo above, on the 6th day, the starter was fed at 8 am, it peaked around 2 pm, then it started deflating, and by 8 pm, it was “hungry” again. See those downward “slide” marks on the jar? Now we can test it!
How to Do the Float Test
When the starter is at its peak, or just after, place a teaspoon of starter (just from the top, don’t stir it down) in a glass full of water; it should hopefully float. If it floats, that’s a good sign! You can now make our sourdough bread…tonight!
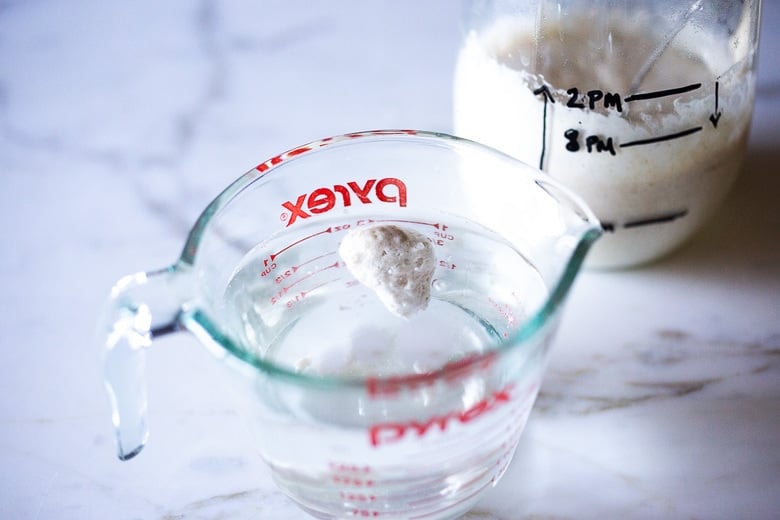
But what if your starter does not float? If it doubles in size but does not float, you can still try baking a loaf if it doubles within 6-8 hours of feeding it.
At this point, if your starter does not double in size within 6-8 hours of feeding, don’t give up! Often, it just takes longer, especially during the winter months. Keep feeding it once or twice a day until you see a consistent, predictable rise and fall.
Read through the troubleshooting section. If you need to take a break, put it in the fridge and try it again up to a week later. Don’t toss it. If you see bubbles, it is alive.
Day 6 Evening: Let’s Bake! Use 1/3 cup starter to make this sourdough bread recipe and place the remaining starter (or if not making bread, place all of it) in the refrigerator, and feed it at least once a week, reserving ½ cup starter, before feeding it the usual 1 cup bread flour, 1/2 cup water.
My Best Sourdough Baking Tip: For the best rise, use your starter at or near its peak, when it has doubled in size, is full of bubbles, and is still strong and active. A starter that has just begun to fall will also work beautifully.
TROUBLESHOOTING Your Sourdough Starter
- SMELL: Starter should smell sweet, tangy, earthy, like a wet horse – not “bad”. If it really smells foul or unpleasant, you may have used an unclean jar, an unclean utensil, or somehow introduced other bad bacteria. I would start over.
- NO ACTION: On day 4-5 it is typically for it to slow down. If your starter is not rising at all but there is evidence of hunger (liquid at the top, or bubbles) try 3 things. First, substitute 1/4 cup whole grain flour (add to ¾ cup white bread flour) on your next feeding. If no rise, then try using mineral water, specifically San Pellegrino, instead of water. San Pellegrino specifically has the right mineral ratio; I have great luck with it. Others not so much! Also try stirring the starter a couple of hours after feeding, a couple of times throughout the day to allow wild yeast from the room to get in there. Lastly, you could try pineapple juice instead of water.
- FLOUR: Try to use fresh milled whole grain flour to start, then organic BREAD FLOUR. The more wild yeast in the flour, the better your starter will do, so smaller brands like Bob’s Red Mill seem to do better than bigger conventional brands that have been overly processed. It is totally OK to mix flours and to switch them up- this adds different kinds of wild yeast- a good thing!
- DO NOT overfeed. For example, maybe feeding 2 x day at 12-hour intervals is too often. You want to feed after the starter has peaked, then deflated (see photo above- you’ll see some slide marks on the jar) and this tells you that it is hungry. If you feed the starter before it has had a chance to metabolize (or eat) all the flour (before peaking) and then you discard part of it, and feed it again, you are actually diluting all that amazing bacteria, weakening your starter. So it’s all about watching your starter in your home. If you are not seeing rising and falling, but notice the starter just gets liquidy, this too is a sign of “hunger”. Or if it gets runny enough to pour out of the jar, another sign it is hungry. There are lots of variables here. Just be patient, pay attention and watch. This is a living thing- it doesn’t care about time schedules and recipes or what it “should” do. It will “eat” when it is “hungry” and sometimes it likes to eat slowly. 😉
- TIME: It may take longer than 6 days in colder environments. Use a kitchen thermometer and take its temp. Is it over 65F? Find a place where it can be warm. In the oven with the light on, or in an upper cupboard (heat rises). Sometimes it takes 12-14 days! Be patient, keep going. If it is doing absolutely nothing, leave it out on the counter for 24-48 hours and see what happens. If you run out of flour or need a break, don’t just toss it; put it in the fridge and see if you can get it going a few days later.
- ACIDITY: If you still can’t get that starter going, some people recommend subbing pineapple juice for the water for one feeding- raising the acidity level. My good friend just tried this and it got hers going.
- LIQUID: If you see any liquid at the top of your starter, it means your starter is hungry. So, yes it’s still alive which is a good thing! You can stir the liquid in, or pour the liquid out, either way, but feed it. This is a sign that you may need to feed it more often.
- MOLD: If you see fuzzy mold or pink, orange, or other unusual discoloration, discard the entire starter and begin again with a clean jar and utensils. Do not scrape off the mold and reuse the starter underneath.
- FLOAT TEST: Is the float test necessary? No! While it can be a helpful indicator, it’s not always reliable. For best results, test your starter at its peak, taking a spoonful from the top without stirring it down. If it floats, that’s a good sign! But don’t worry if it sinks. The most reliable sign that your sourdough starter is ready to bake with is that it consistently doubles in volume within 6-8 hours of feeding, with plenty of bubbles and a pleasantly tangy aroma.
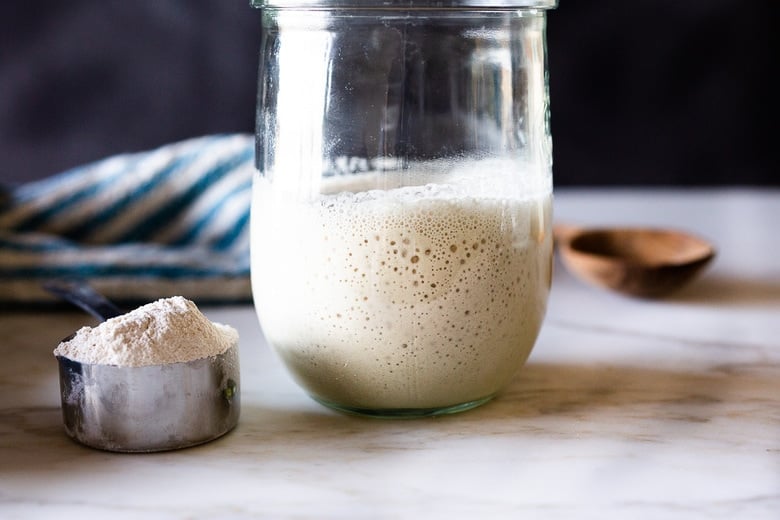
Sourdough Starter Storage Tips
- REFRIGERATE & FEED AT LEAST ONCE A WEEK: Pick a scheduled day and try to stick with it, always reserving 1/2 cup and feeding it 1 cup flour and 1/2 cup water. Discard the remaining, give it away, or keep the discard in a separate container for sourdough pancakes, sourdough buns, banana bread, biscuits, etc. I usually don’t feed the discard unless I give it away.
- If you forget to feed it one week, it is most likely OK; feed it 1-2 times a day for 1-3 days in a row to revive it (keeping it out on the counter) until bubbly and active and doubles within 6 hours. I’ve left my starter for a month on vacation (in the fridge) without feeding and simply revived it by feeding it 3 days in a row, 1-2 x day. It’s surprisingly hard to kill. You can also freeze it for more extended storage.
- This batch of starter will allow you to bake 2 loaves of bread per week with enough left to feed for the next week. If you want to bake more often, you can keep it out and feed it 1-2 x daily. Or if baking every few days, you can pull it out of the fridge, feed it 10 hours before using, leaving it out, use what you need while it is peaking (or slightly after), then put it back in the fridge that evening. Do the same thing a few days later when ready to use again. So this would be feeding 2-3 times a week, best if baking 4-5 times a week.
- If you are not actively baking, you can maintain a smaller amount of starter using the same ratios.
- You can also freeze the sourdough starter if you’re leaving on a long trip.
FAQs
Yes. While you are building your starter, during the first week, it is the simplest, easiest, fastest, and most economical way to create a healthy starter. (Or save it separately -in the fridge- and use it in Pancakes, Waffles, Buns, or Biscuits. ) This is because you always have to feed it two times its volume in flour. For example, if you kept all of 1 1/2 cups of starter, you would have to feed it 3 cups of flour (instead of keeping just 1/2 cup and feeding it only 1 cup of flour). Discarding will shorten the fermentation process, require less flour in the long run, and create a stronger starter. Once your starter is “established” after the first week- then you can give it away to friends or use it in pizza dough, pancakes, etc).
This recipe for Sourdough Starter takes 6 days (or up to 12 days if it is very cold where you live).
The only ingredients you need to get started are flour (bread flour and whole grain flour) and water.
What is the biggest mistake you can make with your sourdough starter?
The most common mistake is overfeeding, which weakens your starter instead of making it stronger. The secret is to watch for signs of hunger-bubbles slowing down, slide marks in the jar, or liquid on top-before feeding. Once you learn to read your starter's natural rhythm, it will stay bubbly, active, and ready to bake with.
It's surprisingly simple to make a sourdough starter! The process is hands-off and only takes a few minutes each day. The key is consistency: feed it regularly and keep it at a steady temperature. Once you get into the rhythm, caring for your starter becomes second nature, and you'll be rewarded with a healthy, bubbly culture for all your baking.
How to use Sourdough Starter
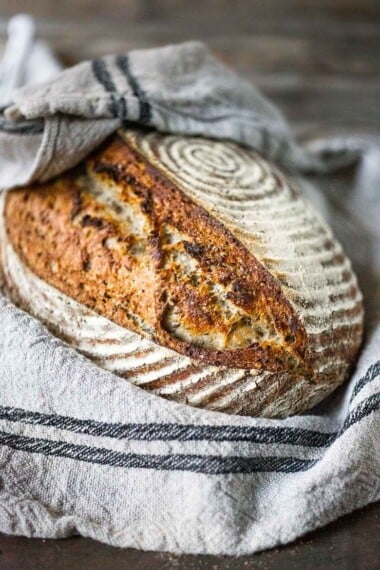




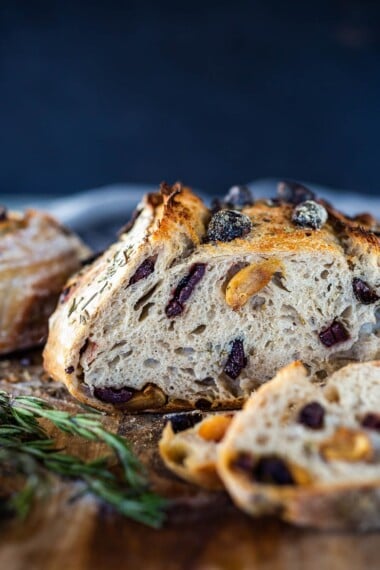
- See all our Sourdough Recipes!
- Sourdough Crackers
- Sourdough Biscuits
- Sourdough English Muffins
- Overnight Sourdough Waffles
Watch How to Make Sourdough Starter
Fast forward to Specific Day by video time (using scroll bar underneath video)
- Day 1 Morning: 0:23
- Day 2 Morning: 4:10
- Day 3 Morning: 7:00
- Day 3 Evening: 9:12
- Day 4 Morning: 11:50
- Day 4 Evening: 13:37
- Day 5 Morning: 14:45
- Day 6 Evening: 16:50
- Day 6 Morning: 18:12
- Day 6 Evening: 20:10
Description
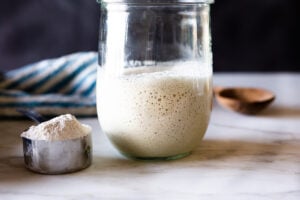
How to make your own Sourdough Starter (see the step-by-step video in post) using simple ingredients with no special equipment, in 6 days, that can be used in sourdough bread. Sourdough Starter is a wild yeast, made from fermenting flour and water.
Ingredients
- Whole-grain flour (Day 1): 120 grams (1 cup, fluffed, spooned, and leveled). Use organic whole wheat, rye, or freshly milled flour to start your sourdough starter.
- Organic white bread flour (Day 2 onward): 120 grams (1 cup, fluffed, spooned, and leveled) per feeding. I like Shepherd’s Grain or Bob’s Red Mill. Have a 5-10 lb bag on hand. Unbleached all-purpose flour can also work.
- Water (Day 1 onward): 120 grams (1/2 cup) per feeding. Filtered or chlorine-free water is ideal.
Instructions
Day 1: Make Your Starter
- In a wide-mouth quart jar, crock, or glass measuring cup, mix 1 cup (120 grams) whole-grain flour with ½ cup (120 grams) filtered water using a fork, making sure all the flour is incorporated.
- Tip: I recommend weighing the flour with a kitchen scale, especially the first time, so you can get a feel for the consistency. The mixture should be a thick paste, similar to peanut butter. If needed, add a splash more water to incorporate the flour.
- Cover loosely with a lid, damp towel, or plastic wrap, and let sit at room temperature (ideally 70-75°F) for 24-48 hours, or until you see some bubbling. See the temperature notes below.
Day 2: First Feeding
- After 24 hours, you may or may not see bubbles. I prefer to wait until there’s a little activity before the first feeding. This can take 36-48 hours, especially in a cool kitchen.
- Once you see bubbles, discard all but ½ cup (approximately 136 grams) of starter.
- To the remaining starter, add 1 cup (120 grams) white bread flour and ½ cup (120 grams) filtered water. Mix thoroughly with a fork, cover loosely, and let rest at room temperature for approximately 24 hours.
Day 3: Watch for Hunger Signs
- By Day 3, you should begin seeing some bubbling. If not, give it more time.
- Depending on the temperature of your kitchen and your starter’s activity, you may need to feed it every 12-24 hours. The key is to feed your starter after it has peaked and begun to fall, or when it becomes noticeably thinner and runnier. These are signs that it’s hungry!
- For each feeding, discard all but ½ cup (approximately 136 grams) starter. Add 1 cup (120 grams) bread flour and ½ cup (120 grams) water. Mix well, cover loosely, and let rest until your starter shows signs of hunger again.
- In a warm kitchen, this might take 8-12 hours; in a cooler kitchen, it may take 24 hours or longer. Watch your starter rather than the clock.
Day 4: Continue Feeding
- Feed 1-2 times, depending on your starter’s activity, discarding all but ½ cup starter each time. Add 1 cup (120 grams) bread flour and ½ cup (120 grams) water.
- Transfer your starter to a clean jar and mark its starting level with a rubber band or marker. This makes it easier to see when it rises and falls.
- Important: If your starter is still rising at the time of the next scheduled feeding, wait until it peaks and begins to fall. Feeding too frequently can dilute the developing culture.
- It’s also completely normal for your starter to slow down around Day 4. Be patient and keep going!
Day 5: Look for a Predictable Rise and Fall
- Continue feeding 1-2 times a day, or when your starter shows signs of hunger. Each time, discard all but ½ cup starter and add 1 cup (120 grams) bread flour and ½ cup (120 grams) lukewarm water.
- Your starter should begin looking more active, with bubbles and a noticeable rise and fall. Ideally, it will be getting close to doubling in size.
- If it’s not doubling yet, don’t worry! Repeat this feeding routine for a few more days, watching for signs of activity. See the troubleshooting section for additional tips.
Day 6: Is Your Starter Ready to Bake?
- Give your starter one final feeding. This time, discard all but ⅓ cup starter. Add 1 cup (120 grams) bread flour and ½ cup (120 grams) water. Mix well and transfer to a clean jar, marking the starting level.
- Your starter is ready to bake with when it consistently doubles in volume within 6-8 hours of feeding, with plenty of bubbles and a pleasantly tangy aroma.
- Optional float test: When your starter is at its peak, gently take a teaspoon from the top without stirring it down and place it in a glass of water. If it floats, that’s a good sign! But don’t worry if it sinks. Consistent doubling is a more reliable indicator of readiness.
- For the best rise, use your starter at or near its peak, while it’s bubbly and active. You can now make your first loaf of sourdough bread!
- Refrigerate the remaining starter and feed it within a week. See the maintenance section for ongoing care.
What If Your Starter Isn’t Ready on Day 6?
- Don’t give up! Some starters take up to two weeks or longer to become fully active, especially in cooler kitchens.
- Continue feeding once or twice daily, according to your starter’s activity, until it rises and falls predictably and doubles within 6-8 hours of feeding.
- Read the troubleshooting section for more help. If you need a break, you can refrigerate your starter and resume feeding later, provided there are no signs of spoilage.
- Yield: This batch makes enough starter for approximately two loaves of sourdough bread, with some remaining to maintain for future baking, depending on how much starter your bread recipe requires.


Notes
- TEMPERATURE: The colder your home, the longer it will take for the starter to grow and become active (bubbles). Find a warm spot (70-80 degrees) for the best results. On the stovetop, with the light turned on, or on top of the fridge. Or in the oven with the light on. On top of a heating pad (set to low) with a towel in between). You can still make the starter in a colder home, it will just take longer- even up to 2 weeks.
- FLOUR: Always try to start the batch by using organic, freshly milled whole-grain flour (wheat or rye) because it has more wild yeast in it than All-Purpose or white flour and will get it active and growing sooner. You can, of course, continue to use whole grain, but I’ve had the best luck using organic “bread” flour for days 2 through 6. People have made a sourdough starter with All-Purpose flour- but personally, this has never worked for me– there are fewer nutrients and wild yeasts in the flour and results in a very lethargic starter. If it is your only option, try mixing in 2+ tablespoons of whole-grain (wheat or rye) with the AP flour per feeding. Feel free to use different flours or mix different flours together. It is OK to use all-purpose flour if in a pinch, but using it repeatedly will result in sad starter.
- WATER: I usually use tap water -but sometimes the chlorine in tap water can inhibit the growth of your starter. Lukewarm water helps fermentation to start faster. Sterilized bottled water is often overly sterile and can also inhibit. Mineral water, like Perrier (carbonated is OK) can sometimes work miracles.
- HYDRATION: Hydration refers to the ratio of water to flour in terms of weight. It is a ratio. The starter is typically at 100% hydration- meaning equal parts flour and water, in terms of weight. So if you use 120 grams of water, use 120 grams of flour. This roughly translates to 1 cup of flour and 1/2 cup water. Feel free to weigh instead of measure if you want to be more precise, or want to familiarize yourself with the consistency you are aiming for. If using whole grain flours (which tend to be “thirstier”) and your starter seems very thick, it is totally OK to add more water to thin it a bit. I intentionally keep the hydration a little lower here (a thicker starter) so you can more clearly see the rise and fall “action” in the jar.
- STORING AND FEEDING: When your starter is kept cold, in the fridge, you don’t need to feed it as often- only once a week. Feel free to feed it “cold”, and put it right back in the fridge if you like. If you keep it out on the counter, you’ll likely need to feed it 1-2 x daily (or just watch and feed only when hungry). Cold slows down the fermentation; heat speeds it up.
- USING: When you need to use your starter for baking bread, feed it 10-12 hours before making bread dough, using it after its peak height. For a more “sour” flavored bread, use the starter straight from the fridge, 3-6 days after feeding. The starter gets more sour-tasting the longer it goes without feeding. Feeding the starter the same day as making bread will produce a milder sourdough flavor.
Nutrition
- Serving Size: 1 tablespoon
- Calories: 31
- Sugar: 0 g
- Sodium: 0.2 mg
- Fat: 0.1 g
- Saturated Fat: 0 g
- Trans Fat:
- Carbohydrates: 6.2 g
- Fiber: 0.2 g
- Protein: 1 g
- Cholesterol: 0 mg







If you half the recipe, do you also half all ingredients and retained starter? Or should I keep the the original amount of starter?
Yes, half everything. 🙂
Thank you. Clarification: I meant to ask how much starter do I retain to keep the starter alive for future loaves?
If halving the recipe, if you keep ¼ cup, feed it (¼ cup water, ½ cup flour) then use ½ cup in a loaf, you’ll should have ¼ cup left to feed the next time. I think. 😉
Thank you! Love your blog and love your recipes even more!!
Thanks so much Peggy!
When I double the recipe, instead of keeping 1/2 a cup do I keep 1 cup and put 240 grams of water on the second day and there on out? I doubled the recipe. Thank you!
Yes Double everything. 🙂
Hi, this is my first time making sourdough. Maybe it’s in you’re a description and I’m just not seeing it or understanding but when you put the starter in the fridge and you are feeding it once a week, how much do you discard when you feed it? And do you continue to feed it the same amount 120 g of water and flour?
Thank you!!
Hi Brooke, yes, when storing in the fridge for the week, when you go to feed it, discard all but a half cup. Feed with ½ cup water and 1 cup flour.
I am currently on day 3 with this starter. I am seeing lots of activity – bubbling and a good amount of rising. However, my starter looks much thicker than the one in your video. Is this ok given that I’m seeing activity? Or should I add more water at the next feeding?
Hi Leanne. It is probably OK! It could also be the flour- wondering, are you using only whole grain? Also, as the starter “processes” the flour it will thin out a bit. I wonder if you are letting it go long enough before refeeding?
Thank you for your reply! I’m pretty sure I fed it a bit too early.. with some patience and subbing whole wheat flour into recent feedings, I’m happy to report it is coming back to life!
Awesome to hear Leanne!
Do you keep your starter in the fridge? How often do you feed it and what ratio?
Hey Nicole- Yes I keep it in the fridge and feed it once a week. There is section on how to maintain your starter above. 🙂
I have shared your recipe many times recently my daughter asked for it but she lives in Colorado in high altitude. Can you adjust your recipe for high altitude baking?
Thanks
Patty
Thanks Patty! Do you mean adjust the sourdough bread recipe?
Yes please for high altitude
Wild Yeast tends to work faster at altitude, so your starter may peak sooner. Check it more often and feed when it’s just about doubled, not on a strict schedule. Cool it down – If it’s fermenting too quickly, keep it in a slightly cooler spot to slow things down and prevent over-acidification. Air is drier at high altitudes, so water evaporates more. if it seems dry, add a little more water.
Hi Sylvia, starting my “starter” 🙂 looking at the notes, on the discard, I didn’t see any mention of how to do this? Do you keep the initial day one (rye/water,) and subsequent left overs in the same jar? Thank you!
Hi Shawn, I would personally toss “the discard” this first week. It is just simpler. I mean you can keep it if you really really want to- yes adding to the same jar, but its not active yet. Up to you. 😉
Great, thank you so much!
Hello, help! I had 2 starters going for almost 2 years, keep them in the fridge and feed every 2 weeks. Nothing has changed, but when I took them out today both have about 1/4” liquid on top. They still smell ok. Should I toss them? 😩
They should be OK. I would feed once a week!
Hi, currently on day 5! I followed this recipe using a light variety of organic spelt flour and San Pellegrino water. It was rising the first two days and since then just getting quite runny as it gets hungry with few bubbles and a foamy texture on the surface. I’ve mixed some wholegrain spelt flour into the feedings since yesterday, which has shown a tiny bit of rise overnight. Do I just keep going until it rises more significantly? Or would you mix in conventional flour in further feedings so it’s not purely spelt?
Hi Isabel, I’d give it a few more days using the spelt. It takes longer in the cooler months. If after 3-4 days no improvement, try a feeding of organic bread flour.
Hi Oliva, is it liquidy? Could you pour it out of the jar? If so, I’d feed it. 🙂
Very much so – and liquid (I’m assuming alcohol based on the smell) is pooling at the top, so I’ll try to discard that as much as possible like you suggested. Will try feeding it, thanks!
Let us know how it turns out Olivia!
Thank you for this recipe/method! My starter went bad in the fridge (not your recipe) so I needed to start over. I had been feeding my old starter all wrong! Your way worked perfectly, and I’m ready to bake some bread today!
I’m so happy it worked for you! Let us know how the bread goes!
Hi Sylvia, I used your recipe to make my starter during the pandemic. It has been going strong and immigrated to many of friends far and wide.
The last couple of weeks, after feeding, it (Sourpuss) has begun overflowing after a couple of hours on the counter. I have always let it feed then put it in the fridge. I like my bread to be sour. What should I do to calm him down and save the mess?
Hi Bette, I would just put it straight in the fridge after feeding, to slow down the process!
Hi Sylvia
Thank you for your recipe which I think is easy to use compared to others.
When it is winter I find that the starter dough did not seem to rise . What would you recommend I do ?
Many thanks
Cheng
Hi Cheng, the starter can really slow down when it it cold. You could try placing in the oven, with the light on. Or another warm spot in your kitchen?
Hi Sylvia –
I’ve been using your recipe for a few years and have shared it with my starter many times. I’m now experimenting with dehydrating the starter and wonder if you have done this and have some rehydrating tips? Thanks!
Hey Donna, I love the idea of this, but have not tried it personally. Has anyone else out there done this?
Hi Sylvia, Love this recipe and your video’s
I’m well past day 6 and my starter rises beautifully, but doesn’t fall!! It doesn’t seem to matter how long I leave it (12 hours.. 24..). I have been using the acetone smell as my feeding indicator. That ok?
Hi Leslie, that is OK. It still sounds very happy. Try the float test.
Hi, Sylvia!
I’m currently working through the troubleshooting section as I’m experiencing some of the setbacks described occurring around day 4. My starter has bubbles but is not peaking/dropping at all. I tried adding the whole wheat flour (for one feeding), used San Pelligrino (for one feeding), and just tried pineapple juice for this morning’s feeding. I also stirred her as you suggested. Is there anything you think I’m missing or you would recommend? It’s very warm in my house, so I was hoping I wouldn’t encounter these barriers!
Thanks!
I think you are on the right track, it just may need more time?
Thank you for your reply! Would you recommend continuing to use pineapple juice for the feedings moving forward? Or should I alternate with water as well?
I would hold off on the pineapple juice for a while. Once should be enough?
I’m having a similar experience to Aggie, bubbles but no rise and fall. I’m finding it hard to tell when the best time to feed is, perhaps when the bubbles are looking active on the surface? As well as when it’s runnier?
Yes Nina, when it is runny!
It’s very humid where I live. Should I reduce the amount of water I use when making my dough? It was fine during the winter but this summer the dough is very sticky and doesn’t rise much.
Hi Michelle, how is your starter? Does it double within 6 hours of feeding it?
Hi Sylvia,
Would you still recommend this ratio if you do not want to bake bread that often…
Thank you so much!
Some people have halved this recipe with good results- but I havent tried this. It seems like it should work fine though.
hi, i am trying you method for the sour dough starter and i used the 100% rye whole grain that’s in your link. i measured out on my scale exactly 120g water and the rye flour. my consistency was quite think. i tried both times and got the same results. i’m hoping in 24 hours (the first 24hr) it will change to a more liquidly consistent. thoughts ?
Hi Anthon, are you only using rye? Or mixing with the bread flour?
I LOVE your content/videos.
Last fall I received two large jars of starter that supposedly originated in San Francisco (from an acquaintance that I no longer have contact with). (I don’t recall what happened to them as I now only have a small amount!) I was wondering your thoughts on how to amass such a large quantity in order to share some starter with others. I don’t ever have enough. I keep mine in the fridge and feed about once a week. I don’t always use it weekly. It seems to be about 1/2 to 1 cup depending on the rise/fall. TIA
Hi Robin, to increase your starter you can feed it without discarding, and leave it on the counter so it processes the feeding faster. For example if you have ½ cup starter, feed it ½ cup water and 1 cup flour. When it is hungry again, instead of discarding all but ½ cup, measure the the total amount of starter (stir it down, and let’s say it is 1 cup now) feed it equal amount water (1 cup) and double the flour (2 cups). You can keep doing this until you have the amount of starter you want.
Thank you so much!
Hi Sylvia! Thanks so much for this recipe and all the great details included! I am on day 3 for this first go-round, and it’s going so well. Everything has progressed just as you said it would and today I am progressing toward feeding it every 12 hours. This morning it was so stinky (in a good way) and had kind of deflated from its doubling last night. But you said that just shows that it’s hungry and what we want to happen :-). I’ve done sourdough starter in the past and had a really hard time discarding any of it, but I have moved forward and am excited to throw some of it out to watch it grow and develop. Can’t wait to make some bread loaves AND to experiment with some whole grain breads. Thanks again!
Thanks Kiersten- so happy this is working for you! It is such a fun process. Yes, you MUST discard, or you will dilute its strength. 🙂
Nothing is as satisfying as making homemade bread. I have made many non-leavening varieties with great success. Yeast wasn’t available anywhere when I started trying to bake bread.
I’m sure many will try this recipe and have great success. I for one, don’t have the focus to be able to go through the week-long process, but can imagine the confidence achievable once it actually works out! I knew that sourdough starter was finicky but now have a MUCH larger respect for the sourdough process from reading your very helpful,detailed recipe. That said, I’ll be purchasing my ready-made sourdough loaves as I have been, and paying retail prices without complaint from now on. 🤣
Hahaha, you are funny Mandy. Glad you post the post helpful, and there is nothing wrong with purchasing sourdough bread- often a lifesaver!
Hello. I’m on day 12 and the starter will not rise. It has a lot of bubbles but won’t move. I tried feeding it the whole wheat flour and it wouldn’t rise either. What should I do for this?
Hi Nikole, please read through the trouble shooting section in the post for more options, I would try all those suggestions, one by one. If it has bubbles it is alive so don’t give up yet. 🙂
Thank you so much for this recipe! This is my second attempt at a sourdough starter!
My starter more than doubled in size on Day 1! After feeding it on Day 2 with bread flour, it also doubled. Day 3 it completely stalled out and didn’t rise at all. I decided to feed it again with whole wheat and it is starting to move again. My previous attempt at a sourdough starter was with all bread flour and it never rose at all… I gave up on it.
I’m wondering if it’s possible that not all bread flours made equally? I’ve been using Organic Arrowhead Mills for the bread flour and Organic King Arthur for the whole what. Would perhaps a mix of AP and whole wheat be worth it? If so, what ratio would you recommend?
Thank you in advance! 🙂
Hey Emilee! Good job for giving this another go! You are correct not all bread flours are the same- each have different bacteria, and your location matters too- different wild yeast in the air. So many variables. I think you are on the right track. It is very typical for it to stall on day three or four. Just keep going. You can experiment with different flours and ratios. I would say ¼ whole wheat to ¾ cup AP. The bread flour sounds like it made it very active though…you could even blend three- ⅓ of each. Sometimes I’ll through in rye, too.
I just wanted to thank you for taking the time to respond! My starter is now a month old and it’s doing great! I have made several loaves of bread with great success.
Thanks again for this thorough recipe/post!
Great to hear Emilee! Glad it is working for you!
Hey there! So I have active sourdough starter that has been great. But I decided to start another to help a friend go through the process together. My first feeding on day 2 was VERY successful. It more than doubled and reached the top within less than 24 hours. But, after the second feeding, it has not moved at all, and has been about 10 hours or so. Literally has not budged with any activity. What would you recommend at this point? Leave it and see what happens? Feed it again, this evening anyway? Feed it with pineapple juice? (I have been using Pellegrino, since that has had the most success so far)
Thank you for any help!!
Yes, leave it, it hasn’t been that long. I would just just let it get hungry- it may take up to 36 hours. 🙂 Perhaps don’t do the trouble shooting options until day 4 or 5?
Hello. I’m on “day 2” and I’m seeing tiny bubbles all around the jar, just not on top. Should I feed now or wait until more bubbles form on top??
Hi Lex, you should be able to feed it now, give it a go. 🙂
Hi,
I fed my starter after using some to bake, and left it on the counter overnight. It more than doubled and I put it in the fridge in the morning. If I want to bake again, do I have to discard and feed? Or can I use some starter straight out of the fridge?
You can use it straight from the fridge Jackie!