How to make your own Sourdough Starter, using simple ingredients with no special equipment, in just six days, that can be used in our sourdough bread. Video.
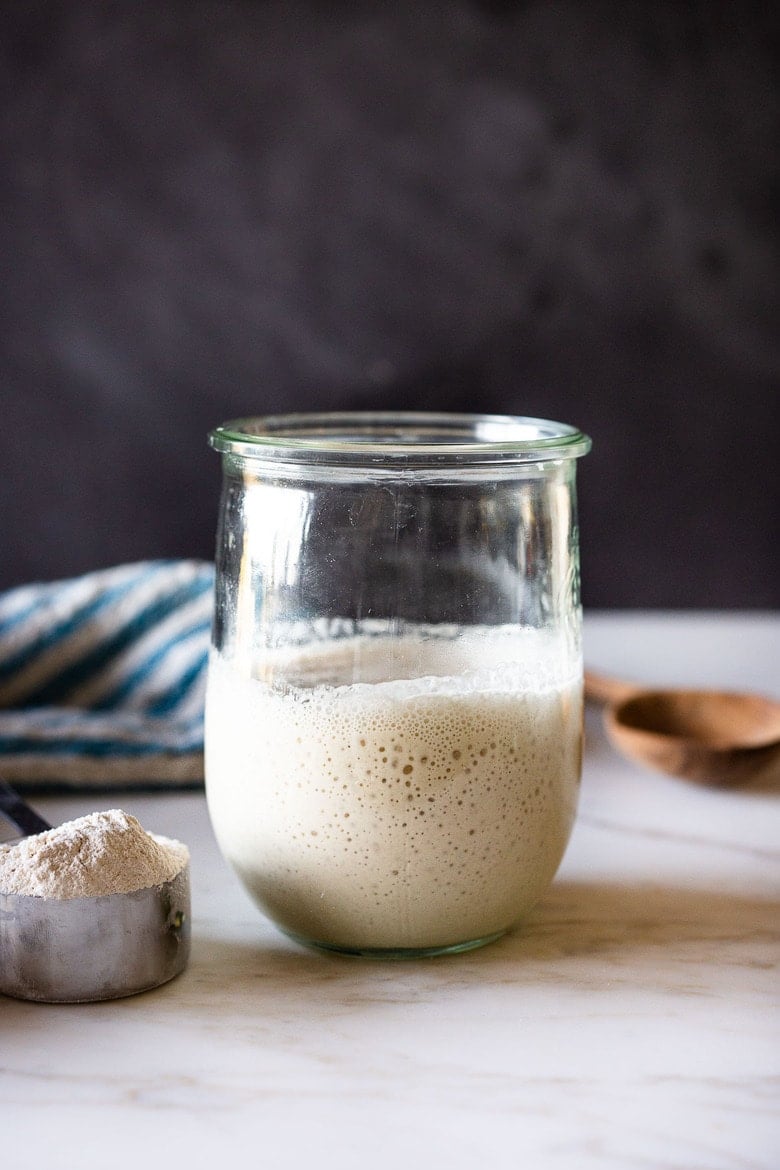
When you understand one thing through and through, you understand everything.~ Shunryu Suzuki
With over 500 five-star reviews and hundreds of success stories, my chef’s perfected sourdough starter guide has everything you need to make your own homemade starter. In just six days, you’ll be baking the most beautiful sourdough loaves!
But first, What is a starter?
Sourdough starter is a “wild yeast” made from flour, water, and the natural wild yeast in the air. With a little care and patience, it ferments, and when strong and active, just a little bit of starter replaces commercial yeast and makes your bread rise, while transforming the gluten in the bread into something more easily digestible. Store-bought yeast is not needed!
How to Make Sourdough Starter | 20-Min Video
***Don’t see the video? Allow 15-20 seconds to load it right here!*** (Still don’t see it? Check that your ad blocker is turned off; use Chrome for the best experience.)
Fast forward to Specific Day by video time (using scroll bar underneath video)
- Day 1 Morning: :23
- Day 2 Morning: 4:10
- Day 3 Morning: 7:00
- Day 3 Evening: 9:12
- Day 4 Morning: 11:50
- Day 4 Evening: 13:37
- Day 5 Morning: 14:45
- Day 6 Evening: 16:50
- Day 6 Morning: 18:12
- Day 6 Evening: 20:10
Sourdough Starter Recipe Ingredients
- Jar – A wide-mouth quart jar or a Weck’s 1-liter tulip jar.
- Flour – 5 lb bag of organic bread flour (plus 1 cup organic whole grain flour )
- Water – filtered water, tap water, or mineral water (specifically, San Pellegrino, for the correct mineral ratio). Distilled water does not have enough minerals.
- Scale – using a kitchen scale is optional but handy.
- Thermometer – Knowing the temp of the starter using a thermometer is optional but handy!
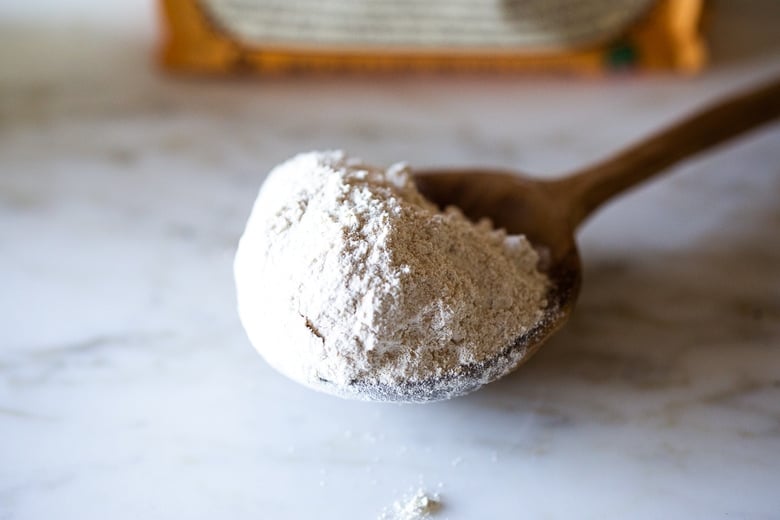
Understanding starter
- Think of sourdough starter as yeast. Only in this case, instead of buying a packet of yeast from the store, you are making your own living “wild yeast” by fermenting flour and water. Once it’s bubbly and happy, it is very much ike a very low-maintenance pet.
- You must feed it (stir in a mixture of flour and water) once a week to keep it active and strong. You know it’s happy when it bubbles. 😉 And YES, you can even name it.
- Some people believe that bread made with sourdough starter is actually better for you than bread made with yeast. Here and Here are a few articles to get you started on your own research. While I’m not sure if this is scientifically proven, I do know that bread made with sourdough starter, tastes infinitely better, feels easier to digest, and has more complexity and better texture, than bread made with commercial yeast. So if you are a bread lover- this is absolutely the way to go, as far as the quality of your finished bread.
How to Make Sourdough Starter
*See the recipe card for detailed instructions.
This recipe for Sourdough Starter takes 6 days (or up to 12 days if it is very cold where you live). For a primer, watch the 20-minute Sourdough Video above!
Day 1: Staring in the morning or at night, using a wide-mouth quart jar, tulip jar, or Crock or Glass Measuring Cup , mix 1 cup whole grain flour (120 grams) with 1/2 cup filtered water (120 grams) using a fork (or chopstick) making sure you’ve incorporated all the dry flour.
Place the lid lightly on top (using the Weck jar lid is really handy here) or a wet towel to keep moisture in, or plastic wrap- and let sit at room temperature (70-ish degrees) on the kitchen counter for 24-48 hours. If you are unsure how warm it is, use a kitchen thermometer and check it a few hours later. See notes for TEMPERATURE.
TIP #1: For your first measurement, weigh the flour using a kitchen scale so you can get an idea of how the mixture should feel. Do not weigh the measuring cup! It should be like a thick paste, like peanut butter. If you need to add a little more water to incorporate the flour, that is OK too!
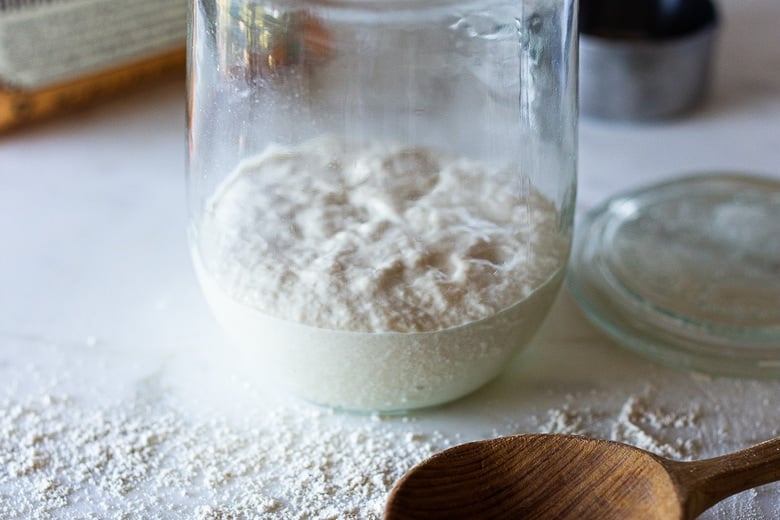
Day 2: After the first 24 hours, there may or may not be a bit of bubbling. Let the mixture rest until you see activity (bubbles or rising) sometimes this takes 36 hours or even 48 hours if very cold. When you see active bubbling, discard all but 1/2 cup of the starter (4 ounces).
To the remaining ½ cup of starter, stir in 1/2 cup water (120 grams), and mix well with a fork. Add 1 cup of organic bread flour (120 grams)spooned and leveled. Stir until combined. Again, it should feel like a thick paste. If overly dry, feel free to add a bit more water. Cover again and allow the mixture to sit at room temperature for another 24 hours.
Day 3: After 24 hours, hopefully, you will see some bubbling or rising and if not, let it go a bit longer until you see activity. Be patient.
Depending on how warm your house is and how active your starter, you may need to begin feeding more often or move to two feedings a day, in the morning and at night. If it is cold, one feeding a day may be enough.
TIP #2: Only feed the starter after it has peaked or looks hungry. See the “3 Signs of Hunger” below. Feeding it when it is “not hungry” will basically dilute all the growing yeast and make it lethargic. Better to underfeed than overfeed.
The 3 Signs of hunger
The photo below was taken after the starter was fed, and after it peaked (reached its highest), and now is sliding down. It is now “hungry” again. See the downward slide marks on the jar? Pay attention – your starter is telling you it is hungry.
- Look for “slide marks” (be sure to use a clean jar so you can see these clearly).
- Liquid at the top of the starter.
- Thin and runny. The starter is liquidy enough to pour out of the jar (when at room temp).

This might be 12 hours, it might be 14, it might be 18, or 24, depending on the temp in your house. In very warm climates, it may only be 6-8 hours. In winter, this may take 36 hours. It is better to underfeed rather than overfeed here.
For each feeding, discard all but 1/2 cup of the starter (keeping roughly ½-cup of starter in the jar). Add 1/2 cup water and 1 cup Bread Flour (spooned and leveled). Mix well, cover, and let this rest at room temperature for 12-24 hours or until the starter looks “hungry” again before repeating.
Day 4: Feed 1-2 times, discarding all but 1/2 cup of starter each time. Feed 1 cup bread flour, 1/2 cup water.
TIP #3: It is typical on day 4 for the starter to slow down and stall a bit. This is OK. Just keep going, be patient and look for the hunger signs, and only feed when clearly hungry. Hopefully, you’ll begin to see some rising and falling. It’s helpful to put the starter in a clean jar each day and mark the beginning level (with a sharpie, string or rubber band) so you can easily see this.
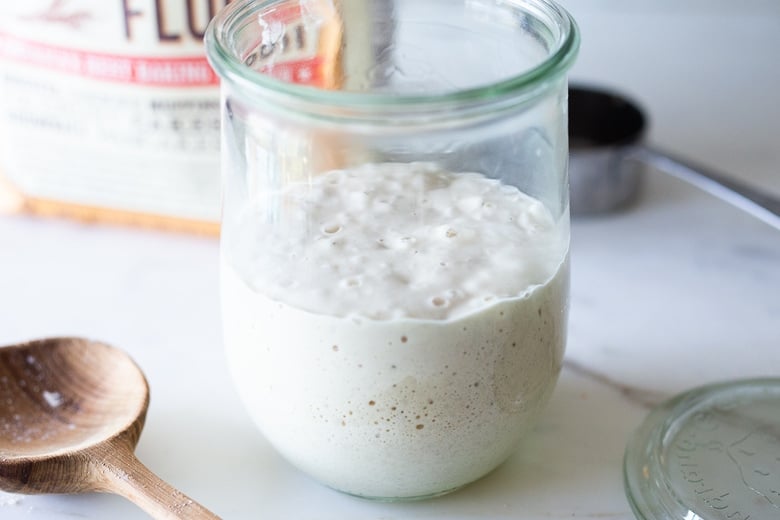
Above, you’ll see it peaking, and below, you’ll see it deflating and getting “hungry.” There may not be too much difference in the beginning, so look closely.
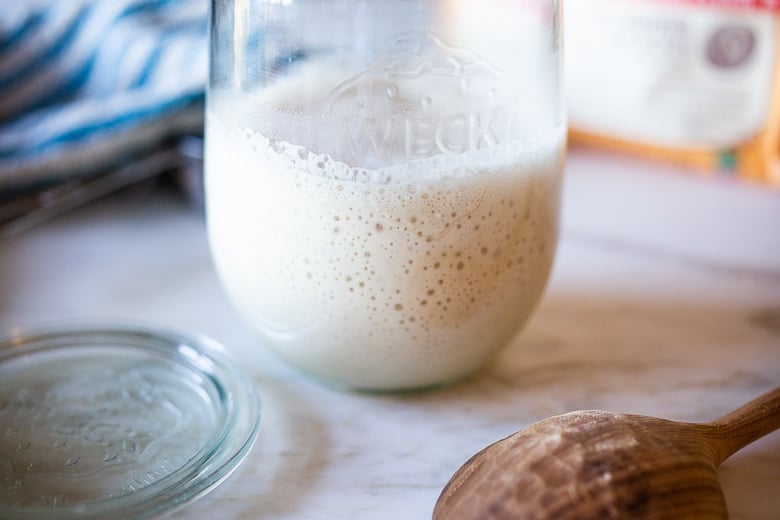
Understand that your starter has a schedule of its own; it is a living thing, so watch it and pay attention.
If your starter is not rising and falling, look at its consistency. As it metabolizes the flour and gets hungry, it will get runny and liquidy, like to the point where you can pour it right out of the jar. If it is still thick like paste, it’s not done metabolizing (eating)the flour.
Day 5: Feed again, 1-2 times, discarding all but a 1/2 cup the starter each time. Adding 1 cup bread flour and 1/2 cup lukewarm water. The starter should look visibly active, bubbling, rising, hopefully, close to doubling in size.
Repeat day 5 until the starter is rising and falling predictably and is close to doubling in size within 6-8 hours.
TIP #4: If your starter is not rising but there is evidence of hunger (liquidy or liquid at the top) try 3 things: substitute 1/4 cup whole grain flour (add to ¾ cup white bread flour) on your next feeding. Try using mineral water like San Pellegrino instead of water. Stir the starter a few times after feeding to allow more wild yeast from the kithcen to get inside.
DAY 6 Morning: Baking day! Give it one last feeding in the morning: this time discard all but a 1/3 cup. (The reason we are changing this to 1/3 cup is to feed it a little bit more.) Add 1 cup flour (120 grams) and 1/2 cup water, stir, and place it in a clean jar so you can see the action clearly. You can use a sharpie or place a rubber band around the jar to mark the beginning level. The starter should hopefully double in volume within 6-8 hours of feeding.
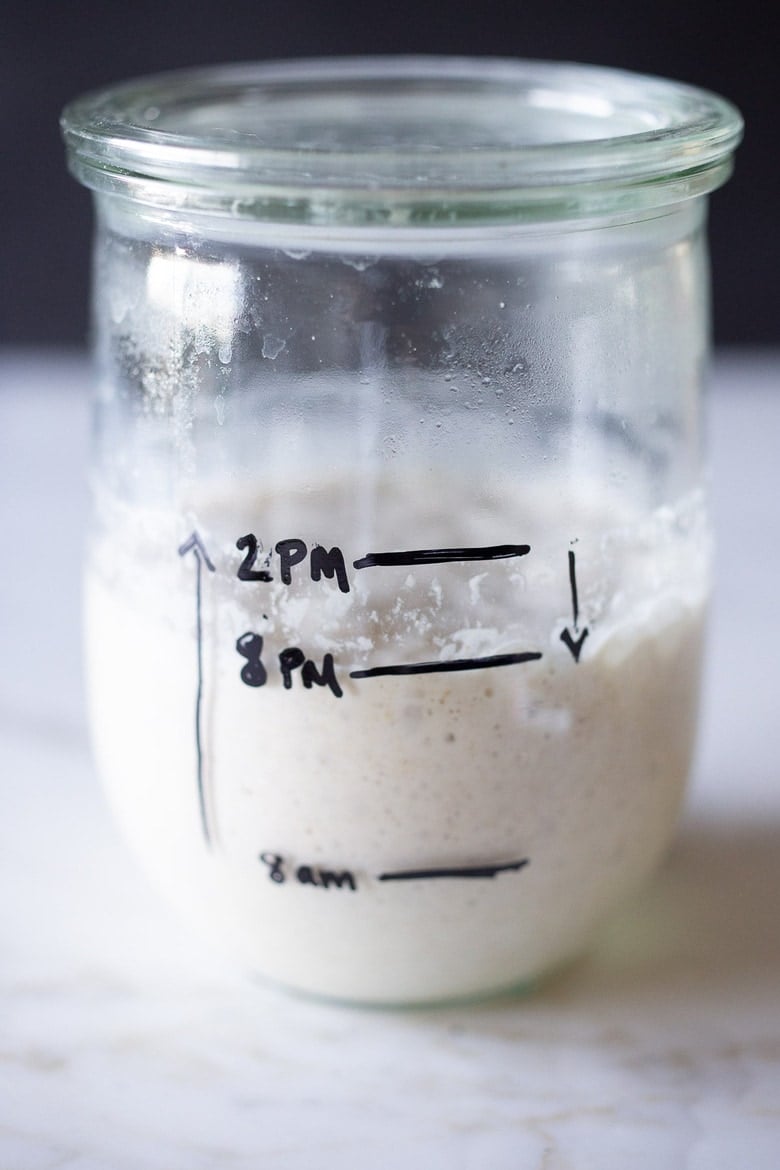
In the photo above, on the 6th day, the starter was fed at 8 am, it peaked around 2 pm, then it started deflating, and by 8 pm, it was “hungry” again. See those downward “slide” marks on the jar?
DO THE FLOAT TEST: When the starter is at its peak, or just after, place a teaspoon of starter (just from the top, don’t stir it down) in a glass full of water; it should hopefully float. If it floats, success!!! Congrats. You can now make our sourdough bread…tonight!
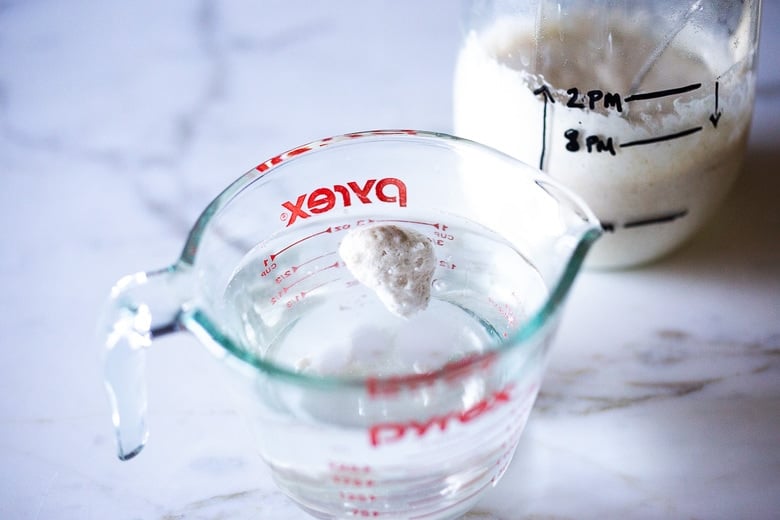
TIP #5: When baking bread always use hungry starter that has already peaked!
STARTER DOES NOT FLOAT? If it doubles in size but does not float, you can still try baking a loaf if it doubles within 6-8 hours of feeding it.
At this point, if your starter does not double in size within 6-8 hours of feeding, don’t give up! Often, it just takes longer, especially during the winter months. Continue feeding one to two times a day until you see a consistent, predictable rise and fall.
Read the troubleshooting section. If you need to take a break, put it in the fridge and try it again up to a week later. Don’t toss it!
Day 6 Evening: Let’s Bake! Use 1/3 cup starter to make this sourdough bread recipe and place the remaining starter (or if not making bread, place all of it) in the refrigerator, and feed it at least once a week, reserving ½ cup starter, before feeding it the usual 1 cup bread flour, 1/2 cup water.
TROUBLESHOOTING Starter
- SMELL: Starter should smell sweet, tangy, earthy, like a wet horse – not “bad”. If it really smells foul or unpleasant, you may have used an unclean jar, unclean utensil, or somehow introduced other bad bacteria. I would start over.
- NO ACTION: On day 4-5 it is typically for it to slow down. If your starter is not rising at all but there is evidence of hunger (liquid at the top, or bubbles) try 3 things. First substitute 1/4 cup whole grain flour (add to ¾ cup white bread flour) on your next feeding. If no rise, then try using mineral water, specifically San Pellegrino instead of water. San Pelligrino specifically has the right mineral ratio, I have great luck with it. Others not so much! Also try stirring the starter a couple of hours after feeding, a couple of times throughout the day to allow wild yeast from the room to get in there. Lastly, you could try pineapple juice instead of water.
- FLOUR: Try to use fresh milled whole grain flour to start, then organic BREAD FLOUR. The more wild yeast in the flour, the better your starter will do- so smaller brands like Bob’s Red Mill seem to do better than bigger conventional brands that have been overly processed. It is totally OK to mix flours and to switch them up- this adds different kinds of wild yeast- a good thing!
- DO NOT overfeed. For example, maybe feeding 2 x day at 12-hour intervals is too often. You want to feed after the starter has peaked, then deflated (see photo above- you’ll see some slide marks on the jar) and this tells you that it is hungry. If you feed the starter before it has had a chance to metabolize (or eat) all the flour (before peaking) and then you discard part of it, and feed it again, you are actually diluting all that amazing bacteria, weakening your starter. So it’s all about watching your starter in your home. If you are not seeing rising and falling, but notice the starter just gets liquidy, this too is a sign of “hunger”. Or if it gets runny enough to pour out of the jar, another sign it is hungry. There are lots of variables here. Just be patient, pay attention and watch. This is a living thing- it doesn’t care about time schedules and recipes or what it “should” do. It will “eat” when it is “hungry” and sometimes it likes to eat slowly. 😉
- TIME: It may take longer than 6 days in colder environments. Use a kitchen thermometer and take its temp. Is it over 65F? Find a place where it can be warm. In the oven with the light on, or in an upper cupboard ( heat rises). Sometimes it takes 12-14 days! Be patient, keep going. If it is doing absolutely nothing, leave it out on the counter for 24-48 hours and see what happens. If you run out of flour or need a break, don’t just toss it, put it in the fridge and see if you can get it going a few days later.
- ACIDITY: If you still can’t get that starter going, some people recommend subbing pineapple juice for the water for one feeding- raising the acidity level. My good friend just tried this and it got hers going.
- LIQUID: If you see any liquid at the top of your starter, it means your starter is hungry. So, yes it’s still alive which is a good thing! You can stir the liquid in, or pour the liquid out, either way, but feed it. This is a sign that you may need to feed it more often.
- MOLD: if you see any discoloring or mold on the surface, starter was probably contaminated. If it is only on the surface, it is probably ok to save. Scrape it off, save 1/2 cup of the underneath starter, and keep going, using a clean jar. Feed, smell, use your best judgment.
- FLOAT TEST: Try testing when your starter is peaking. Take a spoonful from the top without stirring it down. If your starter is rising and falling consistently, but not passing the float test and it has been over 8-10 days- just try baking a loaf. People are having luck with good loaves without passing the float test. It may be the flour…
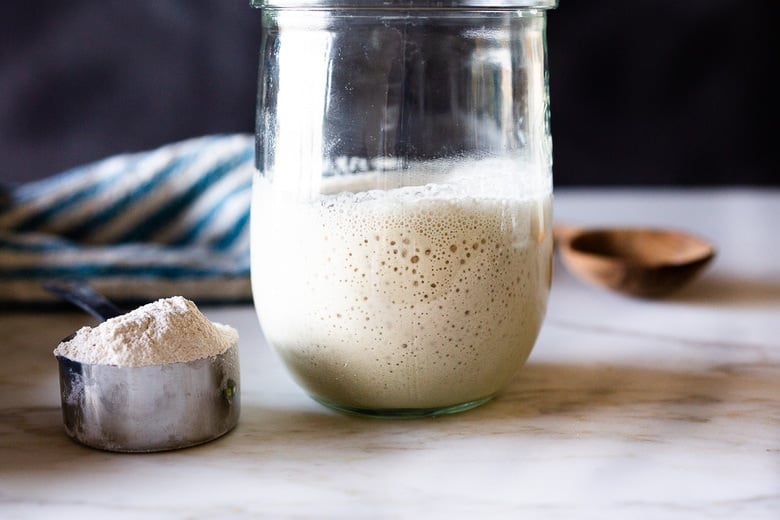
How to Maintain Your Starter
- REFRIGERATE & FEED AT LEAST ONCE A WEEK: Pick a scheduled day and try to stick with it, always reserving 1/2 cup and feeding it 1 cup flour and 1/2 cup water. Discard the remaining, give it away, or keep the discard in a separate container for sourdough pancakes, sourdough buns, banana bread, biscuits, etc. I usually don’t feed the discard unless I give it away.
- If you forget to feed it one week, it is most likely OK; feed it 1-2 times a day for 1-3 days in a row to revive it (keeping it out on the counter) until bubbly and active and doubles within 6 hours. I’ve left my starter for a month on vacation (in the fridge) without feeding and simply revived it by feeding it 3 days in a row, 1-2 x day. It’s surprisingly hard to kill. You can also freeze it for more extended storage.
- This batch will allow you to bake 2 loaves of bread per week with enough left to feed for the next week. If you want to bake more often, you can keep it out and feed it 1-2 x daily. Or if baking every few days, you can pull it out of the fridge, feed it 10 hours before using, leaving it out, use what you need while it is peaking (or slightly after), then put it back in the fridge that evening. Do the same thing a few days later when ready to use again. So this would be feeding 2-3 times a week, best if baking 4-5 times a week.
The best time to use sourdough starter is just after it peaks or on its way down when you know it is hungry.
Sourdough Bread Starter FAQs
Yes. While you are building your starter, during the first week, it is the simplest, easiest, fastest, and most economical way to create a healthy starter. (Or save it separately -in the fridge- and use it in Pancakes, Waffles, Buns, or Biscuits. ) This is because you always have to feed it two times its volume in flour. For example-if you kept all the 1 1/2 cups of starter, you would have to feed it 3 cups of flour (instead of keeping just a 1/2 cup and only feeding it ONE cup). Discarding will shorten the fermentation process, require less flour in the long run, and create a stronger starter. Once your starter is “established” after the first week- then you can give it away to friends, use it in pizza dough, pancakes, etc) or give it to a friend.
How to use your Sourdough Starter
- See all our Sourdough Recipes!
- Sourdough Scones
- Sourdough Crackers
- Sourdough Biscuits
- Sourdough Buns
- Sourdough Tortillas!
- Vegan Banana Bread
- Overnight Sourdough Waffles
More from Feasting At Home

Simple Sourdough Starter
- Prep Time: 30
- Cook Time: 6 days
- Total Time: 144 hours 30 minutes
- Yield: 1 ½ cups
- Category: sourdough, fermented, cultured, bread, baking,
- Method: fermented
- Cuisine: bread
- Diet: Vegan
Description
How to make your own Sourdough Starter (see the step-by-step video in post) using simple ingredients with no special equipment, in 6 days, that can be used in sourdough bread. Sourdough Starter is a wild yeast, made from fermenting flour and water.
Ingredients
- 120 grams whole grain flour (whole wheat flour, rye flour, or freshly milled flour) 1 cup, fluffed, spooned and leveled
- Organic White Bread Flour (5-10 lb bag ) I like Shepherd’s Grain or Bob’s Red Mill.
- 120 grams Water per feeding (1/2 cup water)
Instructions
-
- Day 1: Starting in the morning or at night, using a wide-mouth quart jar or Crock or Glass Measuring Cup mix 1 cup whole grain flour (120 grams) with 1/2 cup (120 grams) filtered water using a fork making sure you’ve incorporated all the dry flour. For your first measuring – it is a good idea to weigh the flour, using a kitchen scale so you get an idea of how thick it should feel. It should be like a thick paste. Thick like peanut butter. If you need to add a little more water to incorporate the flour, that is OK, but be precise with the flour. Place the lid on top (using the Weck jar is really handy here) or a damp towel to keep moisture in, or plastic wrap- and let sit at room temperature (70-80 degrees) on the kitchen counter for 24-48 hours, or until you see some bubbling. If you are not sure how warm it is, use a kitchen thermometer and check it a few hours later. See notes for TEMPERATURE.
- Day 2: After the first 24 hours, you may or may not see a bit of bubbling. I prefer to let this rest until I see a tiny bit of activity (bubbles) and sometimes this takes 36 or up to 48 hours. So start “day 2”, when you see a little bit of bubbing. Discard all but 1/2 cup (136 grams) of the starter. (See notes for discard). Add to the remainder, 1 cup of white bread flour, (120 grams), spooned and leveled, and 1/2 cup filtered water (120 grams), mixing well with a fork. Place the lid on loosely again and allow the mixture to sit at room temperature (70-80F) for another 24 hours.
- Day 3: By the third day, you should definitely see some bubbling- and if not, let it go a bit longer. Depending on how warm your house is and how active your starter, you may need to begin feeding more often, or even move to two feedings a day roughly 12 hours apart, like in the morning and at night. In a nutshell, you want to feed the starter only after it has peaked (metabolized all the flour from the last feeding) and has started sinking down or gets liquidy- this is when it is hungry! This might be 12 hours, it might be 14, it might be 18, or 24, depending on the temp in your house. In very warm climates it may only be 8 hours. It is better to underfeed rather than overfeed here. For each feeding, like before, discard all but 1/2 cup of the STARTER (keeping roughly ½-cup of starter in the jar -4 ounces or 136 grams) Add 1 cup Bread Flour (spooned and leveled) and 1/2 cup water to the 1/2 cup starter and let this rest at room temperature for 12-24 hours or until the starter looks “hungry” again before repeating.
- Day 4: Feed 1-2 times, discarding all but 1/2 cup of starter EACH TIME. Feed 1 cup bread flour, 1/2 cup water. Look for the hunger signs. Hopefully, you’ll begin to see some rising and falling. It’s helpful to put the starter in a clean jar and mark the beginning level (with sharpie, string or rubber band) so you can easily see this. ***If for some reason your starter looks like it is still rising at the time of second feeding (at night) and there is no evidence it has fallen or no slide marks, it is still “eating” so skip this feeding and feed first thing in the morning. AGAIN, Feeding it when it is “not hungry” will basically dilute all the growing yeast and make it lethargic. Better to starve than overfeed.
- Day 5: Feed again, 1-2 times, roughly 12 hours apart, or when hungry, discarding all but a 1/2 cup the starter EACH TIME. 1 cup bread flour, 1/2 cup lukewarm water. The starter should look active, bubbling, rising, sliding down, hopefully, close to doubling in size. (If not, repeat this day until starter doubles in size within 8-12 hours of feeding- and read the troubleshooting section.)
- DAY 6: Give it one last feeding. Discard all but a 1/3 cup. Add 1 cup flour ( 120 grams) and 1/2 cup water, and place it in a clean jar so you can see the action clearly. You can use a sharpie or place a rubber band around the jar to mark the beginning level. The starter should hopefully double in volume within 6 hours of feeding. When it peaks, DO THE FLOAT TEST: To test the starter, place a teaspoon of starter (just from the top, while it is peaking, don’t stir it down) in a glass full of water, it should hopefully float. If it does, you can make sourdough bread. Tonight! Let the starter keep resting at room temperature or a few more hours allowing it to fully metabolize the flour, perhaps sinking a little before making your dough. You want to make dough with slightly hungry starter. Place the remaining starter in the fridge and feed it in a week. You’ll have enough stater to make one more sourdough loaf during the week, and still have enough to feed. If you want to wait to make bread until later in the week place starter in the fridge. Be sure to feed it in 7 days. Read maintenance section.
- At this point, if your starter does not double in size don’t give up! Often it just takes longer, sometimes up to two weeks, especially if it’s cold. Continue feeding one-two times a day (only when hungry) for a few more days, until you see a visible rise and fall. Read the troubleshooting section. If you need to take a break, just put it in the fridge and try it again up to a week later. Don’t toss it- if there are bubbles, it is still alive.
- This batch of starter will make two loaves of bread with enough left over to feed for the following week.
Notes
- TEMPERATURE: The colder your home, the longer it will take for the starter to grow and become active (bubbles). Find a warm spot (70-80 degrees) for the best results. On the stovetop, with the light turned on, or on top of the fridge. Or in the oven with the light on. On top of a heating pad (set to low) with a towel in between). You can still make the starter in a colder home, it will just take longer- even up to 2 weeks.
- FLOUR: Always try to start the batch by using organic, freshly milled whole-grain flour (wheat or rye) because it has more wild yeast in it than All-Purpose or white flour and will get it active and growing sooner. You can, of course, continue to use whole grain, but I’ve had the best luck using organic “bread” flour for days 2 through 6. People have made a sourdough starter with All-Purpose flour- but personally, this has never worked for me– there are fewer nutrients and wild yeasts in the flour and results in a very lethargic starter. If it is your only option, try mixing in 2+ tablespoons of whole-grain (wheat or rye) with the AP flour per feeding. Feel free to use different flours or mix different flours together. It is OK to use all-purpose flour if in a pinch, but using it repeatedly will result in sad starter.
- WATER: I usually use tap water -but sometimes the chlorine in tap water can inhibit the growth of your starter. Lukewarm water helps fermentation to start faster. Sterilized bottled water is often overly sterile, and can also inhibit. Mineral water, like Perrier (carbonated is OK) can sometimes work miracles.
- HYDRATION: Hydration refers to the ratio of water to flour in terms of weight. It is a ratio. The starter is typically at 100% hydration- meaning equal parts flour and water, in terms of weight. So if you use 120 grams of water, use 120 grams of flour. This roughly translates to 1 cup of flour and 1/2 cup water. Feel free to weigh instead of measure if you want to be more precise, or want to familiarize yourself with the consistency you are aiming for. If using whole grain flours (which tend to be “thirstier”) and your starter seems very thick, it is totally OK to add more water to thin it a bit. I intentionally keep the hydration a little lower here (a thicker starter) so you can more clearly see the rise and fall “action” in the jar.
- STORING AND FEEDING: When your starter is kept cold, in the fridge, you don’t need to feed it as often- only once a week. Feel free to feed it “cold”, and put it right back in the fridge if you like. If you keep it out on the counter, you’ll likely need to feed it 1-2 x daily (or just watch and feed only when hungry). Cold slows down the fermentation, heat speeds it up.
- USING: When you need to use your starter for baking bread, feed it 10-12 hours before making bread dough, using it after its peak height. For a more “sour” flavored bread, use the starter straight from the fridge, 3-6 days after feeding. The starter gets more sour tasting the longer it goes without feeding. Feeding the starter the same day as making bread will produce a milder sourdough flavor.
Nutrition
- Serving Size: 1 tablespoon
- Calories: 31
- Sugar: 0 g
- Sodium: 0.2 mg
- Fat: 0.1 g
- Saturated Fat: 0 g
- Trans Fat:
- Carbohydrates: 6.2 g
- Fiber: 0.2 g
- Protein: 1 g
- Cholesterol: 0 mg





I enjoy making bread but have never tried sourdough. The instructions, video, and other what ifs information were very helpful! It took me two tries but I got it!!
Awesome Jessica!
Hi Silvia,
I started to do sourdough because it looks to be a challenge for me.
My starter came out beautiful, I am very proud of it but my bread no too much.
My first dough let it rest on my counter for about 12 h. In the morning I found a flat dough but anyhow I continued with the baking, result, a dense and some holes but a nice flavour.
Today I am in my second one and it was rising in the fridge, it came too soft. I did all the folders etc etc. The bread is in the oven and I can predict the result..😔
What an I doing wrong? I am measuring exactly you say in the video. I feel hopeless. Can you give me an advice please?
Cheryl
Don’t give up Cheryl. 🙂 My guess is, if you starter doubles with in 6 hours of feeding, then you need to get the rising time dialed in. Flat means overproofed, so too long of a rise ( you could try 8-10 hours on the counter overnight. When you say the dough was too soft, do you mean really runny?
Hi Sylvia,
Thanks for replaying my question. My starter is amazing, beautiful but the dough looks to soft to shape it, I can’t make a ball because is a runny batter.
I will try again today changing the “observing” time of rising to see if is easier like that.
Gracias.
I have never read such a thorough, HELPFUL guide regarding this subject anywhere! THANK YOU for this, I SO appreciate the reasons behind the “why”!!! Going to start one right now!
Things become so much easier, when we understand the “whys”, don’t they? 😉 thanks Lori!
Hi Sylvia! First I’d like to say THANK YOU for all the concise, helpful information on this subject. I love your videos, and recipes are so thorough yet easy to follow. I was apprehensive to try a sourdough starter until I found your blog. I need HELP though! I have carefully followed your instructions. Yesterday, Day 4, I got no action at all. No signs of ‘hunger’ so I did not feed. Today, still no signs. A small amount of bubbles are present and a wonderful smell. I decided to feed anyway as it looked weak and a small bit of liquid on top. At noon, I added in 30 grams whole wheat and 90 gr bread flour (per your troubleshooting section). Temperature remains at around 75 F. w/ a breathable cover. Checking after 6 hours, no activity. What shall I do next? It hasn’t risen, and consistency is like a pancake batter. Should I go ahead and feed, but add sparkling, filtered water this time? I wouldn’t normally be panicked, but I’m having a pizza dinner party this weekend and wanted to do a sourdough pizza SO BAD. I should have started the ‘starter’ earlier, I know, but yours was the only recipe I felt good about. Advice, please?!?
Hey Teresa, yes, try the San Pelligrino and just keep going as you have been!
Okay will do! Thank you for your response!
Hi again! Well, I did the sparkling water, along with 40 grams WW flour w/ the 80 bread flour. Had a totally clean jar, placed on a warmer area of the counter. NOTHING. No rise at all since day 3. Today is day 6. Failed the float test too. Just a few tiny bubbles and still smells nice. (wish I could attach a pic). So I intend to keep trying. But I don’t think I can count on it being active for making the dough on Thursday. Will using my discard instead, contribute at all to the pizza being more tangy, and if so, shall I use the same amount you suggest in your pizza dough recipe with active starter, 90 grams, adding yeast? Really appreciate your help. Teresa
Oh shoot, Teresa. Maybe try a little rye flour at some point? Yes, I think that is what I would do- use both yeast and discard. 🙂 Also, can you confirm if you used San Pellegrino or another brand- just curious.
I used filtered water that I ‘fizzed ’ with the Sofa Stream. So perhaps not enough minerals? I will be buying Pelligrino and rye flour tomorrow. 😆. I make a really tasty OO dough and we have a wood fire pizza oven, but just really wanted to do a sourdough one. So do you think my discard will take it up a notch in the flavor department? 🙏
Ahhh! It is not the bubbles, it is the minerals that give the boost. AND I tested every type/brand of mineral water I could get my hands on- San Pelligrino truly is magic. ✨ I bet adding a little discard would add a little flavor- can’t hurt?
Hi! This is my first time trying to make a sourdough starter and your videos are awesome! Thank you!
So on my second day my starter doubled in size and it was overflowing. I didn’t know what to do so i poured half out. Then I continued with the feedings as usual. Today is Day 7 and I don’t see much action. Help!
It smells good and has some bubbles but not as much as I had seen on day 2,3,4. Advise?
Hummmm, I wonder if throwing half out maybe could have weakened it? I would just continue with the feedings and try the suggestions in the trouble shooting section?
Thank you. I kept feeding it but it continued to weaken. I’m going to start over.
Darn. what if you put it in the fridge for a few days- without feeding and then try again?
Hi! I used your recipe to make my first starter 3 years ago and it’s still going strong at my home in Texas. Now trying to get one going in Utah where the elevation and temperature is different. I am on day 8 and it rises ever so slightly in a 12 hour period (like 1/4 inch) I am feeding it bobs rye organic flour (same as my other one) using filtered water and keeping it at about 75-80 degrees. Any tips? Thanks! LZ
Try swapping out San Pelligrino for the water- this specific brand has the right combo of minerals to boost the starter.
Hi! Thanks for the great video and instructions. It seems like there is a lot of waste though. Is there anything you can do w/ the starter that is left in the jar when you measure out 1/2 cup for feeding?
Hi Julie, Yes! There are all kinds of recipes for sourdough discard on the blog! You can just save the discard in the fridge for about a week, (or keep it in the freezer for longer) until you are ready to use it. Type “sourdough discard” in the search bar to check them out.
Day 1 and mixed dark rye stone ground with 120g of water and came out too thick. Do I need to add more water because it’s stone ground?
Yes, add more water to create a thick paste- stone ground flours are “thirstier.”
Hi! I love the instructions and the video. I am seeing a stall on day 3. The starter was SO active on day 2! What should I do when it stalls? Wait longer or feed it?
Just wait for signs of hunger. 🙂 If it’s runny, feed.
Thank you! I waited several hours and feed it because it seemed runny and some clear liquid on top. Now, no action 12 hours later. It seems to still be runny. Feed or wait? Thanks for your guidance.
Runny enough to pour out of the jar? If so, feed. 🙂
Hi! How do I get to the videos on the sourdough bread making process?
Thank you!
Hi Cindy, if you have ad blockers turned on, you cant see the videos- try a different browser or go to your browser settings.
So, I have been struggling. My starters keep dying after the second feeding (the 1st feeding day3). I am following the instructions to each last detail. But, I will say, my starter was VERY active last night. More so than I would have thought possible. Should I have gone off recipe and fed it last night? This has been happening the past dozen starters I have tried. They start out good, then die on day 3. I have tried all the troubleshoots….and I am trying not to give up. The temp in my house is correct. I have tried a few flour brands. Placing the jars in different places…. I am so frustrated.
My guess is they are not dying- just really slowed down. Don’t give up. If you still have it, just let it sit until it gets really runny before feeding again.It is typical for it to stall. If you had good activity in the beginning, it is fine!
Oh it’s DEFINITELY runny. And has a layer of hooch on top. Should I go ahead and try feeding it again?
Yes. If it is runny and has hooch, this is another sign it is not “dead”. Just keep on going. 😉
This explains the process so well and helped me to understand what to do and when to do it. Thank you.
Great to hear!
Seriously, 1 cup flour and 1/2 cup water???
I ha8a brick the next day!!
Terrible recipe!
Hi James, add ½ cup water to the ½ cup starter. Then mix in the flour. It will be a thick paste.
I used Bob red mill. whole wheat flour… though 120 grams was 1/3 c…. So should I use 120g or 1 c?…
Hey Amy- Is it possible that you weighed the measuring cup too?
I’ve been using this guide for about a year, I started last year and made 4-6 loaves last year before life got hectic and I stopped making bread. I restarted using the starter I began last year within these last two weeks and it’s been rising and falling maybe about 1/4-1/3 it’s size but I cannot get it to double in size! I had this issue last year and the loaves I made were fine but not airy and a little dense so I thought it was maybe the climate of my previous home but im having the same issue! Any suggestions?
Hummm… I would try all the things in the troubleshooting section. Mineral water, pineapple juice, different whole grain- and if nothing helps, honesty I would start over, in this new home- with different wild yeast in the air. Your old starter may have picked up something that could be inhibiting it.
What happens if your sourdough is consistently overflowing out of your weck jar? Is that normal?
It means it is really really happy and active. You could place it in a bigger jar. Basically, it’s a good problem. 😉
I want to give some starter to a friend. What is the best time to give it away, should I feed it first or give away the refrigerated starter?
I would feed it first, and supply a couple of feedings worth of flour along with it.
Hi! I’m approaching 48 hours with my starter, and it has doubled in size! It’s risen and been bubbly for about 5 hours. I have a question regarding the first feeding, and subsequent feedings. For the first feeding, do I need to wait for the starter to fall and get liquify to ensure it’s hungry before I feed it? And for all subsequent feedings do I follow that same method? Or do I feed right after it has peaked but before the rise has fallen? Thanks so much!
I would let it fall just a little. 🙂 To ensure it is truly hungry!
Thank you so much for your response! I’m on day 4/5 now, and I’ve begun feeding every 12 hours but am not seeing much rising or bubbles. Minimal bubbles on top and a very little bit throughout the starter. However, it shows hunger signs in that it’s really quite liquidy. I know you said to err on under feeding rather than over feeding. Any insights or direction? Thank you so much!
Sounds like you are doing everything right. Read through the troubleshooting section. Stir a few hours after feeding, try the san pellegrino, maybe let it get extra hungry, it is typically for it to stall like this around now. Just keep going! 🙂
I’ve cooked many beautiful loaves following this recipe, but this attempt feels doomed. It took almost 15 days for my current starter to almost double and finally float. I decided to make bread. It is full of holes and kind of soggy. This is my worst result . Need your help!!!
Hi Peggy, your start may not be active enough yet. Read through the trouble shooting section. I would just keep making loaves, you will get there!
My starter doubled and peaked within 6 hours (2:00 pm) and floated after it began to decline around 4:00pm. I put the starter in frig until 9:00 pm when I planned to mix and stretch for overnight proofing. At 9:00 pm the starter had declined to the beginning point. Can I use it in 3 days ? Should I feed it again tomorrow around 11:00 am so that it might peak closer to 8:00 pm?
Great job Peggy~ I think you could go either way. You could use it unfed straight form the fridge after 3 days, or you could feed it early morning before baking that night.
Excellent plan of operation. I used alternatively rye flour and strong white flour and added variety of seeds to my final bread recipe.
Perfect!
By day 2 my starter had more than doubled at about 20 hours. It just kept rising almost reaching the top of the 4 cup jar. I am using organic rye flour. I weighed the flour carefully, but found that the half cup of water was not enough, it was way too thick, so I added a little more to achieve the right consistency.
Perfect Laura- yes whole grain flour can be “thirstier”.
Started sour dough on Monday and now Friday, have followed your instructions carefully. Tuesday the starter grew beautifully but since there is bubbling action but does not rise. Have tried adding some whole grain to the feed but still no rise. Fed it Friday morning and will try the float test tomorrow morning. Actually didn’t feed it at all on Wednesday to make sure it was hungry but still no rise. Any suggestions why I’m not seeing any rise but bubbles, yes.
Hey Gillian! This is pretty typical. 🙂 Read through the troubleshooting section. Stir a couple of hours after feeding. Try San Pelligrino. Just keep going for a few more days. It usually comes back around. 🙂
Hello! I’m a proud starter mom thanks to your guide! After some trial and error understanding the signs, I finally got a consistent rise and fall, made my first loaf, and have started refrigerating.
My question is: should you expect a normal rise-and-fall while in the fridge? Should it double in size within a week? Or can I expect the rise to be very minimal? I fridged my starter on Wednesday, and it’s now Sunday night and I’m only seeing a slight rise.
Thanks for your help!!
Yay Shelby! I feel like it takes the full week for mine to double. It all depends on your fridge temp. 🙂
I’m on Day 6 and my starter looks great! Already passes the float test. I want to continue with the directions for day 6 but have two questions.
1) Is it really 1/3 cup of starter that I reserve and not 1/2 like all the other days?
2) I’v already mixed my day 6 but don’t want to use my starter until the morning. It’s 4:33 pm Is this ok!
Yes, 1/3 cup starter on day 6. Yes, you can wait to make dough; feel free to place the starter in the fridge after it has peaked, or leave it out and feed again tomorrow and make dough after it has peaked.
Thanks for confirming this. I had the same question for day 6. I’m on day 3, do you have a recipe for the next step of making the starter into bread?
Yes, Tom, there is a separate Easy Sourdough recipe to follow!
I’ve tried so many starter recipes in the past and failed miserably! I’m hoping this time around is a success!
I’m using organic bread flour (and some Italian bread flour) and on day 4. I have a few bubbles on top this morning, but it’s pretty lethargic. I wonder if I fed it too soon yesterday, but it had dropped a little so presumed it was hungry.
Can I just leave it and starve it? I currently have it in the oven with the light on in a desperate attempt to revive it. This always happens on day 4 lol maybe I’m cursed 😜
I’ve had some really good bubbles this time around too! Gave me hope
This is really typical, there is usually a lag on day 3-4. Check its temp and make sure it’s not too much over 75 in the oven. I would stir it an hour after feeding, and just keep going. Yes let it get nice and hungry. It’s pretty hard to kill, so “starving it” can jumpstart it.
Good morning i feed my sarter for the first time yesterday, today it’s aleady when up an down,is it normal after 2 nights.
Yes, normal- keep going Michel! 😉
wow! great instructional video. My starter doubled on morning of day 3. I used rye flour. So I will continue for several days even though it already passed float test? I can’t wait to try your recipes!
Great Nancy! Yes, just keep going, it may slow down a bit. 🙂