With hundreds of success stories behind it, this step-by-step sourdough starter recipe shows you how to create your own bubbly starter in six days, no fancy tools required. Perfected over years of testing, this easy method is foolproof!
When you understand one thing through and through, you understand everything.
Shunryu Suzuki
With over 500 five-star reviews and hundreds of success stories, my chef's perfected sourdough starter guide has everything you need to make your own homemade starter. It is an easy process, and once you understand it, you’ll think to yourself, why didn’t I do this sooner! In just six days, you'll be baking the most beautiful sourdough bread! Just read all the success stories below.
What is Sourdough starter?
Sourdough starter is a “wild yeast” made from flour, water, and the natural wild yeast in the air. With a little care and patience, it ferments, and when strong and active, just a little bit of starter replaces commercial yeast and makes your bread rise, while transforming the gluten in the bread into something more easily digestible. Store-bought yeast is not needed!
How long will it take?
It takes 6-7 days to make sourdough starter from scratch. In colder climates, it can take up to 12 days, and in warmer climates, it may only take 5 days. Once you have a bubbling active starter that consistently rises and falls, you can bake sourdough bread, typically on day 7. For a primer, watch the 20-minute Sourdough Video below, where I personally walk you through each day.
Watch: How to Make Sourdough Starter
Fast forward to Specific Day by video time (using scroll bar underneath video)
- Day 1 Morning: :23
- Day 2 Morning: 4:10
- Day 3 Morning: 7:00
- Day 3 Evening: 9:12
- Day 4 Morning: 11:50
- Day 4 Evening: 13:37
- Day 5 Morning: 14:45
- Day 6 Evening: 16:50
- Day 6 Morning: 18:12
- Day 6 Evening: 20:10
Best Sourdough Starter Ingredients
Sourdough Starter Ingredients
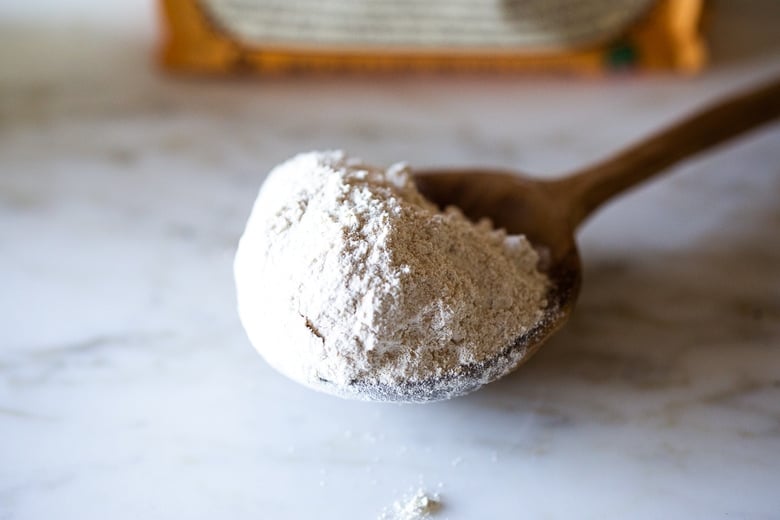
- Flour – 5 lb bag of organic bread flour (plus 1-2 cups organic whole grain flour like rye flour or whole wheat flour). All-purpose flour is not reccommended. Whole grain flour has more wild yeast- and will help jump start your starter!
- Water – filtered water, tap water, or mineral water (specifically, San Pellegrino, for the correct mineral ratio). Distilled water does not have enough minerals.
Sourdough Starter Equipment
- Jar – A wide-mouth quart jar or a Weck’s 1-liter tulip jar.
- Kitchen Scale – using a kitchen scale helps measure the flour and water more accurately – optional but handy.
- Thermometer – Knowing the temperature of the starter using a thermometer gives you great information!
Understanding Your Sourdough Starter
The secret to making sourdough starter is understanding the process, your environment and your starter’s needs. Each starter is different and unique. Here, we’ll show you what to look for and, most importantly, why.
- Think of sourdough starter as a yeast. Only in this case, instead of buying a packet of yeast from the store, you are making your own living “wild yeast” by fermenting flour and water. Once it’s bubbly and happy, it is very much like a very low-maintenance pet. Yes, you can even name it. Mine is called Vita.
- You must feed it (stir in a mixture of flour and water) once a week to keep your pet active and strong. We will show you how to tell when it is hungry and when to feed it.
- Some people believe that bread made with sourdough starter is actually better for you than bread made with yeast. Here and here are a few articles to get you started on your own research. While I’m not sure if this is scientifically proven, I do know that bread made with sourdough starter, tastes infinitely better, feels easier to digest, and has more complexity and better texture than bread made with commercial yeast. So if you are a bread lover, this is absolutely the way to go, as far as the quality of your finished bread.
How to Make Sourdough Starter
*See the recipe card for detailed instructions.
For your first measurement, weigh the flour using a kitchen scale so you can get an idea of how the mixture should feel. Do not weigh the measuring cup! It should be like a thick paste, like peanut butter. If you need to add a little more water to incorporate the flour, that is OK too.
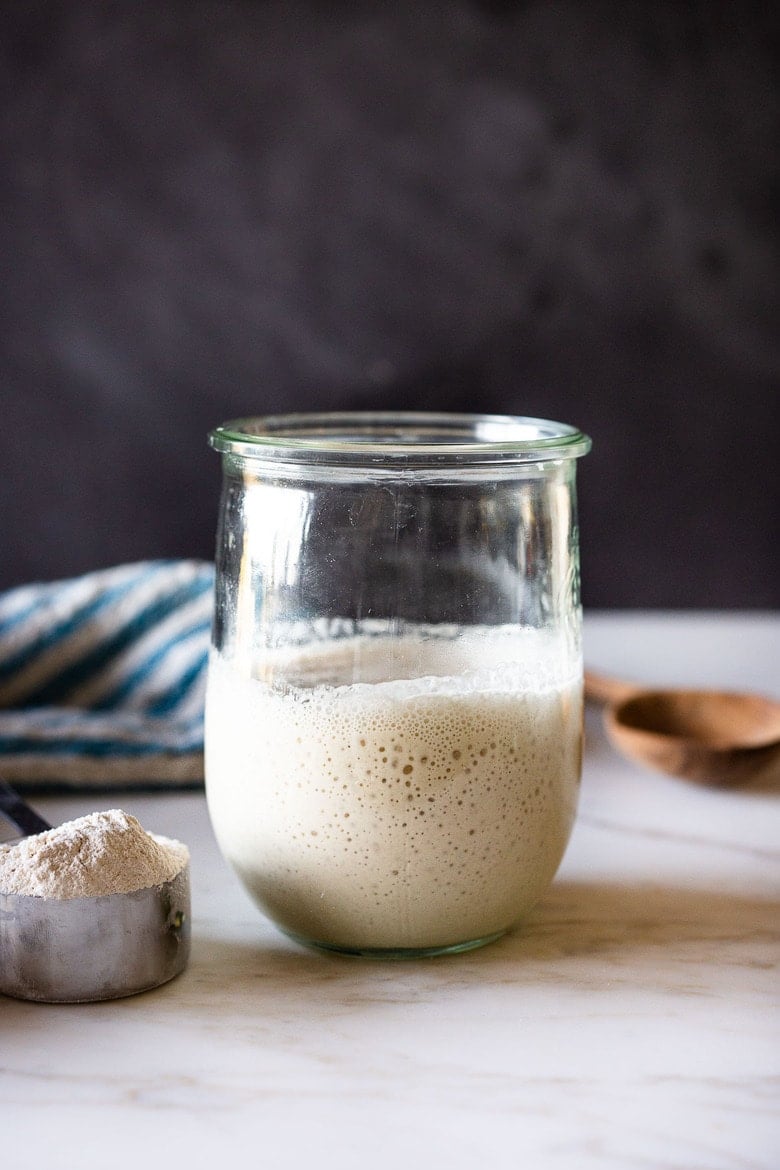
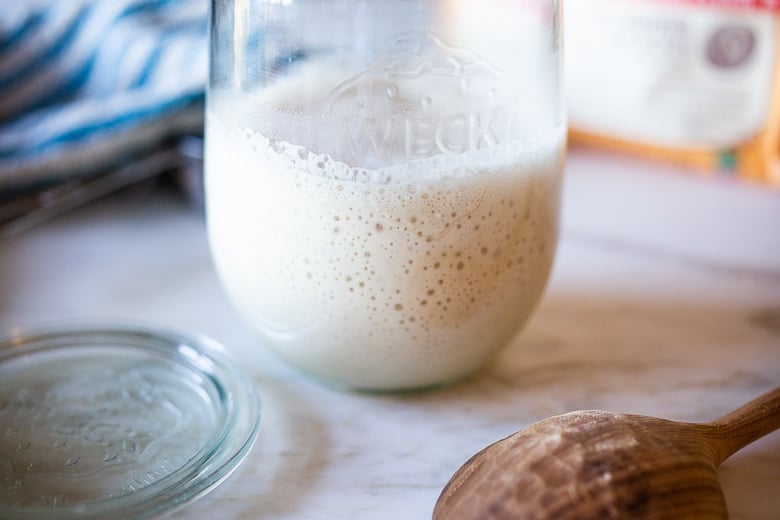
Day 1: Starting in the morning or at night, using a wide-mouth quart jar, tulip jar, mix 1 cup whole grain flour (120 grams) with 1/2 cup filtered water (120 grams) using a fork, making sure you’ve incorporated all the dry flour.
Place the lid lightly on top (using the Weck jar lid is really handy here) or a wet towel to keep moisture in, or plastic wrap- and let sit at room temperature (70-ish degrees) on the kitchen counter for 24-48 hours. If you are unsure how warm it is, use a kitchen thermometer and check it a few hours later. It is best at 70-75°F.
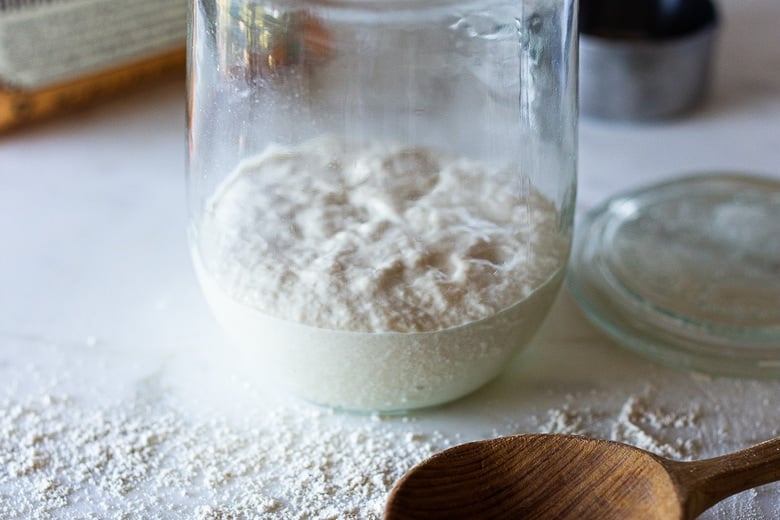
Day 2: After the first 24 hours, there may or may not be a bit of bubbling. Let the mixture rest until you see activity (bubbles or rising). Sometimes this takes 36 hours or even 48 hours, especially if the weather is very cold. When you see active bubbling, discard all but 1/2 cup of the starter (4 ounces).
To the remaining ½ cup of starter, stir in 1/2 cup lukewarm water (120 grams), and mix well with a fork. Add 1 cup of organic bread flour (120 grams) spooned and leveled. Stir until combined. Again, it should feel like a thick paste. If overly dry, feel free to add a bit more water. Cover again and allow the mixture to sit at room temperature for another 24 hours.
Day 3: After 24 hours, hopefully, you will see some bubbling or rising, and if not, let it go longer until you see some activity. Be patient. Depending on how warm your house is and how active your starter, you may need to feed it less often or more often, depending on when it gets “hungry”.
How to Know when to Feed your starter
Only feed your starter after it has peaked or looks “hungry”. Feeding it when it is “not hungry” will basically dilute all the growing yeast and make it lethargic. Better to underfeed than overfeed. How to tell if it is hungry?
- Look for “slide marks” (be sure to use a clean jar so you can see these clearly-see photo below).
- Thin and runny. The starter is liquid enough to pour out of the jar (when at room temperature).
- There is liquid at the top of the starter- a clear sign of hunger!
- Smells like acetone. The starter has processed all of the previous feeding and needs to be fed again.
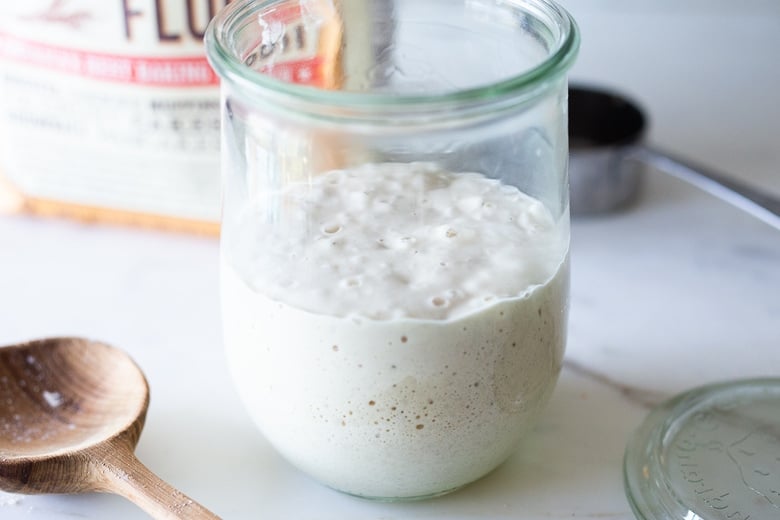
In the photo below, the starter “peaked” at the top line, then slid down. I call these slide marks- indicating the starter is hungry.

This might be 12 hours, it might be 14, it might be 18, or 24, depending on the temp in your house. In very warm climates, it may only be 6-8 hours. In winter, this may take 36 hours. It is better to underfeed rather than overfeed.
For each feeding, discard all but 1/2 cup of the starter (keeping roughly ½-cup of starter in the jar). Add 1/2 cup water and 1 cup bread flour (spooned and leveled). Mix well, cover, and let this rest at room temperature for 12-24 hours or until the starter looks “hungry” again before repeating.
Day 4: Feed 1-2 times a day (only feeding when hungry), discarding all but 1/2 cup of starter each time. Feed 1 cup of bread flour and 1/2 cup of water.
TIP: It is typical on day 4 for the starter to slow down and stall a bit. This is OK. Just keep going, be patient, and look for the hunger signs, and only feed when clearly hungry. Hopefully, you’ll begin to see some rising and falling. It’s helpful to put the starter in a clean jar each day and mark the beginning level (with a sharpie, string or rubber band) so you can easily see this.
Above, you’ll see it peaking, and below, you’ll see it deflating and getting “hungry.” There may not be too much difference in the beginning, so look closely.
Understand that your starter has a schedule of its own; it is a living thing, so watch it and pay attention.
If your starter is not rising and falling, look at its consistency. As it metabolizes the flour and gets hungry, it will get runny and liquidy, like to the point where you can pour it right out of the jar. If it is still thick like paste, it’s not done metabolizing (eating) the flour.
Day 5: Feed again, 1-2 times, discarding all but a 1/2 cup of the starter each time. Add 1 cup of bread flour and 1/2 cup of lukewarm water. The starter should look visibly active, bubbling, rising, hopefully, close to doubling in size.
*Repeat day 5 until the starter is rising and falling predictably and is close to doubling in size within 6-8 hours.
If your starter is not rising but there is evidence of hunger (runny or liquid at the top), try these three things:
- Substitute 1/4 cup whole grain flour (add to ¾ cup white bread flour) on your next feeding.
- Use mineral water like San Pellegrino instead of water.
- Stir the starter a few times after feeding to allow more wild yeast from the kitchen to get inside.
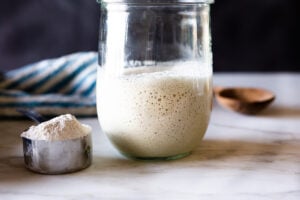
DAY 6 Morning: Baking day! Give it one last feeding in the morning: this time discard all but a 1/3 cup. (The reason we are changing this to 1/3 cup is to feed it a little bit more.) Add 1 cup flour (120 grams) and 1/2 cup water, stir, and place it in a clean jar so you can see the activity clearly. You can use a Sharpie or place a rubber band around the jar to mark the beginning level.
How to Know When Your Bread Flour Sourdough Starter is Ready to Bake Bread
The starter should double in volume within 6-8 hours of feeding.
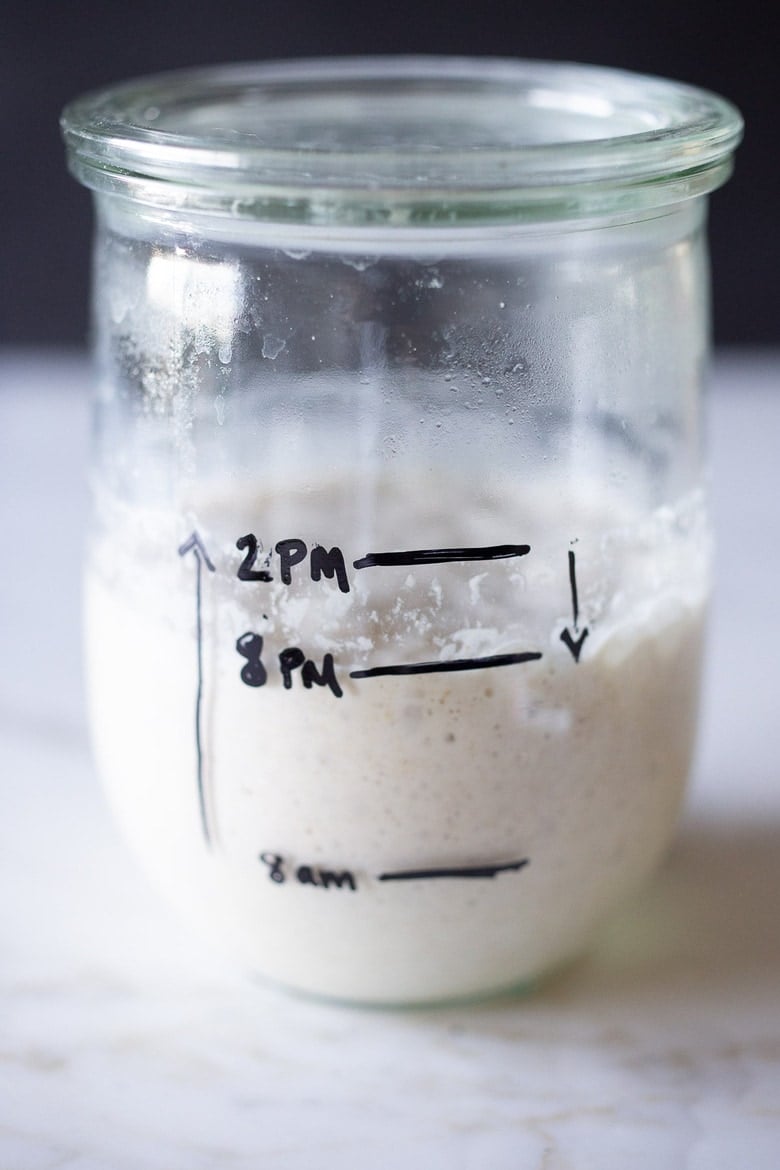
In the photo above, on the 6th day, the starter was fed at 8 am, it peaked around 2 pm, then it started deflating, and by 8 pm, it was “hungry” again. See those downward “slide” marks on the jar?
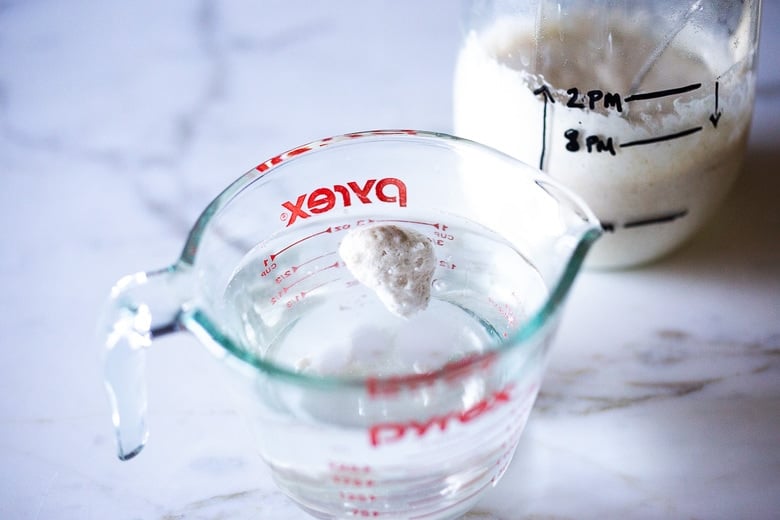
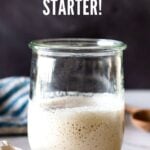
Do the Float Test
When the starter is at its peak, or just after, place a teaspoon of starter (just from the top, don’t stir it down) in a glass full of water; it should hopefully float. If it floats, success! Congrats. You can now make our sourdough bread…tonight!
My Best Sourdough Baking Tip. When baking bread, always use a hungry starter that has already peaked.
STARTER DOES NOT FLOAT? If it doubles in size but does not float, you can still try baking a loaf if it doubles within 6-8 hours of feeding it.
At this point, if your starter does not double in size within 6-8 hours of feeding, don’t give up! Often, it just takes longer, especially during the winter months. Continue feeding one to two times a day until you see a consistent, predictable rise and fall.
Read the troubleshooting section. If you need to take a break, put it in the fridge and try it again up to a week later. Don’t toss it!
Day 6 Evening: Let’s Bake! Use 1/3 cup starter to make this sourdough bread recipe and place the remaining starter (or if not making bread, place all of it) in the refrigerator, and feed it at least once a week, reserving ½ cup starter, before feeding it the usual 1 cup bread flour, 1/2 cup water.
TROUBLESHOOTING the Best Sourdough Starter
- SMELL: Starter should smell sweet, tangy, earthy, like a wet horse – not “bad”. If it really smells foul or unpleasant, you may have used an unclean jar, an unclean utensil, or somehow introduced other bad bacteria. I would start over.
- NO ACTION: On day 4-5 it is typically for it to slow down. If your starter is not rising at all but there is evidence of hunger (liquid at the top, or bubbles) try 3 things. First substitute 1/4 cup whole grain flour (add to ¾ cup white bread flour) on your next feeding. If no rise, then try using mineral water, specifically San Pellegrino instead of water. San Pelligrino specifically has the right mineral ratio, I have great luck with it. Others not so much! Also try stirring the starter a couple of hours after feeding, a couple of times throughout the day to allow wild yeast from the room to get in there. Lastly, you could try pineapple juice instead of water.
- FLOUR: Try to use fresh milled whole grain flour to start, then organic BREAD FLOUR. The more wild yeast in the flour, the better your starter will do, so smaller brands like Bob’s Red Mill seem to do better than bigger conventional brands that have been overly processed. It is totally OK to mix flours and to switch them up- this adds different kinds of wild yeast- a good thing!
- DO NOT overfeed. For example, maybe feeding 2 x day at 12-hour intervals is too often. You want to feed after the starter has peaked, then deflated (see photo above- you’ll see some slide marks on the jar) and this tells you that it is hungry. If you feed the starter before it has had a chance to metabolize (or eat) all the flour (before peaking) and then you discard part of it, and feed it again, you are actually diluting all that amazing bacteria, weakening your starter. So it’s all about watching your starter in your home. If you are not seeing rising and falling, but notice the starter just gets liquidy, this too is a sign of “hunger”. Or if it gets runny enough to pour out of the jar, another sign it is hungry. There are lots of variables here. Just be patient, pay attention and watch. This is a living thing- it doesn’t care about time schedules and recipes or what it “should” do. It will “eat” when it is “hungry” and sometimes it likes to eat slowly. 😉
- TIME: It may take longer than 6 days in colder environments. Use a kitchen thermometer and take its temp. Is it over 65F? Find a place where it can be warm. In the oven with the light on, or in an upper cupboard (heat rises). Sometimes it takes 12-14 days! Be patient, keep going. If it is doing absolutely nothing, leave it out on the counter for 24-48 hours and see what happens. If you run out of flour or need a break, don’t just toss it; put it in the fridge and see if you can get it going a few days later.
- ACIDITY: If you still can’t get that starter going, some people recommend subbing pineapple juice for the water for one feeding- raising the acidity level. My good friend just tried this and it got hers going.
- LIQUID: If you see any liquid at the top of your starter, it means your starter is hungry. So, yes it’s still alive which is a good thing! You can stir the liquid in, or pour the liquid out, either way, but feed it. This is a sign that you may need to feed it more often.
- MOLD: if you see any discoloring or mold on the surface, starter was probably contaminated. If it is only on the surface, it is probably ok to save. Scrape it off, save 1/2 cup of the underneath starter, and keep going, using a clean jar. Feed, smell, use your best judgment.
- FLOAT TEST: Try testing when your starter is peaking. Take a spoonful from the top without stirring it down. If your starter is rising and falling consistently, but not passing the float test and it has been over 8-10 days, just try baking a loaf. People are having luck with good loaves without passing the float test. It may be the flour…

Sourdough Starter Storage Tips
- REFRIGERATE & FEED AT LEAST ONCE A WEEK: Pick a scheduled day and try to stick with it, always reserving 1/2 cup and feeding it 1 cup flour and 1/2 cup water. Discard the remaining, give it away, or keep the discard in a separate container for sourdough pancakes, sourdough buns, banana bread, biscuits, etc. I usually don’t feed the discard unless I give it away.
- If you forget to feed it one week, it is most likely OK; feed it 1-2 times a day for 1-3 days in a row to revive it (keeping it out on the counter) until bubbly and active and doubles within 6 hours. I’ve left my starter for a month on vacation (in the fridge) without feeding and simply revived it by feeding it 3 days in a row, 1-2 x day. It’s surprisingly hard to kill. You can also freeze it for more extended storage.
- This batch of starter will allow you to bake 2 loaves of bread per week with enough left to feed for the next week. If you want to bake more often, you can keep it out and feed it 1-2 x daily. Or if baking every few days, you can pull it out of the fridge, feed it 10 hours before using, leaving it out, use what you need while it is peaking (or slightly after), then put it back in the fridge that evening. Do the same thing a few days later when ready to use again. So this would be feeding 2-3 times a week, best if baking 4-5 times a week.
- If you are not actively baking, you can maintain a smaller amount of starter using the same ratios.
- You can also freeze the sourdough starter if you’re leaving on a long trip.
FAQs
Yes. While you are building your starter, during the first week, it is the simplest, easiest, fastest, and most economical way to create a healthy starter. (Or save it separately -in the fridge- and use it in Pancakes, Waffles, Buns, or Biscuits. ) This is because you always have to feed it two times its volume in flour. For example-if you kept all the 1 1/2 cups of starter, you would have to feed it 3 cups of flour (instead of keeping just a 1/2 cup and only feeding it ONE cup). Discarding will shorten the fermentation process, require less flour in the long run, and create a stronger starter. Once your starter is “established” after the first week- then you can give it away to friends or use it in pizza dough, pancakes, etc).
This recipe for Sourdough Starter takes 6 days (or up to 12 days if it is very cold where you live).
The only ingredients you need to get started are flour (bread flour and whole grain flour) and water.
What is the biggest mistake you can make with your sourdough starter?
The most common mistake is overfeeding, which weakens your starter instead of making it stronger. The secret is to watch for signs of hunger-bubbles slowing down, slide marks in the jar, or liquid on top-before feeding. Once you learn to read your starter's natural rhythm, it will stay bubbly, active, and ready to bake with.
It's surprisingly simple to make a sourdough starter! The process is hands-off and only takes a few minutes each day. The key is consistency: feed it regularly and keep it at a steady temperature. Once you get into the rhythm, caring for your starter becomes second nature, and you'll be rewarded with a healthy, bubbly culture for all your baking.
How to use Sourdough Starter
- See all our Sourdough Recipes!
- Sourdough Scones
- Sourdough Crackers
- Sourdough Biscuits
- Sourdough English Muffins
- Sourdough Tortillas!
- Vegan Banana Bread
- Overnight Sourdough Waffles
Easy Sourdough Starter Recipe
- Prep Time: 30
- Cook Time: 6 days
- Total Time: 144 hours 30 minutes
- Yield: 1 ½ cups 1x
- Category: sourdough, fermented, cultured, bread, baking,
- Method: fermented
- Cuisine: bread
- Diet: Vegan
Description
How to make your own Sourdough Starter (see the step-by-step video in post) using simple ingredients with no special equipment, in 6 days, that can be used in sourdough bread. Sourdough Starter is a wild yeast, made from fermenting flour and water.
Ingredients
- 120 grams whole grain flour (whole wheat flour, rye flour, or freshly milled flour) 1 cup, fluffed, spooned and leveled
- Organic White Bread Flour (5-10 lb bag ) I like Shepherd’s Grain or Bob’s Red Mill.
- 120 grams Water per feeding (1/2 cup water)
Instructions
-
- Day 1: Starting in the morning or at night, using a wide-mouth quart jar or Crock or Glass Measuring Cup mix 1 cup whole grain flour (120 grams) with 1/2 cup (120 grams) filtered water using a fork making sure you’ve incorporated all the dry flour. For your first measuring – it is a good idea to weigh the flour, using a kitchen scale so you get an idea of how thick it should feel. It should be like a thick paste. Thick like peanut butter. If you need to add a little more water to incorporate the flour, that is OK, but be precise with the flour. Place the lid on top (using the Weck jar is really handy here) or a damp towel to keep moisture in, or plastic wrap- and let sit at room temperature (70-80 degrees) on the kitchen counter for 24-48 hours, or until you see some bubbling. If you are not sure how warm it is, use a kitchen thermometer and check it a few hours later. See notes for TEMPERATURE.
- Day 2: After the first 24 hours, you may or may not see a bit of bubbling. I prefer to let this rest until I see a tiny bit of activity (bubbles) and sometimes this takes 36 or up to 48 hours. So start “day 2”, when you see a little bit of bubbing. Discard all but 1/2 cup (136 grams) of the starter. (See notes for discard). Add to the remainder, 1 cup of white bread flour, (120 grams), spooned and leveled, and 1/2 cup filtered water (120 grams), mixing well with a fork. Place the lid on loosely again and allow the mixture to sit at room temperature (70-80F) for another 24 hours.
- Day 3: By the third day, you should definitely see some bubbling- and if not, let it go a bit longer. Depending on how warm your house is and how active your starter, you may need to begin feeding more often, or even move to two feedings a day roughly 12 hours apart, like in the morning and at night. In a nutshell, you want to feed the starter only after it has peaked (metabolized all the flour from the last feeding) and has started sinking down or gets liquidy- this is when it is hungry! This might be 12 hours, it might be 14, it might be 18, or 24, depending on the temp in your house. In very warm climates it may only be 8 hours. It is better to underfeed rather than overfeed here. For each feeding, like before, discard all but 1/2 cup of the STARTER (keeping roughly ½-cup of starter in the jar -4 ounces or 136 grams) Add 1 cup Bread Flour (spooned and leveled) and 1/2 cup water to the 1/2 cup starter and let this rest at room temperature for 12-24 hours or until the starter looks “hungry” again before repeating.
- Day 4: Feed 1-2 times, discarding all but 1/2 cup of starter EACH TIME. Feed 1 cup bread flour, 1/2 cup water. Look for the hunger signs. Hopefully, you’ll begin to see some rising and falling. It’s helpful to put the starter in a clean jar and mark the beginning level (with sharpie, string or rubber band) so you can easily see this. ***If for some reason your starter looks like it is still rising at the time of second feeding (at night) and there is no evidence it has fallen or no slide marks, it is still “eating” so skip this feeding and feed first thing in the morning. AGAIN, Feeding it when it is “not hungry” will basically dilute all the growing yeast and make it lethargic. Better to starve than overfeed.
- Day 5: Feed again, 1-2 times, roughly 12 hours apart, or when hungry, discarding all but a 1/2 cup the starter EACH TIME. 1 cup bread flour, 1/2 cup lukewarm water. The starter should look active, bubbling, rising, sliding down, hopefully, close to doubling in size. (If not, repeat this day until starter doubles in size within 8-12 hours of feeding- and read the troubleshooting section.)
- DAY 6: Give it one last feeding. Discard all but a 1/3 cup. Add 1 cup flour ( 120 grams) and 1/2 cup water, and place it in a clean jar so you can see the action clearly. You can use a sharpie or place a rubber band around the jar to mark the beginning level. The starter should hopefully double in volume within 6 hours of feeding. When it peaks, DO THE FLOAT TEST: To test the starter, place a teaspoon of starter (just from the top, while it is peaking, don’t stir it down) in a glass full of water, it should hopefully float. If it does, you can make sourdough bread. Tonight! Let the starter keep resting at room temperature or a few more hours allowing it to fully metabolize the flour, perhaps sinking a little before making your dough. You want to make dough with slightly hungry starter. Place the remaining starter in the fridge and feed it in a week. You’ll have enough stater to make one more sourdough loaf during the week, and still have enough to feed. If you want to wait to make bread until later in the week place starter in the fridge. Be sure to feed it in 7 days. Read maintenance section.
- At this point, if your starter does not double in size don’t give up! Often it just takes longer, sometimes up to two weeks, especially if it’s cold. Continue feeding one-two times a day (only when hungry) for a few more days, until you see a visible rise and fall. Read the troubleshooting section. If you need to take a break, just put it in the fridge and try it again up to a week later. Don’t toss it- if there are bubbles, it is still alive.
- This batch of starter will make two loaves of bread with enough left over to feed for the following week.


Notes
- TEMPERATURE: The colder your home, the longer it will take for the starter to grow and become active (bubbles). Find a warm spot (70-80 degrees) for the best results. On the stovetop, with the light turned on, or on top of the fridge. Or in the oven with the light on. On top of a heating pad (set to low) with a towel in between). You can still make the starter in a colder home, it will just take longer- even up to 2 weeks.
- FLOUR: Always try to start the batch by using organic, freshly milled whole-grain flour (wheat or rye) because it has more wild yeast in it than All-Purpose or white flour and will get it active and growing sooner. You can, of course, continue to use whole grain, but I’ve had the best luck using organic “bread” flour for days 2 through 6. People have made a sourdough starter with All-Purpose flour- but personally, this has never worked for me– there are fewer nutrients and wild yeasts in the flour and results in a very lethargic starter. If it is your only option, try mixing in 2+ tablespoons of whole-grain (wheat or rye) with the AP flour per feeding. Feel free to use different flours or mix different flours together. It is OK to use all-purpose flour if in a pinch, but using it repeatedly will result in sad starter.
- WATER: I usually use tap water -but sometimes the chlorine in tap water can inhibit the growth of your starter. Lukewarm water helps fermentation to start faster. Sterilized bottled water is often overly sterile, and can also inhibit. Mineral water, like Perrier (carbonated is OK) can sometimes work miracles.
- HYDRATION: Hydration refers to the ratio of water to flour in terms of weight. It is a ratio. The starter is typically at 100% hydration- meaning equal parts flour and water, in terms of weight. So if you use 120 grams of water, use 120 grams of flour. This roughly translates to 1 cup of flour and 1/2 cup water. Feel free to weigh instead of measure if you want to be more precise, or want to familiarize yourself with the consistency you are aiming for. If using whole grain flours (which tend to be “thirstier”) and your starter seems very thick, it is totally OK to add more water to thin it a bit. I intentionally keep the hydration a little lower here (a thicker starter) so you can more clearly see the rise and fall “action” in the jar.
- STORING AND FEEDING: When your starter is kept cold, in the fridge, you don’t need to feed it as often- only once a week. Feel free to feed it “cold”, and put it right back in the fridge if you like. If you keep it out on the counter, you’ll likely need to feed it 1-2 x daily (or just watch and feed only when hungry). Cold slows down the fermentation, heat speeds it up.
- USING: When you need to use your starter for baking bread, feed it 10-12 hours before making bread dough, using it after its peak height. For a more “sour” flavored bread, use the starter straight from the fridge, 3-6 days after feeding. The starter gets more sour tasting the longer it goes without feeding. Feeding the starter the same day as making bread will produce a milder sourdough flavor.
Nutrition
- Serving Size: 1 tablespoon
- Calories: 31
- Sugar: 0 g
- Sodium: 0.2 mg
- Fat: 0.1 g
- Saturated Fat: 0 g
- Trans Fat:
- Carbohydrates: 6.2 g
- Fiber: 0.2 g
- Protein: 1 g
- Cholesterol: 0 mg


I was gifted a sourdough starter over a week ago and would like to gift some of mine to others. Would I just give away the discard for them to feed? Right now I am still feeding 2 times a day so I have lots of discard and hate throwing it away.
Yes you could do that!
so my online grocery pickup left out the whole wheat flour and I cannot get another pick up day for several more days. Can I make this with white flour only? Or add whole wheat once I can pick up a new order?
Oh shoot! You know you probably could… but I feel you will have better success with the whole wheat at the beginning. I would just wait?
Success! Bubbles. Lots of happy bubbles. Floats! Follow directions exactly, so excited to make bread! Post your recipe soon please!
YAY!!!!
I’m on Day 1 and verrrryyy excited. However just figured out that we’re out of bread flour and can’t get any before tomorrow! I have a ton of whole wheat flour. Can I just keep adding whole wheat flour instead? I assume it will just take longer. Thank you!
Hi Christine, yes wheat until you get the white bread flour. 🙂
I am on day 3 and my culture doubles in 4H, is fill of bubbles and floats. How much of this do i use to make bread? thx!
Holy cow Bri! Good for you. I would still do it one more day, just to get it stronger. I am putting out a bread recipe soon.
Why not just use less than keep discarding 1/2 to 2/3 during the initial fermentation?
After fermentation is done, think it would be better to say “use in baking” rather than “discard”.
Thanks
Because I have never tried using it in baking. This is just an idea I had. The “discarding” is standard in starter recipes. I’m sorry you are having a hard time with it. The issue here is, you need to feed the starter, 2 times the amount of its volume. For a 1/2 cup starter, you need to feed it 1 cup flour. Twice the amount.
As much as I love sourdough bread, I’m going to pass on making this recipe for a while at least… Flour is a limited item in our grocery stores right now, and this recipe uses at least 7 cups of flour, half of which is tossed! I’ll continue making my yeasted breads for now, but maybe as things even out, I’ll give it a try.
Totally makes sense Deb. This is for those of us who have plenty of flour but can’t find yeast. Plus it is just a fun project if you’ve always wanted to learn, and now have the time! 🙂
thanks for the great and simple recipes. Before I get started just a quick question. Do you need discard half the starter or can it be used to make another batch? I’m not really into just throwing away if I can use it elsewhere?
Well, if you made another batch, then you’de have to find something to do with that discarded starter too- and more as the process continued. You’d basically have double the amount to discard. 🙂 I know it seems wasteful to discard. The only thing I can think of is to collect all the discarded starter from the first week and keep it in the fridge, then create a dough out of it – add salt and yeast and make a yeasted bread? I haven’t tried this though. Once your starter is up and running (after the first week) you’ll find many uses for it ( waffles, rolls pizza dough) but it’s tricky with the starter the first week because it is just not strong enough to rise things on its own yet. Hopefully, this makes sense.
On day 2, my starter is looking extremely dry – the top layer has turned dark and is kind of crusty looking. Is this normal?
It’s fine, it probably just needed a little more water. At 24 hours just spoon out the dry stuff off, keeping a roughly a half cup of starter in the jar, add the water and the flour (fluffed), adding a little more water if you need to, to create a thick paste, stirring all with a fork.
Great, thank you! 🙂
One final question! Finally on day 6, I’ve realized that I’ve been discarding half of the starter each time, but not measuring it out to be 1/2 – 1/3 cup that is kept in the jar (I am now realizing that it turns out to be a bit more than that). Do you think this matters much? Thank you!
Very simple recipe. Hope it works for me as well. Just started my batch now. Keeping fingers crossed.
I can’t wait ti bake with this. It’s my 2nd attempt at making a started. Messed up the first one. Is the part you discard each time of any use or does it get tossed in the trash ?
Hi Sylvia! Love this recipe and just started my sourdough starter. (After having made a spelt flour sourdough starter successfully)… Is there anything one can use the ‘discarded’ starter for from day 2 and onward? In the current situation it feels wasteful to throw away so much flour. Thank you!!
I’m in Australia. Right now I can’t buy bread flour. Can I substitute either self raising flour or plain flour to make a starter?
You could try it with plain flour- it may take a little longer, but I would not recommend self-rising flour.
Having mixed it up, it looks awfully dry compared to a starter I made 10 years or so ago and abandoned b/c I was getting too plump from eating all that good bread (which my children, still little at the time, did not recognize as bread, nor it must be said, did their dad, but I digress…) I’m going rogue! Gonna add another 1/2 c of liquid – room temp apple cider.
Hi, another 1/2 cup would be way too much. You just need enough liquid to make a very thick paste.
Ok I will try this again. I have failed in the past….wish me luck!
I have faith in you, just be patient.
Hello Sylvia, I’m so glad to embark upon an exiting experience in baking homemade bread using sourdough starter. Thank you for your fascinating blog and looking forward to receiving some bread and pizza recipes in the not too distant future
Thanks so much Irina! So happy you are here!
Perfect when there’s no yeast to be had in the grocery store!!
Yes!
Ooh, this sounds like fun. I am going to try this. I would think the discarded portions could be cooked up like a flat bread of some sort, or added to biscuit dough etc.
How much of the starter then is typically used when baking a loaf of sourdough bread- the whole starter? Thanks
I generally use 1/3- 1/2 cups starter per 3 1/2 cup bread flour, with 1 3/4 cup water, 1 3/4 teaspoons salt.
Could home brewed kombucha work as the liquid at the beginning stage? Thank you so much for making this starter simple!
Wow, I’ve never thought of that, and it sounds really interesting! I don’t know though. 🙂
When using the starter to make bread or pizza dough, how do you know how much of the starter to use? What would the equivalent of one packet of yeast be? Amateur here. Thanks so much.
I will post some bread and pizza dough recipes soon. I generally use 1/3- 1/2 cup starter per 3 1/2 cup bread flour, with 1 3/4 cup water, 1 3/4 teaspoons salt.
Hi Sylvia, so perfect. My husband just asked about us making bread. I am gluten free, could I use a gluten free all purpose flour and have good results?
Hi Maria- Yes I think if you use a gluten-free flour blend- you could use this in the same way.
I’m also going to do this! It is definitely a great project to do during Pandemic times. I’m going to do this with my teenage son. It’ll be fun to watch the growth and feed it and then make bread with it at the end. Will you post a good sourdough bread recipe after a week?!?
Thanks
Sondra
Yes, will post in the next week or so!
great! Thank you. It seems to be growing quite nicely at the moment. Tomorrow we shall be feeding twice a day
thanks for posting this.. can’t wait to start was one of my projects to do while at home..
Can you send us a bread recipe to make with the starter?
Working on a bread recipe this week!
Hi! This is exactly a project I wanted to start during this pandemic so thank you for posting this! The links for the health benefits of sourdough starters wasn’t working for me but I am very interested in this information!
Thanks Kristen I will fix the links!
If 1/2 the starter is thrown out … can it not be used to make another batch, or given to a friend to make their own? It seems a waste.
Once the starter is up and going and active- Yes, then absolutely share with friends. For the first week, while building the starter, I would just discard it. Or if you are especially good at baking, I guess you could collect all the discarded starter ( during that first week) refrigerate it, then add yeast and salt and turn it into some kind of bakeable dough? It could be a fun challenge! 😉
THANK YOU for this! I desperately need to be able to make pizza dough, bread etc. to keep our 4 boys fed without going to NY stores! I started another recipe for a starter but it looks too dry and I was searching for more help and found this. It is day 6 (all along it had a dry crusty top). The recipe only called for feeding once per day! I had it covered with a kitchen towel in my tv cabinet to keep warm. It has never doubled in size and is very dry! should I toss it and start over?
Salvage 1/2 cup underneath the crust. Begin feeding 2 times a day, and either cover with a lid (not tight) a wet kitchen towel or plastic wrap. It sounds like the moisture is getting out.