All disease begins in the gut. – Hippocrates
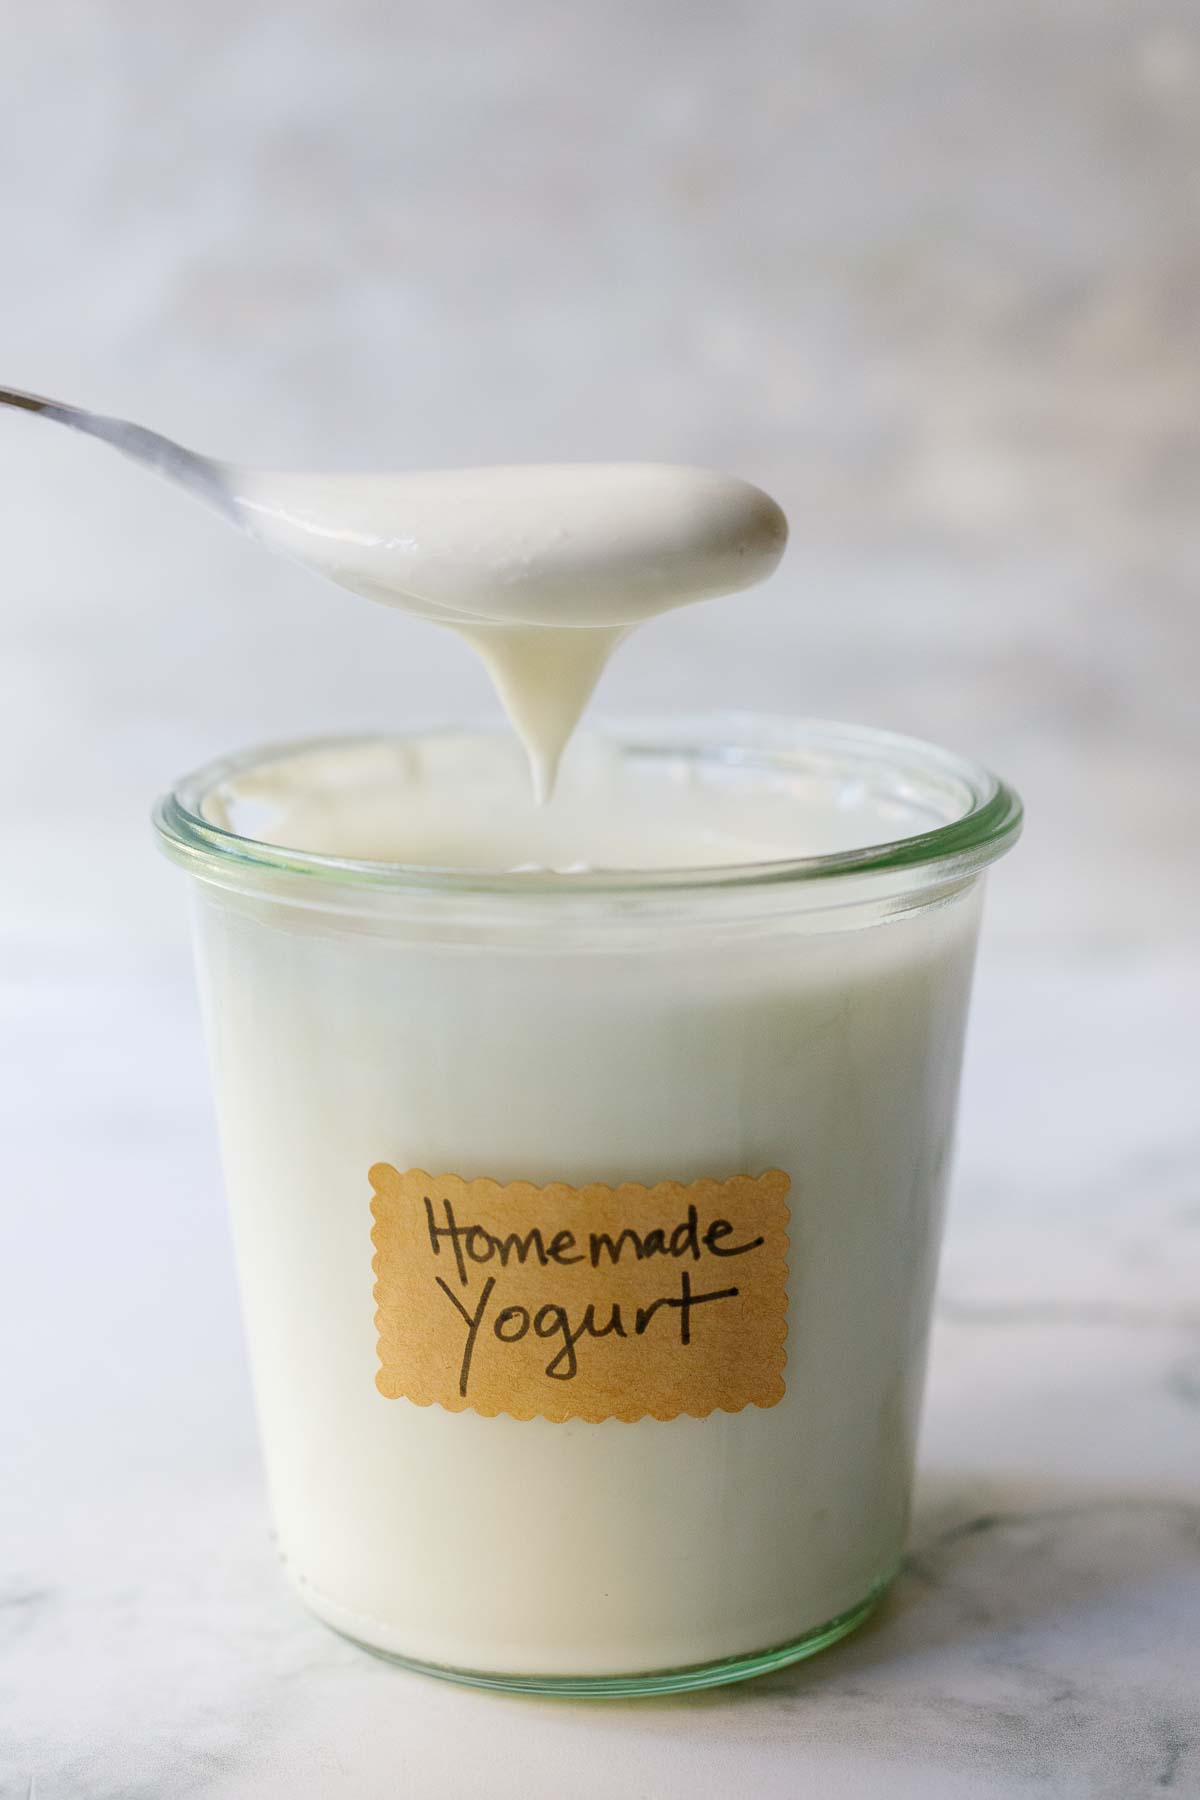
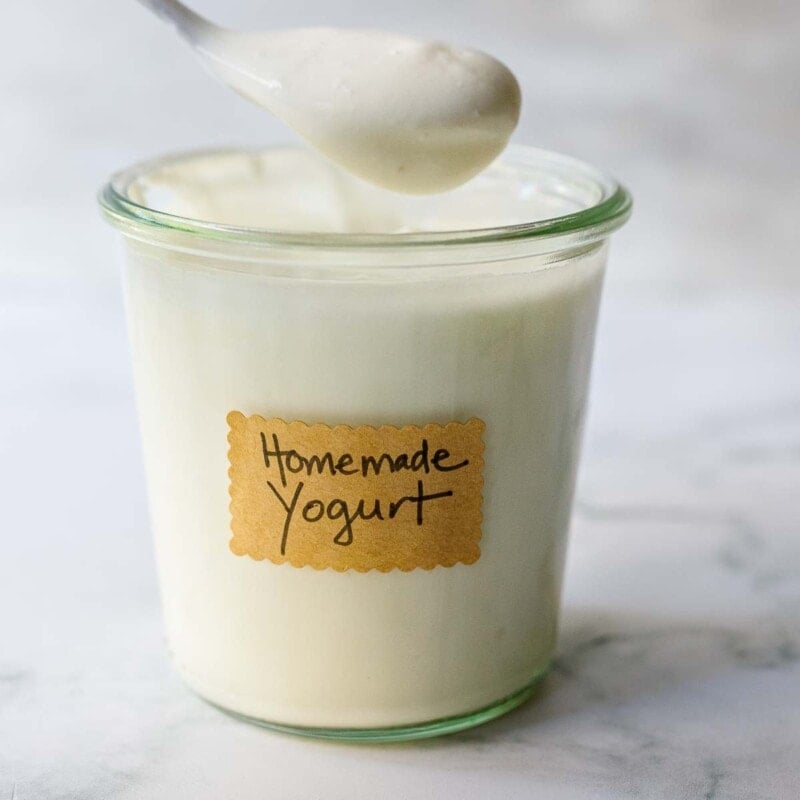
Believe it or not, making your own yogurt at home is so easy and requires no special equipment. There are lots of ways to make homemade yogurt, but the basic concept is the same. Heat whole milk, let it cool, then stir in a little plain yogurt with active cultures, either from the previous batch or store-bought yogurt and incubate at a steady warm temperature for a period of 8-12 hours and let it works it’s magic.
What is happening behind the scenes is the healthy bacteria in the yogurt cultures will feast on the the sugars found in the milk, called lactose. They will proliferate and the milk produce lactic acid. The lactic acid is what preserves the yogurt and gives it the tangy taste. Strain to thicken little more and and that’s it.
You now have happy alive yogurt! Creamy tangy yogurt packed with millions of happy, active good bacteria, or probiotics, that help support gut diversity, which in turn supports our immune system.
You can make yogurt out of regular store-bought pasteurized milk, organic milk, raw milk or even goat’s or sheep’s milk. Pasteurized milk, the kind you find at the grocery store, is basically milk that has been heated up to 180 F to slow the growth of bacteria in milk, which lengthens its shelf life. While this does make it safer by lowering the risk of harmful bacteria, there is growing research that shows that pasteurization changes the chemistry of milk and makes it less digestible.
I prefer making yogurt out of RAW, Unpasteurized milk– basically fresh milk, straight from the cow, that hasn't been treated or heated. If you are curious about the benefits and risks of raw milk, here are a couple of websites that will explain both. Please do a little research and make an educated decision for yourself and family.
Homemade Yogurt Ingredients
- Milk– use organic whole milk, goat’s milk, sheep’s milk or organic raw milk- opt for organic and grass-fed if possible. Using skim milk or low-fat milk will result in runny yogurt. Tip: yogurt yield is half of the volume of milk. For example, one-gallon milk will yield roughly ½ gallon of yogurt.
- Plain Yogurt (to use as the yogurt starter) or use yogurt culture or starter culture. You can use some of your last batch of yogurt, or a little store-bought yogurt, Greek yogurt, etc. You’ll need one tablespoon per quart of milk.
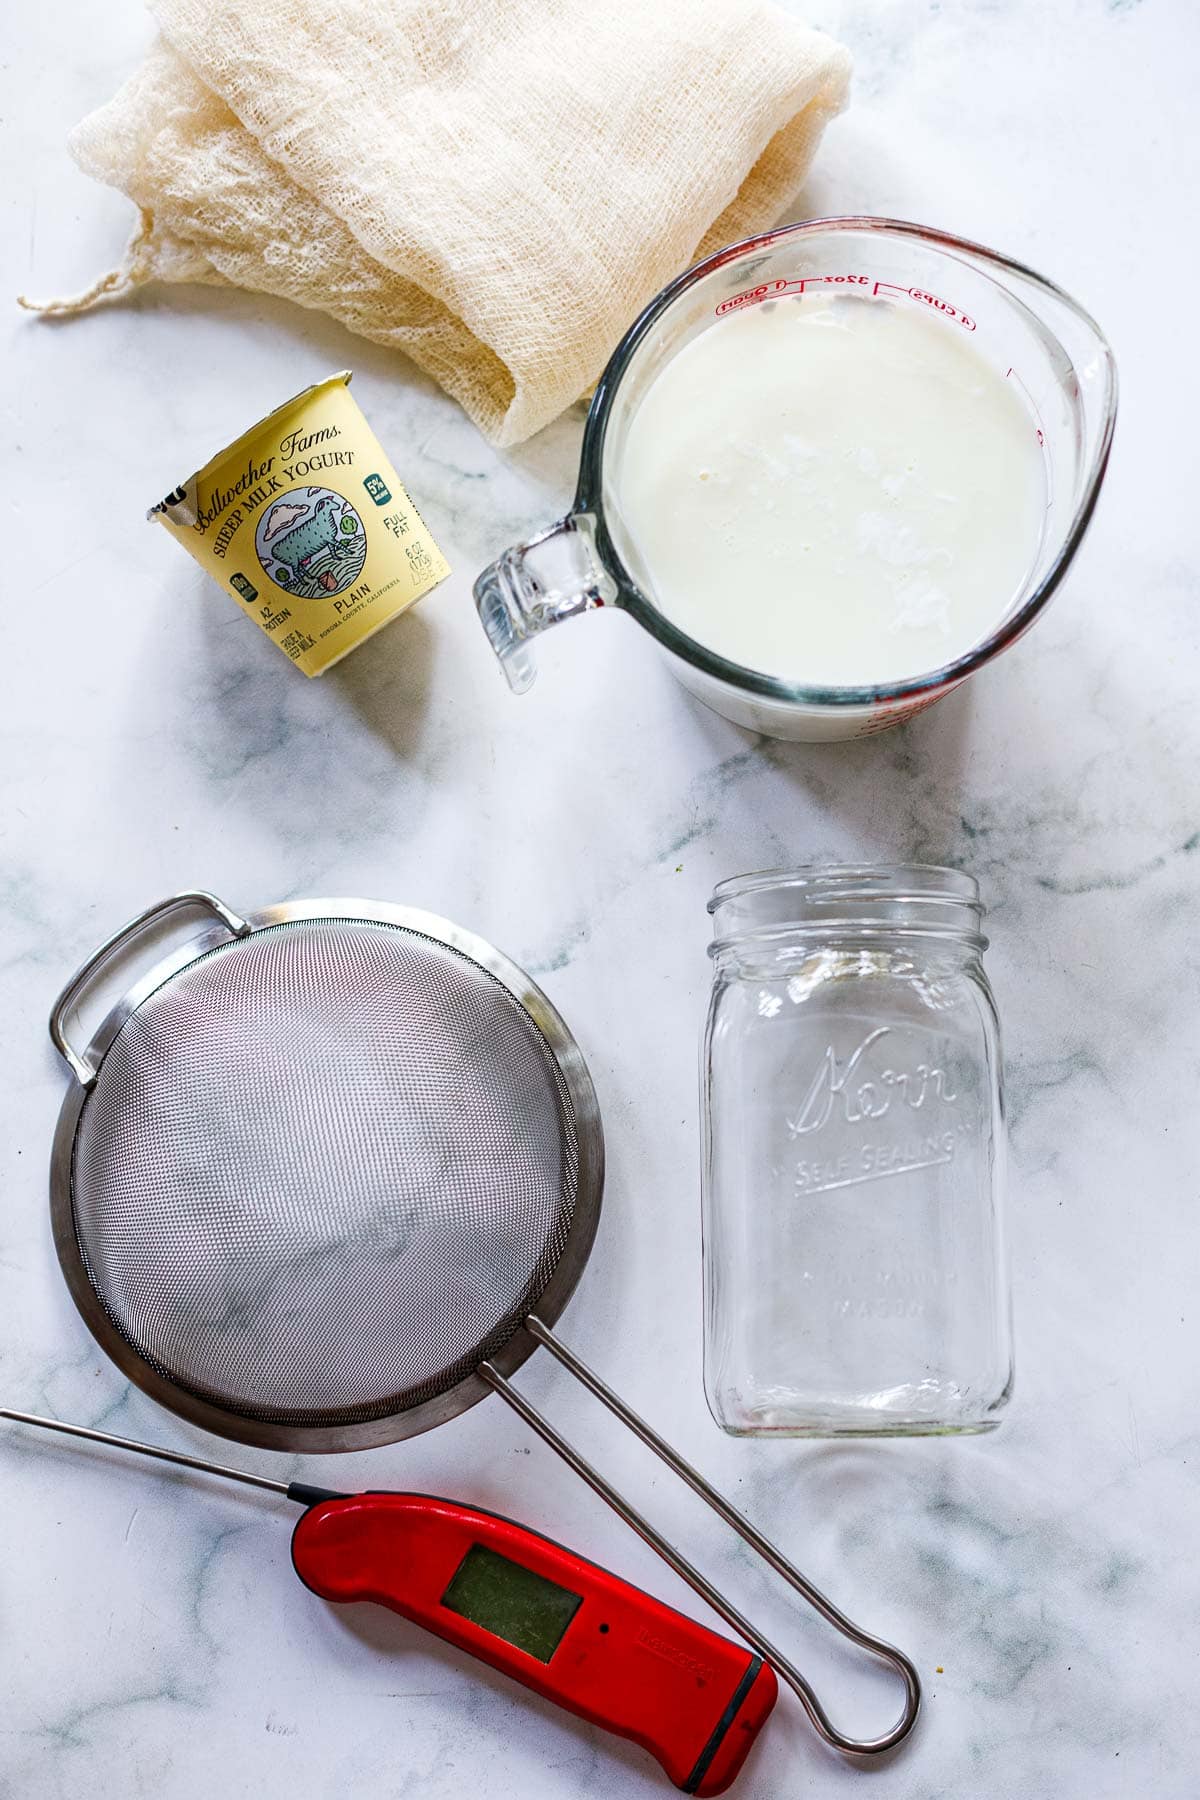
- Strainer, Cheesecloth (or thin kitchen towel), and an instant-read thermometer.
- optional addition: milk powder or dry milk (to thicken)
How to make Yogurt (step-by-step instructions)
Tip: To thicken yogurt (without straining it afterward) stir in 1/2 cup dry milk powder to the heating milk. This will produce more of a Greek-style yogurt.
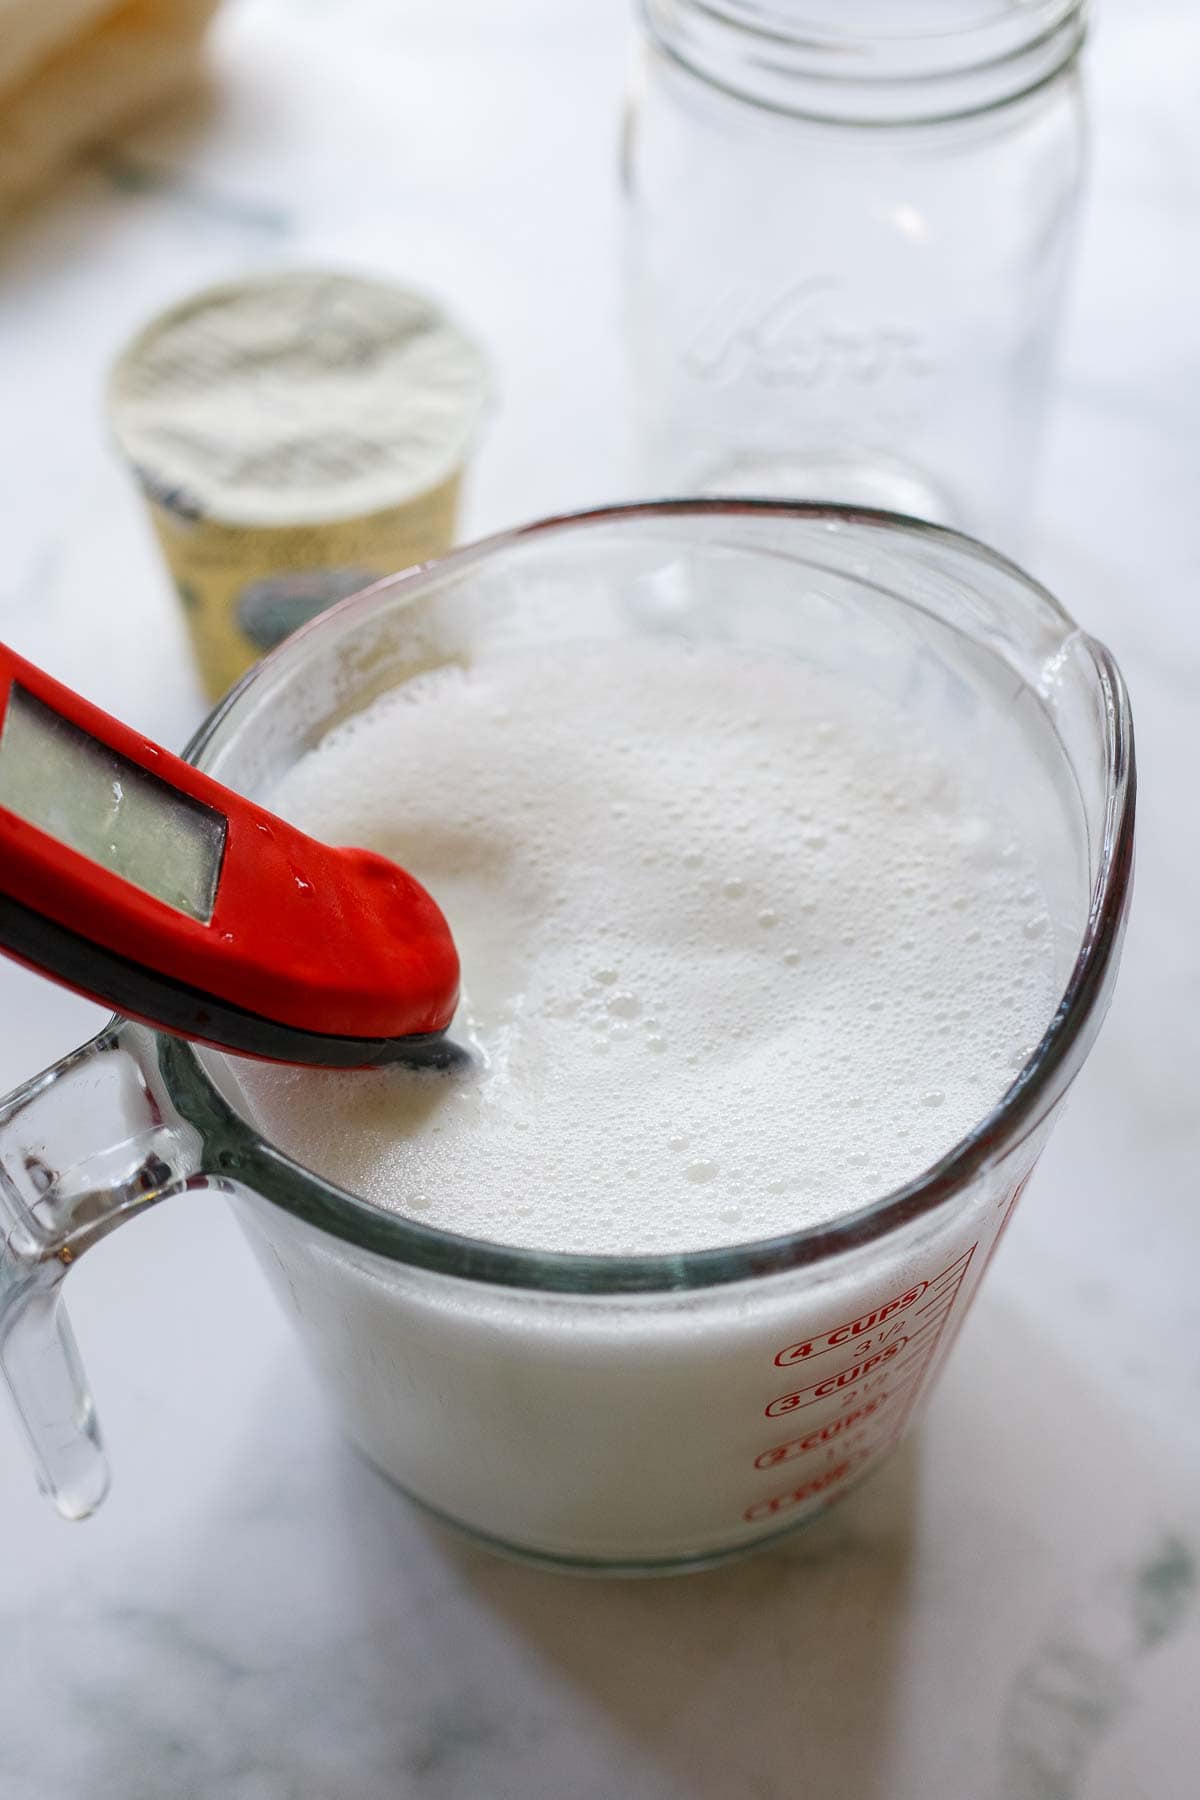
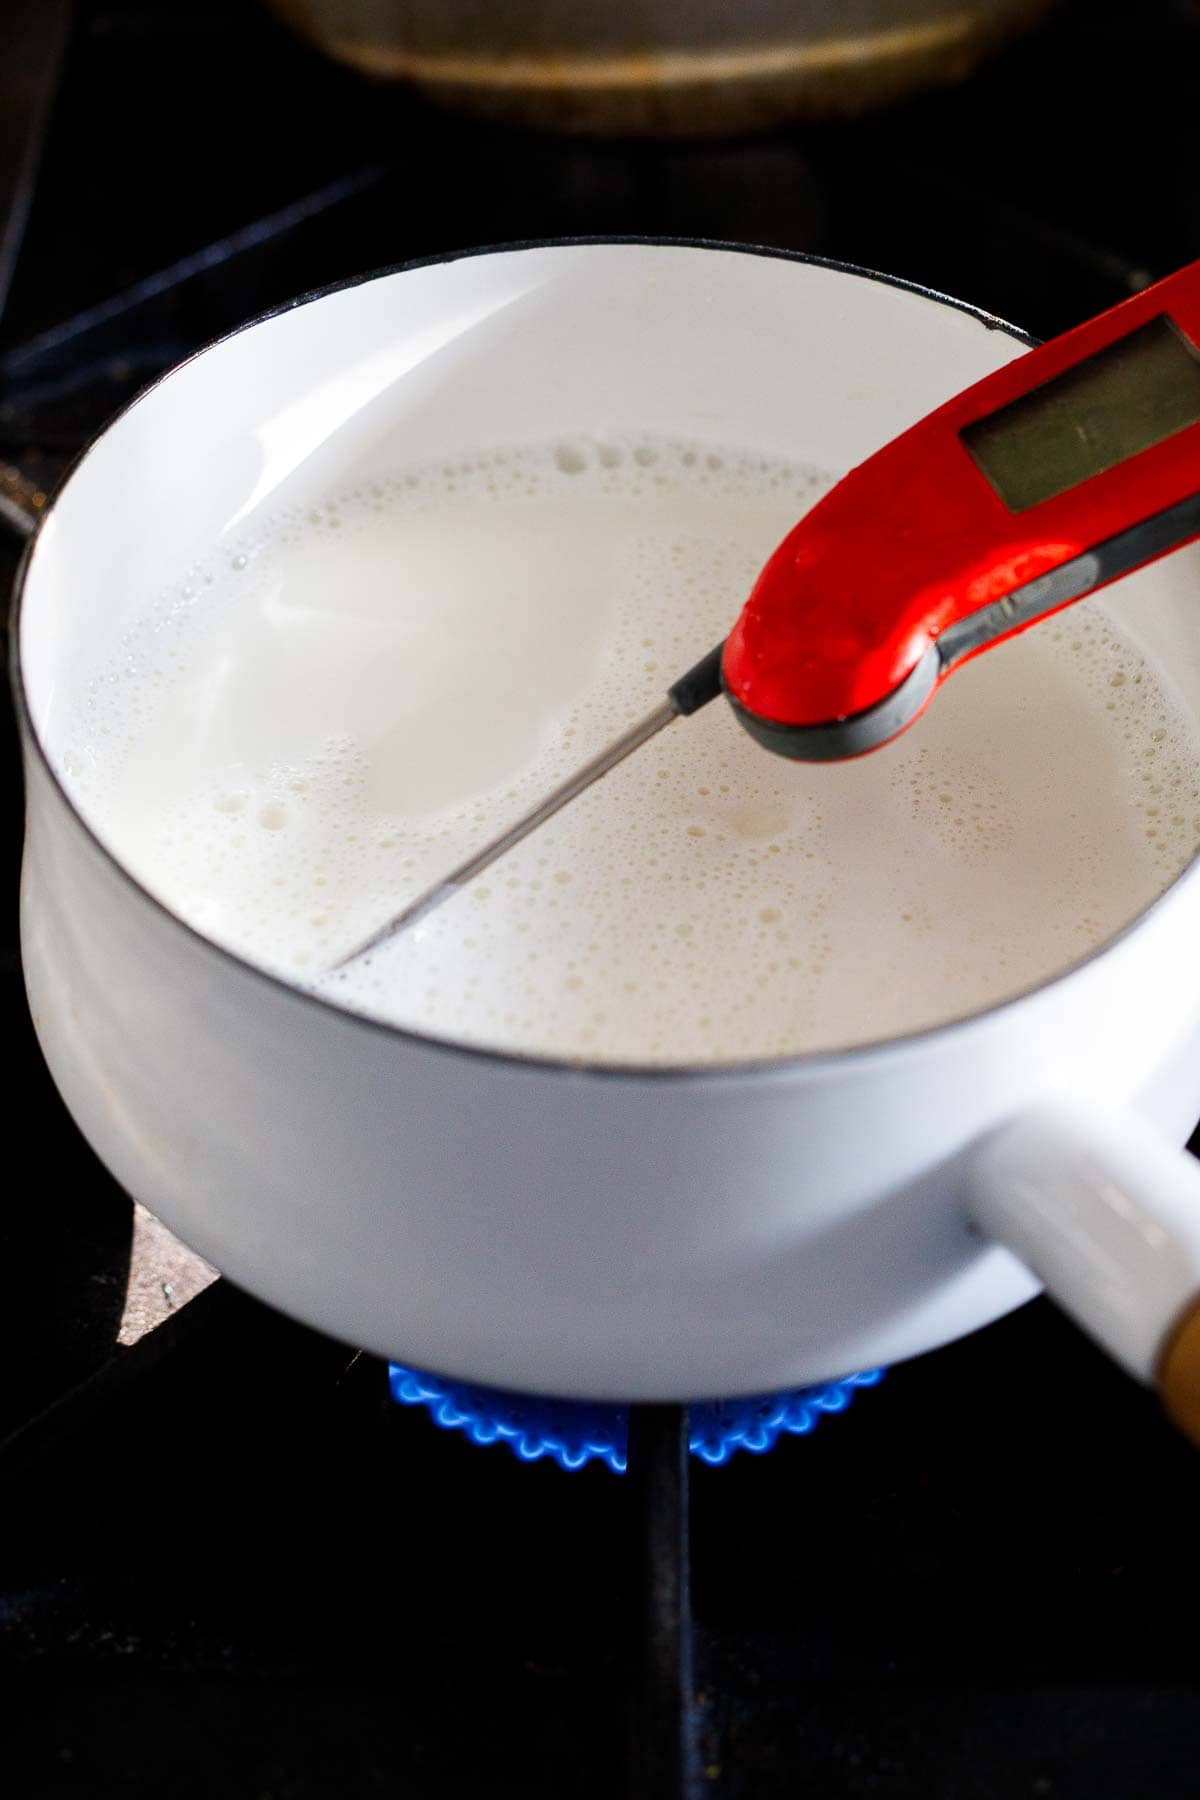
Let the milk cool to 110F. This is important- overly warm milk will kill the active cultures in the yogurt, so be patient here and let it cool down and use a thermometer.
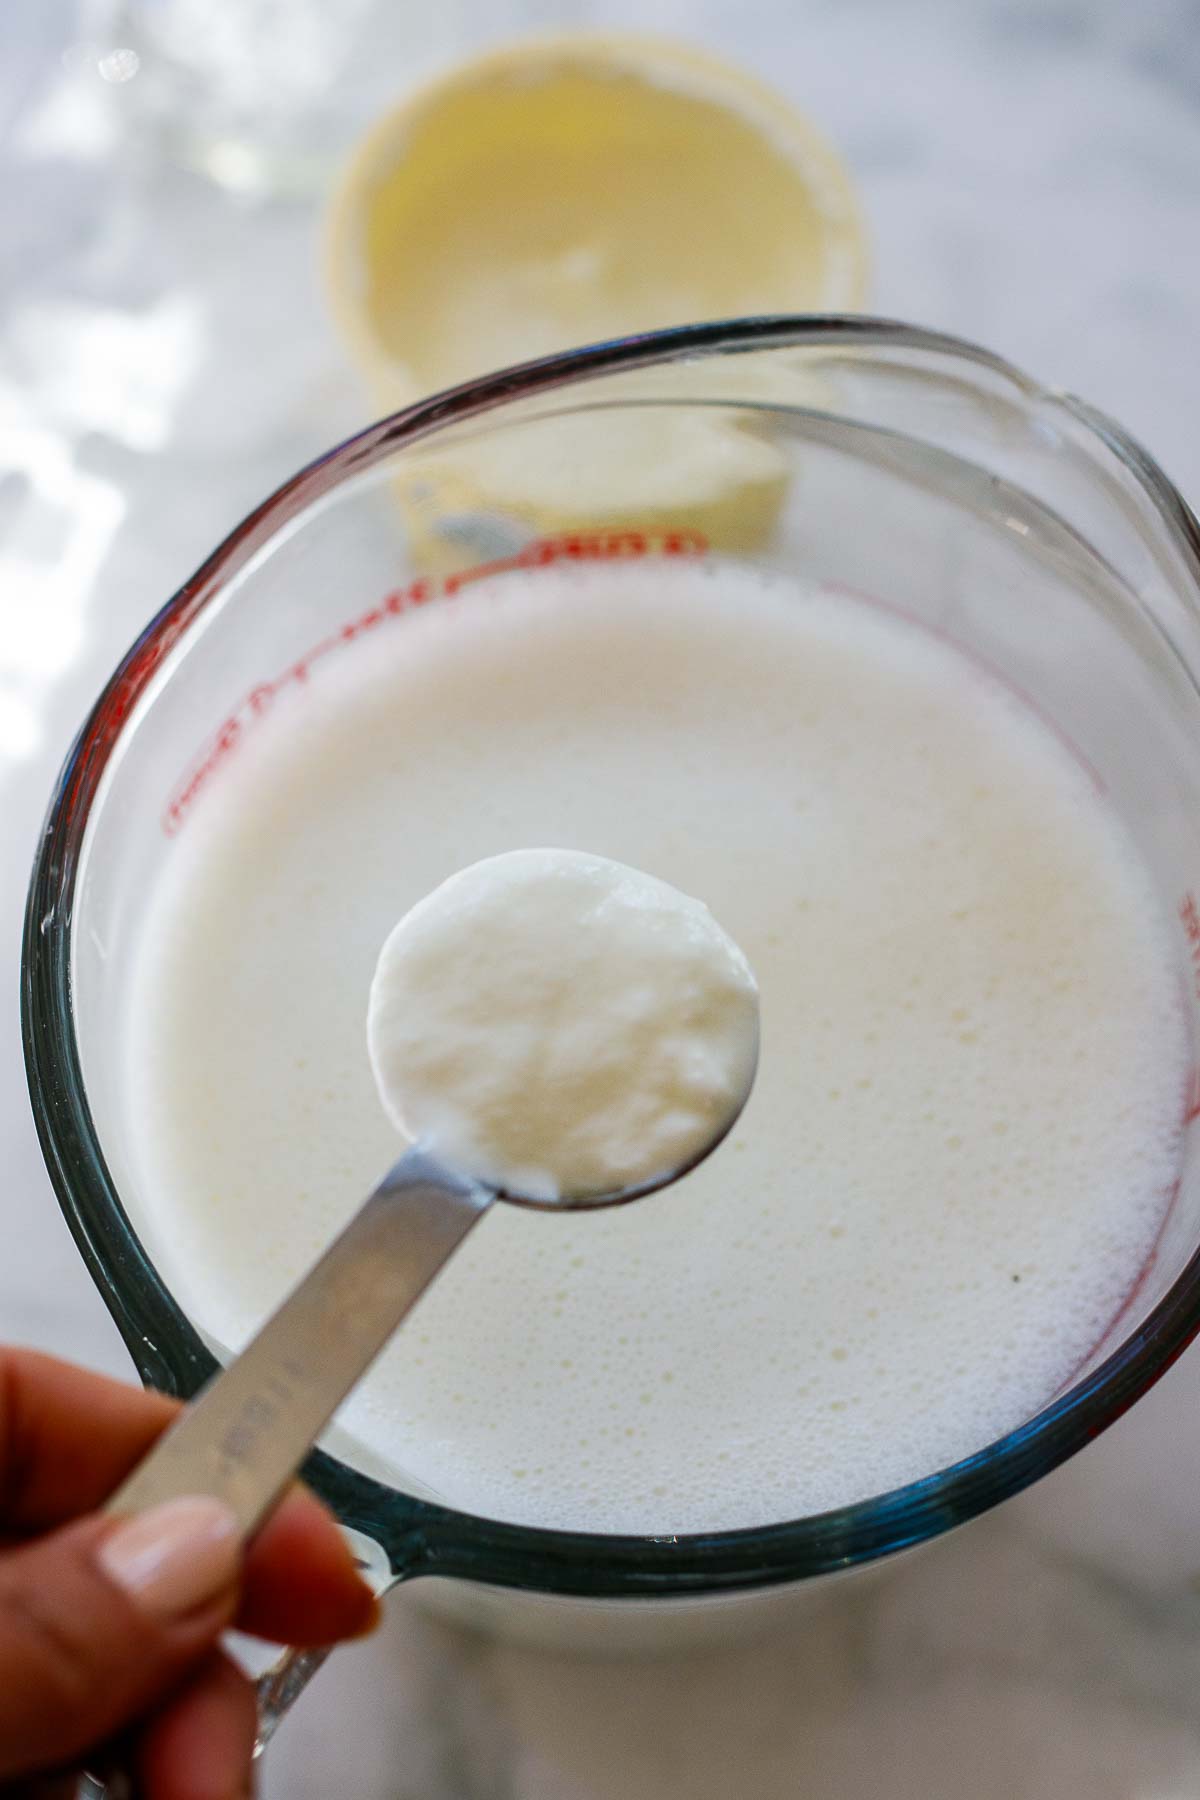
Step two: Add 1 tablespoon plain yogurt with live cultures and whisk, spreading around the cultures. You can use any store-bought yogurt, Greek yogurt, or your own homemade yogurt.
TIP: Don’t be tempted to add more yogurt; your yogurt may end up overly sour and runny. Give them the space to multiply, and this way, they are all fed and happy.
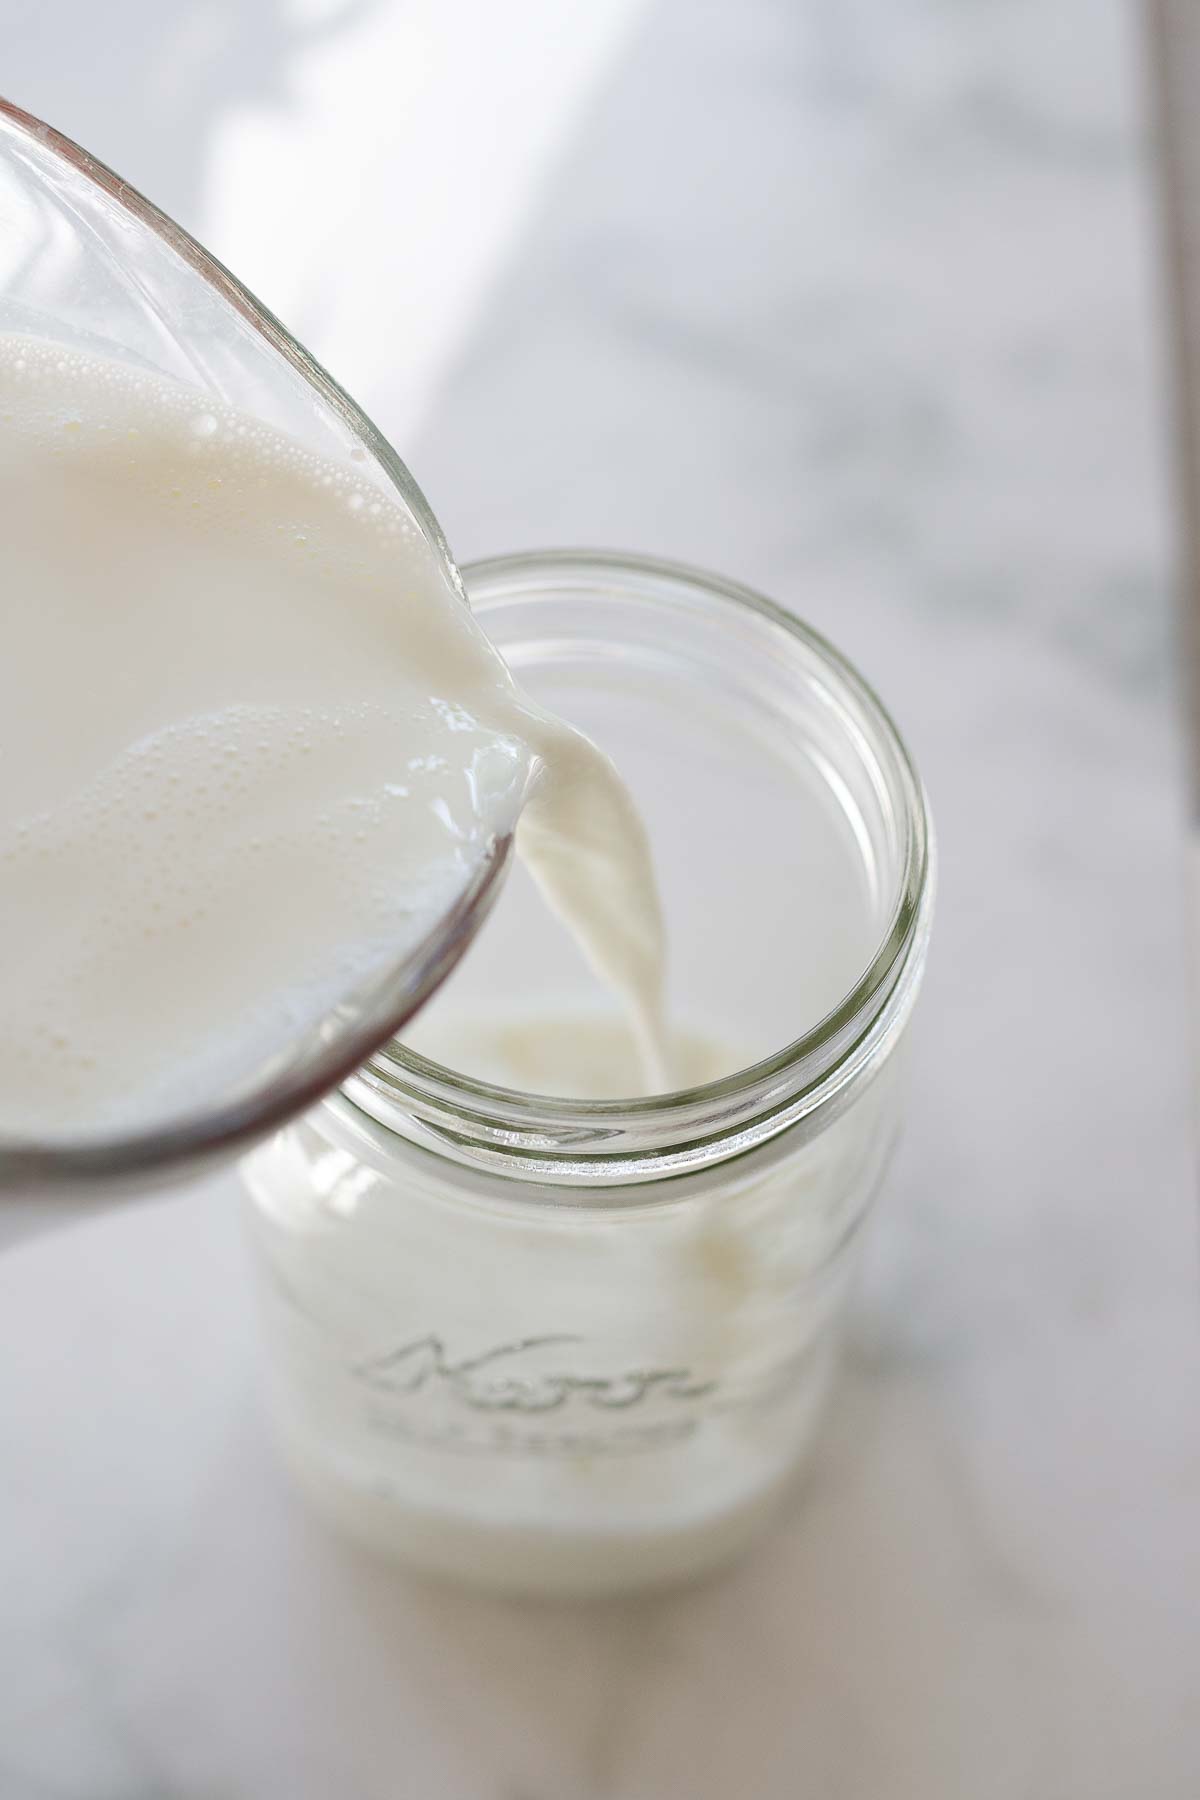
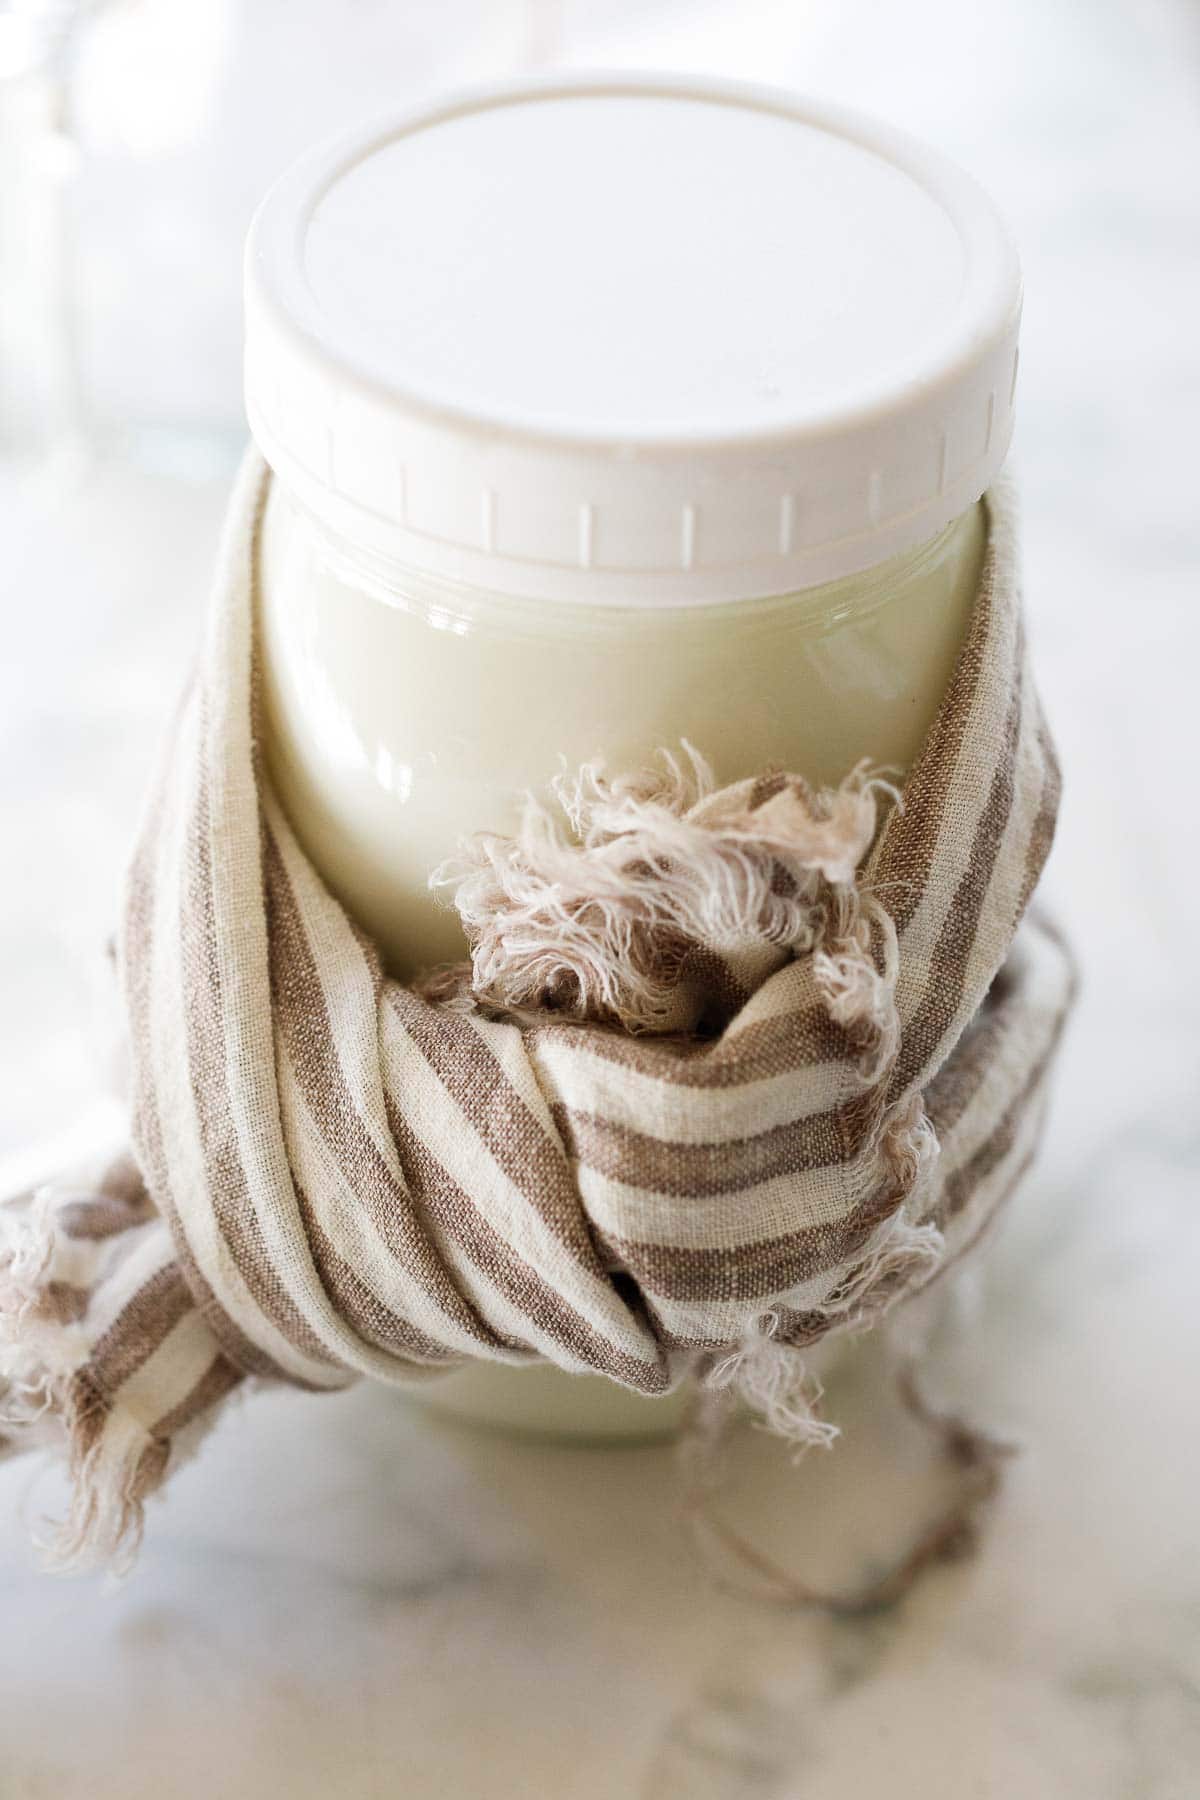
Step Three: Pour into a clean jar and wrap with a towel. Keep the yogurt at a warm steady temp between 100-110F for 6-8 hours. The easiest option is to turn on your oven for 5 minutes, then turn it off, but leave the light on. (Alternatively, you can use a yogurt maker, a slow cooker, a dehydrator, or an instant pot using the yogurt function. You can also place in a cooler, with a couple of bottles of hot water or use a heating pad!)
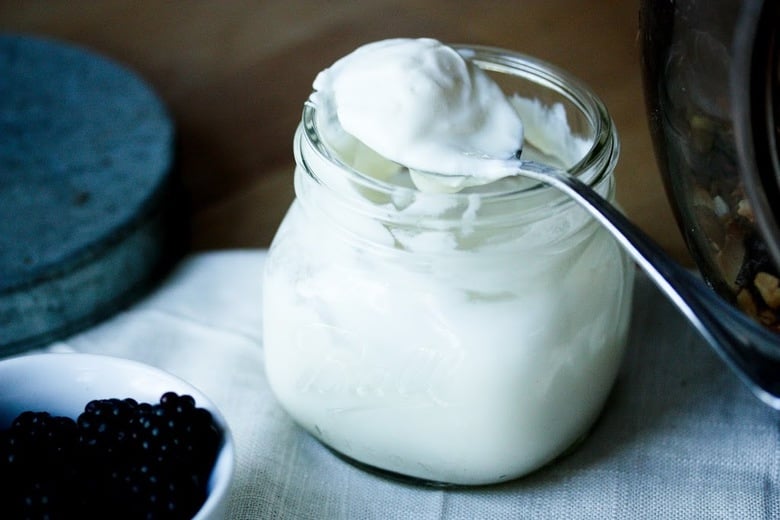
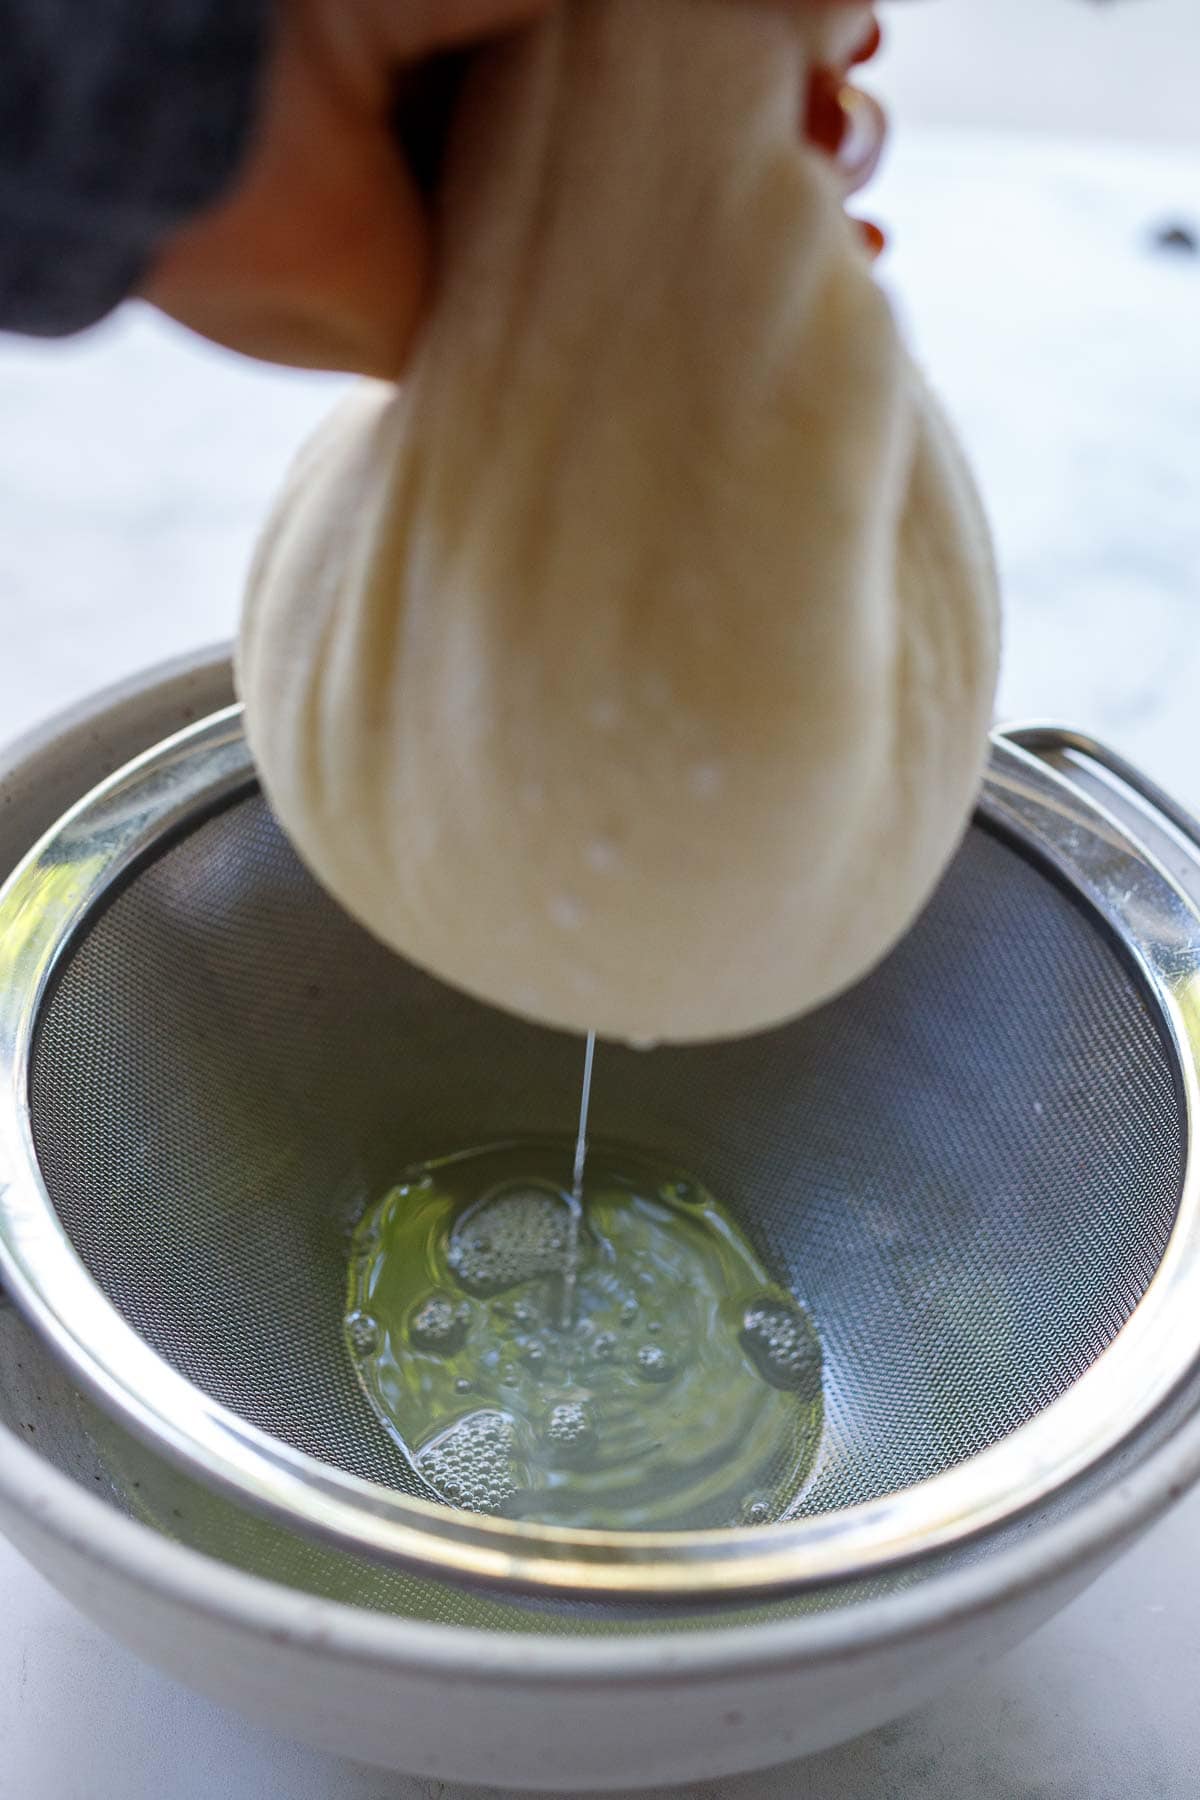
Step four: Strain. After 6-8 hours, strain using a strainer placed over a bowl with a few added layers of cheesecloth. A thin clean kitchen towel works here too.
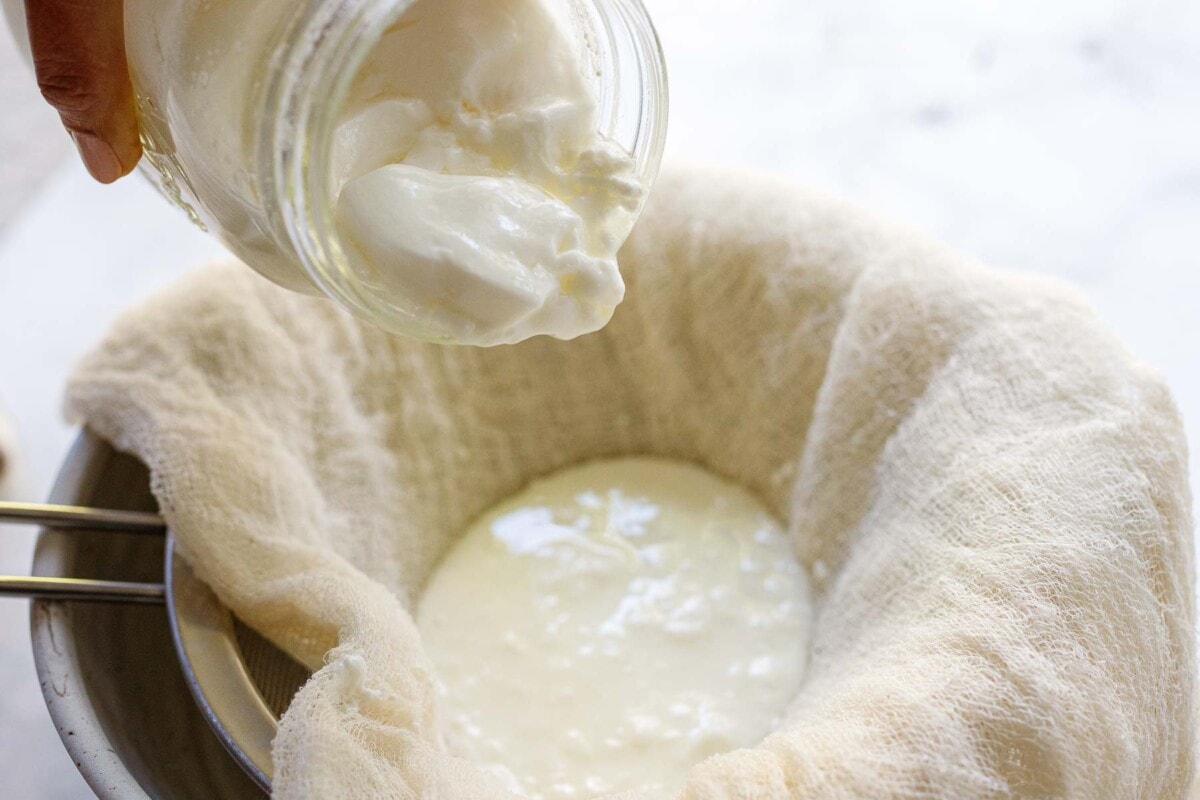
The liquid you are straining out is called whey; rich in probiotics it can be used to make \beet kvass, water your plants, or add to smoothies, used to make soup, etc.
TIP: I always try to make beet kvass with the extra whey, it speeds up the kvass fermentation!
If you like a runny yogurt, more like milk kefir consistency, then no need to strain. Or for a thicker yogurt, like labneh, strain for a few hours.
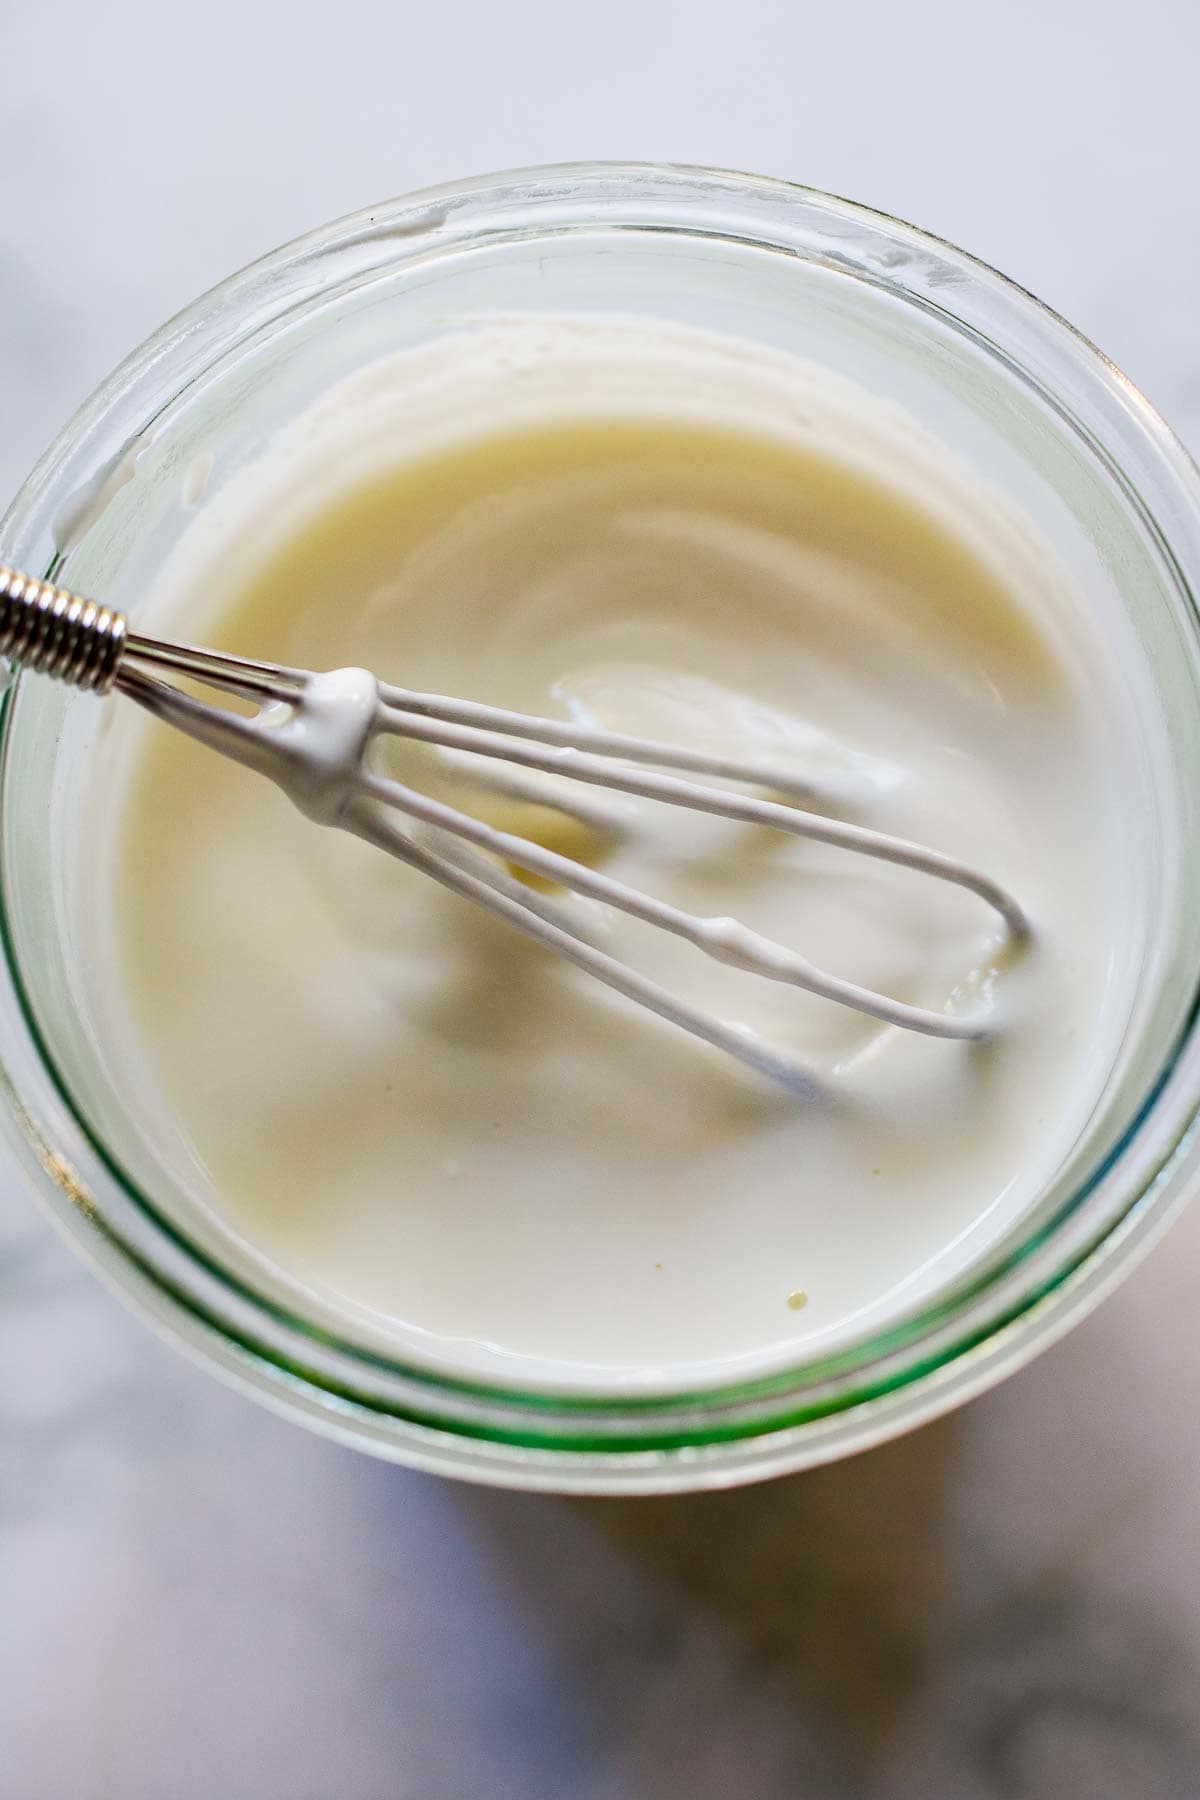
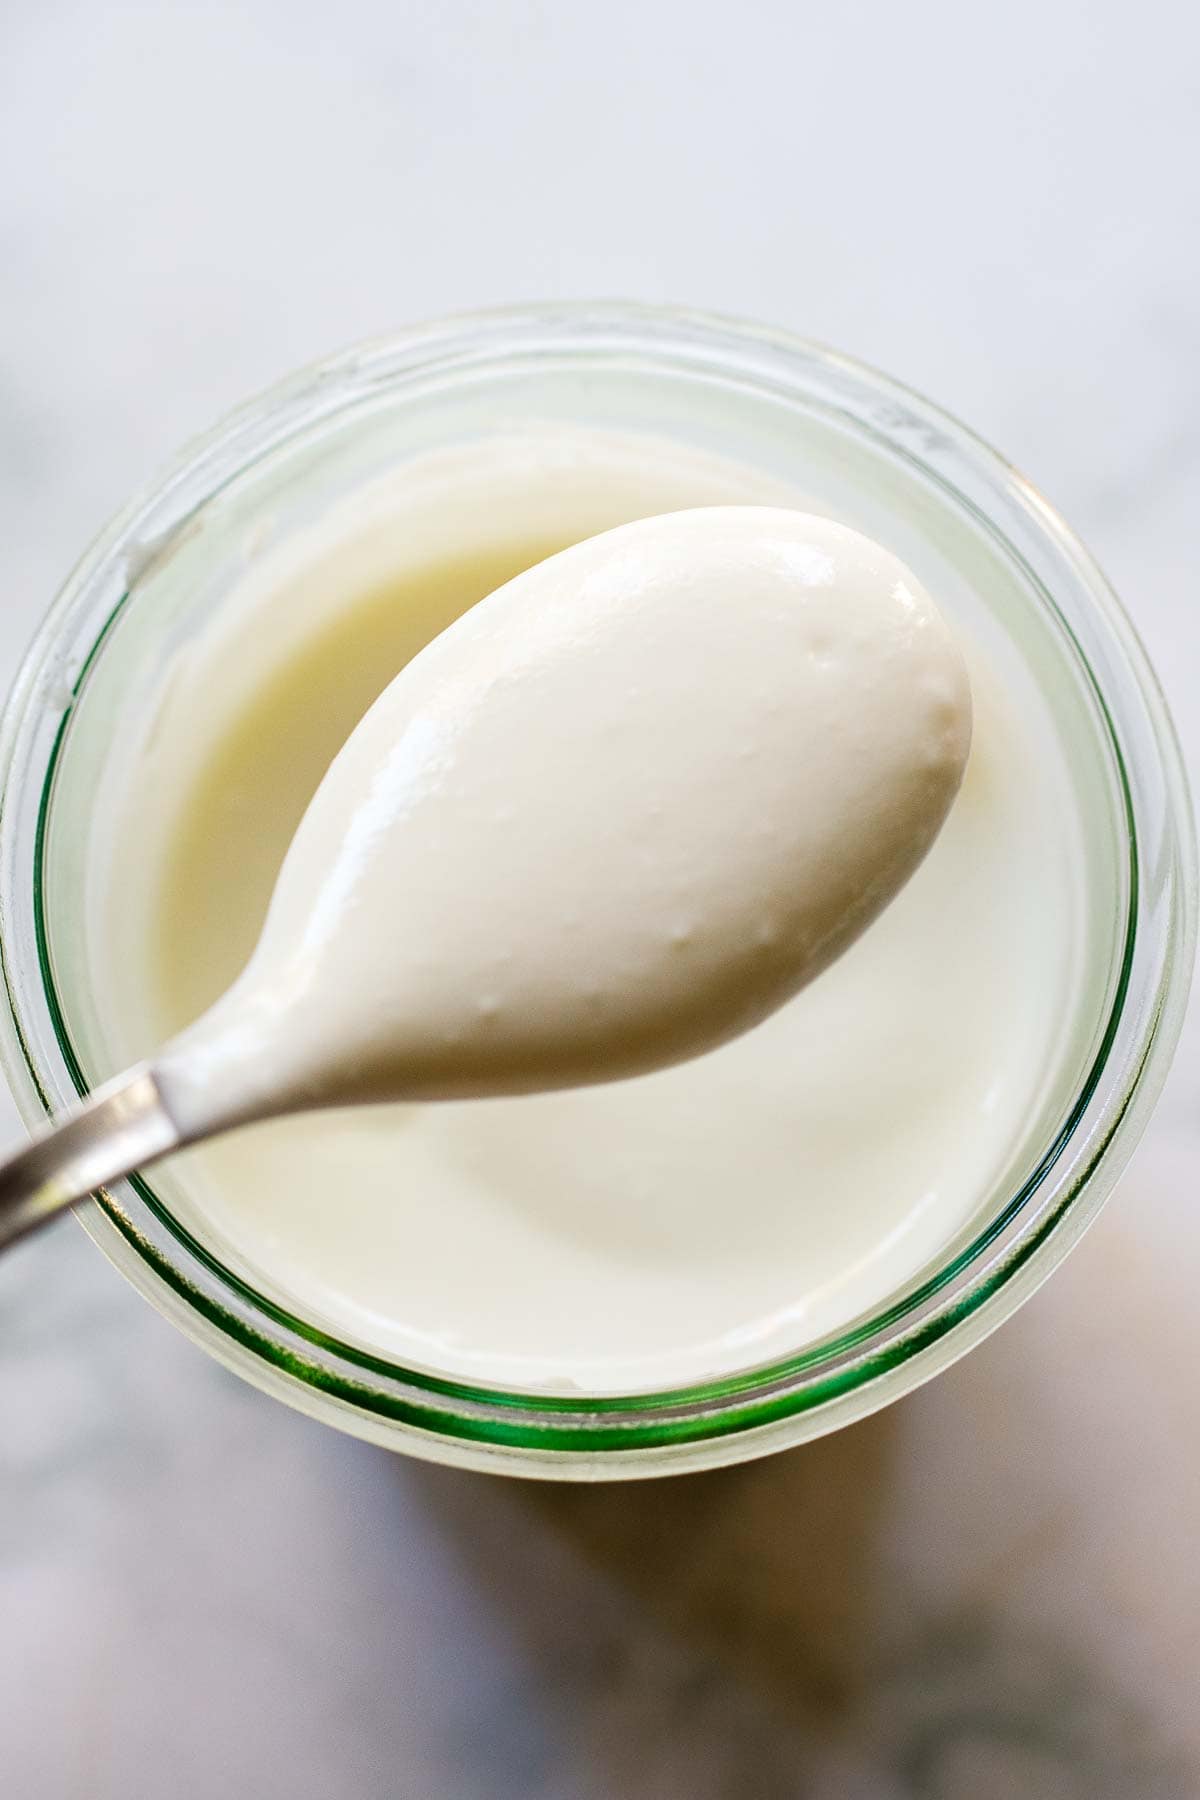
Step five: Spoon the yogurt into a clean jar, and whisk until smooth.
Step six: Seal with a lid and refrigerate! Yogurt will keep up to two weeks in the fridge! Save one tablespoon of yogurt for another batch using this yogurt as the starter!
Ways to Flavor Yogurt
Add honey, maple syrup or vanilla to taste!
Ways to use Yogurt
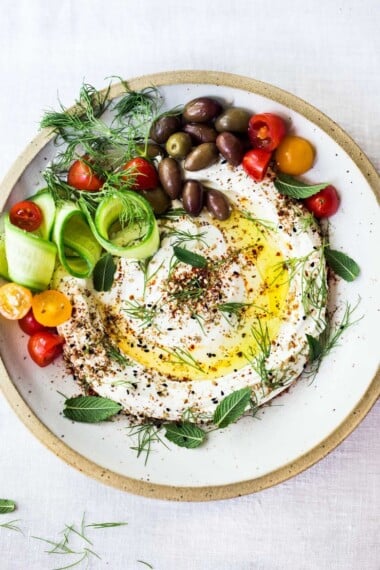
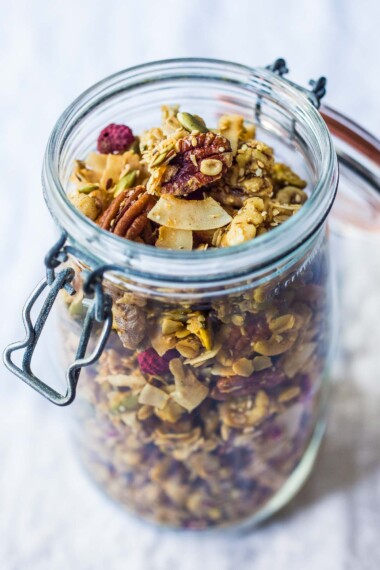
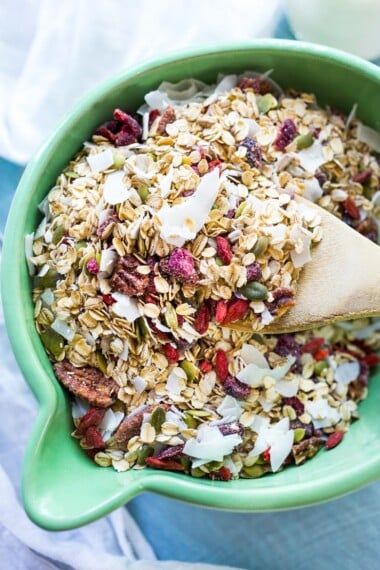
- Serve with granola and fresh berries for a healthy breakfast.
- Add to smoothies.
- Add to dressings.
- Make savory sauces like tzatziki or raita!
- Blend with fruit and make frozen yogurt.
Faqs
Yogurt can be kept in a refrigerator under 40F for up to two weeks.
Yes, yogurt can be frozen for up to 3 months.
Organic, whole cow’s milk, grass-fed if possible. You can also use raw cow’s milk, goat’s milk or sheep’s milk.
Look for mold or curdling, signs that yogurt is not healthy to eat.
More recipes you'll love!

Homemade Yogurt Recipe
- Prep Time: 10 mins
- Cook Time: 8 hours
- Total Time: 8 hours 10 mins
- Yield: 2 cups 1x
- Category: breakfast, brunch,
- Method: stovetop
- Cuisine: American
Description
How to make homemade Yogurt from scratch- an easy step by step guide with no special equipment needed! 1 quart milk yields 2 cups strained yogurt.
Ingredients
- 1 quart milk – whole milk, raw milk, goats milk, or sheeps milk
- 1 tablespoon plain yogurt with active live cultures (or yogurt from a previous batch)
- Cheesecloth
- Strainer
- Thermometer
- Optional: 1/2 cup milk powder, see notes!
Instructions
- Turn oven on lowest setting for 10 minutes. Turn off, but leave light on.
- Heat milk gently in a saucepan or dutchoven on the stove over medium heat to 180 F, stirring often. If you want all the benefits of raw milk yogurt, remember to heat the milk only to 110 degrees and no higher. This ensures that milk’s own bacteria will stay alive. Or if unsure, heat to 180F .(please see notes)
- Let the yogurt cool to 110-115 F.
- Add 1 tablespoon of yogurt. ( The general rule is 1 tablespoons yogurt per quart of milk -resist the temptation to add more, or you will end up with yogurt that is watery and overly sour. I find that 1 tablespoon is best! )
- Place in a clean jar, cover, wrap in a towel, and place in the oven with the light on, (100-110F). The light will act as an incubator. Alternatively, you could also pour this into an instant pot (yogurt function), slow cooker, in a cooler with hot water bottles. The idea is to keep yogurt at a steady but low warmth (100F-110F) for 6-8 hours. If it gets too warm, it can curdle.
- After 6-8 hours, strain with a cheesecloth over a strainer over a bowl. (Straining is optional, this thickens the yogurt). Save the whey for Beet Kvass, smoothies, soups, or water your plants with it!
- Scoop into a clean container, whisk until smooth, cover and store in the fridge for up to 2 weeks. Make another batch before you run out!
Notes
- If you like sweetened yogurt mix in honey, vanilla, maple, or agave. I prefer to sweeten yogurt in smaller batches, keeping my main batch, plain.
- Making yogurt from unpasteurized raw fresh milk is full of nutritious enzymes, fat-soluble vitamins and linoleic acid. If you want all the benefits of raw milk yogurt, heat the milk only to 110 degrees- which will keep these enzymes alive. If you are nervous about the process, or this is your first time making yogurt, just heat it to 180F. You will feel more confident about the whole process and when you get more comfortable, you can try this with the lower heat.
- Adding milk powder to the heating milk thickens yogurt without straining it. Add 1/2 cup to give it a thick Greek Yogurt-like consistency. FYI: You can also use goat’s milk powder.
Nutrition
- Serving Size: ¾ cup
- Calories: 149
- Sugar: 12.3 g
- Sodium: 104.9 mg
- Fat: 8 g
- Saturated Fat: 4.6 g
- Trans Fat:
- Carbohydrates: 11.7 g
- Fiber: 0 g
- Protein: 7.7 g
- Cholesterol: 24.4 mg


I followed your method carefully, using powdered milk to thicken the yogurt. It turned out with a perfect texture but I found the taste very mild. I would like it a little more tart. Can you advise what could be done to make it more sour? Thank you.
To get it more sour, you could let it ferment a little longer. I’ll taste it as it goes, to get the perfect sour for my taste.
I’ll be trying your yogurt recipe today. Excited! One question though. If milk is already pasteurized by heating it to 180 degrees, why do we need to reheat it to that temperature? Can we simply heat the milk to 110 degrees? Thank you!
Hey Ruth- That is a good question and I wondered the same thing! I read something about it thickening the yogurt? Maybe I’ll have to test this theory.
What is calcium content?
Hi Nancy- my guess is it depends on the milk you use- I would check that label! I added calcium, to the nutrition calculator but it may take a while to populate that info!
Finally success! All of the recipes I’ve seen uses much more than 1 tablespoon of yogurt for culturing and I always ended up with pretty much the consistency of milk. This time I stuck with your recommended one tablespoon of yogurt. I also use another reader’s suggestion of adding powdered milk. I did put in a yogurt maker for 8 hours, and it turned out perfectly: The consistency of Greek yogurt. Thank you, thank you, thank you!
So happy to hear this Suzanne. Thanks for highlighting that tip!
Hi Sylvia! I LOVE all your recipes and have used so many of them in our whole food plant-based adventure. Have you made oat milk yogurt? Could you adapt this recipe and swap in oat milk and live cultures?
Hey Jen, no I have not. While you can make vegan yogurt with plant-based milk or nut milk- I personally stay away from oat milk- not because of the “Oats” but because of the added oils. I started looking at the labels a couple of years ago, and there are seed oils- which can be inflammatory. I would personally use a naturally “fattened” milk like cashew or coconut. But I haven’t tried this yet. 🙂
Thanks! I usually make my own oat milk to avoid the yucky oils. I’ll give it a try with your recipe and swap the milks. Thanks!!
Oh gotcha Jen! I’m really curious if it will thicken because there’s no fat. Please do let us know!
Morning! I didn’t want to reply to a reader since this is your jam, but I did try making plant based yogurt with great success. I followed a recipe that used Silk Protein milk (combo cashew and almond milk with 10g protein per serving. The extra protein in the milk was the key to not needing thickeners). https://summeryule.com/instant-pot-yogurt-recipe-only-two-ingredients/#recipe
Thanks so much Tami! Appreciate this!