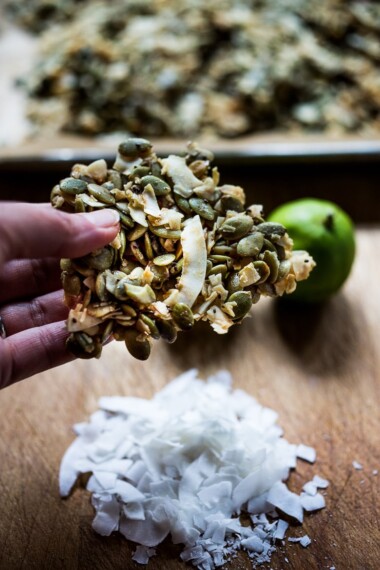
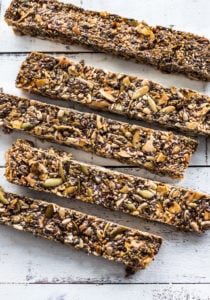
These gluten-free granola bars (aka Seed Bars) are easy and delicious! They’re nut-free, oil-free, and grain-free, made with seeds and coconut- super crunchy, energizing, and satisfying.
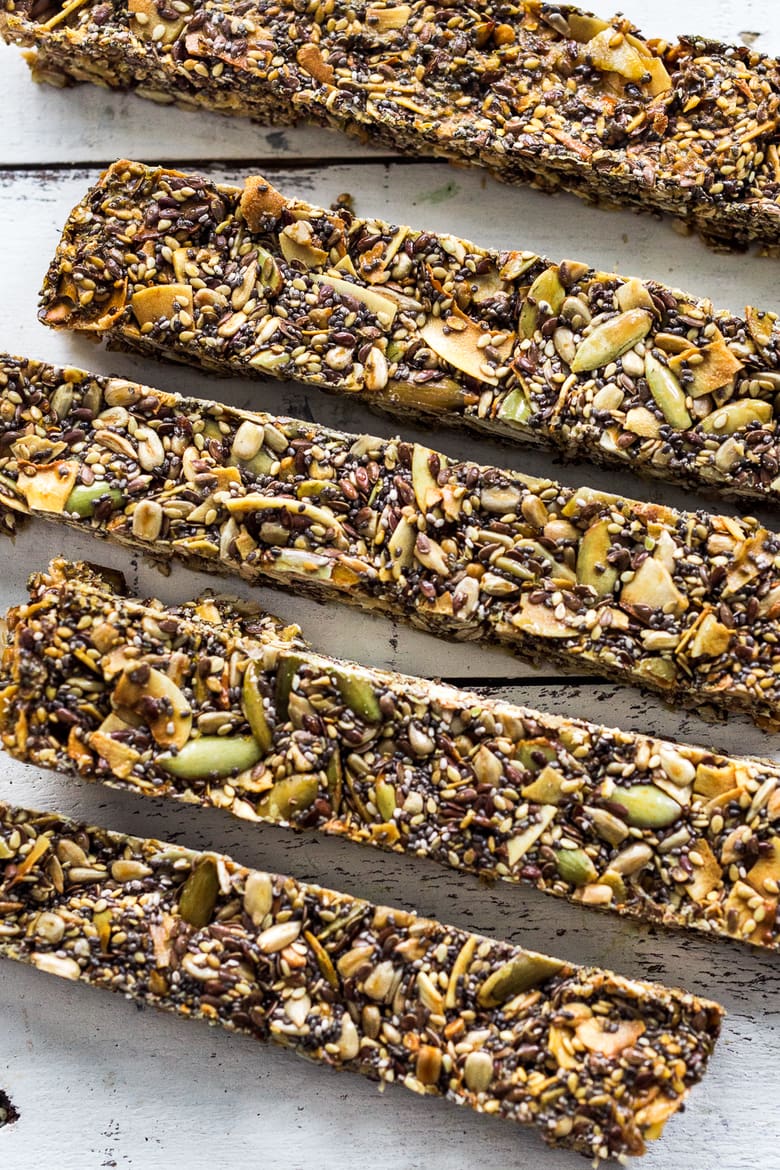
Seed Bars require only 5-10 minutes of hands-on time before baking in the oven. High in protein and fiber, these nutritious bars make for a simple breakfast on the go or an energy-boosting midday snack!
Because they are full of little scrubbing seeds they do a great job of keeping your digestive system healthy!
What I personally love about them is how convenient they are as a “grab and go” snack- keeping me feeling energized and fueled whether I’m running errands, hiking or cross-country skiing. Easily transportable, I keep a little zip-lock bag tucked away in the glove compartment of my car for hunger emergencies. Pretty handy.
Gluten-Free Granola Bars Video
Why You’ll Love This!
- Diet-friendly. Nut-free, oil-free, paleo, dairy-free, gluten-free, and vegan adaptable!
- Super energizing. Perfect for on-the-go when you need a boost!
- Quick and easy. Only 5 minutes of hands-on time.
- So nutritious. Full of so many healthy ingredients that support a strong digestive system.
- High in protein. Perfect for a mid-day crash or post-workout.
Gluten-Free Granola Bar Ingredients
- Super seeds: raw pumpkin seeds, sunflower seeds, chia seeds, sesame seeds, flax seeds (or hemp seeds)
- Large flaked coconut: unsweetened
- Salt
- Vanilla extract
- Honey: Or brown rice syrup or maple syrup. If you can have honey, it is ideal for flavor and binding!
How to Make Grain-Free Granola Bars
- Preheat oven to 300 degrees F.
- Mix the seeds, coconut flakes, and salt together in a medium or large bowl. Stir in vanilla and warm honey.
- Place a piece of parchment in an 8 x 8 baking dish. Spray lightly with oil.
- Pour seed mix into a lightly greased, parchment-lined pan, and using a wet metal spatula, spread it out, into corners and edges and press down firmly until you have a compacted, smooth surface.
- Place on the middle rack in the oven, check at 25 mins, rotate if need be, and continue baking. For a chewy consistency, take them out at 40-45 minutes, for a crispy crunchy consistency, let it cook the full 50 -55 minutes. Remember, all ovens are different! Start watching at 35 min and remove when golden.
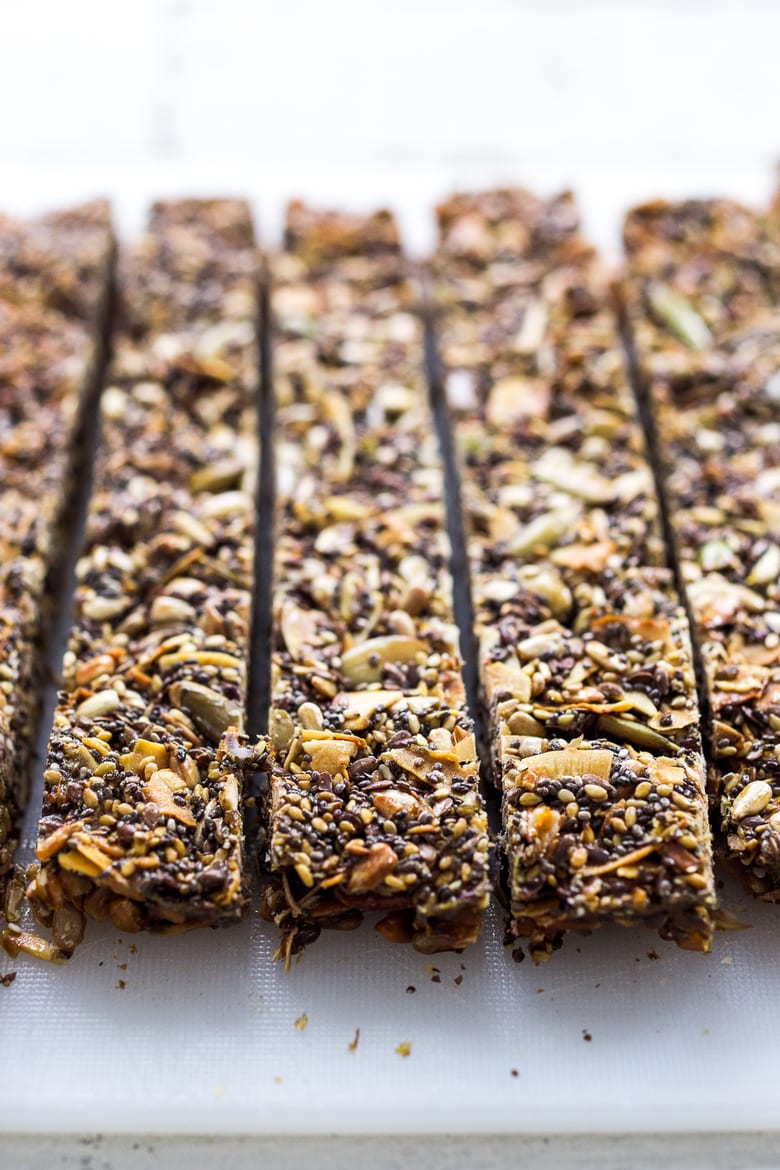
- Remove from oven, and cool completely. You could place it in the fridge to cool faster. When it’s completely cooled, take the parchment out of the pan, turn it over, and remove the parchment. Flip back over and cut into desired shapes or bars. Store at room temp.
FAQs
Wrap lightly in parchment and leave on the counter. Wrapping too tightly or placing in the fridge can cause them to soften.
Made with superfood seeds, these bars are high in protein and fiber and packed with health-boosting nutrients, vitamins and minerals! Many of the seeds are a great source of healthy fats too.
Use brown rice syrup or maple syrup with a tablespoon of ground flax. They may turn out slightly more crumbly. But still delicious!
Place the jar of honey in a bowl or small saucepan of hot water.
These bars are made up entirely of nutritious seeds (and coconut flakes), whereas granola bars are usually made with oats (and nuts or chocolate chips).
STORAGE
Leave your Seed Bars out on the counter wrapped in parchment, and they should stay crisp. The energy bars keep for up to 10 days!
We are on our third batch this month. I just make the Seed Bars and leave them out on the counter in the kitchen for easy snacking. They magically disappear!
Also, leaving them out, uncovered also keeps them nice and crisp.
Tell me what you think … I hope you love these Seed Bars as much as we do.
xoxo
More recipes you may like!

Seed Bar Recipe
- Prep Time: 5
- Cook Time: 55
- Total Time: 1 hour
- Yield: 10 1x
- Category: snack, breakfast
- Method: baked
- Cuisine: American
- Diet: Vegan
Description
These gluten-free granola bars, aka Seed Bars, are easy and delicious! They are nut-free, oil-free, and grain-free, made with seeds and coconut. They are super crunchy, energizing, and satisfying.
Ingredients
- 1/2 cup pumpkin seeds ( raw)
- 1/2 cup sunflower seeds ( raw)
- 1 heaping cup large flaked coconut (unsweetened)
- 1/4 cup sesame seeds
- 1/4 cup chia seeds
- 1/4 cup flax seeds ( or sub hemp seeds )
- generous pinch salt
- 1 teaspoon vanilla
- 1/2 cup honey ( warmed for easier mixing- heat jar in a hot water bath) or brown rice syrup or maple syrup- see notes
Instructions
- Preheat oven to 300F
- Mix the seeds, coconut flakes, and salt together in a medium bowl. Stir in vanilla and warm honey, until uniformly combined.
- Place a piece of parchment in an 8 x 8 baking pan ( all the way up the sides too). Spray lightly with oil.
- Pour seed mix into a lightly greased, parchment-lined pan, and using a wet metal spatula, spread it out, into corners and edges and press down firmly until you have a compacted, smooth surface at a uniform depth.
- Place on the middle rack in the oven, check at 25 mins, rotate if need be, and continue baking. For a chewy consistency, take them out at 40-45 minutes, for a crispy crunchy consistency, let it cook the full 50 -55 minutes. Keep in mind, all ovens are different, so heat may vary. The key is….You want to take them out when they are perfectly golden, before they get too dark. So watch them like a hawk after 35-40 minutes. If you take them out too early (before they are golden) they can too sticky. Pay attention to the color. For example, I’ve cooked these in two different ovens. In the gas oven, 50-55 minutes delivered perfectly golden bars. In the electric oven, 40 minutes were enough for perfectly golden. 55 minutes would have totally burnt them.
- Remove from oven, and cool completely. You could place it in the fridge to cool faster. When it’s completely cooled, take the parchment out of the pan, turn it over, and remove the parchment. Flip back over and cut into desired shapes or bars. Store at room temp.
Notes
To keep them crisp, wrap very lightly in parchment. Sealing them too tightly may cause them to get soft. I usually just leave them on a plate uncovered on the counter. Keeps up to 10 days.
You can easily make this vegan by substituting brown rice syrup, or maple syrup and 1 tablespoon ground flax. They may be slightly more crumbly, but not too bad!
Do NOT use sugar-free syrup- it will NOT work here. Honey or, brown rice syrup or real maple syrup!
If you don’t have an 8×8 pan, you could make a “crackle” on a sheet pan. Basically place the mixture on a parchment-lined sheet pan, pressing down hard with a spatula, into an 8-10-inch round. It will spread out and become thin in the oven. Check at 35-40 minutes and pull it out when it is deeply golden. Let it cool completely. Break apart into sections.
Nutrition
- Serving Size: 1/10th of the recipe
- Calories: 222
- Sugar: 14.5 g
- Sodium: 34.4 mg
- Fat: 14.9 g
- Saturated Fat: 5 g
- Carbohydrates: 20.8 g
- Fiber: 4.5 g
- Protein: 5.3 g
- Cholesterol: 0 mg
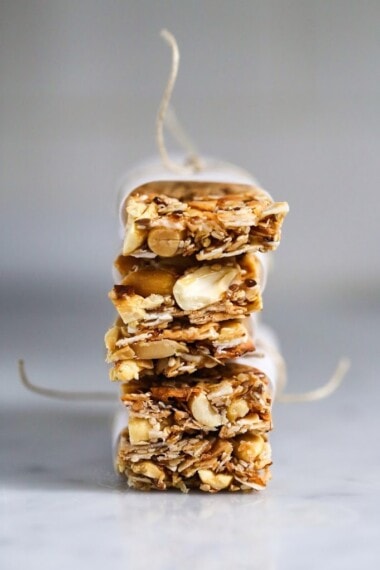
I dislike coconut so I used rolled oats instead. Also added melted dark chocolate on top and left it to harden in the fridge. Yummy!
Ooo that sounds good! Glad you enjoyed. 🙂
Are the chia seeds soaked or unsoaked?
This looks great and I’m going to make it soon
Hi Jan, Unsoaked. 🙂
Made them exactly as written- they came out wonderful and crunchy with great flavor. I keep these around always now!
Happy to hear this Emily! Glad you are enjoying them.
AMAZING recipe! I replaced the coconut with puffed quinoa, and used hemphearts instead of flax, I also replaced about 3tbsp of the syrup with tahini and they came out just beautiful. Thanks for explaining about the bake time so clearly, as mine have the perfect crunchy texture and wow they are delightful!!!
Wonderful to hear this Mina! Thanks for sharing your notes, so helpful!
The bars turned out great even though I didn’t follow the recipe all the way due to not having all the ingredients. I didn’t have any sunflower seeds and substituted them with 1/4 cup of hemp seed and 1/4 c of quinoa. The bars probably turned out more crunchy due to the not cooking the quinoa. I baked them for about 45 minutes keeping them more on the chewy side. Great for breakfast!
Glad you adapted Dagmar!
These were so tasty. Had a great crunch! And fueled me through the week when I needed a little something!
Glad you liked these!
So delicious. My favorite treat. Use black sesame seeds and add some goji berries.
That sounds amazing Yvonne!
So delicious and versatile. Buckwheat hulls work great, too. Even with the honey, they can be pushed to savory with garlic powder, a little cayenne, etc
Thank you for sharing.
Glad you gave them a try Alyson!
My husband and I have been trying to eat healthier. These are a game changer. A little pricey but totally worth it. These are absolutely fabulous and easy to double. Im forever grateful. Yum!
So glad these are working out for you Annette!
My kids and I love these bars!
Great to hear!
How thick are they supposed to be?
Hi Mimi! They are about ½-¾ inch thick. 🙂
Hi, this looks great! Can I use dried coconut? Rehydrate?
It is dried coconut that you use, Petra.