How to make tortillas from scratch! Learn my chef-tested method for soft, tender tortillas with tips I picked up while cooking in Mexico. This recipe includes variations for corn tortillas, flour tortillas, a corn-flour blend (my favorite), and even sourdough tortillas using starter. Vegan and gluten-free options included. Step-by-step video tutorial.
Here's a versatile tortilla recipe with a few chef's tips I learned firsthand while traveling and cooking in Mexico-where tortillas are at the heart of daily meals. Making them from scratch is not only rewarding, but the flavor and texture are unmatched. Soft, warm, and pliable, homemade tortillas elevate everything from tacos to enchiladas.
In my catering days, I made tortillas in large batches for events, and through trial and error (and some guidance from skilled Mexican cooks I was lucky enough to learn from), I discovered a few techniques that make the process simple, reliable, and fun. We have many Mexican recipes on the blog, and I'm often asked: "Which do you prefer, corn or flour?" Truthfully, both have their place depending on the filling. My personal favorite is a blend of corn and flour for their incredible texture and flavor. And if you're a sourdough baker, try the sourdough starter tortilla variation-it takes them to another level.
Homemade Tortilla Recipe Ingredients
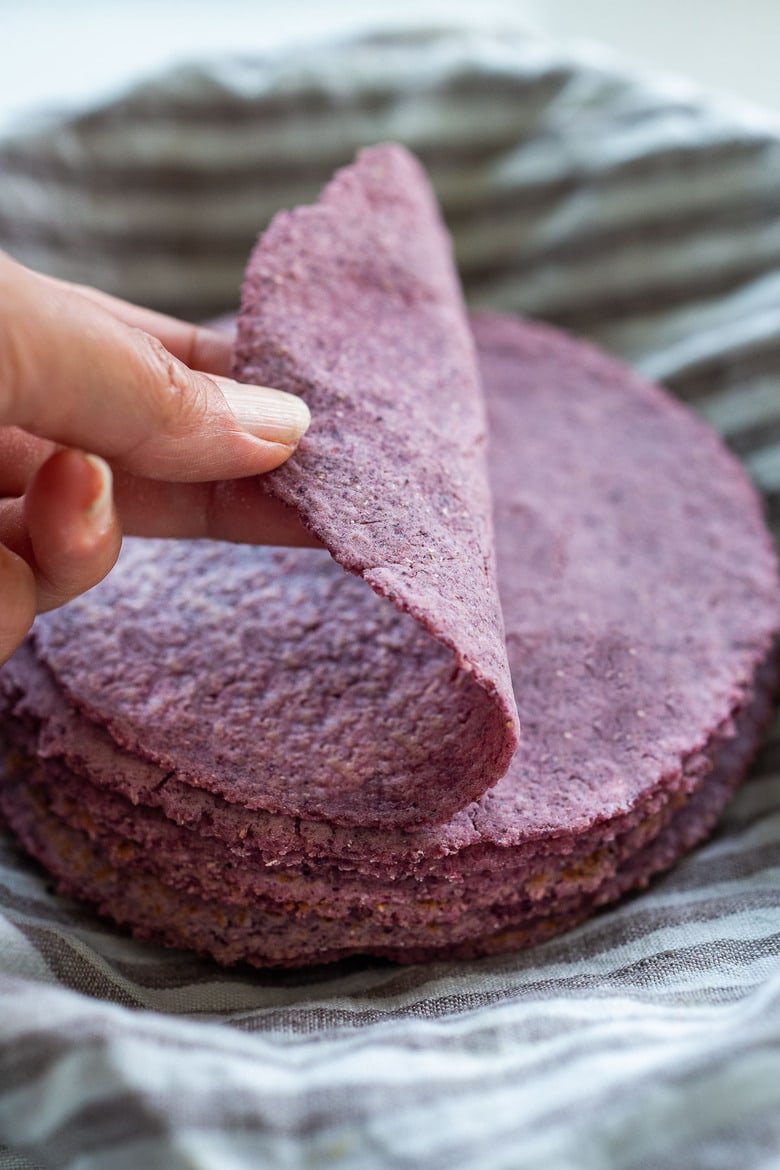
- Flour- use Masa Harina or all-purpose flour or a blend of both! Here we are using blue corn masa harina. Use whole wheat flour, or gluten-free flour blends. Note: Bread flour or high protein flour are not advised here- and cause shrinking.
- Salt– we use fine sea salt to bring out the flavor.
- Oil-We use olive oil, but coconut oil and avocado work, too. Lard or shortening are traditional, but we lightened this up a bit!
- Water– just enough to make the dough.
- Optional additions– baking soda ( if making flour tortillas) or add sourdough starter, for the best flavor!
What is Masa Harina?
Masa harina, if unfamiliar, masa harina comes from dried corn kernels treated with lime (calcium hydroxide from limestone), which softens the kernels and makes them more easily digestible. This is very different from cornmeal or polenta!
Variations
- Make wholewheat tortillas or use other whole grain flour like buckwheat flour, or rye flour.
- Make gluten-free tortillas with masa harina and a gluten-free flour blend.
- Make sourdough tortillas– see the recipe notes!
How to make Homemade Tortillas
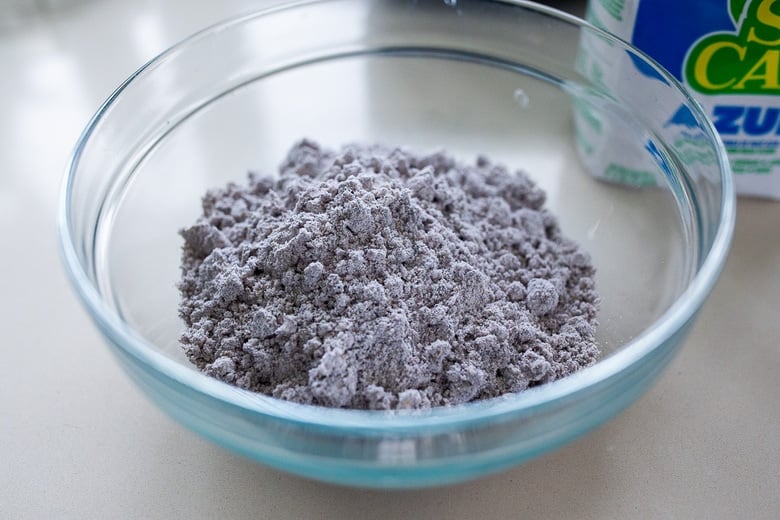
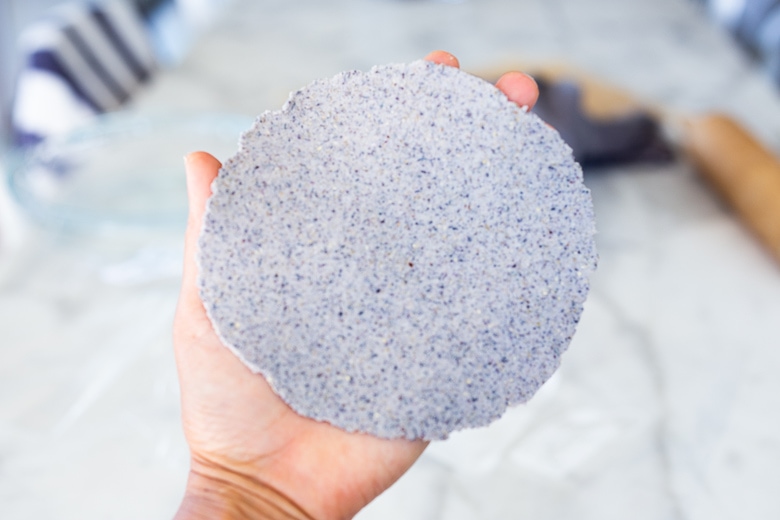
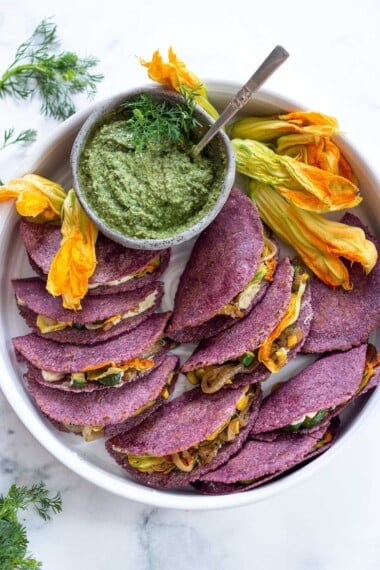
Step 1: Mix the dry ingredients. Place the masa harina (or all-purpose flour or a blend of both) in a large bowl with salt. Here, we are using blue corn masa harina mixed with all-purpose flour.
Step 2: Mix warm water and oil in a smaller bowl and pour this into the flour mixture and knead, using your hands for a minute until combined.
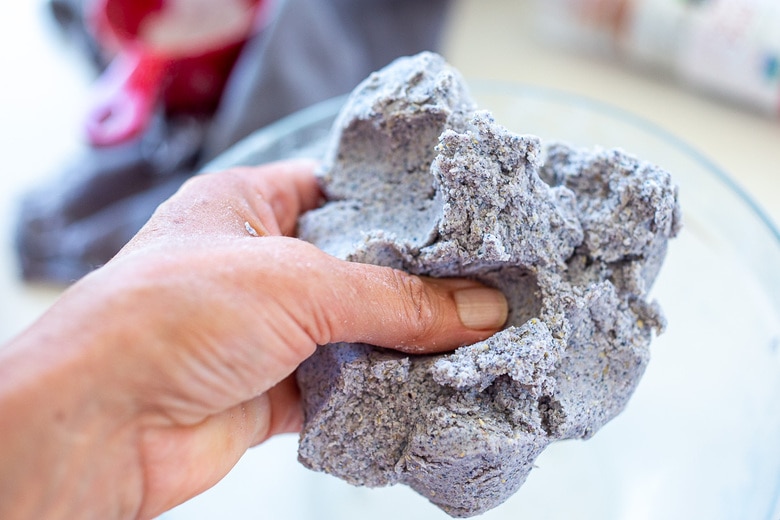
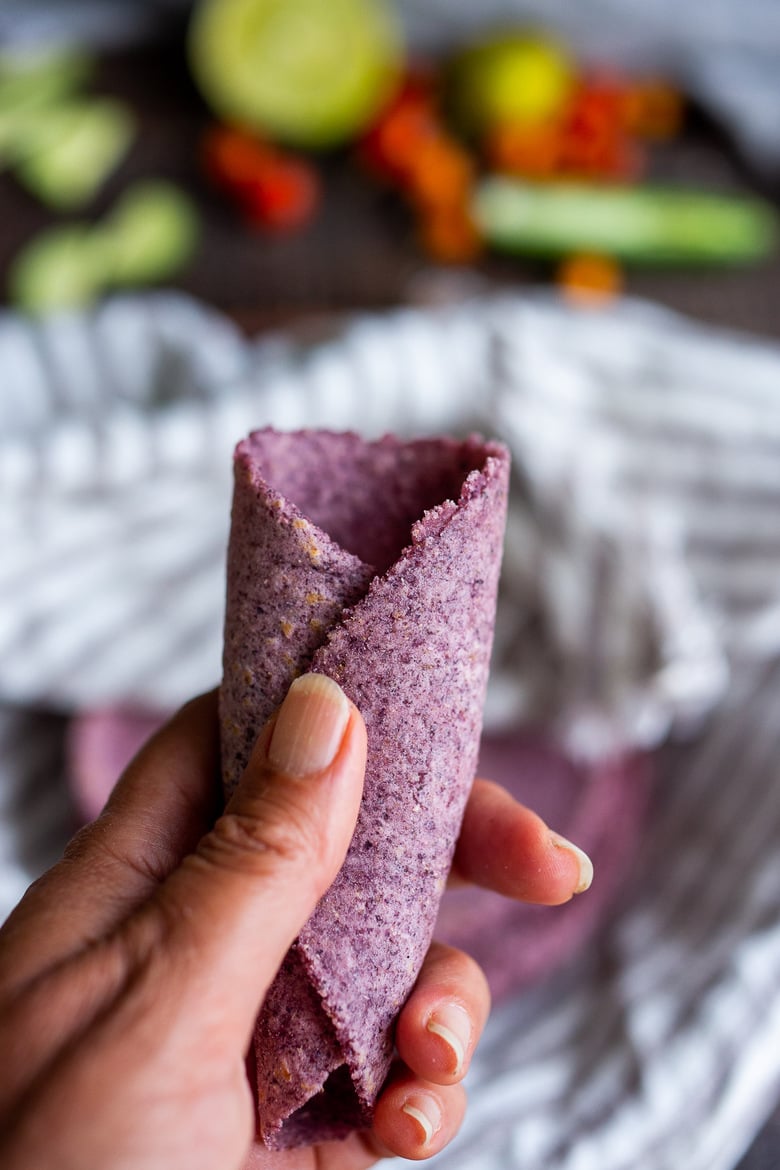
The tortilla dough should feel wonderfully soft but not sticky-like fresh play dough. If it feels dry, crumbly, or very firm, add a little more water to make it soft and pliable. If it’s wet or sticky, add a little more flour or masa.
Step 3: Let the tortilla dough rest. Form a ball, place it in the bowl and cover with a damp kitchen towel and let sit 30 minutes (or refrigerate up to 4 days- keeping the towel moist). This allows the masa or flour to hydrate fully!
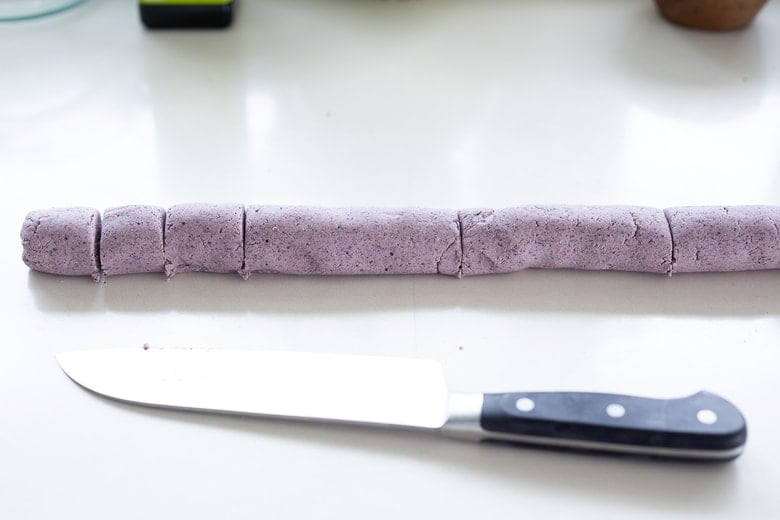
Step 4: Divide. Roll the dough into a 12-to 16-inch log. Slice it in half, then half again, and into thirds or fourths so you have 12-16 pieces roughly the same size.
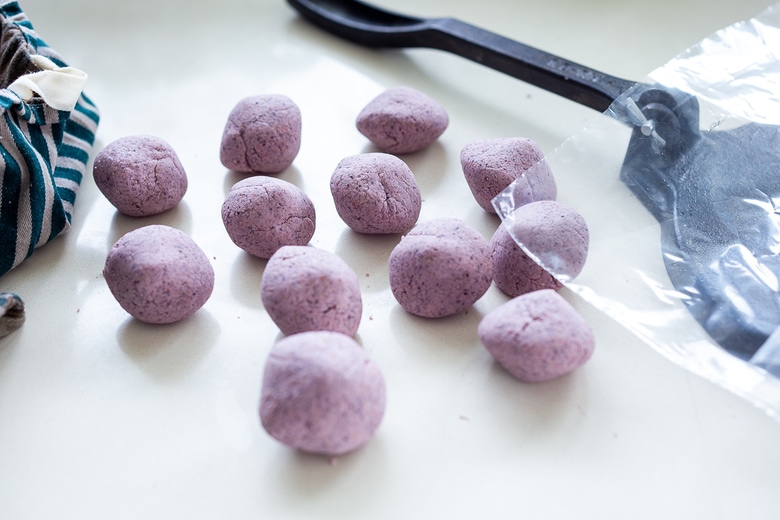
Step 5: Roll into dough balls. Cover with a kitchen towel. To get equal-sized tortillas, you can also weigh them individually like we would when catering.
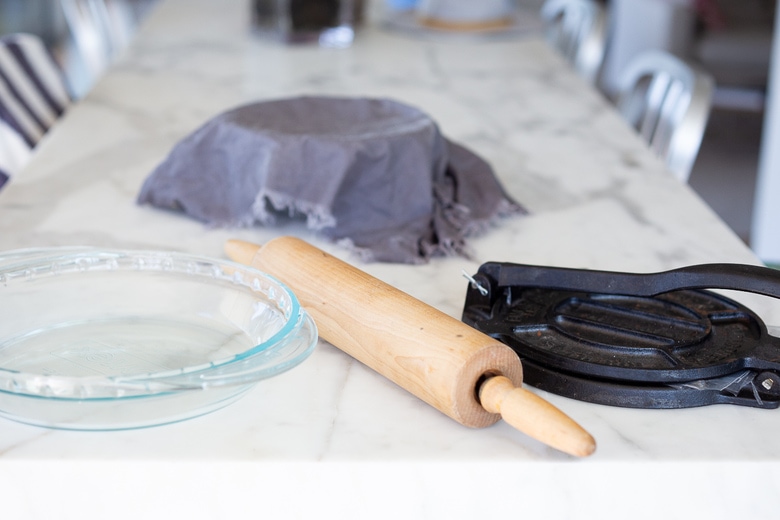
Step 6: Press! You can use a tortilla press, rolling pin or a pie plate. After making tons of tortillas I personally love the simplicity of using a glass pie pan! One less gadget in the kitchen, plus the added benefit of being able to see through the clear glass pan to see how thin the tortilla is!
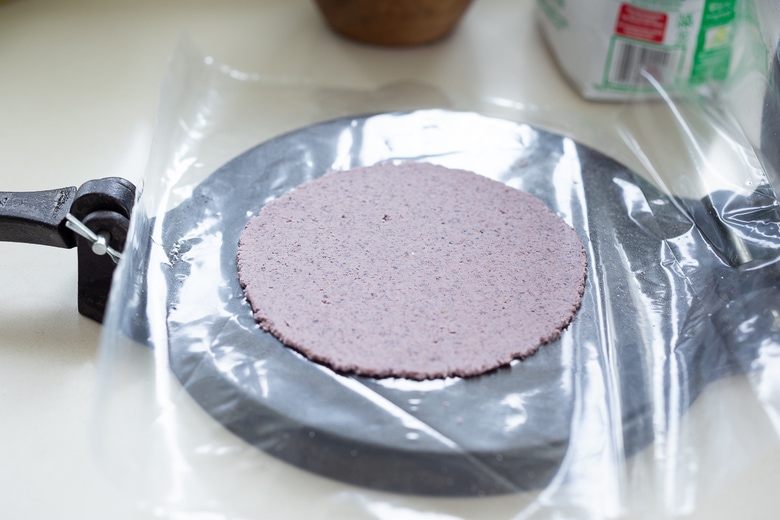
Do a tester. Place the dough between two pieces of parchment or a gallon freezer ziplock bag with the edges cut off. (Leave the fold intact.) Press to ⅛ inches thick.
Note: If the plastic sticks to the dough, it means that it is too wet. If the edges are cracking, it means that the dough is too dry. To fix this, knead in a little more flour or water. The edges should look like this below.
When making all-flour tortillas, let them rest a little longer (45-60 minutes) and divide and flatten them all out with a pie plate or tortilla press. Then, let them rest for 15 minutes and either flatten them again or roll them out on a floured surface using a rolling pin-they tend to shrink. Resting the dough is key here.
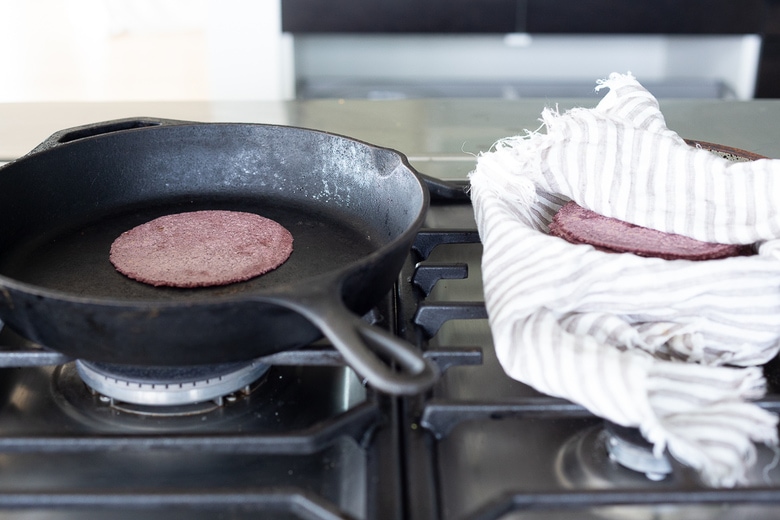
Step 7: Cook the tortillas! In Mexico, it is traditional to use a comal. The closest thing to this is simply using a dry cast iron pan. Heat the skillet over medium heat for 4 minutes. When you add a drop of water, it should sizzle. Add tortillas one at a time.
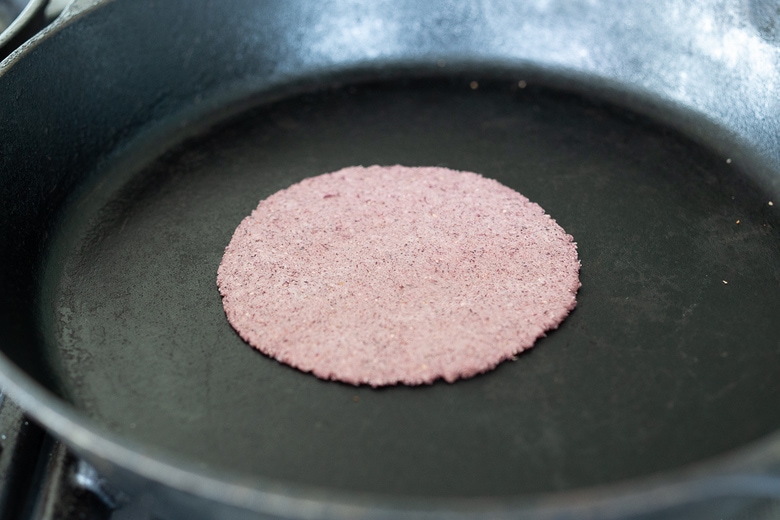
Cook for 45 seconds, then flip. Cook another 30-45 more seconds then flip again, back to the first side.
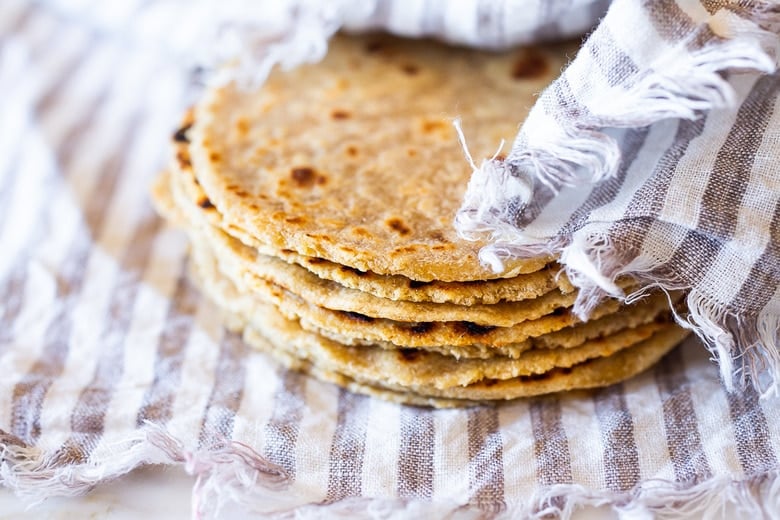
This third flip will puff up the tortilla beautifully, letting you know the insides are cooked through, with golden brown spots. Here is where the magic is.
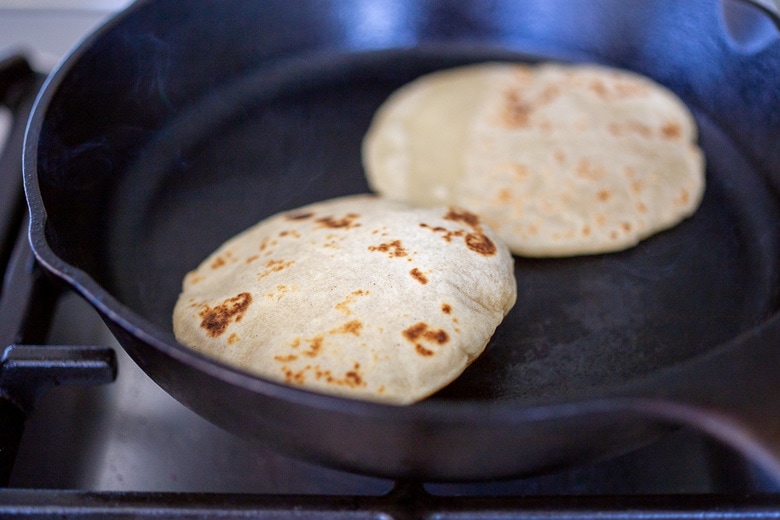
Once you get the hang of things, you can cook two tortillas at once. 😉 If you’re making bigger batches, you can have multiple skillets or a large griddle going at the same time.
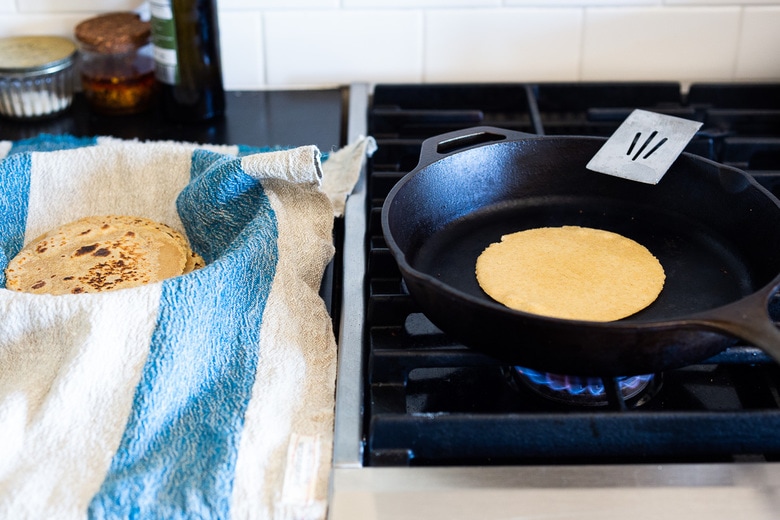
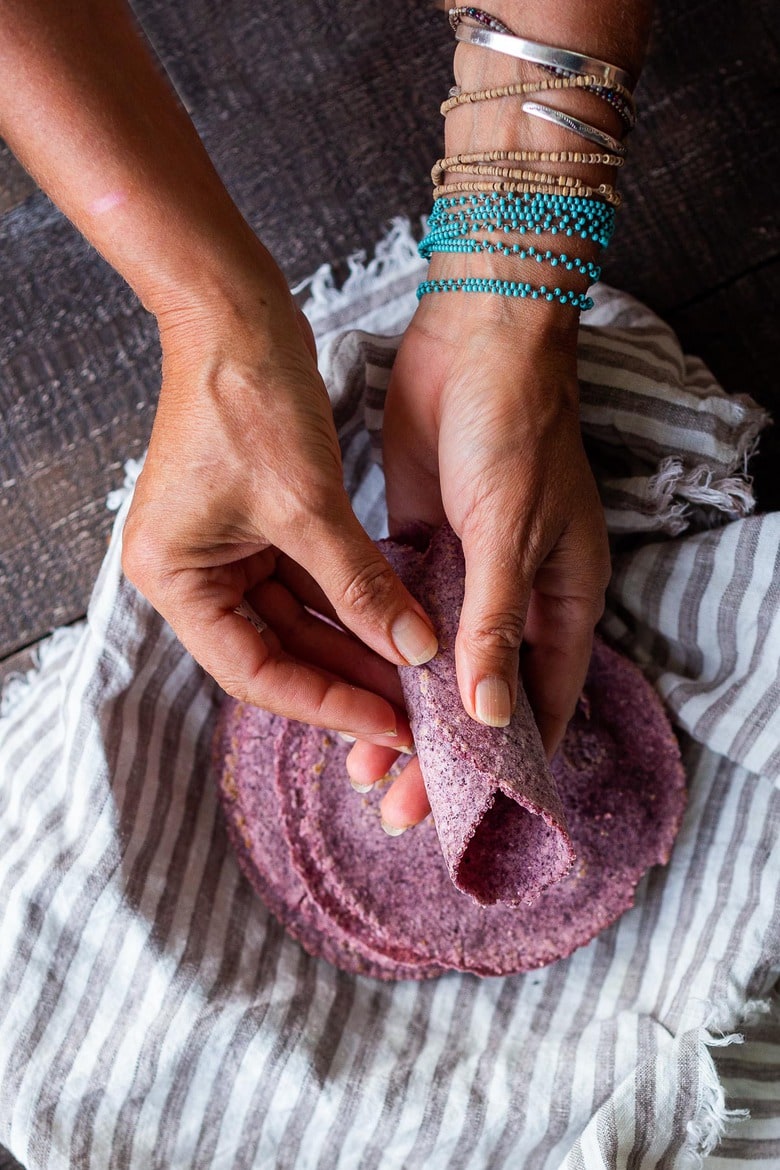
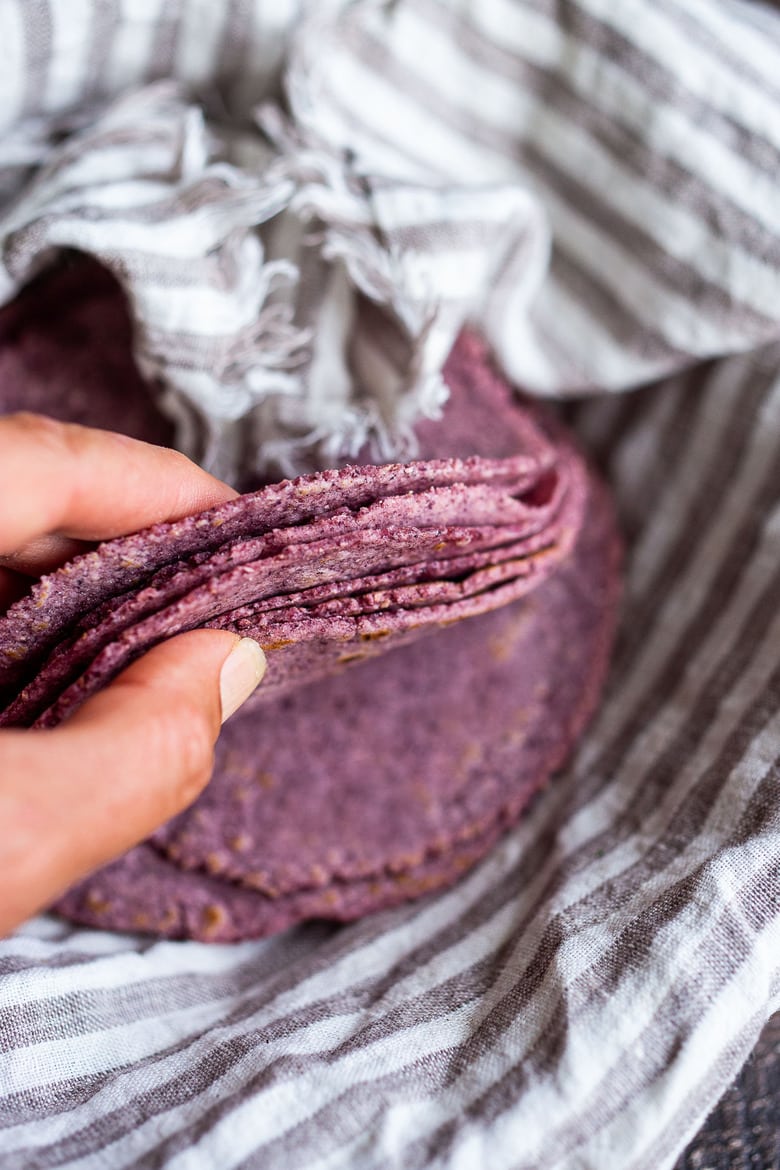
Step 8: Wrap the tortillas. Wrap the cooked tortillas in a towel-not only will this keep them warm, but it will also make them soft and pliable. So wrap them up as you go!
More Helpful Tips
- Hydration: The most important part is getting the hydration right. Too wet, and the dough will stick when pressing. Too dry, the dough will feel tough, crack, and crumble at the edges. Perfectly hydrated dough will be soft and workable like fresh play dough-and like play dough, it will feel fun and pleasurable to hold. So do a tester. Press one tortilla, check for signs of dryness or wetness and adjust the dough by adding more flour or water.
- Cooking: Flip the tortilla 3 times to get it to puff up just a little in the center- now the inside of the tortilla is cooked an not doughy.
- Wrap: wrap cooked tortillas in a clean kitchen towel to keep them soft and pliable until ready to use.
- Prepping ahead- I prep to the point of the rolled balls and place these on a parchment sheet pan and wrap tightly so they stay moist- up to 4 days in the fridge.
- All-Flour Tortillas: Let them rest a little longer (45-60 mins), then divide and flatten using the pie plate or tortilla press. Let them rest again for 15 minutes, then either flatten again or roll them out with a rolling pin on a lightly floured surface. They tend to shrink back a bit, but resting the dough will help with this.
How to store tortillas
Wrap leftover tortillas in a ziplock bag, and keep in the refrigerator for up to 5 days. Reheat gently in a toaster oven or skillet. Feel free to freeze homemade tortillas for up to 6 months, removing as much air as possible.
Turn leftover tortillas into tortilla chips! Cut into triangles or strips (see our Chicken Tortilla Soup for reference). Place in a single layer on a parchment-lined sheet pan and lightly spray with olive oil or avocado oil. Sprinkle with salt. Bake until crisp in a 350F oven.
Homemade Tortilla Recipe FAQs
When making masa or flour tortillas, letting the dough rest for 30-45 minutes before pressing will allow the flour to fully hydrate.
Tortillas are always best served right after they are made, but the tortilla dough can be made 2-3 days ahead and stored in an airtight container until ready to use.
Ways to use Homemade tortillas
Use tortillas in tacos, burritos, enchiladas, fajitas, quesadillas, or flautas!
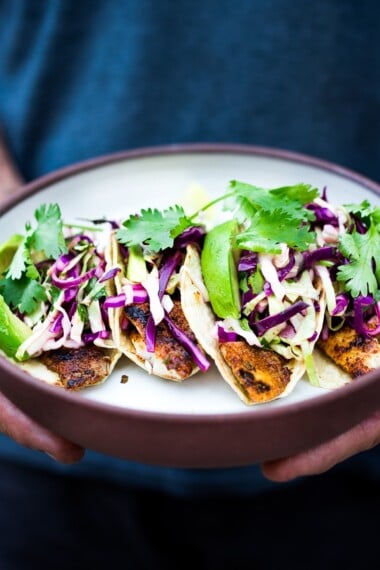
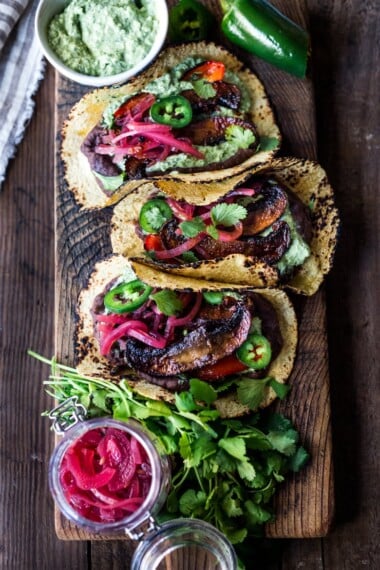
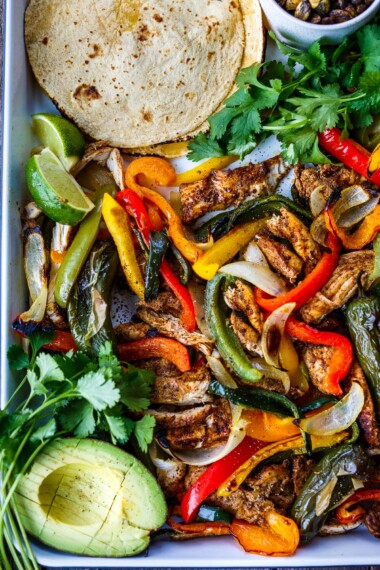
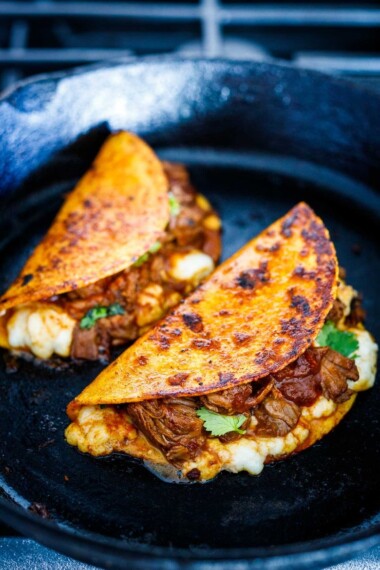
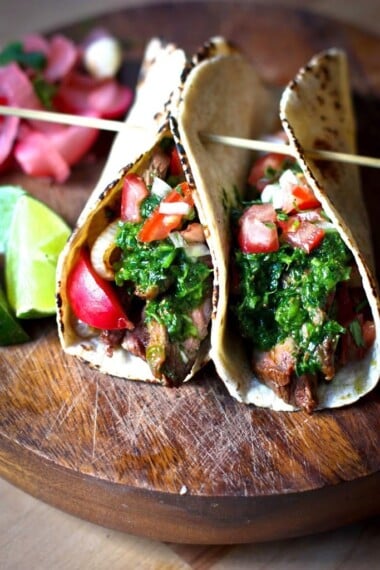
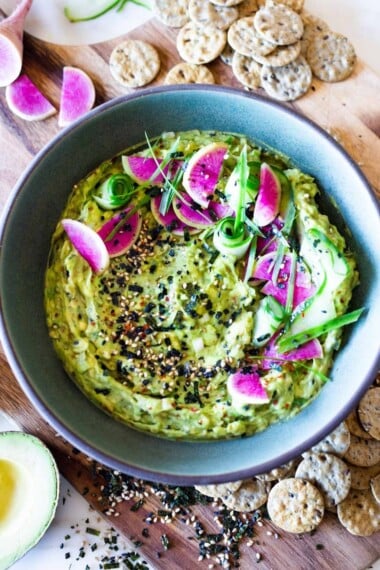
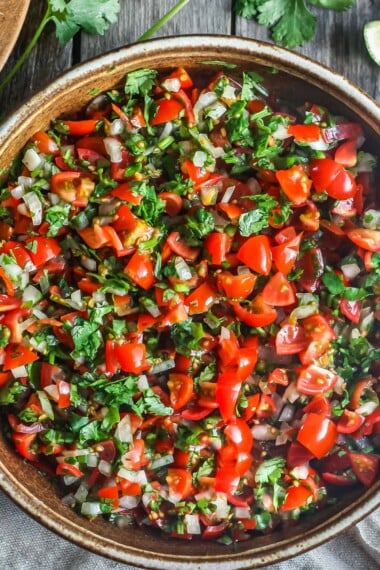
Tortilla Serving Suggestions

Have fun with these homemade tortillas and be sure to share your favorites or adaptions in the comments below!!!
xoxo
Watch How to make Tortillas from scratch

Homemade Tortilla Recipe
- Prep Time: 40
- Cook Time: 20
- Total Time: 1 hour
- Yield: 12 1x
- Category: dyi, how to, tortillas
- Method: Stove top
- Cuisine: Mexican
- Diet: Vegan
Description
How to make Homemade Tortillas from scratch using masa harina, flour, or a blend of both. And you don’t need a tortilla press for this recipe if you have a pie plate! Plus a bonus recipe for Sourdough Tortillas!
Ingredients
Corn & Flour Blend
- 1 cup masa harina
- 1 cup all-purpose flour (do not use bread flour)
- 1/2 teaspoon salt
- 3 tablespoons olive oil (or lard or butter or ghee)
- 3/4 cup hot water, more as needed
Homemade Flour Tortillas:
- 1 1/2 cups all-purpose flour (do not use bread flour)
- 1/2 teaspoon salt
- 1/2 teaspoon baking powder
- 3 tablespoons olive oil
- 1/2 cup hot water
Masa & Sourdough: (allow 4-6 hours proofing time)
- 2 cups masa harina
- 1/2 teaspoon salt
- 3/4 cup warm water
- 1/3 cup sourdough starter
- 2 tablespoons olive oil
Corn Tortillas: (from NY TIMES)
- 1 1/2 cups masa harina,
- 1/3 teaspoon salt
- 2 tablespoons olive oil, lard, butter, ghee (all optional)
- 1 cup hot tap water
Instructions
Corn and Flour Blend:
- Mix masa harina, flour, and salt in a medium bowl. Mix warm water and oil in a smaller bowl and pour this into to the masa harina and knead a for a minute or two, right in the bowl incorporating all the flour from the edges of the bowl. Dough should be soft, but not sticky and should feel like fresh play-dough. If it feels dry, crumbly or very firm, add a little more water, so it’s soft and pliable. If wet or sticky, add a little more flour. Form a ball and cover with a wet kitchen town (or plastic wrap) and let sit 30 minutes. Do a tester, see notes. Roll the dough into a 12 to 16-inch log. Slice it in half, then half again, and into thirds or forths so you have 12-16 pieces roughly the same size. Roll into balls. Cover with a kitchen towel.
- Heat a dry, cast iron skillet over medium-high heat until hot. Lower heat to medium.
- Working one tortilla at a time, center each ball of dough between 2 pieces of thick plastic (see notes), or parchment. Press in a tortilla press, or use a glass pie plate (glass allows you to see what you are doing without having to lift the plate) to flatten the disc to about an 1/8 inch thick.
- Place the tortilla in your palm, remove one side of the plastic, flip into your other palm, remove other side of the plastic, and place this in the hot dry skillet. Cook each side 30-45 seconds, then flip back to the first side until it puffs or you see bubbles- indicating it is cooked through. Wrap in a towel. (Wrapping in the towel will soften them up and make them more flexible.)
Flour Tortilla Recipe:
- Mix AP flour, salt and baking powder in a medium bowl. Add the oil and mix into fine crumbs using your fingers. Add hot water and stir and kneed a for minute or two, right in the bowl until very smooth and form a ball. Cover with a wet kitchen town (or plastic wrap) and let sit 45-60 minutes (or up to 3 hours).
- On a floured surface, roll the dough into a 12-inch log. Slice it in half, then half again, and into halves or thirds so you have 8 or 12 pieces roughly the same size. Roll into balls. Cover with a kitchen towel, let rest 20 mintues.
- Center each ball of dough between 2 pieces of thick plastic or parchment. Press in a tortilla press, or use a glass pie plate (glass allows you to see what you are doing without having to lift the plate) to flatten the disc to 1/8 inch thick. Flour tortillas tend to shrink- so first flatten them all out, then let them rest 15 minutes, and flatten them out again, or roll them out with a rolling pin on a lightly floured surface. Letting them rest a bit, is key to not shrinking.
- Heat a dry, cast-iron skillet over medium-high heat until hot. Lower heat to medium.
- Cook each side 30-45 seconds, then flip back to the first side until it puffs or you see bubbling- indicating it is cooked through. Wrap in a clean kitchen towel.
Corn and Sourdough: ( allow 4-6 hours proofing time)
- Mix masa harina and salt in a medium bowl. Mix sourdough starter, warm water and oil in a smaller bowl. Pour this into to the masa harina and kneed a for minute or two, right in the bowl until very smooth and pliable and form a ball. If crumbly or dry add a little more water, until soft and pliable. If wet and sticky, add a little more masa. Cover with a wet kitchen town (or plastic wrap) and let proof on the kitchen counter 4-6 hours. (70-80 F)
- As the dough sits, it will get softer and moister. After it proofs, massage the dough, is there wetness to the touch? Add more masa or flour, if the dough feels wet. PLEASE Do a tester before dividing, see notes, adding a little more flour. You want it soft, pliable but not sticky or wet feeling.
- Roll the dough into a 12-inch log. Slice it in half, then half again, and into thirds so you have 12 pieces roughly the same size. Roll into balls. Cover with a kitchen towel.
- Heat a dry, cast-iron skillet over medium-high heat until hot. Lower heat to medium.
- Working one tortilla at a time, center each ball of dough between 2 pieces of thick plastic (see notes), or parchment. press in a tortilla press, or use a glass pie plate (glass allows you to see what you are doing without having to lift the plate) to flatten the disc to a diameter of 4 to 6 inches or 1/8 inch thick.
- Place the tortilla in your palm, remove one side of the plastic, flip into your other palm, remove other side of plastic, and place this in the skillet. Cook each side 30-45 seconds, then flip back to the first side until it puffs or you see bubbling- indicating it is cooked through. Wrap in a towel. (Wrapping in the towel will soften them up and make them more flexible.)
Corn Tortillas:
- Mix masa harina and salt in a medium bowl. Add oil and hot water and stir with a fork . Kneed a for minute or two, right in the bowl until very smooth and form a ball. Cover with a wet kitchen town (or plastic wrap) and let sit 2o minutes (or up to 3 hours). Do a tester, see notes. Roll the dough into a 12-inch log. Slice it in half, then half again, and half again so you have 16 pieces roughly the same size. Roll into balls. Cover with a kitchen towel.
- Heat a dry, cast-iron skillet over medium-high heat until hot. Lower heat to medium.
- Working one tortilla at a time (see notes) , center each ball of dough between 2 pieces of thick plastic (see notes), or parchment. press in a tortilla press, or use a glass pie plate (glass allows you to see what you are doing without having to lift the plate) to flatten the disc to a diameter of 4 to 6 inches or 1/8 inch thick.
- Place the tortilla in your palm, remove one side of the plastic, flip into your other palm, remove other side of the plastic, and place this in the skillet. Cook each side 30-45 seconds, then flip back to the first side until it puffs or you see bubbling- indicating it is cooked through. Wrap in a towel. (Wrapping in the towel will soften them up and make them more flexible.)
Notes
TESTER: Before rolling the dough into the log to divide, do a little tester- especially if this is your first time making tortillas. Take a small, ping- pong sized sample, form a ball, and try pressing between the plastic (or parchement) using the tortilla press or pie pan. When you remove the plastic, does it stick? If it sticks to the plastic, the dough may be too wet (or too thin). You could knead in a little more masa harina (like a tablespoon) or flour to help dry up the dough, before continuing. If the dough edges crack a lot, then the dough is too dry, again, kneed in a tablespoon of water before continuing. Let the dough rest 10-15 more minutes. Then form the log and divide.
PLASTIC: For the lining, I’ve had the best luck with using a gallon-sized Ziploc bag, with the zipper side and two edges cut off. It is a thicker plastic, easier for handling, and you can always reuse this. Of course, you can use parchment, but I prefer the clear plastic- allowing one to better see the thickness of the dough.
No Tortilla Press: use a clear pie plate to press down.
Nutrition
- Serving Size: 1 Corn and Flour Tortilla ( 5 inches in diameter)
- Calories: 102
- Sugar: 0 g
- Sodium: 98.2 mg
- Fat: 4 g
- Saturated Fat: 0.6 g
- Carbohydrates: 15.2 g
- Fiber: 0.9 g
- Protein: 1.9 g
- Cholesterol: 0 mg

You make the widespread internet tortilla guru error of describing the masa as the “texture of Play Doh” But since millions of us don’t, and likely never will have any experience of that substance your texture description is meaningless
Hi Gerry. I have a feeling you’ll have the opportunity to experience it soon. 🙂 It should be soft and pliable, not crumbly or sticky.
I noticed that you listed baking powder in the homemade tortilla recipe with all-purpose flour. Is baking powder not necessary with a mixture of a/p and masa flours?
Hey Susan, I found the mixed flours really didn’t need it, where the straight flour felt a little heavy. You can play around with it though!
Hi! I’ve made these twice (the flour version!) and the taste is so good but I can’t get them to not shrink back after I press them. Am I doing something wrong or should I be doing something else? Thank you!!!
Hi Sarah- what type of flour are you using?
Hi!! I’m using all purpose flour for the all flour version (no corn). My family still loves them but I’m wondering if I need to press them first to get that initial circle shape and then use a rolling pin to press the gluten in a different way so it doesn’t shrink back?
Does it help if you let the dough rest before rolling? This will relax the gluten and make it less springy.
I’ve experienced the same thing as Sarah (a couple of times now) when trying to make the tortillas using just AP flour. I follow the directions to an T. After kneading the dough I let it rest for at least a couple of hours. I flatten the dough balls using a tortilla press, and as soon as I pull them off the plastic they shrink back up before I’ve had a chance to place them on the skillet. Urgh… I’ve had much more luck with the AP flour/corn blend version.
Hi Rennie and Sarah- I added some notes regarding flour tortillas both in the post body and in the recipe card. I usually flatten them, then let them rest, then flatten again or roll out using a rolling pin. Resting the dough is key. The flour corn blend are mush easier to handle, I agree!
Nice–I am also a fan of corn +wheat tortillas. Instead of rolling the dough into a thin sausage, cutting into equal pieces and rolling each into balls before pressing, I find it easier and faster to make a fat cylinder maybe 3-4 inches wide, and then cut this into slices that can then be directly pressed in the tortilla press. Saves a needless step and makes these more weeknight friendly.
That make good sense Bri!
These are so good! I made the corn tortillas. I ate them with the jackfruit carnitas tacos recipe (without baking the tacos). So worth making them myself! Can’t wait to try the sourdough variety!
I am so glad you gave these a go Angeli!
Wow! I will never buy another corn tortilla ever. These were so easy and delicious!
Can’t wait to try the sourdough version, as well as some variations in the comments.
Great to hear!
What do think about doing half masa half flour in the sourdough version?
Try it!
These are wonderful and SO easy! Is there a good way to make the dough and store for a few hours later?
You can just store it, covered in the fridge!
Pro tip: roll dough into a fat log, then slice into 12 thinnish disks (about 5mm or ¼ inch thick) ready for pressing. (Keep them covered until you use them to avoid drying out). No need to ball up. If the edges of the tortillas crack, the dough is too dry–add a bit more water. I use multiple sheets of plastic (thin produce bags or whatever) to press tortillas assembly-line like: press several and stack them waiting for the griddle–they won’t dry out or srick this way. When I’ve got a few done, I start cooking the tortillas one at a time while pressing the rest–it is efficient and quick enough for a worknight.
PS In my hands, I don’t see much difference if I let the masa dough rest or not.
cheers!
Love this Bri!
Ok, I’m officially inspired. If I can only remember where I put that old tortilla press. I used to make these years ago, and loved them—but never with your variations. Sourdough? Wow. Cool. Can’t wait to give that a whirl. Fun. I loved experimenting with these, so easy. One combo stood out. Before mixing a batch, I would add half a jalapeno or serrano and a slice or two of roma tomato into the water and toss it into the blendtec at high speed till it foamed, then followed the regular procedure. Really good. I gave some to my gluten-free next-door neighbor to try and she absolutely loved them. So every time I made them, I would make an extra batch for her. And since she was a professional theatrical lighting designer, complimentary theater tickets for new shows would magically appear in my mail box on a regular basis. The joy of cooking indeed. 🙂
Love this Frank. Win-win! Glad you are inspired- yes the sourdough is my favorite! Love the addition of chilies- a fun twist, I’ll have to try that.
Frank, two thumbs up !! I just made my first batch of homemade tortillas. Masa w/ unbleached AP Flour, finished with a little rye and whole wheat.Thank You Sylvia, came out beautifully and tasted great. I really like your input Frank and will check it out on my next batch.A really ingenious idea and will make the tortilla not only more flavorful but better for our health .Thanks
Thanks Phil!
Thanks, for sharing. and the tip about the pie plate is gold!! being handicapped the process of rolling out dough for anything is not for me!! it prevents me from making alot of foods using dough off limits for me. the pie plate tip I think would be alot easier for someone like me. can also use it to make my homemade hotpockets. which my son loves. and I will love not having to roll out dough and cut it to size before filling and sealing. Thanks so much. it’s funny how something so simple you don’t think about, could be so helpful til someone else points it out. Bless you.
Awww 🥰 -thanks Theresa, glad it helped!
I did not find the blue corn tortilla recipe in this article. Could you please forward it to me at papaschmitt13@gmail.com ? It would be greatly appreciated. Thanks in advance. Tim….
hi Tim, it is just using the corn tortilla recipe subbing blue cornflour. 🙂
I made the corn sourdough version of this tortilla–I jump at any recipe that helps put my sourdough discard to good use!– only snafu was my tortilla did not balloon when I flipped it over to cook the other side, indicating it’s cooked thru. Did I do it wrong? We still ate my newbie effort, just wasn’t as pretty as yours!
It may have been the thickness- you could try going a little thicker or thinner?
I made the blue corn tortillas and they turned out very nice and soft. A good new recipe to use up the sourdough discard. Thank you.
Awesome Batoul! Glad these worked for you!
I’m excited to try the sourdough version…do I use fed or unfed (discard) starter?
Unfed. 🙂
Made the corn and flour blend- EASY and delicious! Added 1 tablespoon more water.
Blue masa—how lovely!!! Sad we don’t get it here.
It is in all the recipes, but I have never understood the rolling into balls. I make a thick cylinder (about 7-10 cm in diameter—-2” or so) and slice off ~ 1cm thick disks of about 55g that I directly press into tortillas between sheets of plastic (I use a press but will try the pie plate suggestion!!!). If the hydration is right and everything is well blended, this works beautifully. I do this while I am cooking tortillas in a pan so it is very time efficient. Less fuss, more speed= weeknight dinner! Thx for the pie plate tip—fits so well with a “need less, be more” ethos. Stay safe!
I like that Bri- I think you are right way more efficient.
hey! these look fantastic. I also live in Santa Barbara and was wondering if you got the blue masa locally? it’s beautiful and I’d love to go get some for these.
I got it at the Mexican Grocery Store on Milpas!
amazing thank you so much!! can’t wait to make them 🙂
Could you include the amount of flour in grams? It really helps when I’m subbing my gluten free flour. 🙂
I will as soon as I make them again Allison!
Thank you! I can’t wait to try making these. 🙂
Let us know what you think!
Why not make it easy to print out?
Hi Donald, There is a print recipe button- do you not see that?