

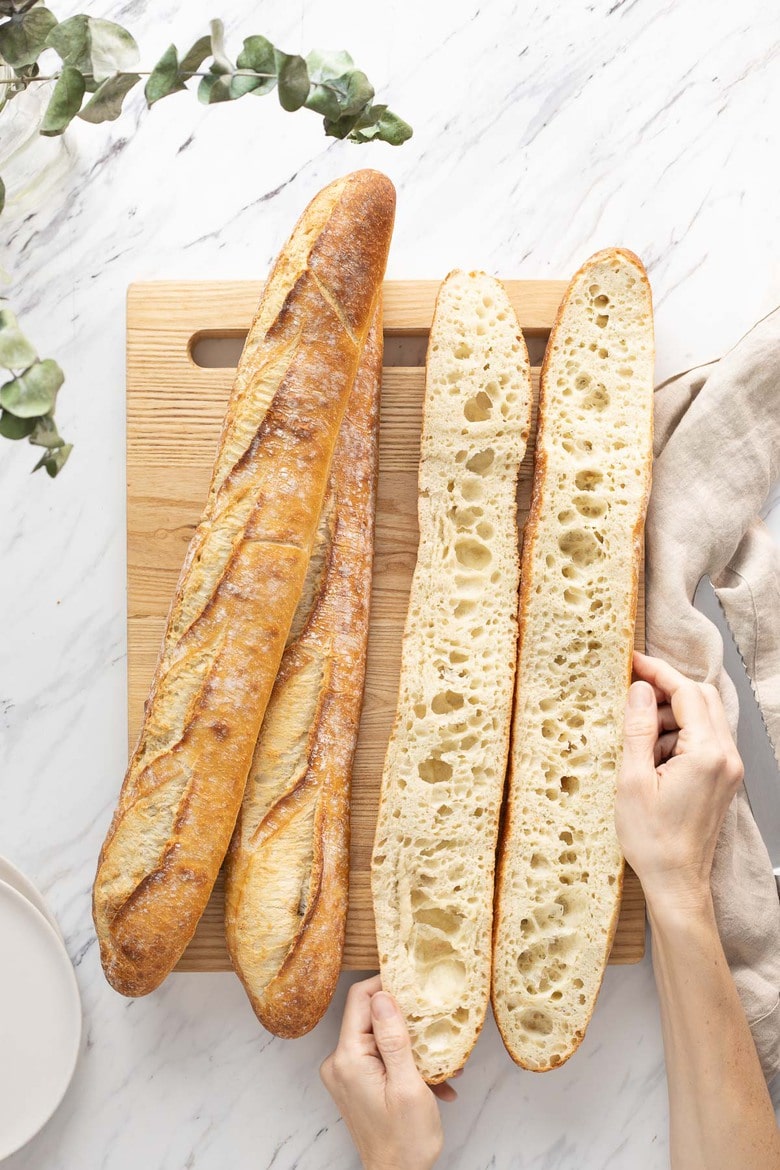
These Sourdough Baguettes have a crisp, crackly crust, an open, airy crumb, and incredible sourdough flavor. This step-by-step recipe walks you through making bakery-style baguettes at home. Video included!
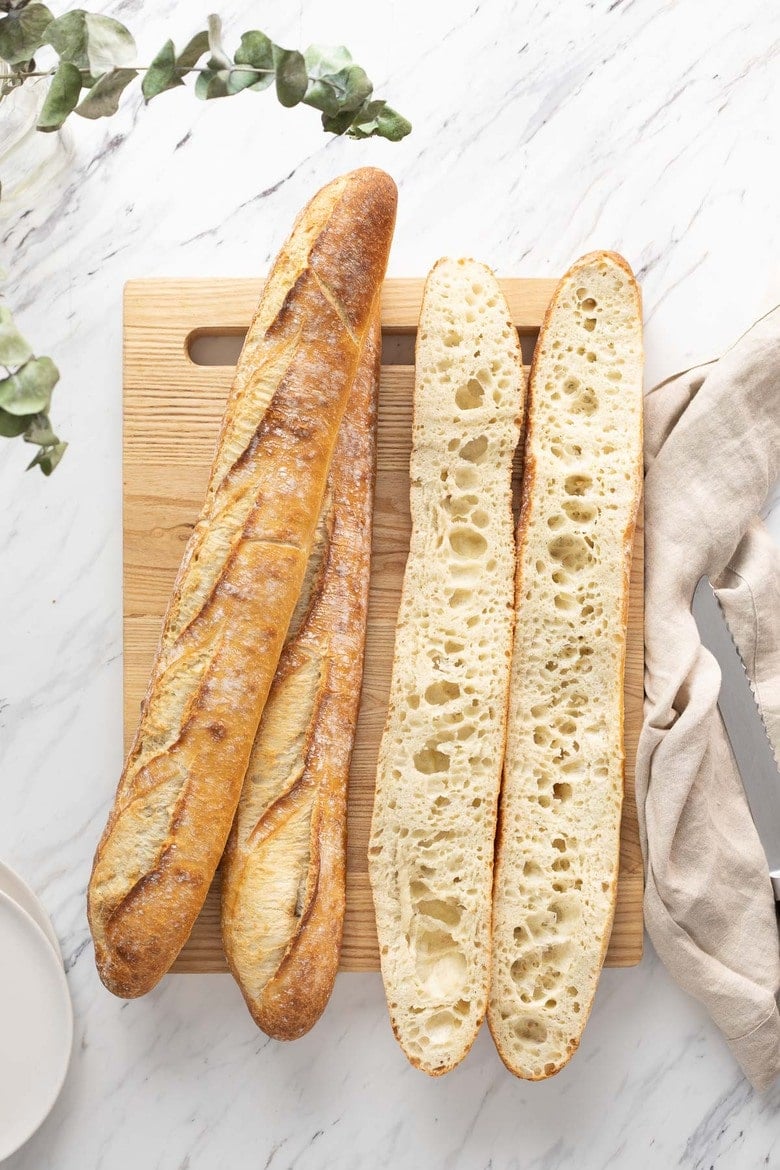
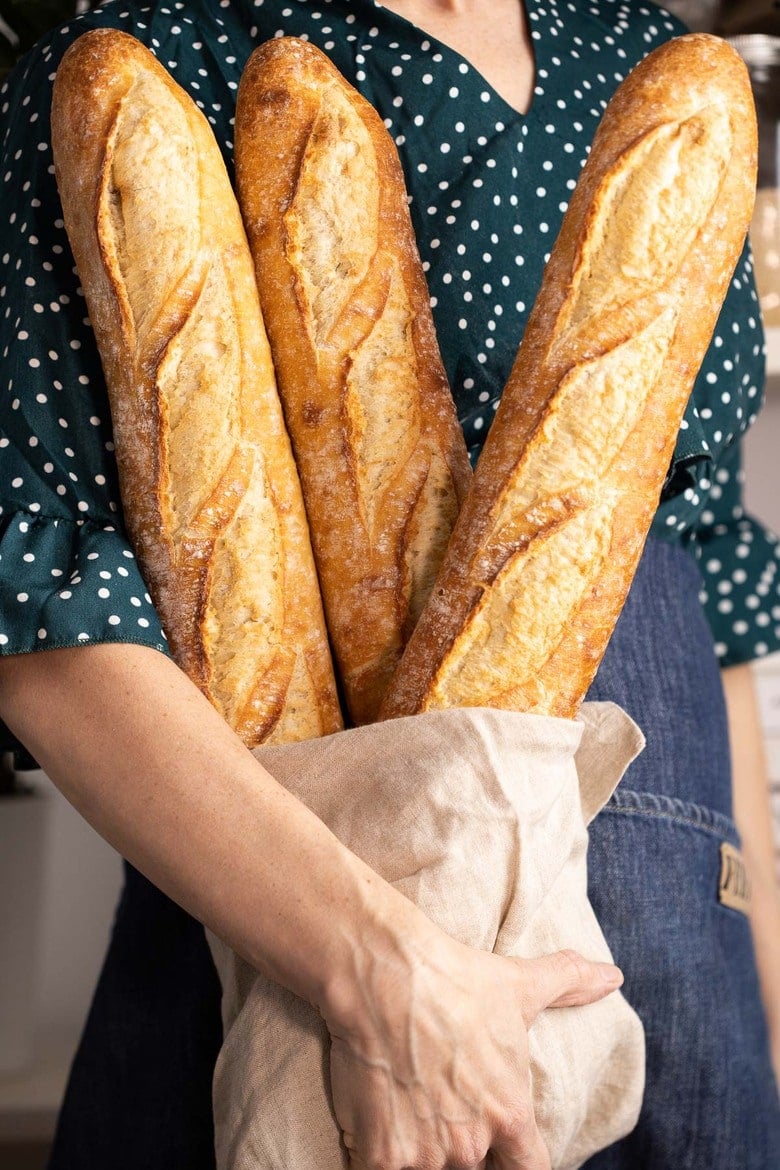
If you’ve mastered our Easy Sourdough Bread and are ready for your next baking adventure, these Sourdough Baguettes are a beautiful next step. They have everything I love about a classic baguette – a crisp, crackly crust, an open, airy crumb, and deep sourdough flavor.
This recipe was created by my friend Kris Osborne of Baked – the blog, and introduces two classic bread-baking techniques: levain and autolyse. You’ll also use the familiar stretch-and-fold method, followed by a long, cold proof that helps develop flavor and texture.
Plan ahead: these baguettes are a three-day process, but most of that time is hands-off. I’ve broken everything down step by step below, with photos and a video to guide you along the way.
Why you’ll love these sourdough baguettes
Bakery-style texture. A deeply golden, crackly crust gives way to an open, airy crumb with just the right amount of chew.
Incredible sourdough flavor. The levain and long, cold fermentation give the baguettes a wonderfully complex flavor without commercial yeast.
A great next step for sourdough bakers. If you’re comfortable making basic sourdough bread, this recipe introduces levain, autolyse, shaping, and scoring in an approachable way.
Mostly hands-off. The recipe spans three days, but much of that time is simply fermentation and resting.
Sourdough Baguette ingredients
- Active sourdough starter – Your starter should be bubbly and active and able to double within 6-8 hours of feeding.
- Bread flour – Provides the protein and gluten strength needed to create a chewy, airy baguette. Organic or locally milled bread flour is wonderful here.
- Water – Used to make both the levain and baguette dough.
- Fine sea salt – Adds flavor and strengthens the dough.
Helpful Equipment: A kitchen scale is highly recommended for accuracy. A baguette pan helps the loaves hold their shape while baking, but isn’t essential – you can also use a parchment-lined baking sheet. A bread lame, razor blade, or very sharp knife is helpful for scoring.
How to make Sourdough Baguettes
Day one: Make the levain (at night)
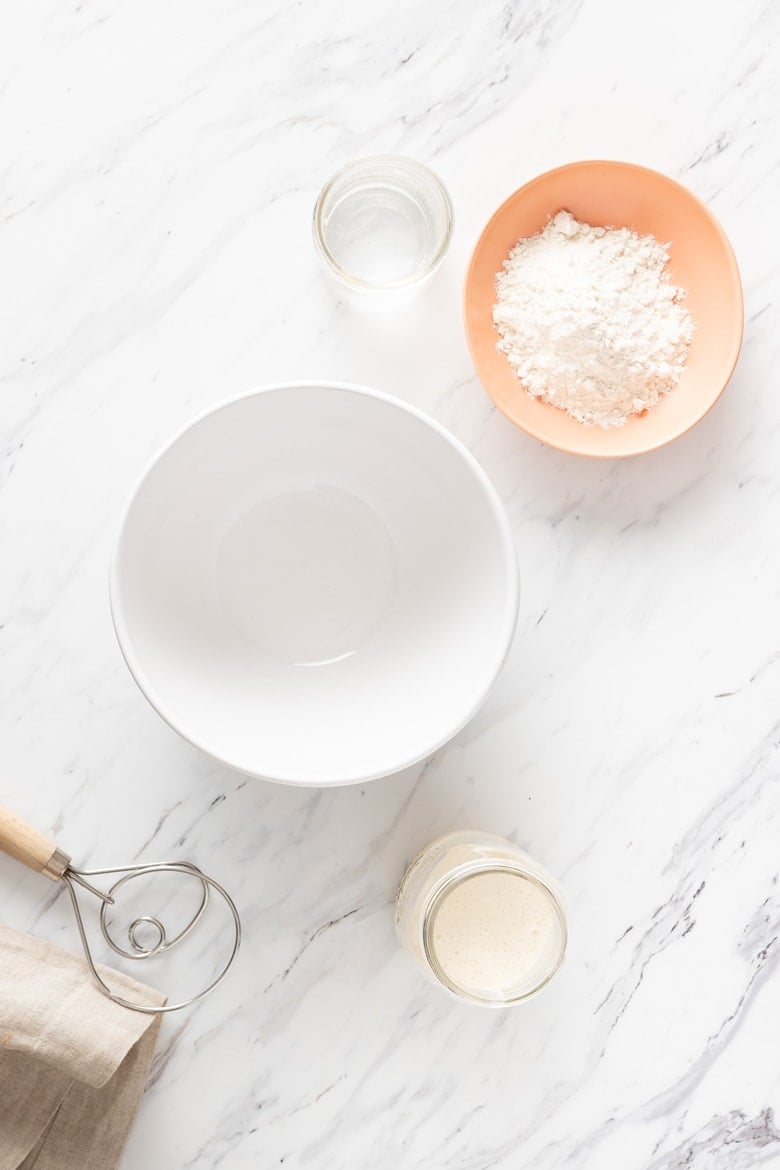
In a medium bowl, mix together the starter, water, and bread flour until well-combined. Cover with a plate and rest overnight (8-12 hours) until very bubbly and active. The levain should have many small bubbles across the top and throughout.
What is a Levain?
A levain is simply a small portion of sourdough starter that is freshly fed and allowed to ferment specifically for a batch of bread. Think of it as a small, active preferment made from your starter and used at peak strength. Using a levain gives you more control over the dough’s rise, flavor, timing, and consistency.
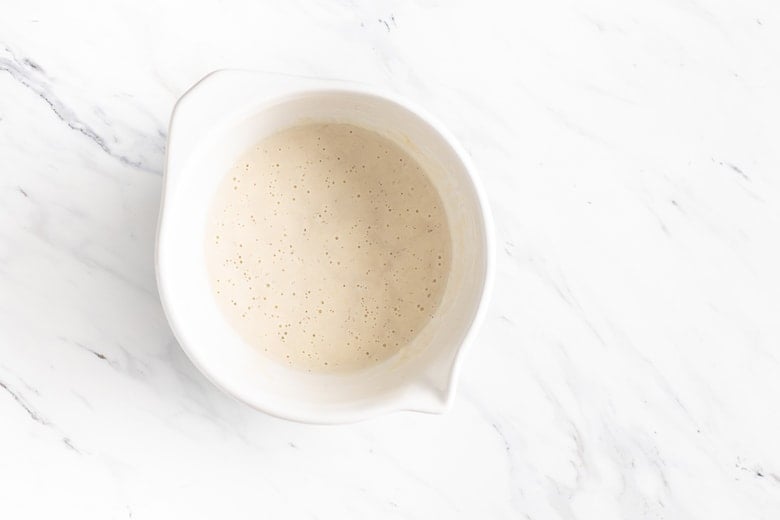
In the morning, the levain should have many small bubbles across the top and throughout.
Day two: Make the autolyse (morning)
Transfer all of the levain to a large bowl. Add the water and bread flour, and mix until all the flour is incorporated and a shaggy dough forms. Cover with a lid or damp towel and set aside for 45 minutes to rest. This is called the autolyse.
What is an autolyse?
An autolyse is a resting period that allows the flour to fully hydrate before the salt is added. This simple rest encourages gluten development naturally, improving the dough’s strength and extensibility while making it easier to handle.
Add the salt. After the 45-minute rest, add the salt to the dough and squeeze and pinch it in until evenly distributed. Perform a set of stretches and folds (see notes), then cover and set aside for 30 minutes to rest.
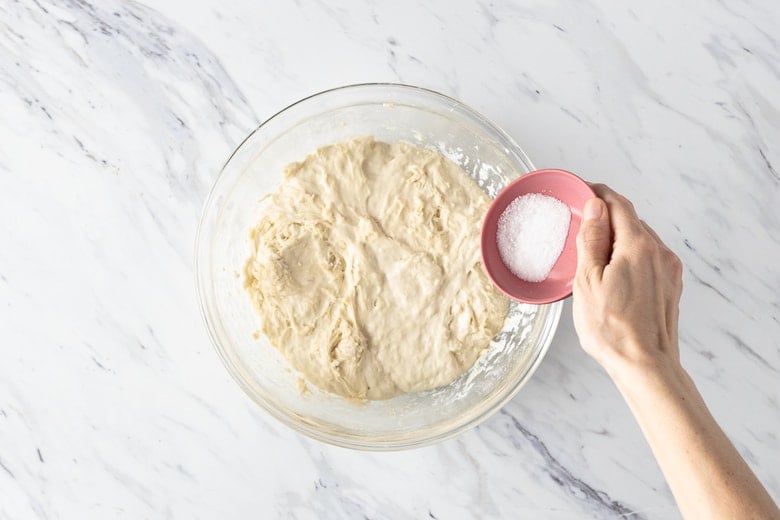
Stretch and folds. Continue performing a set of “stretch and folds” every 30 minutes for 3 hours, covering and resting between each round.
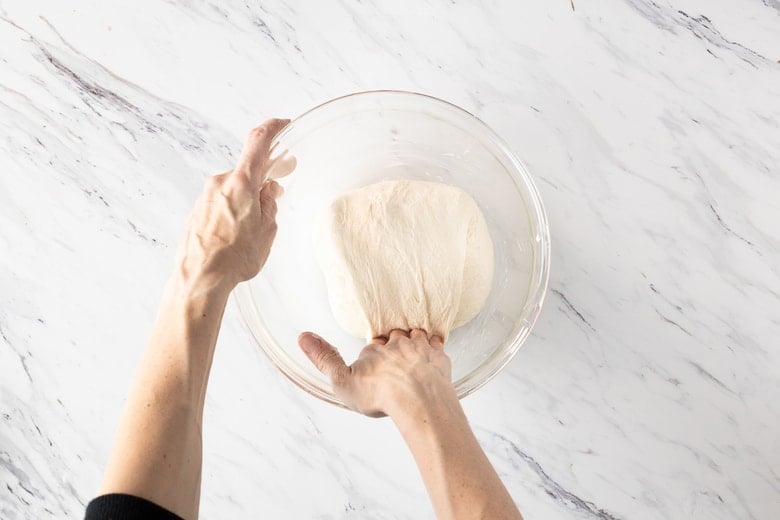
How to Do Stretch and Folds
To perform a series of stretches and folds, imagine the dough in 4 quadrants. Grab the dough in the 12 o'clock position and pull it up and over toward yourself (toward the 6 o'clock position). Watch the video above.
Then, rotate the bowl a quarter turn to the right and grab the dough in the 12 o'clock position again (formerly 9 o'clock), bringing it up and down toward 6 o'clock once more. Repeat this step 2 more times until each quadrant of the dough has made it to the 12 o'clock position and has been stretched and folded onto itself.
The dough will look like a little parcel.
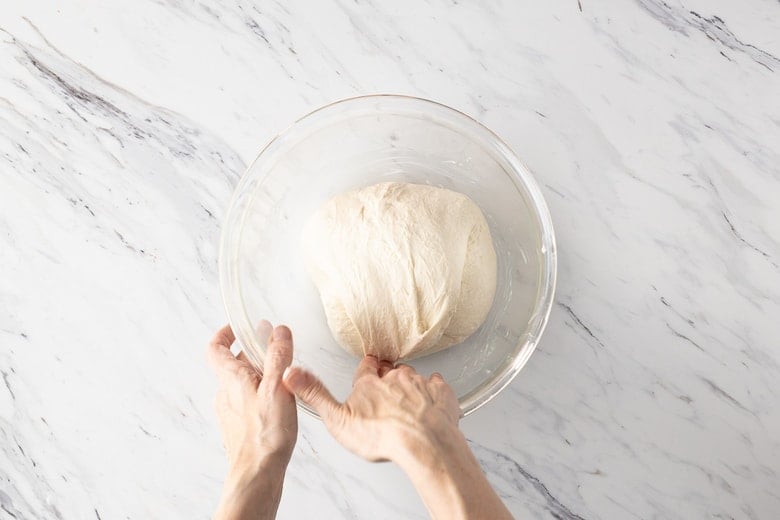
Divide. Gently tip the dough onto a lightly floured surface and cut it into 3 equal portions. Using a circular cupping motion with the palm of your hand, gently roll each ball of dough on the countertop to create a taut ball. Gently dust with flour and cover with a towel. Rest for 30 minutes.
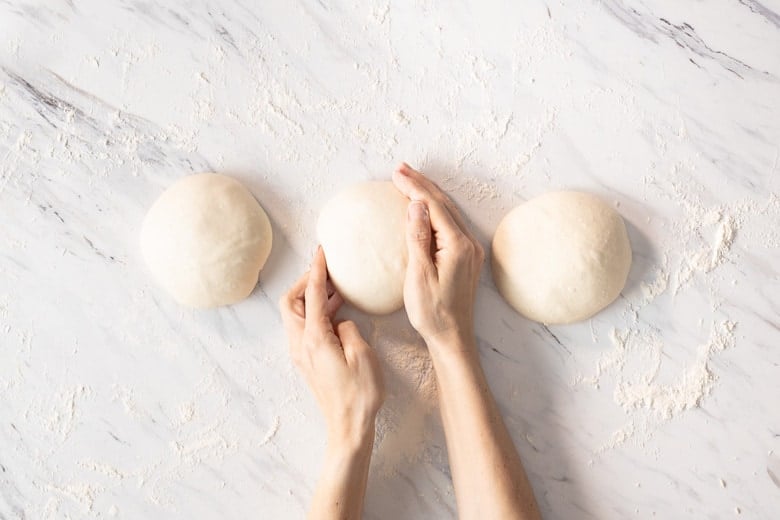
Shape. Sprinkle your countertop with flour and gently pat the first ball of dough into a rectangle, approximately 9 inches long. Fold the top third of the dough down (like folding a business letter) and press it into the dough, using the heel of your hand, to stick the edges together.
Rotate the dough 180 degrees and repeat so that both the bottom and top thirds have been folded in. Fold the dough in half once more to create a slim silhouette, and, again, use the heel of your hand to connect the edges. Roll the dough so it's seam-side down and press and roll the dough out so that a baguette shape forms, pinching the edges to taper them, if necessary.
Place seam-side down on a greased baguette pan or a floured, parchment-lined sheet pan. Please refer to the video.
Cold Proof. Cover with plastic wrap and refrigerate overnight, anywhere from 14-18 hours. This is the long proof.
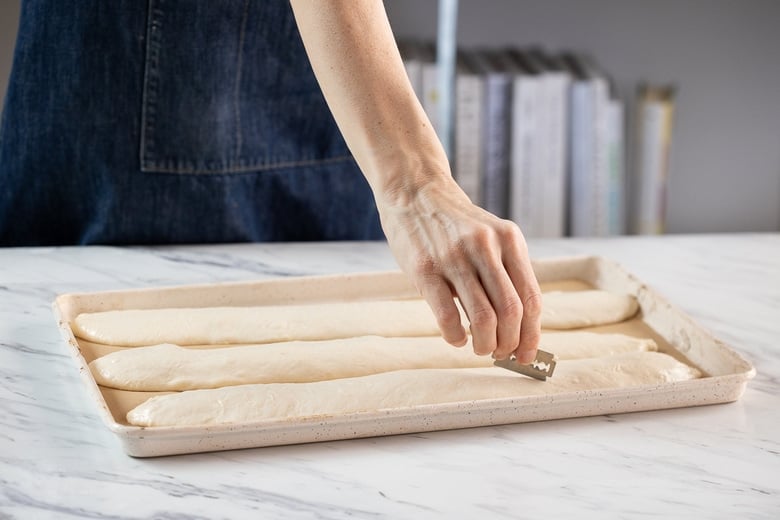
TIP: Take note of the time so you can adjust next time. In the morning, the dough will have expanded by 70-80% (this is the goal).
Day three: Score and Bake
The next morning, preheat the oven to 500°F (260°C) with the oven racks positioned in the middle and one level below.
Bake the baguettes directly on a baking sheet or baguette pan. Keep in mind, the baguette pan will leave slight perforations on the bottom of the bread.
Score. Using a lame (or sharp knife or razor blade), make 3-5 diagonal slashes into each piece of dough.
Bake. Place a handful of ice cubes onto the second baking sheet. Immediately place the baguette dough into the oven on the middle rack and place the baking sheet with ice on the rack below. Close the oven door and turn the temperature down to 450°F. Bake for 30-35 minutes, or until the bread is deep golden brown and the inside temp reaches 204°F.
Remove from the oven and cool completely on a wire rack before cutting.
Sourdough Baguette Tips
- Start with a very active starter. Your sourdough starter should reliably double within 6-8 hours after feeding before you begin.
- Watch the dough, not just the clock. Fermentation times can vary depending on the strength of your starter and the temperature of your kitchen and refrigerator.
- Handle the dough gently. Once the dough has developed air bubbles, avoid pressing out too much of the gas when shaping if you want that beautiful open crumb.
- Create surface tension when shaping. A taut outer surface helps the baguettes hold their shape and encourages a better rise in the oven.
- Don’t skip the steam. Steam helps create that characteristic crisp, crackly baguette crust.
- Let them cool before slicing. Cutting into the baguettes too soon can make the interior gummy. Allow the crumb to set as the bread cools.
How to Store Sourdough Baguettes
- Sourdough baguettes are best enjoyed the day they’re baked. Store leftovers in a paper bag at room temperature for another day to help preserve the crust.
- To refresh a baguette, warm it in a 350°F oven for 5-10 minutes, until the crust is crisp again.
- For longer storage, freeze the baguettes whole or sliced in an airtight freezer bag. Reheat directly from frozen or thaw at room temperature before warming in the oven.
Sourdough Baguette Troubleshooting
Why didn’t my sourdough baguettes rise?
The most common culprit is an underactive sourdough starter. Before making the levain, your starter should be bubbly and reliably double within 6-8 hours after feeding.
Why did my baguettes spread instead of rising?
The dough may have overproofed or may not have developed enough surface tension during shaping. A baguette pan can also help support the dough while you’re learning to shape baguettes.
Why isn’t my sourdough baguette crumb open and airy?
A tighter crumb can result from underproofing, insufficient gluten development, or handling the dough too aggressively during shaping. Be gentle with the dough once it has developed those beautiful air bubbles.
How do I know when my baguettes are properly proofed?
Proofing time will vary depending on the strength of your starter and the temperature of your refrigerator. The goal is roughly 70-80% expansion.
You can also use the poke test. Let the dough begin to come toward room temperature, lightly flour your finger, and gently press the dough.
If it springs back quickly, it may be underproofed. If it doesn’t spring back at all, it may be overproofed – bake it anyway! If it slowly springs back, it’s ready to bake.
Enjoy the process of learning how to make Sourdough Baguettes and let us know how it goes! Take a peek at all our sourdough recipes!
Happy Baking!
More Favorite Sourdough Recipes



Love baking? You might also like our Homemade Pie Crust recipe! Plus, check out all of our baking recipes!
How to Make Sourdough Baguettes: Step-by-Step Video

Description
This sourdough baguette is everything you want in the French classic–a crunchy crust, an open, airy crumb, and lots and lots of flavor. And it's easier to make than you think! Eat it plain, slathered in butter, or serve it with your favorite soup. For best results, this recipe requires a kitchen scale, a baguette pan and 3 days time!
Ingredients
- 65 grams active bubbly starter
- 65 grams tepid water
- 65 grams bread flour
- 420 grams tepid water
- 600 grams bread flour
- 12 grams salt
Instructions
Day 1: (Evening) Levain
Make the levain: In a medium bowl, mix together the starter, water, and bread flour until well-combined. Cover with a plate and rest overnight (8-12 hours) until very bubbly and active. The levain should have many small bubbles across the top and throughout.
Day 2: Mix, stretch and folds, shape, bulk rise overnight.
- Mix. In the morning, transfer all of the levain to a large bowl. Add the water and bread flour, and mix until all of the flour is incorporated and a shaggy dough is formed. Cover with a lid or damp towel and set aside 45 minutes to rest. This is called the autolyse.
- Salt, stretch and fold. After the 45-minute rest period, add the salt to the dough and squeeze and pinch the salt into the dough until evenly distributed. Perform a set of stretch and folds (see video), then cover and set aside for 30 minutes to rest. Continue to perform a set of stretch and folds every 30 minutes for 3 hours, covering and resting in between each round.
- Divide. Gently tip the dough onto a lightly floured surface and cut it into 3 equal portions. Using a circular cupping motion with the palm of your hand, gently roll each ball of dough on the countertop to a create a taut ball. Gently dust with flour and cover with a towel. Bench rest 30 minutes.
- Shape. Sprinkle the countertop with flour and gently pat the first ball of dough into a rectangle, approximately 9-inches long. Fold the top third of the dough down (like folding a business letter) and press it into the dough, using the heel of your hand, to stick the edges together. Rotate the dough 180 degrees and repeat so that both the bottom and top thirds have been folded in. Fold the dough in half once more to create a slim silhouette, and, again, use the heel of your hand to connect the edges. Roll the dough so it's seam-side down and press and roll the dough out so that a baguette shape forms, pinching the edges to taper them, if necessary.
- Bulk rise. 14-18 hours. Place them seam side down on a greased baguette pan or heavily dusted, parchment-lined sheet pan. Cover with plastic wrap and refrigerate overnight 14-18 hours.
Day 3: Morning. Preheat, score and bake!
- Preheat. The next morning, preheat the oven to 500°F (260°C) with the oven racks positioned in the middle and one level below. Have a baking sheet ready to add ice cubes to. (See notes.)
- Score. When the oven is hot, remove the baguette dough from the fridge. Using a lame (or sharp knife or razor blade), make 3-5 diagonal slashes into each piece of dough (¼-½ inch deep).
- Bake. Place a handful of ice cubes onto the second baking sheet. Immediately place the baguette dough into the oven on the middle rack and place the baking sheet with ice on the rack below. Close the oven door and turn the temperature down to 450°F. Bake for 30 – 35 minutes, or until the bread is a deep golden brown. Remove from the oven and cool on a wire rack.
Notes
Stretch and folds: To perform a series of stretch and folds, imagine the dough in 4 quadrants. Grab the dough in the 12 o'clock position and pull it up and over toward yourself (toward the 6 o'clock position). Then, rotate the bowl a quarter turn to the right and grab the dough in the 12 o'clock position again (formerly 9 o'clock), bringing it up and down toward 6 o'clock once more. Repeat this step 2 more times until each quadrant of the dough has made it to the 12 o'clock position and has been stretched and folded onto itself. The dough will look like a little parcel.
Baking: When transferring the cold baguette dough to a parchment-lined pan, it will be snake-ish and hard to work with. Move quickly and efficiently so you don't disrupt the shape of the baguette too much. Alternatively, you can bake the baguettes directly on the baguette pan until you get more comfortable working with the dough. Keep in mind, the baguette pan will leave slight perforations on the bottom of the bread.
Steam: Create steam by placing ice cubes on a sheet pan on the lowest rack, under the baguettes.
Storage. Bread is best eaten on the day that it's made, but if stored in paper will keep an additional day. You can freeze baguettes, sliced or whole. If slicing, freeze individual slices on a baking sheet, then place into a freezer bag. If freezing whole, wrap tightly with plastic freezer wrap, then place in a freezer bag. Bread will keep this way for a few months.
How to tell if the dough is proofed long enough? Do the poke test: let dough come to room temp. Flour a finger and poke the dough. If it springs back quickly, it may be underproofed. If it springs back slowly, it is just right. If it doesn’t spring back, it is likely overproofed (bake it anyway!).
Nutrition
- Serving Size: ¼ of a baguette
- Calories: 196
- Sugar: 0.2 g
- Sodium: 388.7 mg
- Fat: 0.9 g
- Saturated Fat: 0.1 g
- Carbohydrates: 39.3 g
- Fiber: 1.3 g
- Protein: 6.5 g
- Cholesterol: 0 mg






Delicious but my baguettes come out pale and the scoring is a bit disappointing. I do the fridge rise in a plastic bag, maybe I should try a cloth instead so it develops a skin? I only have an electric oven with no convection setting, is it worthwhile getting a baking stone or steel?
Hey Meghan! It sounds like it may have needed more time in the oven. Did you preheat your oven and get it really hot? I would let it go a little longer until it’s crusty and golden.
Hi!
What is the longest amount of time to leave this dough in the fridge? Does it have to be baked right on the 14-18 hour mark? Thanks!
Hi Brooke, it’s more about how much the dough has risen vs. a specific time. Fridge temps can vary a lot. The recipe is quite flexible, but you want to be careful about over-proofing, and the 14-18-hour range is already quite a big window. If your fridge is very cold, you might get away with longer?
Delicious! I just cut into the crusty yet chewy loaves, yummy! This is an easy to follow recipe and the results were great. I will definitely keep this in my bread making rotation.
Awesome to hear Barbara!
Can you tell me what is the amount of levain to use in this recipe. I want to reduce the total recipe to try just one loaf and your recipe is not specific on the amount of levain for the 3 baguettes. Other than that, it is a great recipe and I am v excited to try it. Thank you.
Hi Tia, I don’t know the amount for one loaf as I always make three. Does anyone else?
I increased my recipe to make for loaves using my math teacher background. So, to make the levain for one loaf do 20 grams each of active starter, water & bread flour. Follow the directions. For the dough use 126 grams water, 180 grams bread flour and 3.6 grams of salt. I hope this works as increasing and decreasing recipes doesn’t always work. I make 4 because I give away and freeze my extras. I make this recipe 2 or more times a month for almost 4 years! Everybody’s fav.
Thanks Brenda!
Thank you so very much Brenda. This is much appreciated!
I’m brand new to sourdough and bread baking. There’s such a sense of accomplishment when it all comes together.
Great step-by-step instructions and video made it super simple to follow.
Nice Milly! So happy it went well for you. Appreciate you taking time to leave a review.
Hi! I have recently discovered you and I have truly enjoyed every recipe so far! Could these be made with AP Flour? Bread flour seems to be difficult to come by sometimes. Thank you!
Hi Patti- I think some people have tried with various results (search the comments?) I have only use bread flour here so really can’t say.
Thanks Sylvia! I did use the AP flour and they turned out really well. We used it for fondue bread. It was perfect!
Awesome to hear- thanks Patti!
Hello, I am making your baguette recipe and having problems with the levin. My normal starter is fed with 1/4 c of water and 1/2 cup all purpose flour. It is healthy and passes the float test. When I mix it the night before as instructed with equal amounts bread flour, water and starter it does not pass the float test. I did make the baguettes once and they came out a bit gummy. Can I use my reg starter instead and how much?
It is OK if it doesn’t pass the float test. If they are gummy, most likely not proofed long enough?
Thank you so much for the response. I will try again!
Hi – I’m trying this recipe for the first time. I’m almost at the end of the stretch and folds (have two more to go). I’m worried that my dough seems more moist than what your dough looks like in your video. It still feels kind of sticky and damp and does not look fluffy (can’t think of a good word to describe yours). Is this likely to improve by the shaping after the stretch and folds?
Yes, it should. I would just keep going with the process and see if it gets better.
My first attempt at this, i didn’t cook long enough, only 32 minutes, and the dough was a bit moist, heavy, but hit 208degF internal temp, so I was satisfied with the bake result. My initial reaction was that the dough needed to cook another 5 minutes and needed more salt than the recipe called for. Trying today for a second attempt, adding 1.5g of salt and cooking for 35-37m in a 450deg convection oven preheated to 500 as per instructions.
Glad you gave this a go Nick! It can take a couple times to get this one right- so many variables! Let me know how the next batch goes. 🙂
I’ve been gifted a covered baguette baker (Emily Henry). Can I use this recipe with the baker? Thanks for any tips or adaptations I should make.
Also, are there any other options to plastic wrap that you can recommend? I use a shower cap when I make your other sourdough recipes (it’s perfect over the banneton). Thanks for everything!
I am sure you could Julie- what a lovely gift! I’ve never used one, so not tips- has anyone else used a baguette baker? If so, please pipe in! As far as plastic, I hate using it, but haven’t found a great alternative. I’ve tried parchment with a damp kitchen towel over top- and it does OK, not great.
Okay, I’m inspired to sew a giant shower cap that can fit over my pan… I’ll let you know if it works!
love it!
Can this be done without the conventional baguette tray?
Yes, you can make them on a sheet pan!
Hi thank you for the receipt. I made my starter early in the day and won’t be able to mix all ingredients until the next morning , is it ok to put the starter in the fridge or will I have to start it all over to stay active?
I think it should be fine in the fridge!
Beautifully tasty baguettes so airy!
Great to hear Candice~ Congratulations!
Hi there!
Maybe it’s just me, but the video link doesn’t seem to be live. Made the dough this morning! Excited to go the process.
Hi Leisel, I’m excited for you! Are you using an ad-free browser, or have ad-blocker turned on? That will shut off the video.
This recipe makes 3 baguettes can it be reduced to make just one (single lady here) or can the shaped dough be frozen prior to baking? I’ve frozen sourdough cinnamon rolls the baked them from frozen and feel they bake up better than from fresh.
Thank you ☺️
Hi Cynthia, yes the dough can be shaped and frozen. Perfect for meal prep!
I’m about to try this recipe, and I’m really excited! But I have a question on the timing:
If I’m starting Day 2 in the morning, Step 6 (refrigerating overnight) would begin around 2 or 3 pm.
Is it OK if the bulk rise phase in the fridge lasts for more than 12 hours? I don’t want to get up at 2 am to bake them. 🙂 ha
Thanks!
Hi Jenn, yes this is fine if over 12 hours. 14-18 hours is typical!
Can you keep the dough in the frig less than 14-18 hours? Around 10 hours?
You could, but you would need to add more rise time either before or after the fridge time.
Am I understanding correctly that there is no room temp BF after stretch and folds? Divide, shape, rest, shape and in the fridge for a cold BF? Can’t wait to try this, just wanted to be sure
Hi Michelle! The stretch and folds take about 3 hours – repeated every 30 minutes. Once they are shaped, into the fridge they go!
I do consider myself an experienced baker even with sourdough and I have made yeast baguettes before very successfully. These did not rise in the fridge even though I left them for 48 hours. They rose a bit in the oven but not as they should.Having said that the taste, texture & crunch were pretty perfect so I gave mine a 9/10 (always rate my recipes) I just need to do a bit of work on the recipe. A bit less water or more flour because as we know different flours act differently, so thank you so much for sharing
Hi Annie, I’m glad you enjoyed this flavor and texture. wonder if most of your rising happened before they went in the fridge- which can happen during the warmer months?
Hi Sylvia
I am in South Australia and it is winter here, and I put the shaped dough in the fridge as soon as I finished the stretch and folds, so I don’t think that was the issue. I do think however my fridge is quite cold at 2° and that could be a problem with this particular dough
That could be it. Try pulling them out a couple hours before baking.
Thanks Sylvia
I had more than 1/3 of the dough left in the fridge so this morning I added 1/2 Tspn instant yeast, re-worked it with some extra flour and hopefully it will rise well this time. I should have used my judgement though because I knew the dough was too soft and of course what we do know is that flours can vary so much from country to country and even state to state. Wish I could send you a photo if it works out. Not so much if it doesn’t. Haha
Great Annie- thanks for the update!
So all went to plan. It did swell and flatten during the rise out of the fridge, but once in the oven it popped up beautifully and was pretty perfect, so once again thank you
Great to hear Annie!
ok so I tried to make 2 instead of 3 and they ended up being way too dense. What could have caused this. should i let them rise a bit outside of the firidge
in the morning before putting it in the oven?
Shoot Kristina, it may have been the bigger size needed longer to rise? Yes, you could try leaving them out.
Can you make 2 large baguettes if using a baguette specific pan or will they end up being just too big?
Hey Kristina- they will be quite big but it’s worth a try? Baking time will need to be extended.
It did not get much bigger and not very fluffy seems a little under cooked but good flavor first time baker
Glad the you enjoyed the flavor! Check that your starter is nice and active, and add a few minutes time to baking next time! It takes a few times to perfect this. 🙂
Hi! So I’m still learning, does this recipe not need a bulk fermentation or is that what’s happening during stretch and folds?
Hi Amanda, yes it does need it. The bulk fermentation is happening both with the stretch and folds, and with the overnight rise in the fridge.
wow-this is amazing! Comes out great every time. I divide into four instead of three–keep everything else the same (usually bake about 28min in my oven.) That way i give three away to friends or family–they LOVE them! (I could eat them all myself–but need to watch the calories 🙂 )
Thanks Stan! Appreciate your helpful review. 🙂
Hello. I am new to baking breads with sourdough. This recipe was easy to follow and the end result was delicious. Will definitely be making these again.
So happy this worked out for you!
Hello Sylvia I made a mistake and added the salt at the same time as the flour, water and levain. What issue am I going to have?
Hi Kurt! The salt could affect the rise- slow it down, or perhaps even lessen it… but not always. At this point I would just carry on and hope for the best!