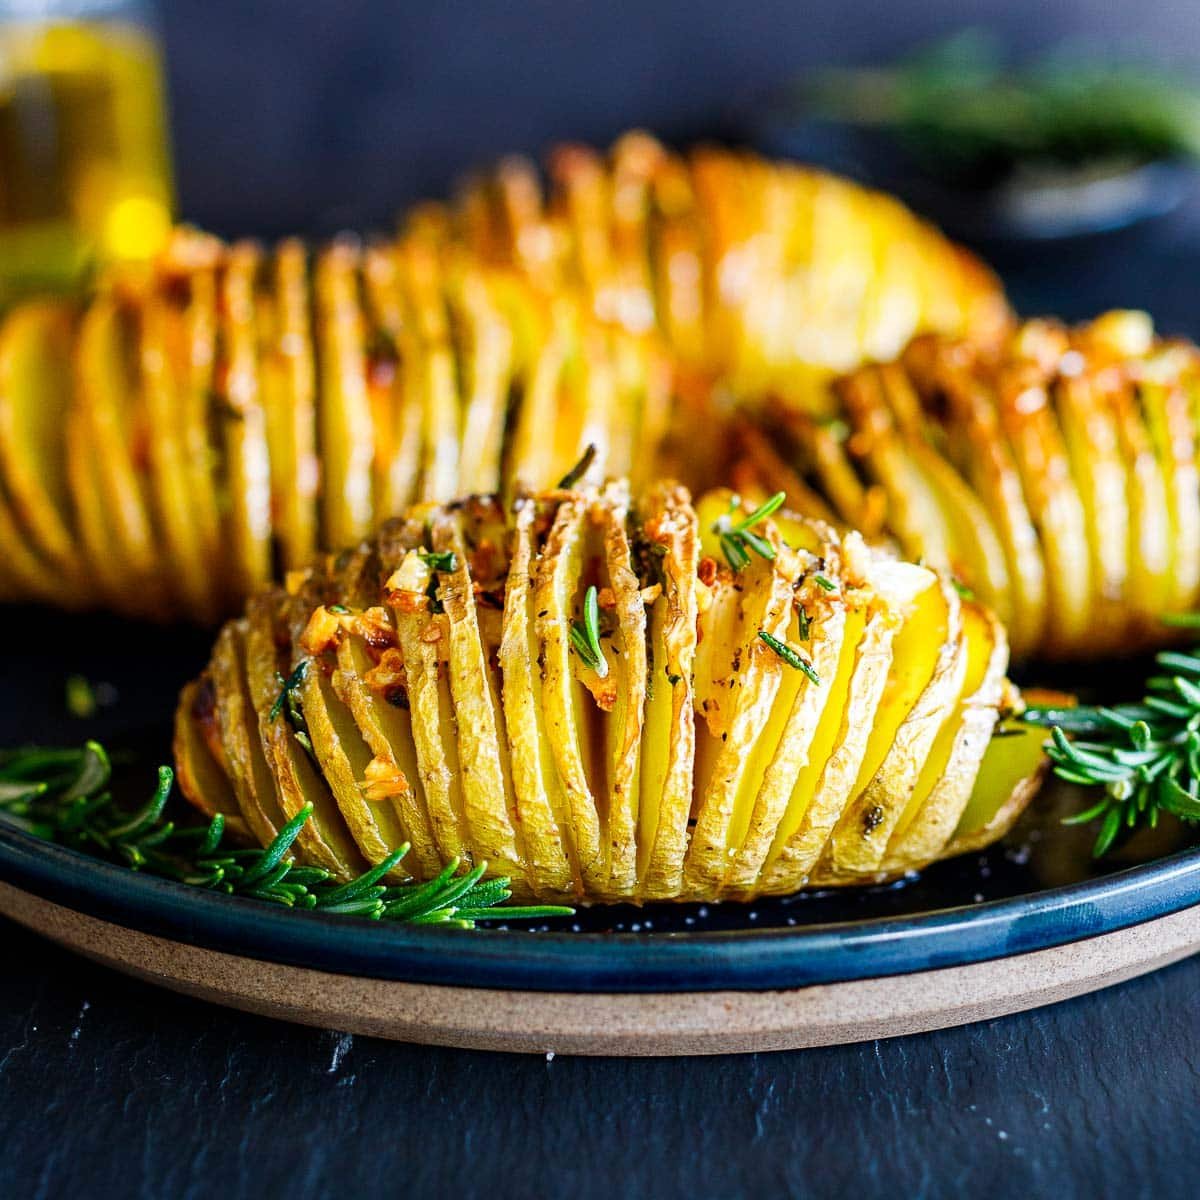
Crispy on the outside, tender on the inside-these rosemary garlic Hasselback potatoes are an easy, elegant side dish, perfect for weeknights or holiday dinners. Vegan and gluten-free.
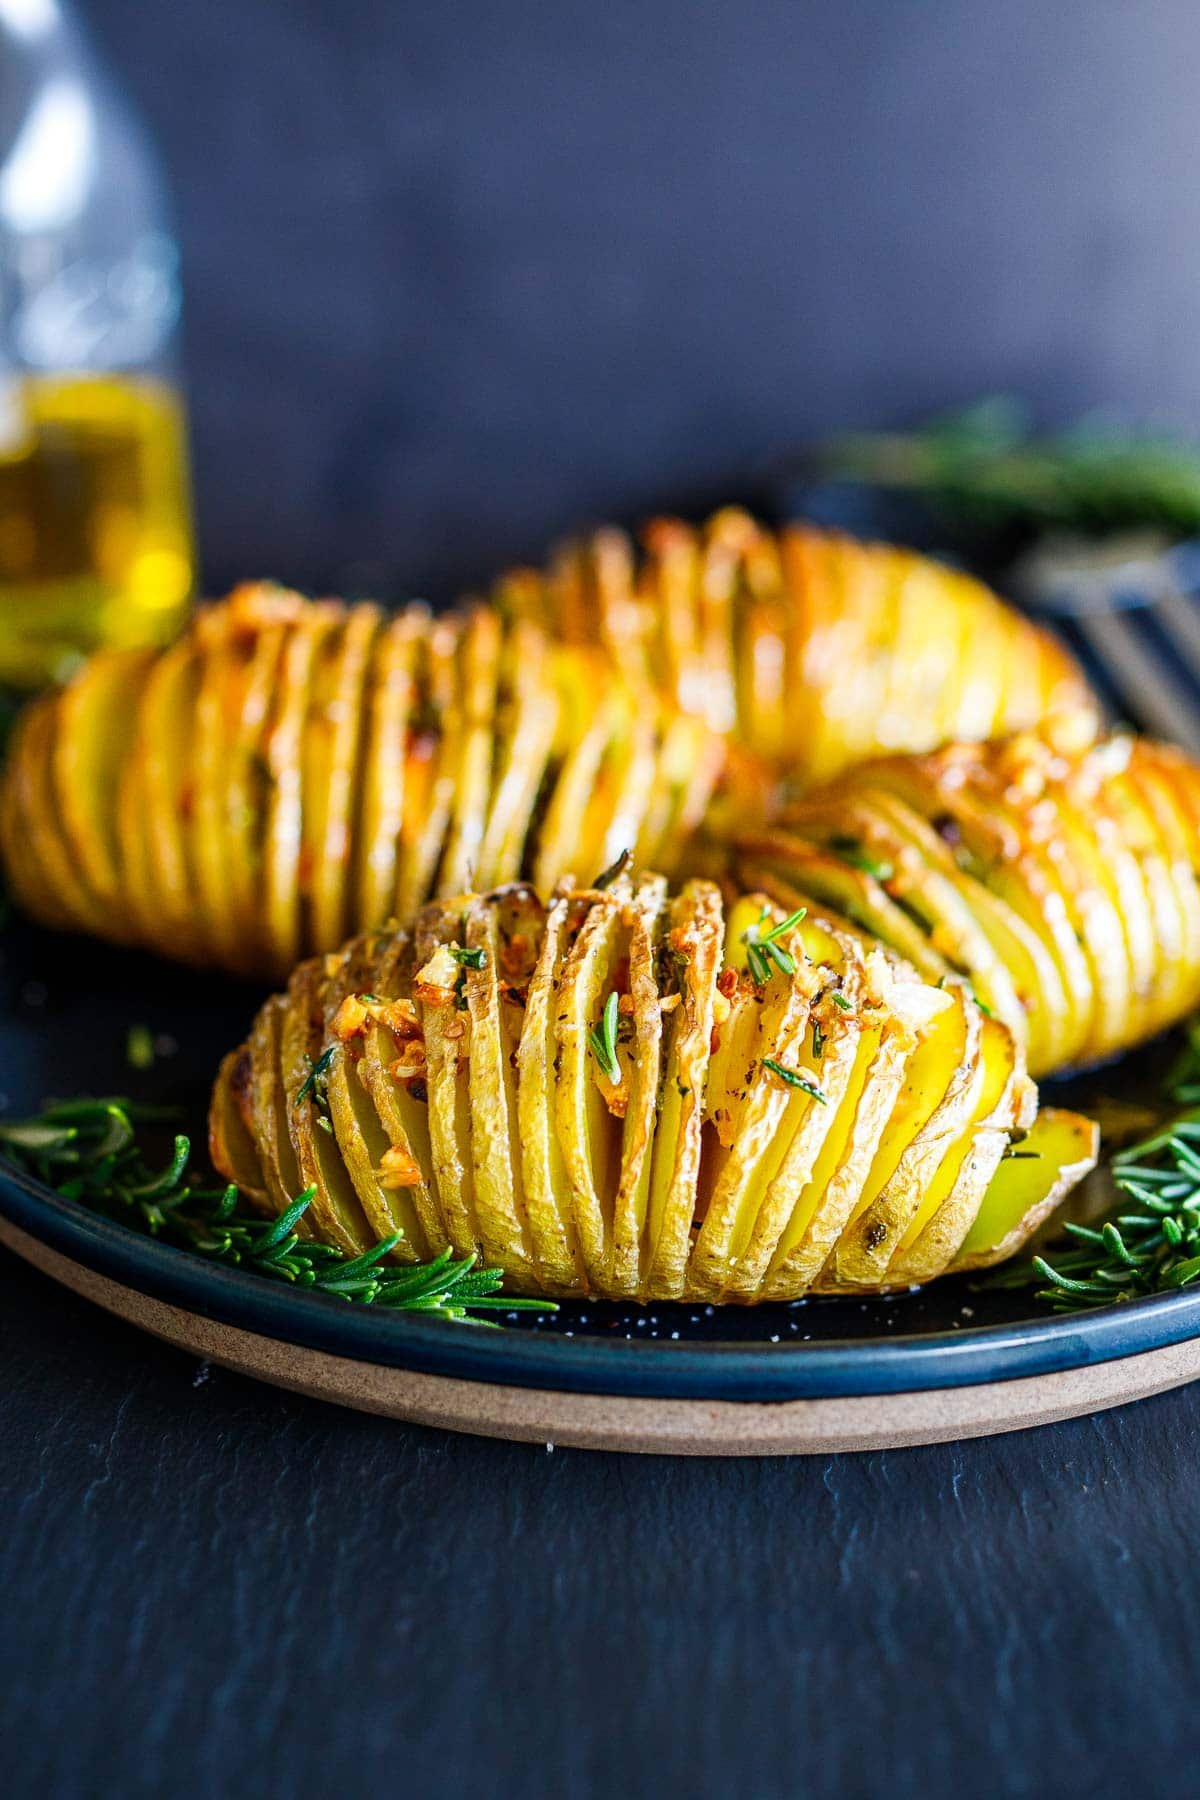
Craving a simple yet stunning side dish that steals the show? These Rosemary Garlic Hasselback Potatoes deliver crisp, golden edges and a tender, flavor‑packed interior-all achieved with just pantry staples and a fool‑proof technique.
Inspired by classic Swedish restaurant fare dating back to 1953, this recipe blends expert kitchen tips (hello, chopstick slicers!) with high‑quality ingredients like fresh rosemary, extra‑virgin olive oil, and garlic.
As a seasoned chef I guarantee these beauties will elevate any meal-from casual weeknights to holiday feasts-with minimal effort and maximum flavor.
Why this recipe works
- ⭐ Proven technique: Thin fan cuts ensure even baking and crispy edges.
- 🌿 Herb‑infused flavor: Rosemary and garlic seep into every bite.
- 🥔 Perfect texture: Starchy potatoes crisp beautifully while staying soft inside. (Use Yukon Gold or russet.)
- 👩🍳 Reader-tested: 5★ rating from 20+ readers-this version is reliably delicious and easy to follow.
Ingredients in Hasselback Potatoes
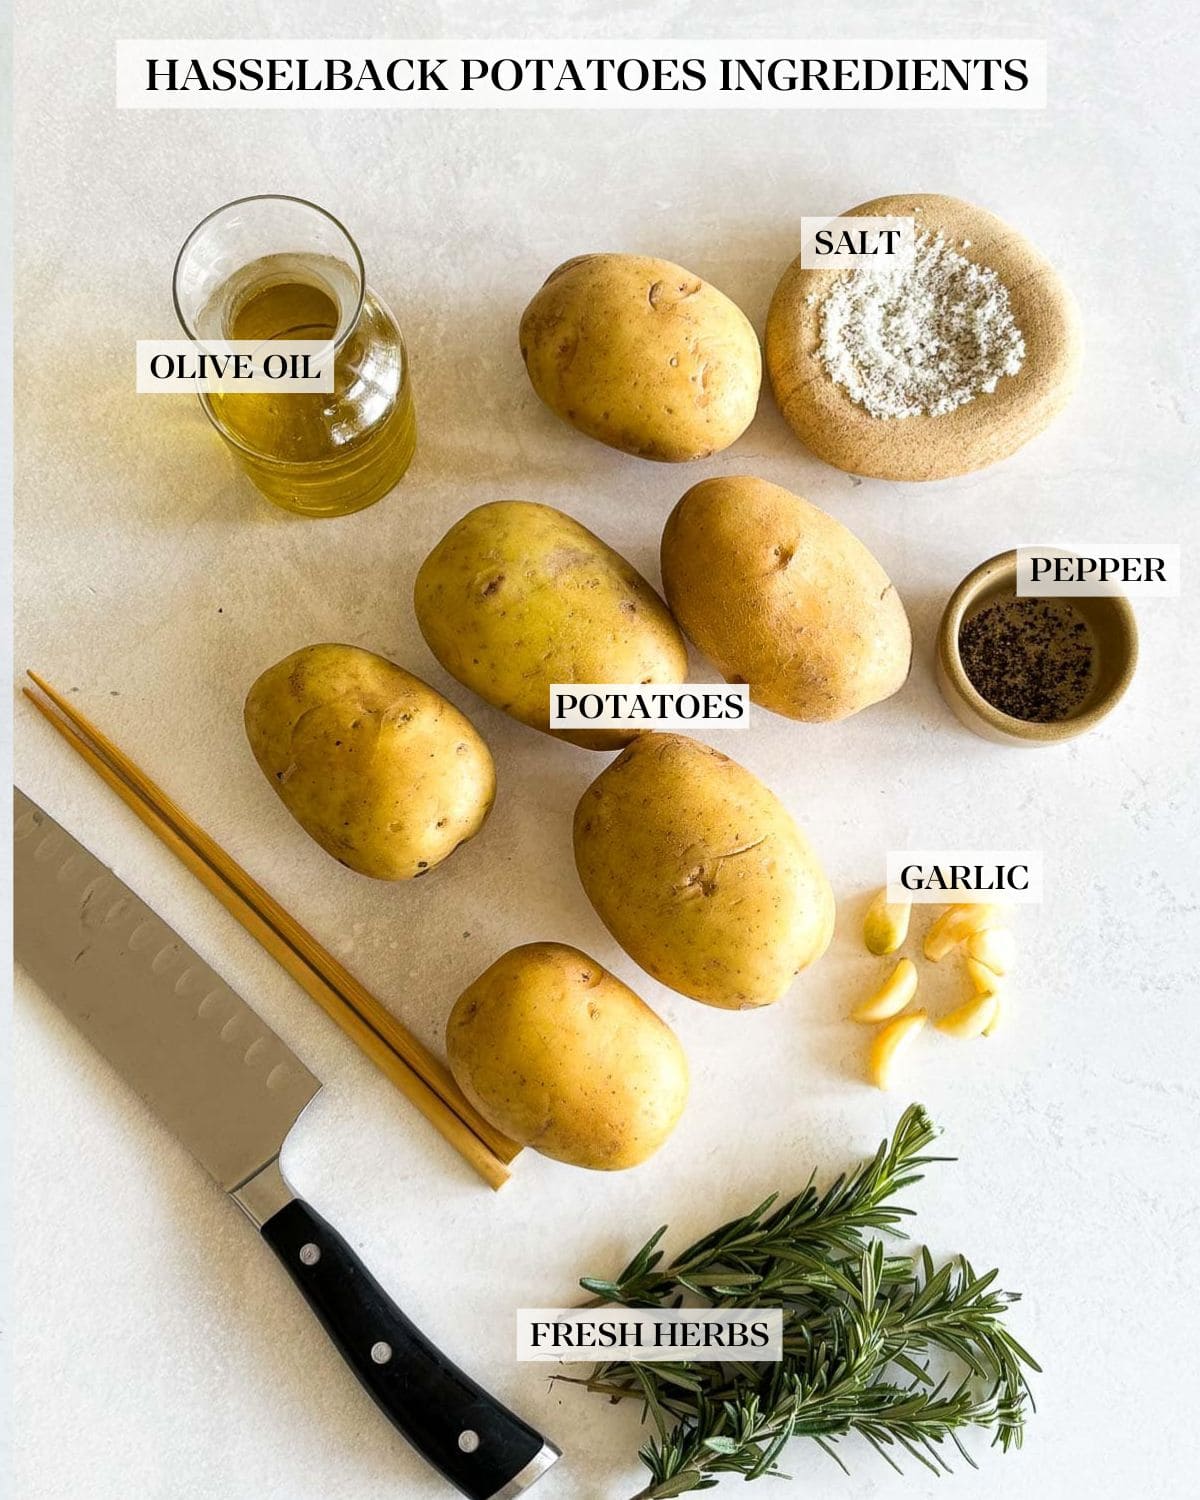
- Potatoes- small to medium sized starchy potatoes like Yukon Gold potatoes or russet potatoes.
- Extra Virgin Olive Oil – for extra crispy texture, and spray olive oil is very handy!
- Garlic Cloves– thinly sliced to separate the slices.
- Fresh Herbs– Rosemary, Sage or Thyme or a combination.
- Salt and Pepper – to bring out the potato flavor.
What Potatoes are best to use for Hasselback Potatoes Recipe?
In a recipe like this, you will want to choose starchy potatoes like russets or all-purpose potatoes like Yukon golds. These have lower moisture content and tend to do better in recipes where the goal is to have them crisp up. A waxy red potato, full of moisture, will not get as crispy here.
How to make Hasselback Potatoes Recipe
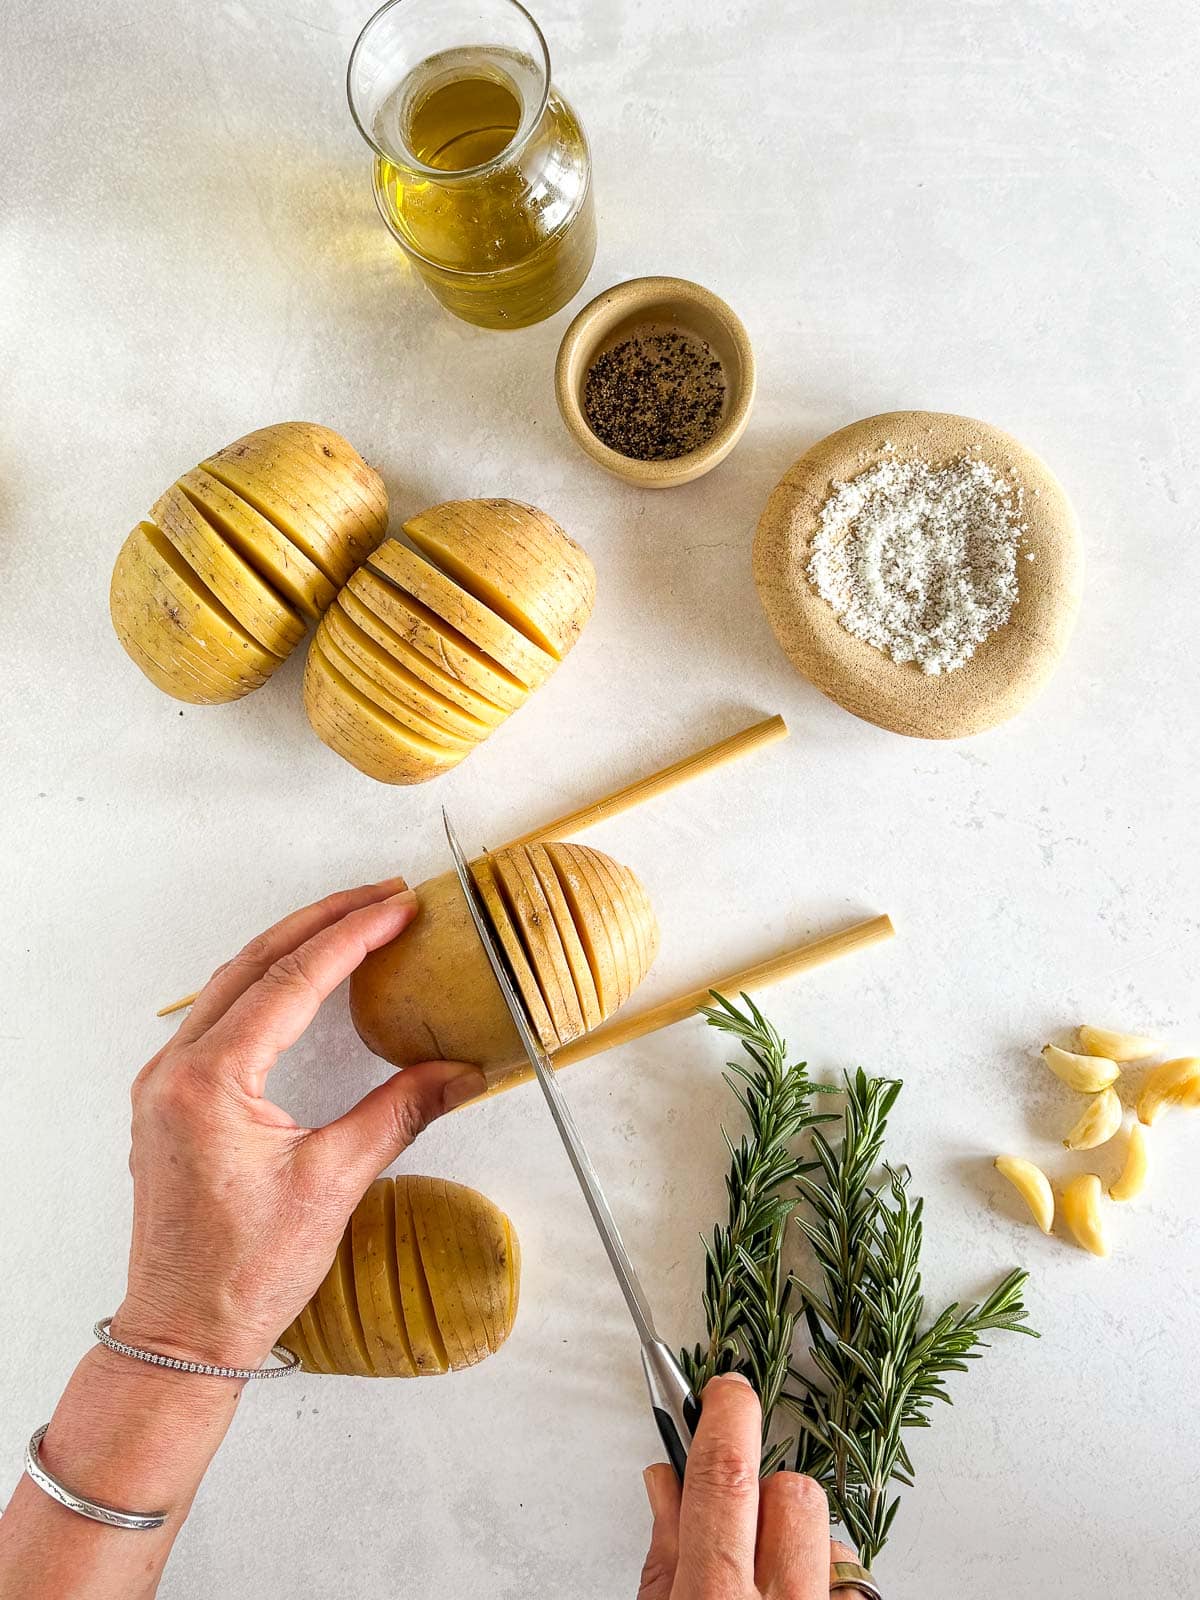
Step 1. Wash and dry the potatoes. Place a chopstick on both sides of each potato and slice them thinly (1/8-inch thick) with a sharp knife on a cutting board. The chopsticks ensure you won’t cut all the way through.
Step 2. Brush the potatoes with olive oil on all sides and in between the slices as best you can.
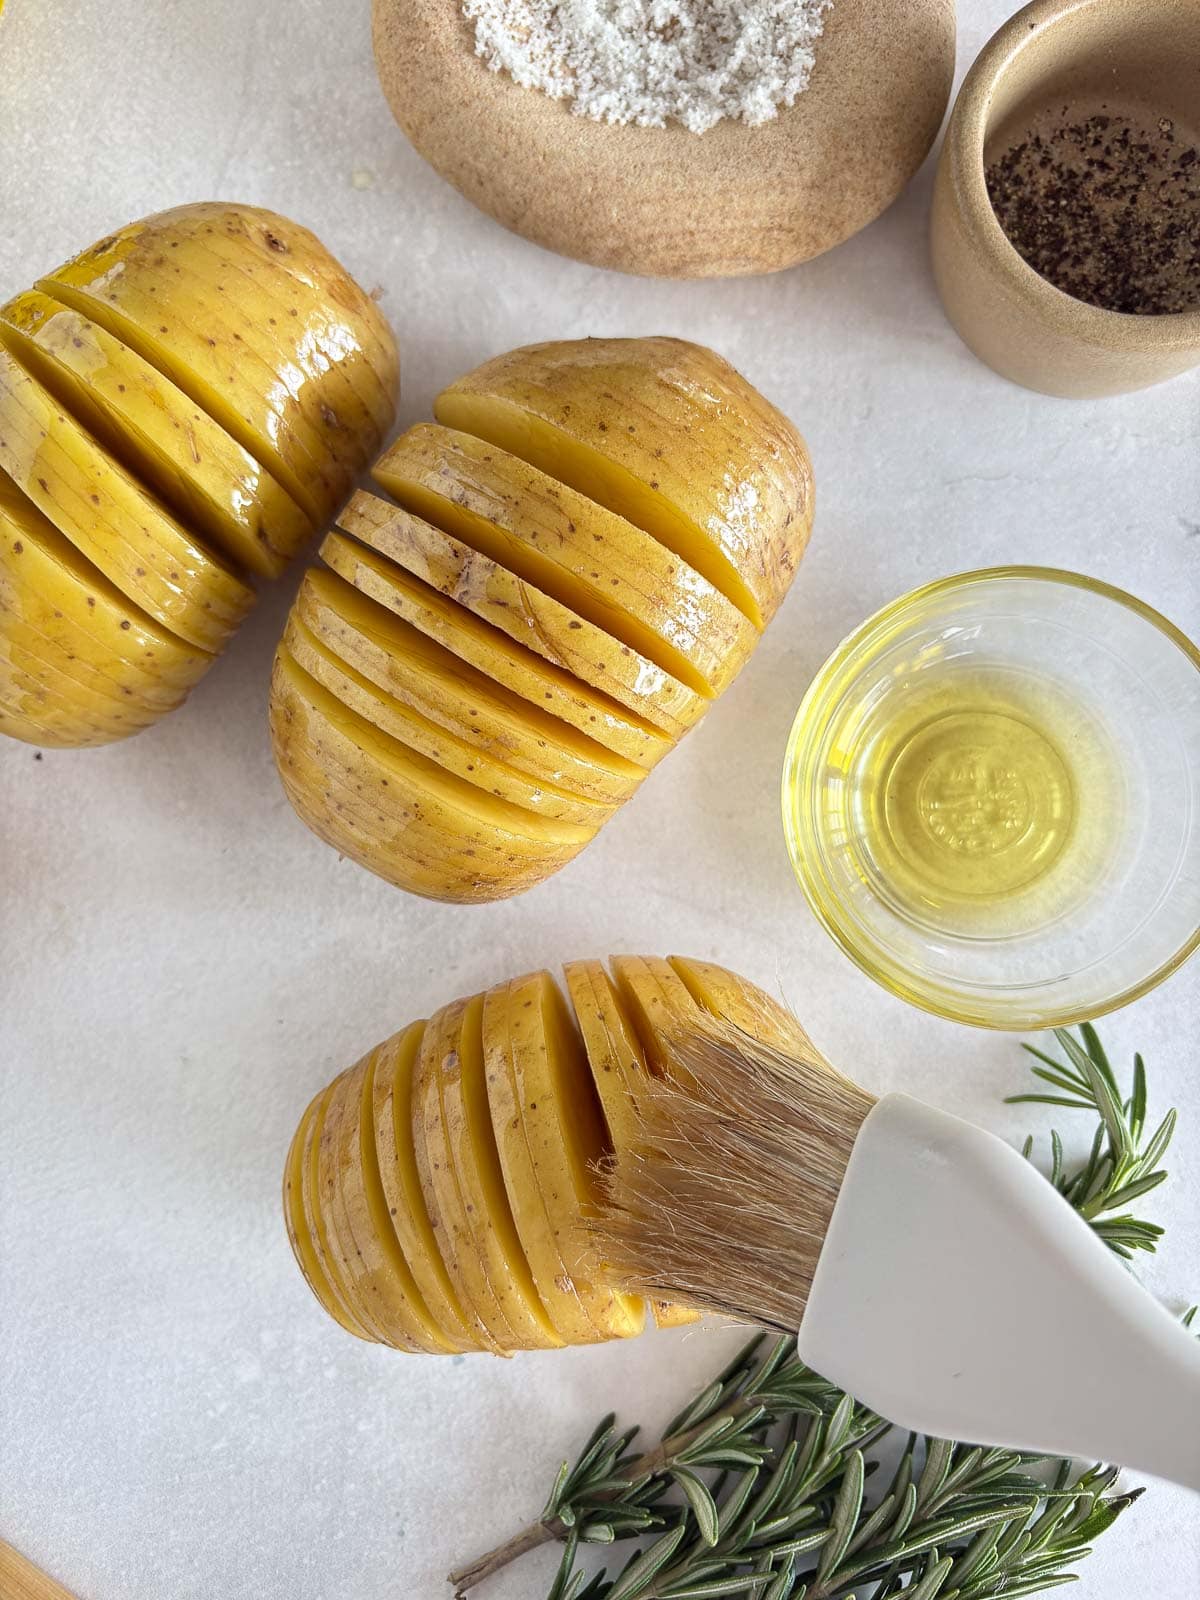
Step 3. Slice the garlic, very thinly, lengthwise. Slip a piece of garlic in every other slit in the potatoes. Tuck a rosemary leaf or two into the other slits. Sprinkle the insides with salt and pepper and generously spray the insides with olive oil.
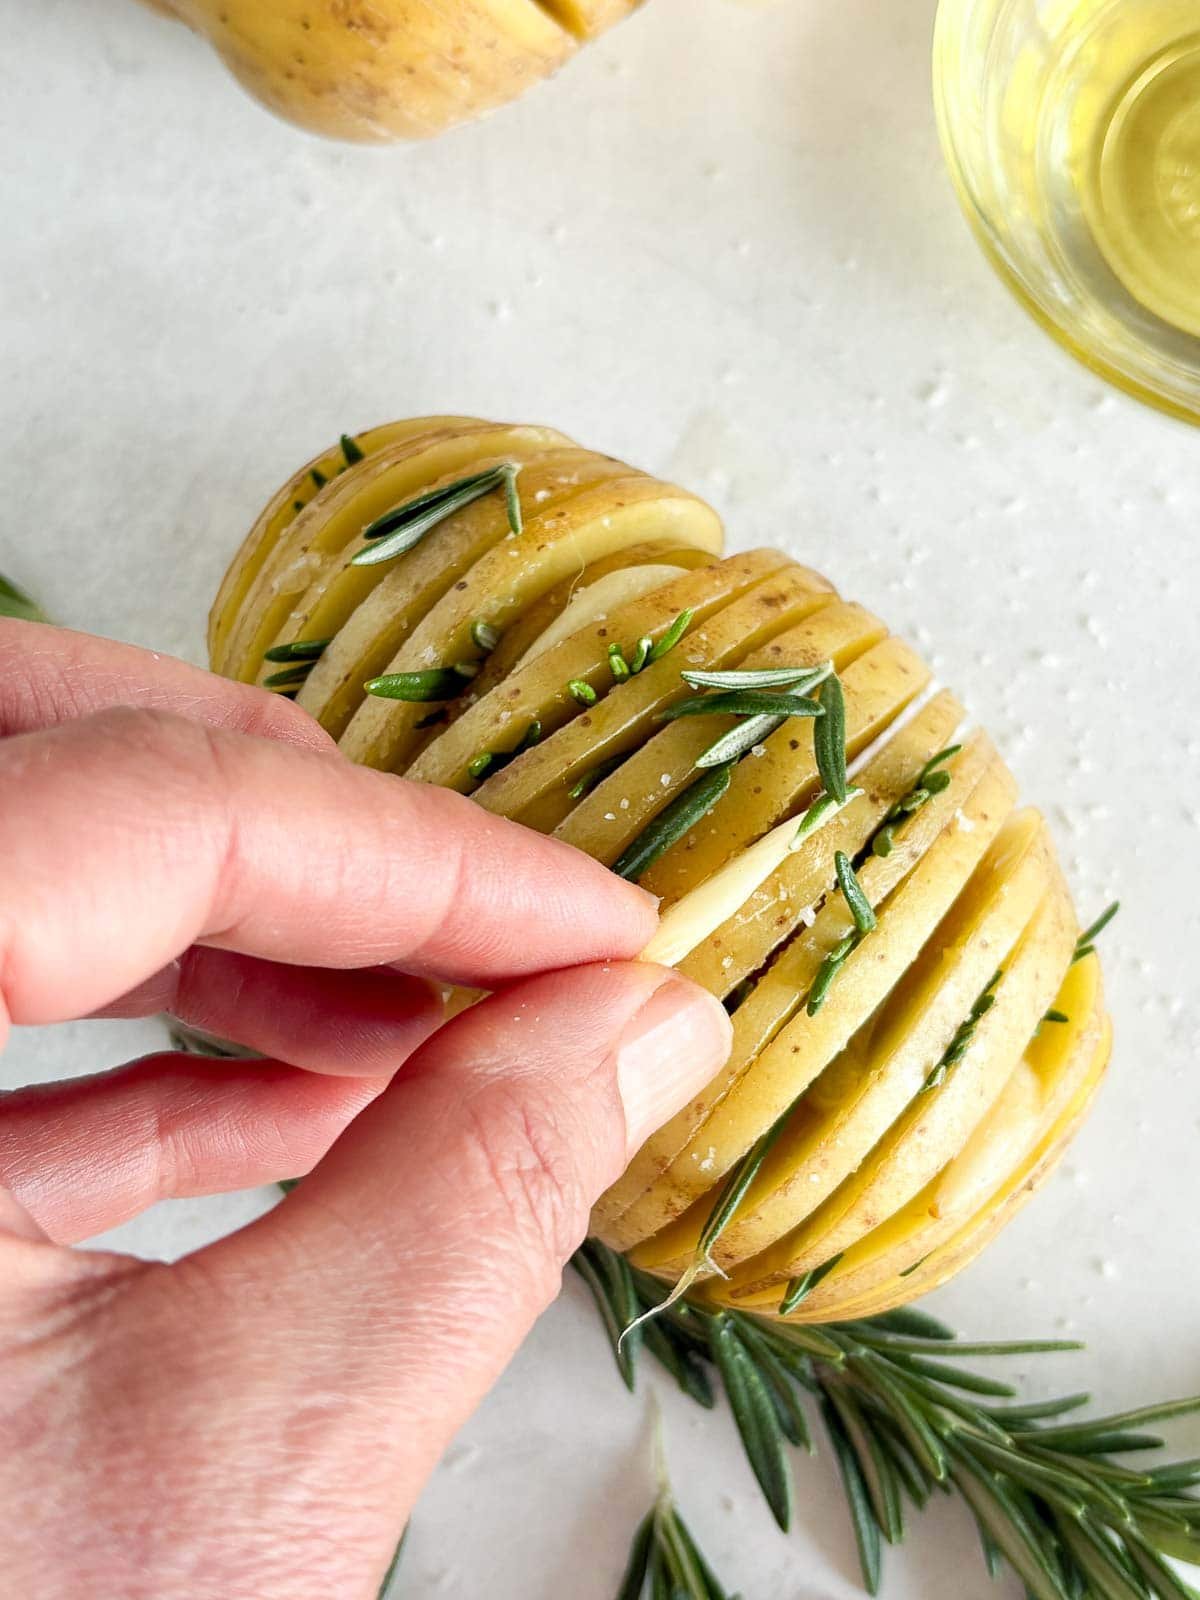
Tip: Placing the rosemary and garlic between the slices separates them, reduces cooking time and allows them to get crispy.
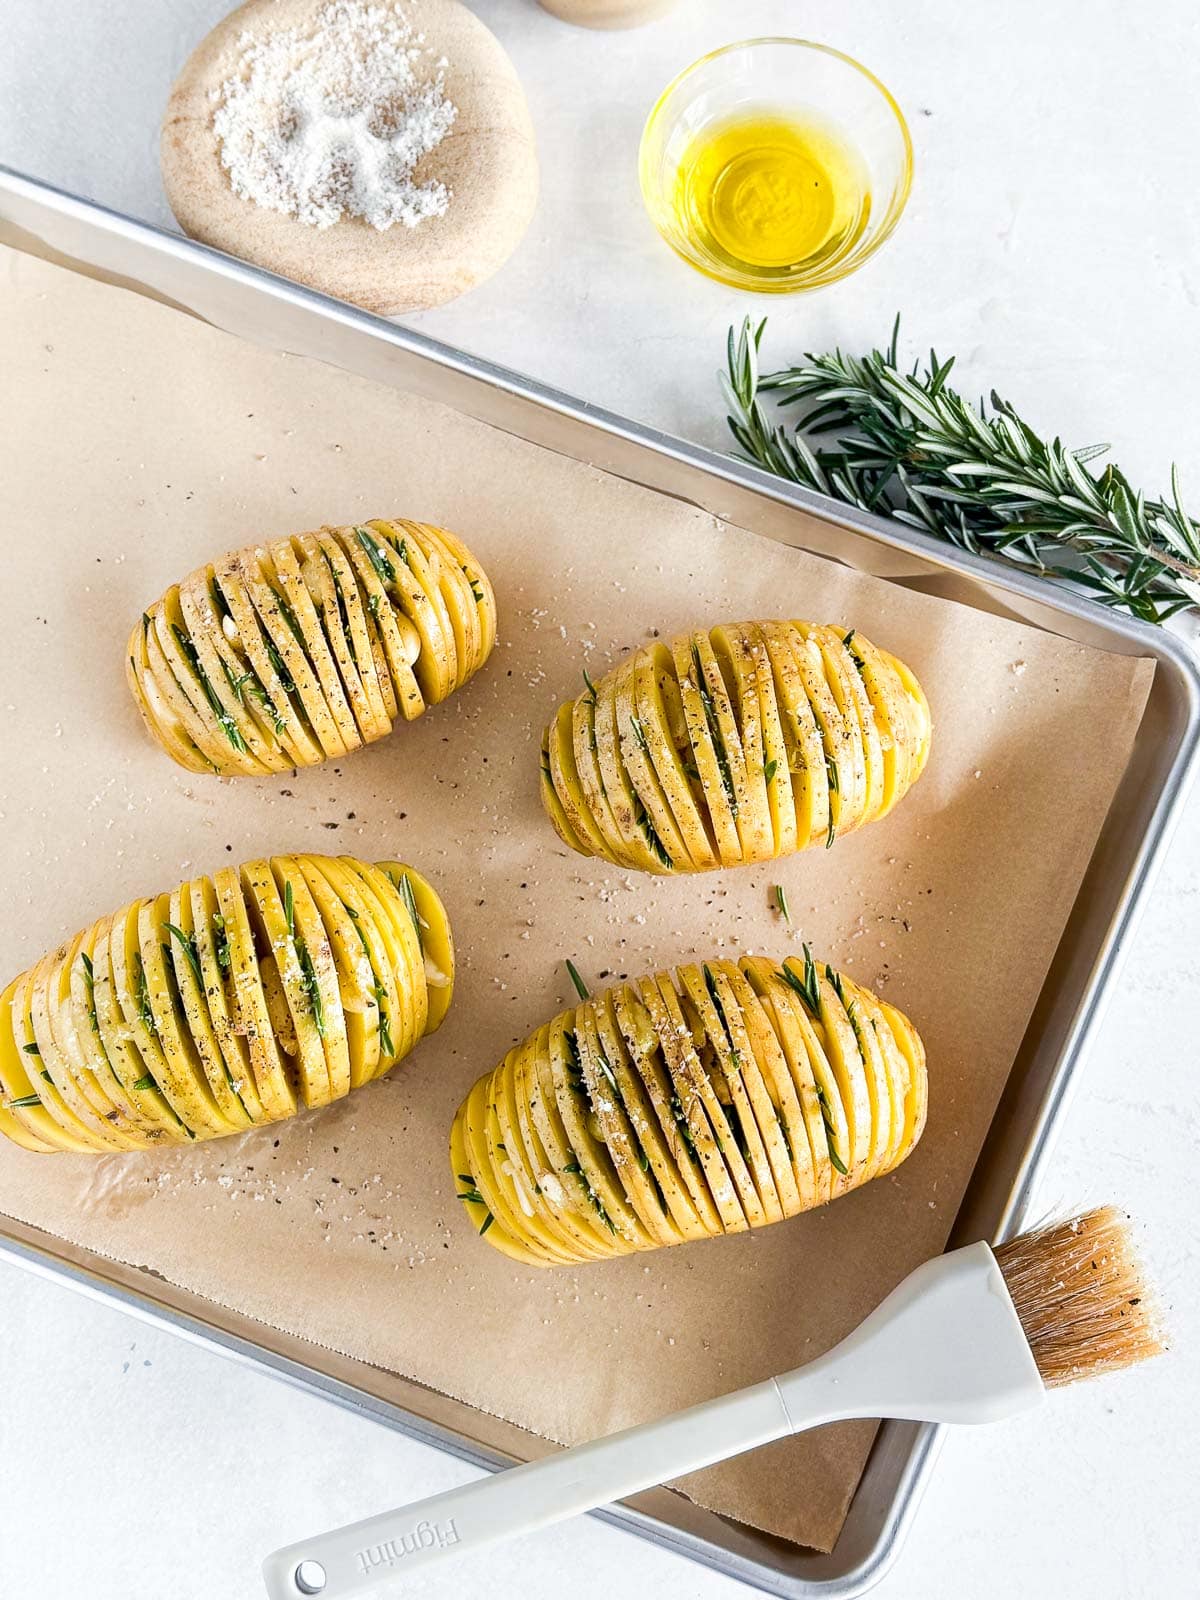
Step 4. Bake them at 425F. Line a baking sheet with parchment paper and spray it with olive oil. Sprinkle the pan with salt and pepper. Place the sliced potatoes over top, swirling them a bit to coat the bottoms. Make sure all the edges are coated with a little olive oil so they crisp up.
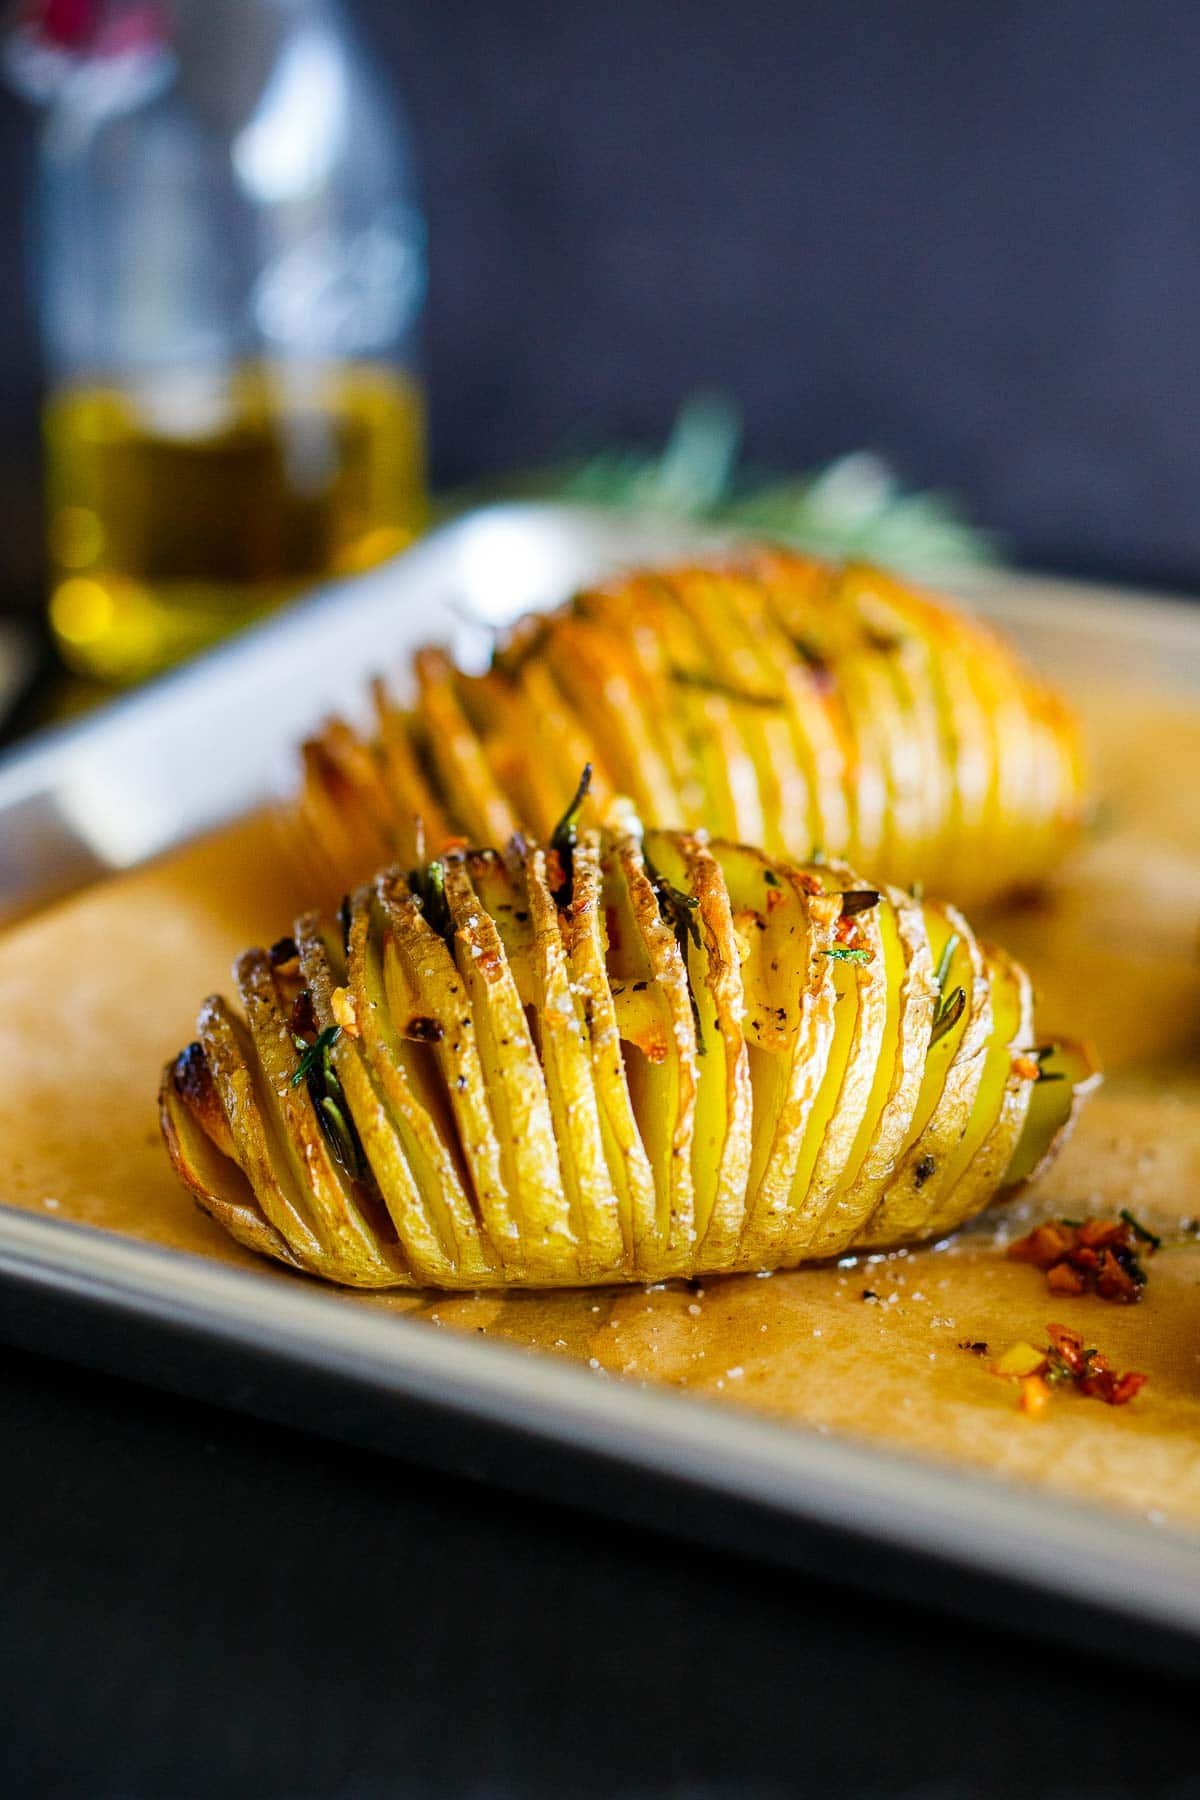
Step 5. Check at 30-40 minutes. At this point, the layers will start separating. Brush or respray the potatoes with a little more olive oil, making sure some of it drips down into the space between the slices. At this time, you could sprinkle them with parmesan cheese if you like.
Continue baking for 25 to 35 minutes until the potatoes are crispy on the edges and fork tender. For medium-sized potatoes, the total baking time is 60 to 70 minutes (if your potatoes are on the small side or larger, adjust the cooking time accordingly).
Note: Bigger potatoes may take longer, and if they begin to get too brown, lightly cover with foil and turn heat down to 400F until tender.
Hasselback Potatoes Serving suggestions
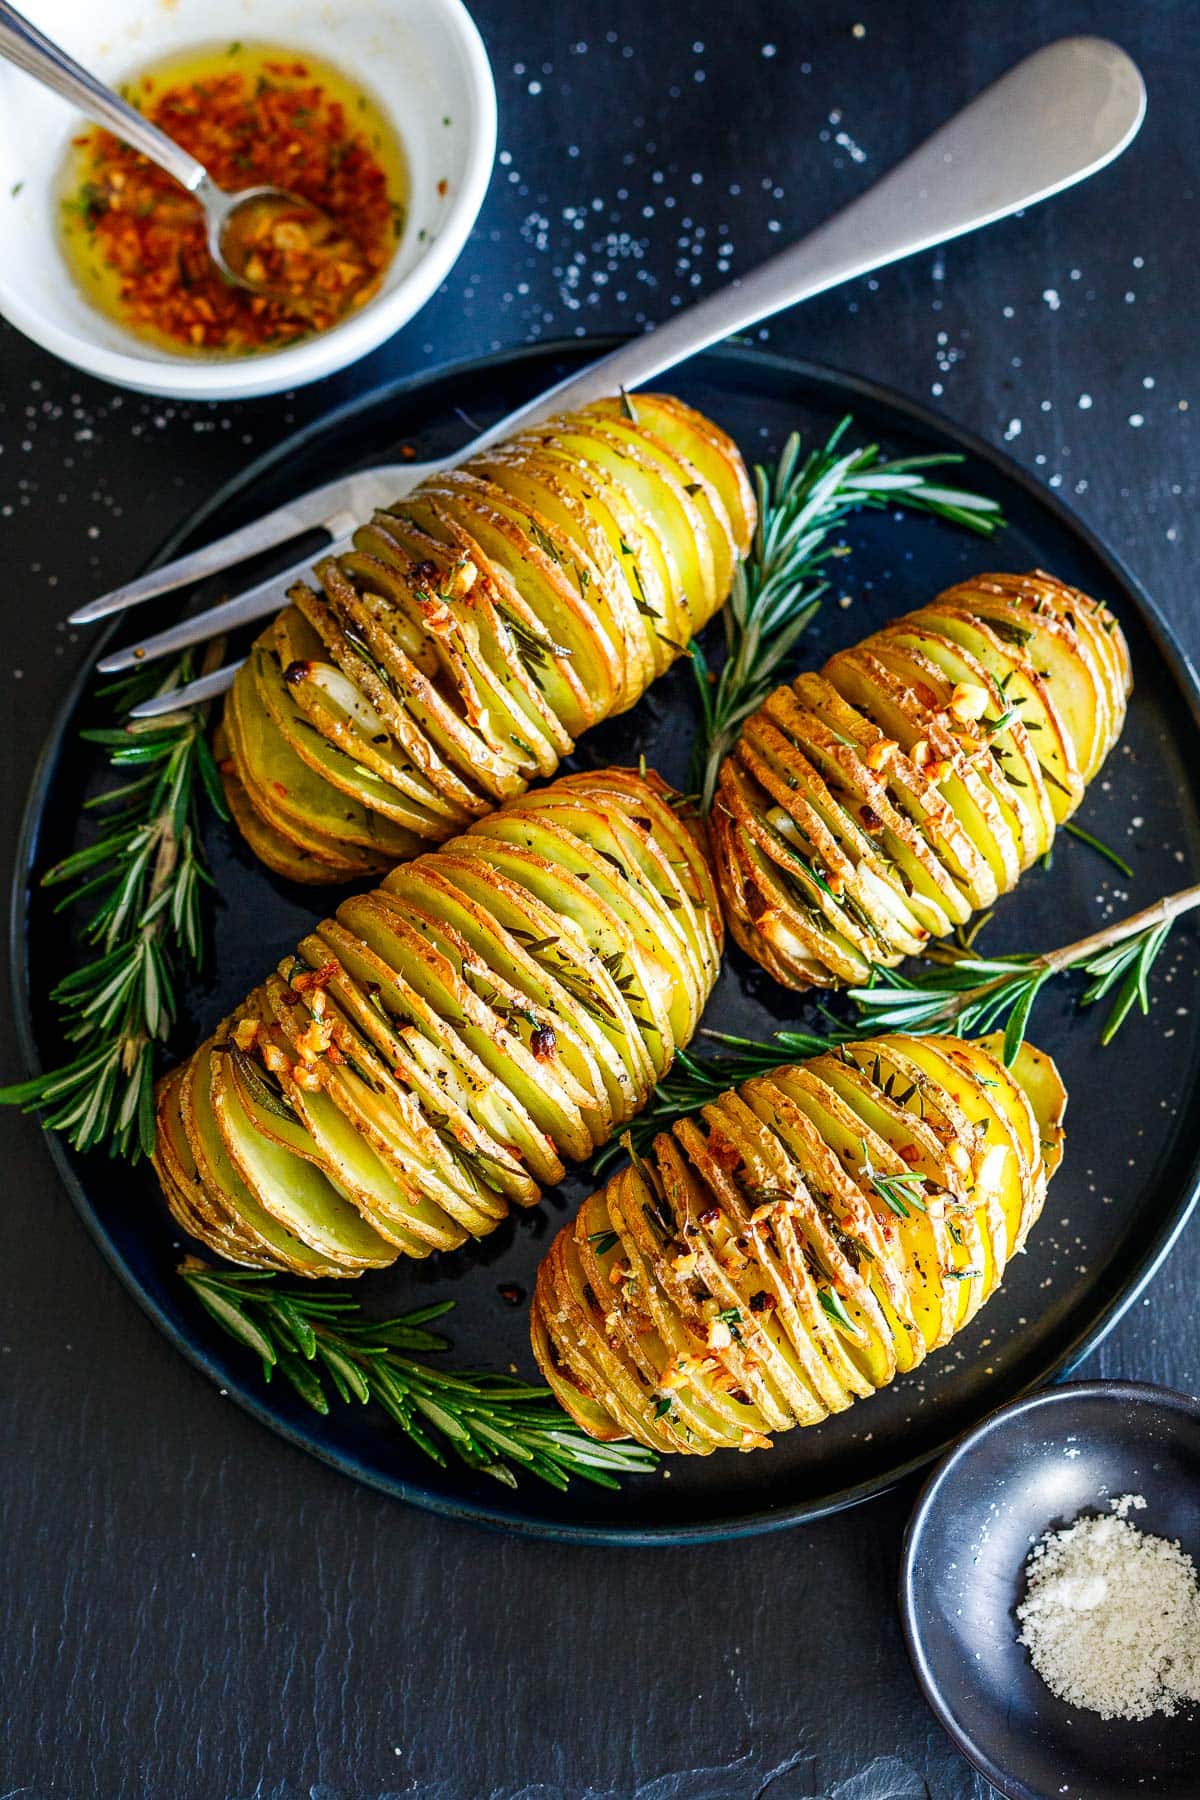
Serve while still hot and crispy, sprinkled with fresh herbs. A sprinkling of pecorino or parmesan would be nice too! Serve with melted garlic butter or for a creamy sauce, try it with our creamy dill sauce.
Storing Hasselback Potatoes
Leftovers will keep up to 4 days in an airtight container in the refrigerator. Reheat uncovered in a sheet pan in a 350 oven until crisp and warm.
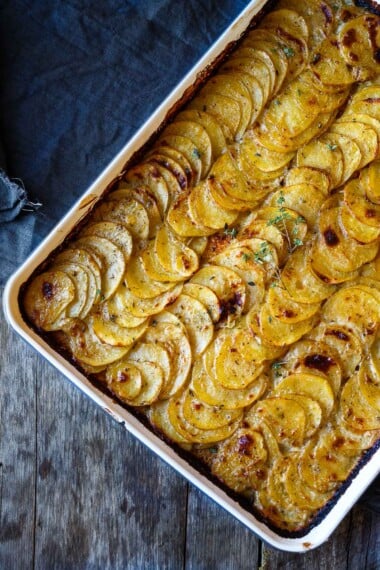
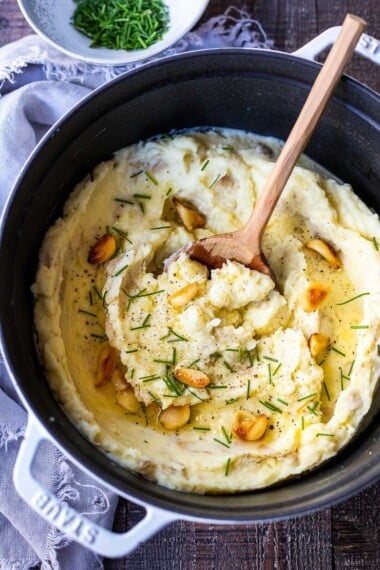
More Favorite Potato Recipes
Watch how to make Hasselback Potatoes

Hasselback Potatoes Recipe
- Prep Time: 20 mins
- Cook Time: 70 mins
- Total Time: 1 hour 30 mins
- Yield: 4-5 1x
- Category: Side dish
- Method: Baked
- Cuisine: American
- Diet: Vegan
Description
The best thing about this hasselback potato recipe is how easy and impressive it is! Crispy on the outside, tender on the inside, generously seasoned with olive oil, garlic, rosemary, and sea salt, they make a stunning side dish. Vegan and gluten-free.
Ingredients
- 5–6 medium to large Yukon gold potatoes, scrubbed, patted dry, but not peeled
- 8–10 garlic cloves, thinly sliced lengthwise
- 3 tablespoons fresh rosemary (or sub sage leave or thyme leaves)
- Salt and black pepper to taste
- 3-4 tablespoons olive oil- or spray olive oil.
Instructions
- Preheat oven 425°F with a rack in the lower-middle position
- Wash and dry the potatoes. Cut the potatoes into thin slices (1/8-inch thick) while keeping their bottoms intact. Placing a chopstick on each side of the potato ensures you won’t cut all the way through.
- Slice the garlic, very thinly, lengthwise. Slip a piece of garlic in every other slit in the potatoes. Tuck a rosemary leaf or two into the other slits. Note: Placing the rosemary and garlic in between the slices separates them and reduces cooking time. Sprinkle the insides with salt and pepper and spritz inside and outside generously with a spray of olive oil.
- Line a baking sheet with parchment paper and spray it with olive oil. Sprinkle the pan with salt and pepper. Place the sliced potatoes over top, swirling them a bit to coat the bottoms.
- Make sure all the edges are coated with a little olive oil so they crisp up.
- Bake the potatoes for 35-40 minutes. At this point, the layers will start separating. Brush or spray the potatoes again with a little more oil, making sure some of it drips down into the space between the slices.
- Bake for another 25 to 35 minutes, until the potatoes are crispy on the edges and fork tender. Bigger potatoes may take longer….and if they begin to get too brown, lightly cover with foil and turn heat down to 400F until tender. Total baking time is 60 to 70 minutes for medium-sized potatoes (if your potatoes are on the small side or are larger, adjust cooking time accordingly).
- Garnish with fresh rosemary leaves.
Notes
Variations- feel free to sprinkle with parmesan or pecorino cheese the last 10-15 minutes of baking, or make melted butter and brush over the baked potato or garlic butter, or serve with sour cream.
Leftovers will stay in the refrigerator for up to 4 days.
Nutrition
- Serving Size: 1 potato
- Calories: 219
- Sugar: 2.5 g
- Sodium: 429 mg
- Fat: 7.5 g
- Saturated Fat: 1.2 g
- Carbohydrates: 35.9 g
- Fiber: 6 g
- Protein: 3.9 g
- Cholesterol: 0 mg

I love this recipe!
Potatoes made this way are amazing. Every recipe on this site is perfect!
Happy to hear you are enjoying Allie!
We love these potatoes! You can you a diverse array of seasonings on the potatoes that season each slice. We love garlic and onion powder or spice it up by adding additional spices, like cumin, smoked paprika, dark chili powder and chipotle powder. Yummy 😋
Glad you are enjoying Monica!
This elegant looking dish is actually so easy to make, and the texture is the perfect combination of crispy and creamy. Delicious!
Great to hear Peggy!