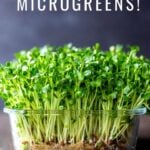
How to Grow Microgreens at Home! Here’s a simple, step-by-step guide on how to grow microgreens (like broccoli sprouts) indoors to add to grain bowls, sandwiches, or wraps. Not only are they packed full of nutrients, but they are also guaranteed to bring a little joy. Video.
Your heart is full of fertile seeds, waiting to sprout. ~Morihei Ueshiba
It is hard not to smile when you see your first batch of broccoli sprouts reach up to the sun, especially in the midst of winter. We all crave sunlight; nothing is more magical than watching these little guys turn their faces to the sun. Such a simple thing, but it never fails to lift my spirits.
Microgreens like broccoli sprouts are packed full of nutrients- so much more than their full-grown counterparts. I once read somewhere that eating “living” foods adds years to our life while eating “dead” foods removes years from our life. Broccoli sprouts, in particular, have more sulforaphane than any other veggie.
I always think of this when eating them. They are about as living as you can get! Plus, they are just so cute. Right? They make everything better. Add them to things you already make – salads, wraps, sandwiches, buddha bowls. Top off your soups or entrees with them, and add to juices and smoothies. Not only are they highly nutritious- they are very flavorful!
What you need to grow Microgreens
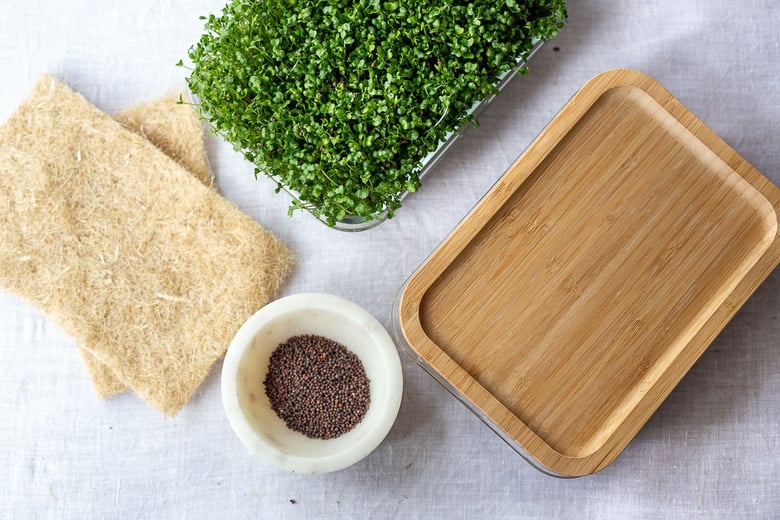
- Glass or ceramic container with a lid or covering
- grow mat or pad (hemp, coconut, jute or natural fiber)
- sprouting seeds (see list below)
- water – and a spray bottle is nice!
- a sunny window
***Here is a handy Microgreens Kit we sell at our Shop!
What is the difference between Microgreens and Sprouts?
In essence, sprouts and microgreens are the same seed, but at different stages of development. Microgreens are “mature” sprouts, which have been allowed to grow a little longer to the stage where they have visible leaves. Because of their tiny leaves, microgreens have much more flavor and possibly more nutrients than baby sprouts. Because you can keep them alive up until you cut them, they last much longer than sprouts.
Sprouts can grow in a jar with just water, where microgreens need a base- either a growing pad or soil. Both microgreens and sprouts can be grown indoors.

Microgreen Seeds (that can grow on a mat)
- Broccoli seeds
- kale seeds
- peas
- arugula
- radish or spicy radish
- amaranth
- chia
- mustard
- beet
- buckwheat
- chard
- cabbage
- cilantro
- fenugreek
- basil – opal basil is pretty
*Sunflower sprouts require soil for germination.
How to grow microgreens (in a nutshell)
- Soak the seeds 6-8 hours, or according to package directions.
- Soak the growing mat with water, and place in a container or baking dish.
- Spread out the seeds.
- Cover tightly and place near a window until the seeds sprout 2-3 days.
- Remove lid, and let grow until vibrant leaves appear.
- Water daily.
How to Grow Broccoli Sprouts (Step-by-Step)
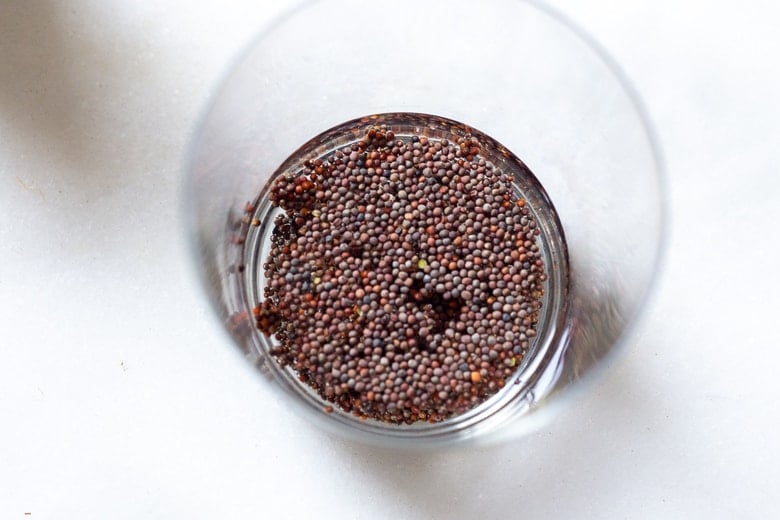
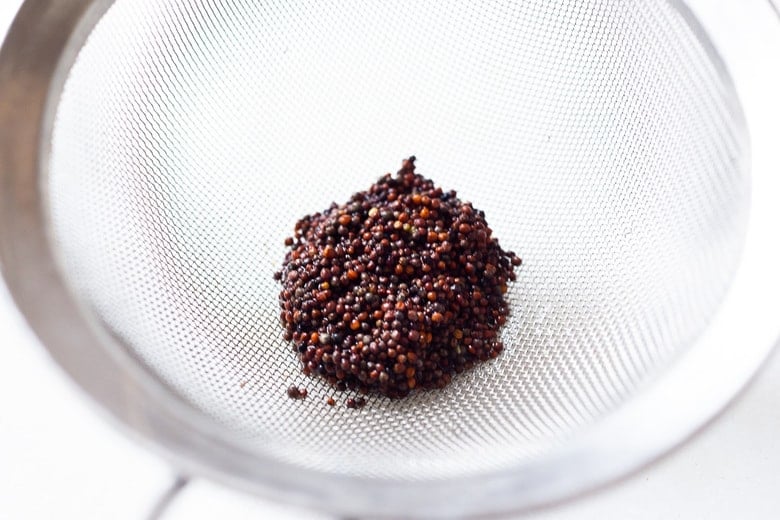
Step 1. Soak the seeds, according to package directions, then drain the seeds.
Step 2: Here I’m using a 5″ x 7″ inch glass container with a lid. Prepare a growing mat.
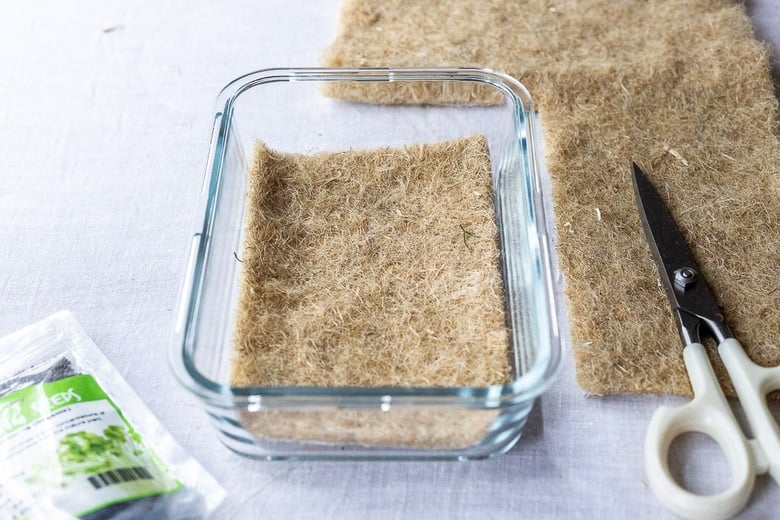
Soak the growing mat well. Here I’m using a natural jute mat. You can find these on Amazon or here at our shop.
You’ll need a new mat for each batch you grow, because the roots tend to really hold on, but they are relatively inexpensive.

Place the drenched growing mat in the container.
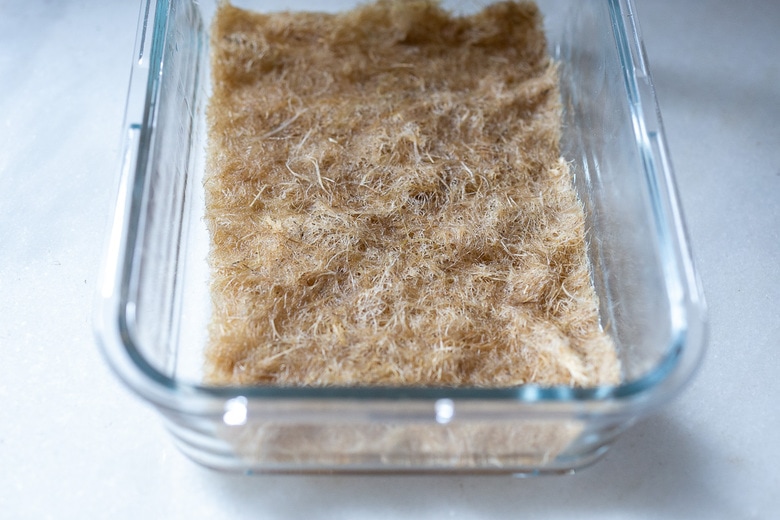
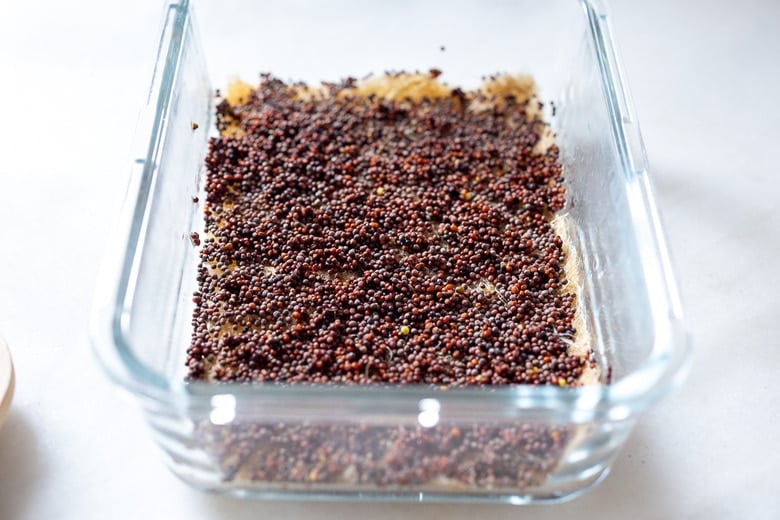
Step 3: Spread out the seeds as evenly as possible. I use 2 tablespoons seeds for a 5×7 inch area. If your seeds seem dry, spray with water. You don’t want them standing in water, just very wet.
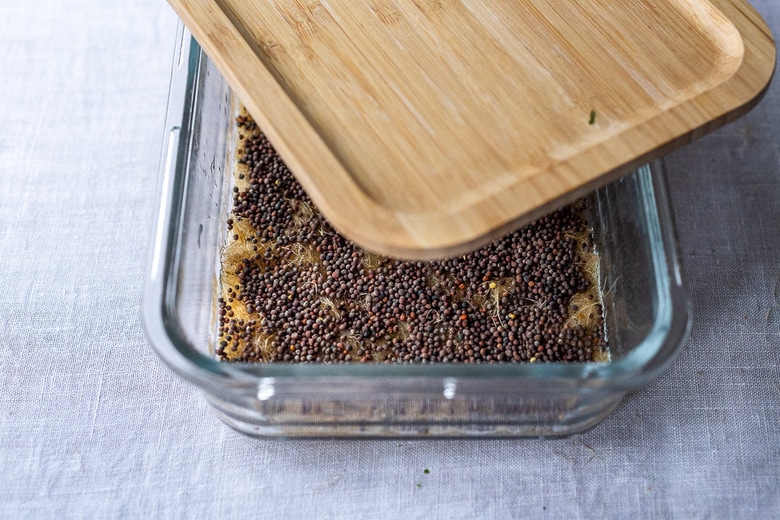
Step 4: Cover and place by a window until they sprout. This may take up to 5 days in cold climates or 1-2 days in warm climates. Soaking them does help them sprout faster.
This was after day 2-a couple of little sprouts.
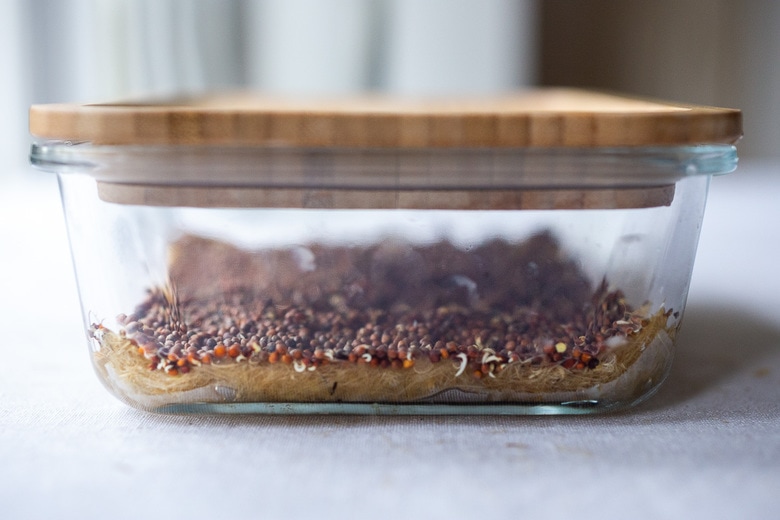
This was after day 5.

Step 5: When most of the seeds look sprouted, remove the lid. Water daily so the growing mat stays nice and moist. If you see any white fuzz- please see the troubleshooting section; it is most likely fine!
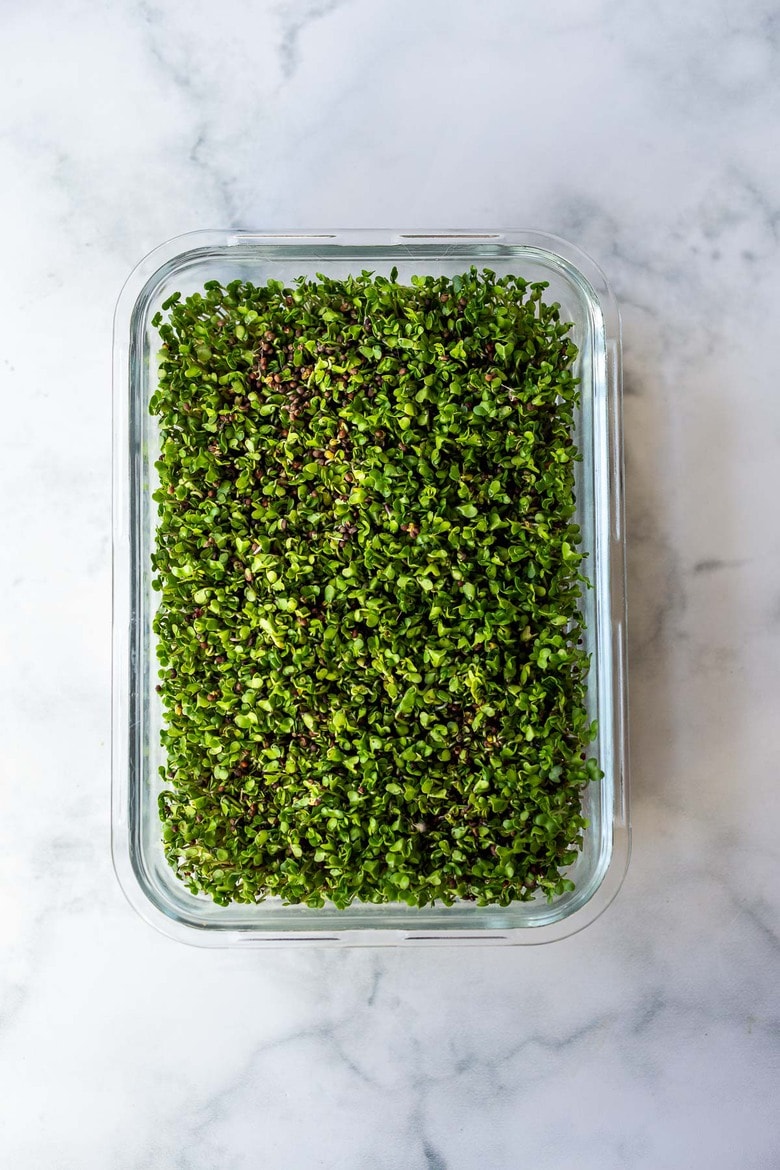
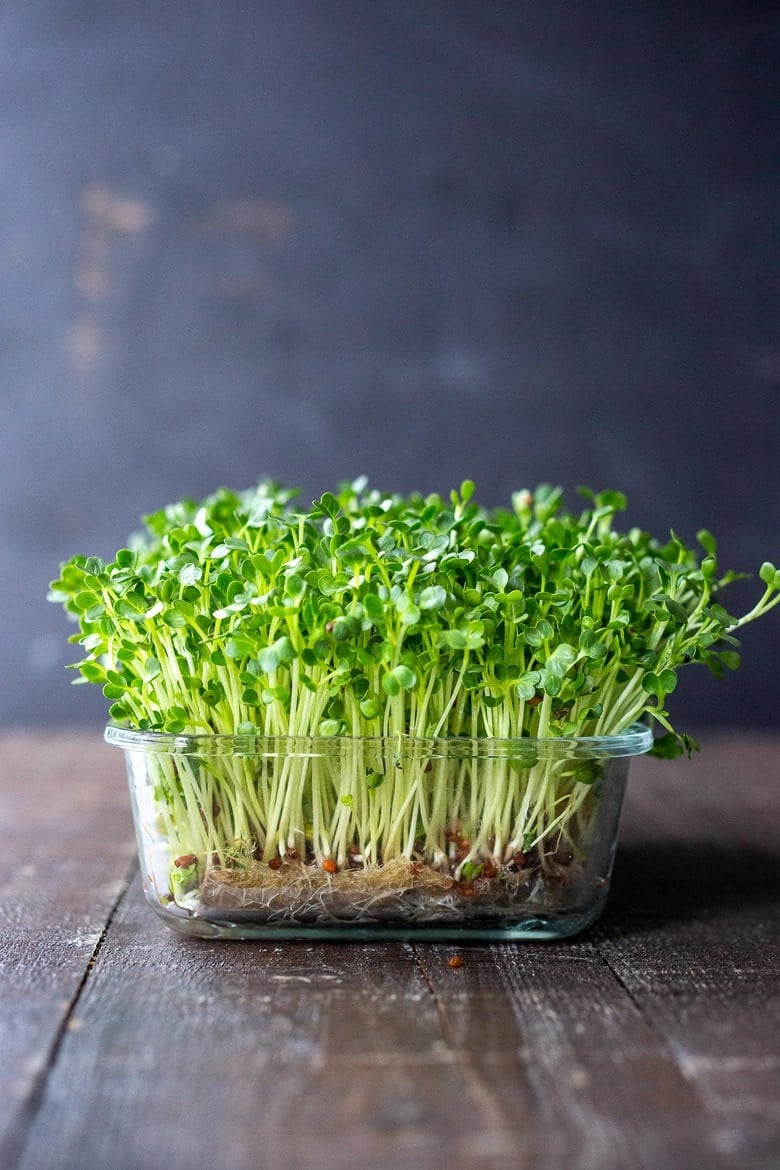
This photo above is day 10, the microgreens are still below the top of the glass.
Step 6: Continue watering daily. After the sprouts take root, you can water generously and then pour out the extra water; the sprouts will adhere to the mat.

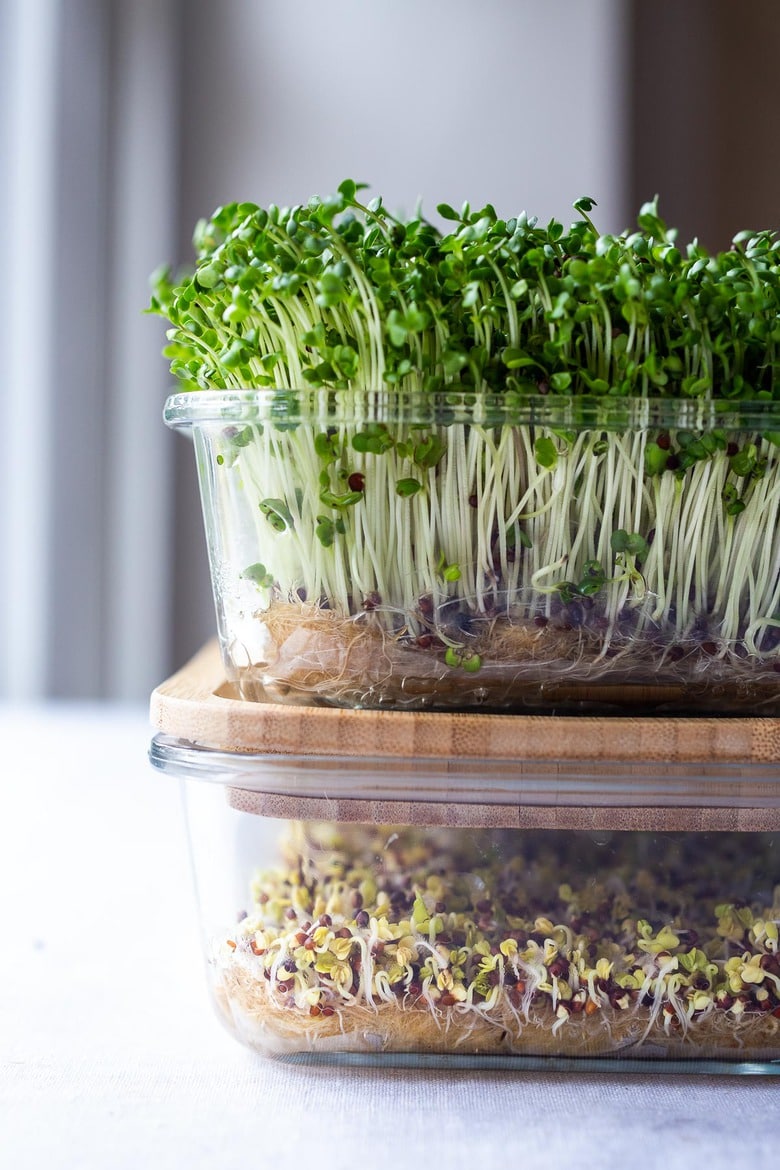
This is day 14. Wait to use the microgreens until they peek over the container.
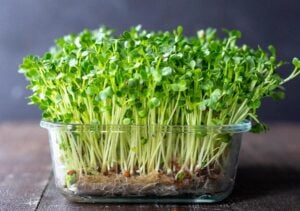
Step 7: They are ready to use! Cut what you need for that meal, letting the rest continue growing. I like to have two batches growing…
Troubleshooting
If your roots grow fuzzy white strands within the first few days of germinating, it is easy to mistake this as mold. It is most likely not!
How to tell the difference between root hairs and mold? Fuzzy root hairs grow directly from the base of the sprout itself. Mold on the other hand, appears as a spiderweb-like substance that grows on top of the seeds.
MicroGreen FAQS
- Do you need lots of light to grow Microgreens? No. Microgreens can grow indoors in the dead of winter, even in low light conditions, if placed near a window. Colder climates require a longer growing period (2 weeks) where warmer climates can produce microgreens in 5-7 days.
- What are the healthiest Microgreens? Broccoli sprouts are one of the most nutrient-dense microgreens you can grow. They are full of glucoraphanin and sulforaphane which are known to prevent cancer. They are highest in minerals and vitamins, so I usually grow these along with another flavor.
10 Health Benefits of Microgreens (Broccoli Sprouts)
- Cancer-Fighting Many microgreens, especially broccoli, contain high levels of sulforaphane, which research shows inhibits the growth of cancer cells.
- Prevents chronic disease. Microgreens have many health-promoting micronutrients to help stave off major diseases.
- High in Minerals. Microgreens have larger quantities of minerals than their vegetable counterpart.
- High in Antioxidants.
- May lower cholesterol
- 40 times more nutrients than their mature plant counterpart.
- Helps with weight management
- Microgreens are considered a prebiotic which feeds good bacteria in the gut.
- Possibly lowers blood pressure
- High in Vitamins A, Beta Carotene, C, E, K and Lutein.
Ways to use Microgreens
- Use on soups for a bright pop of color! Curried Cauliflower Soup
- Use on Buddha bowls: Our best Buddha Bowls!
- Use on salads: 40 Must-Try Vegan Salads
- Add to sandwiches and wraps!
Growing microgreens is truly very simple and easy! Such a joyful thing to do in winter when we all could use a little pick-me-up. Here is our Microgreens Kit we sell at our Shop!
Give them a try and enjoy all the flavor and health benefits they bring.
If you enjoyed this, be sure to check out our DIY All-Purpose Cleaning Spray or Homemade Mosquito Repellent!
xoxo
Watch How to grow microgreens | Video
How to Grow Microgreens
- Prep Time: 15 mins
- Cook Time: 14 days
- Total Time: 14 days
- Yield: 5"x7" flat container. 1x
- Category: how to, projects, diy,
- Method: grow,
- Cuisine: vegan
- Diet: Vegan
Description
How to grow microgreens indoors in 1-2 weeks, using no special equipment. Enjoy the tremendous health benefits of consuming microgreens daily- adding to meals you are already making. Plus 10 Health Benefits.
Ingredients
- 2 tablespoons sprouting seeds- broccoli seeds, radish, kale, chard, arugula, cilantro, chia, buckwheat, etc.
- 5" x 7" inch container with lid (or use plastic wrap or beeswax wrap)
- 5" x 7" inch growing mat
- water
- window
Instructions
Soak seeds according to directions on the package (6-8 hours). This will hasten sprouting time. Drain. (Alternatively, if you choose, you can skip soaking and spray the seeds with water using a spray bottle, once they are on the mat. This is what I typically do.)
Soak the growing mat (you want this quite wet) and place it in the container.
Spread out the seeds as evenly as possible- sometimes giving the container a little shake will help.
Cover tightly and place near a window. If you don’t have a lid, use plastic wrap or bees wrap, to keep the moisture in. (If it is freezing outside, place it a foot away or so). Inspect daily.
When most of the seeds have sprouted- this may take up to 5 days-remove the lid. (You may notice some white webbing- this is OK). Keep by the window and water daily. As the sprouts get rooted in the mat, you could drench the pad with water, then pour off the extra water.
Let the sprouts grown into tall microgreens, with little leaves, 7-10 more days, watering daily.
To use, cut off what you need at the base, with scissors, leaving the rest to grow. Sprouts keep best if they are growing! If you absolutely must store them, place them in a sealed zip lock back with damp paper towels in the fridge. They will keep 5-7 days.
Notes
Refer to the package for soaking instructions as each seed is different.
Nutrition
- Serving Size: ½ cup
- Calories: 10


quick question- do you reuse the growing mat or throw it out after each batch of sprouts? thanks
Hi Jo- I use a new mat each time!
How to grow beetroot sprouts
Hi Danet- you can use thi same technique!
Hi! I attempted to grow arugula and basil microgreens. The basil ones are doing great however the arugula ones not so much. Is it possible to over water them? They seem waterlogged. Is it too late to save them?!
Hi Caro, Yes they can get too much moisture. Are they able to drain in the container you are growing them in? I have better success when using a plastic clamshell container with drainage holes. Misting rather than watering helps too.
Is the bamboo lid more prone to mold than other options?
Hi Margaux- yes, you need to be a little more careful, I’ve had it happen once, but since then I am just more careful about letting them dry before storing.
Hello. I was wondering if i used a piece of cheesecloth instead of the grow mat. Would that work? By the way thanks for your great instructions, I cant wait to get started. I have the seeds already
Hi, I have never tried that, so not sure? I think it is worth a try!? Let us know how it goes. 🙂
Is there a way to do this without the mats?
Hey Pam, I have not had luck growing these without a grow mat, but you are welcome to try! Let us know how it goes!
Can you reuse the mats, or do you toss them?
Hi Kat, I do not reuse the mats.
My microgreens sprouted on day 2, day 3 they have that fuzzy white fungal looking growth. I am afraid to continue. I covered my glass container with seran wrap as I did not have a lid. Could that be the cause? I used a soaked coconut growing mat & broccoli seeds. Thanks
Hi Karen- that has happened to me to and they turned out fine and it went away- try just leaving uncovered right now, but misting often so they don’t dry out.
Hi Sylvia, I talked to a master gardener some years back about growing broccoli sprouts and he told me that you had to grow these in actual dirt and not a growing medium. I have no idea why and it really doesn’t make sense to me. Do you know anything about this? Thanks.
Hey Wendy! I bet he was taking about sunflower sprouts. That makes more sense. 🙂
Hello, where do you buy your microgreen seeds? Thank you!
Hi Susan! We sell them at our Bowl and Pitcher store or most upscale grocery stores like Whole Foods carry them. Or you can buy on Amazon. Look for organic seeds.
You got me making water kefir (looove- especially w pineapple & raspberries!! Beautiful colour & taste. ) and now you got me to grow my first batch of microgreens. Bought seeds online.
Can one use just “standard” veg & herb seeds from the supermarket, e.g. broccoli, or must it be special “microgreen” seeds? I guess I can just try & see if they sprout!
Hi Su V! Glad you are enjoying the water kefir. As for Microgreens, regular seeds should work fine.Yes, try and let us know!
Where is the best source for seeds to make micro greens?
Hi Barbs, most upscale grocery stores like Whole Foods or Co ops have them! You can also buy online.
After reading this post it incentivized me to try them at home so I ordered your starter kit. Excited to see the results. Will be a great gift too. Thanks!
Great! Keep us posted on how it goes.
Best tutorial I’ve seen online. Thank you.
So happy this was helpful Miranda!
Thank you
This is the best explanation I have found on line. I love trying new things and this will be perfect especially during the winter months when our local Farmers Market is closed.
Thanks, Patricia! glad you found it helpful.
It was very well presented. Tks
Thanks so much Stanley. 😉
1. Do you water during the germination period (while it’s covered)?
2. Do you keep them in darkness during germination?
Thanks!!
Hi Joy, no need to water if they are wet to start, no darkness, just covered. 🙂
Thank you!
Can you reuse the growing pad or so I need a new one every time?
I use a new one every time. Feel free to try though…
Love your explanation of the difference between sprouting seeds & Microgreens. I’ve never had any luck with the mats, my seeds always get stuck and the germination rate is very low, so I’m stuck with growing medium. Your example is so bountiful! Looks amazing
Thanks- it is suprsingly easy!
Is the microgreens kit on your website organic?
I think so? You’ll have to ask Jill on her Bowl and Pitcher site. 🙂
I’m put off by the smell. Like leaving broccoli out on the counter… any tips on controlling the odor?
Hey Kara! Yes it can be off-putting. but that smell is the sulforophane present in the broccoli, which is what makes it so highly nutritious! So I’ve “trained” my brain to think of it as a “good” smell. 🙂 I dont think there is a way to control it other than where you place it. 🙂