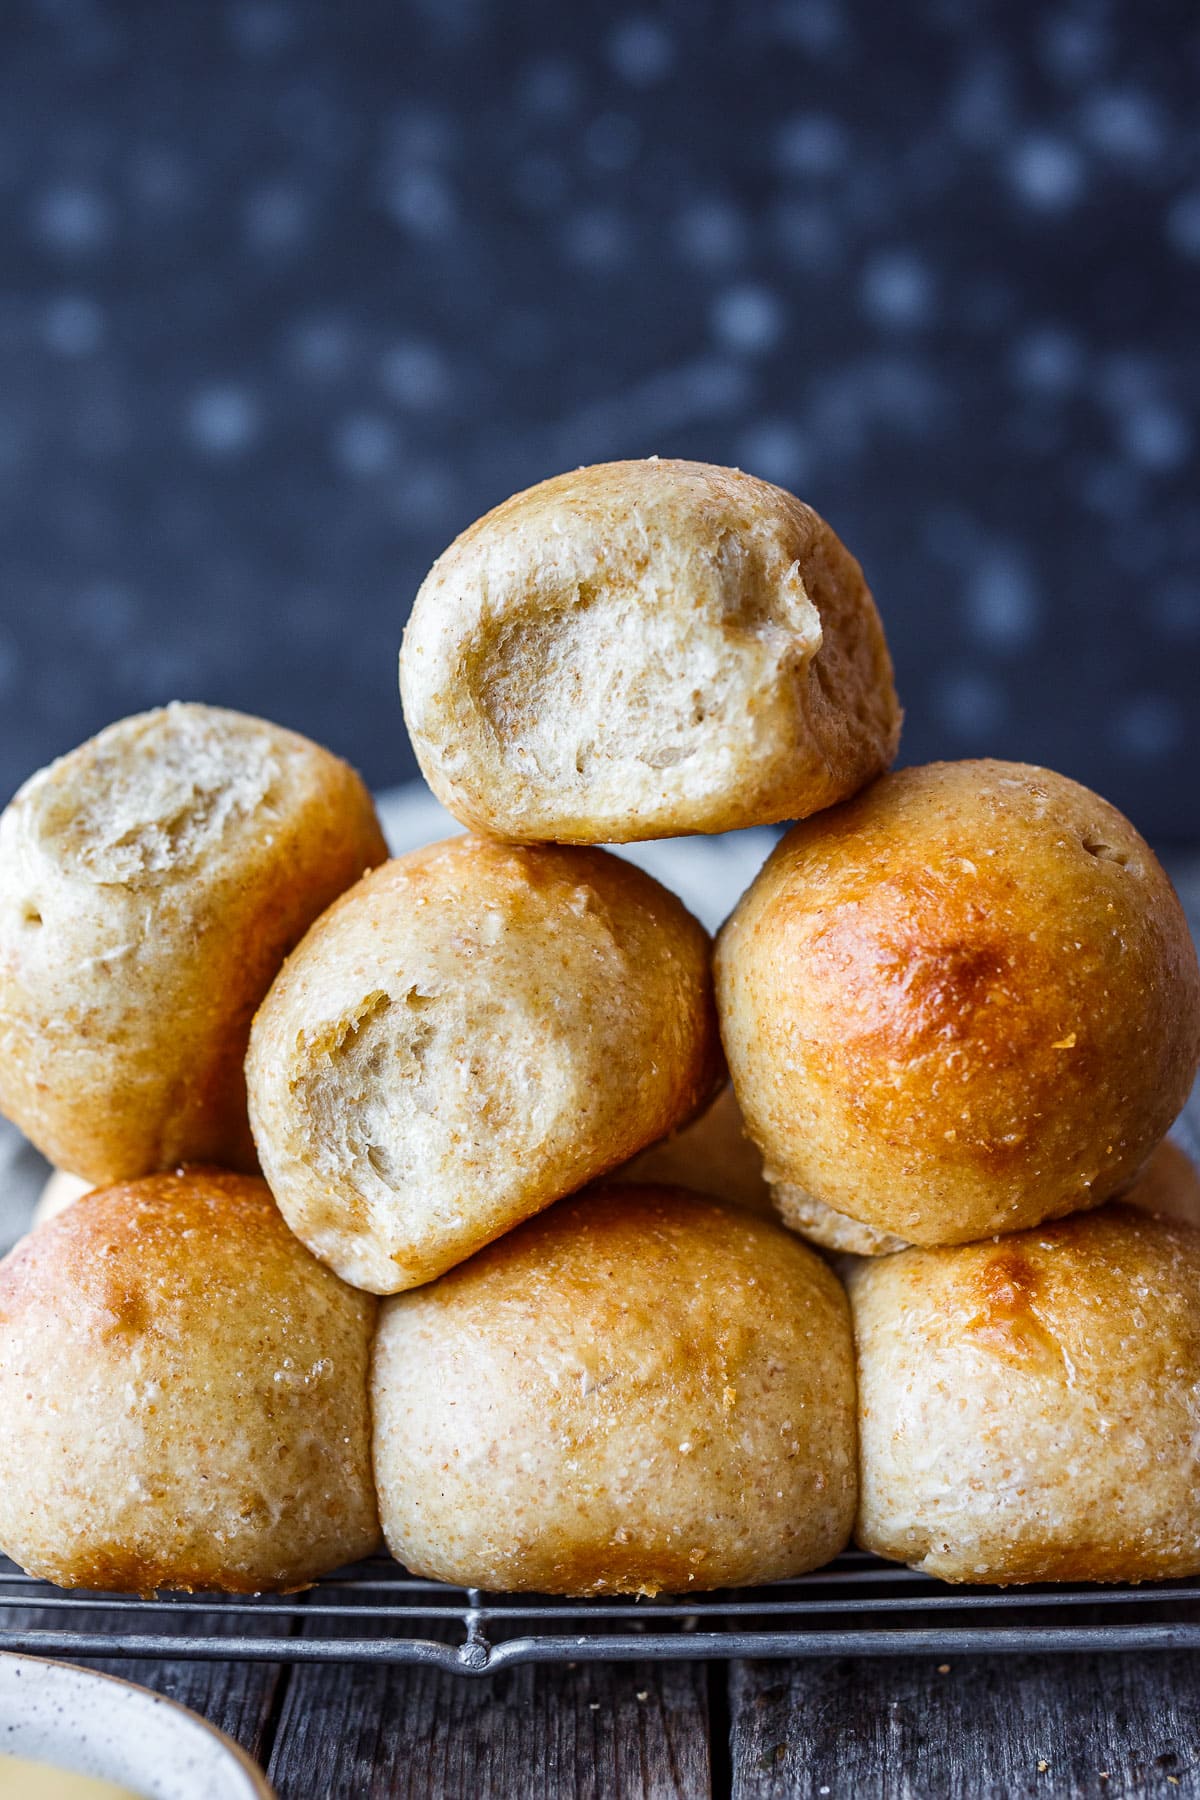
Perfectly tender and ultra-flavorful Soft Sourdough Rolls are made with active sourdough starter, and no yeast. Make in one day or refrigerate overnight. They freeze well and are vegan-adaptable. Watch the video!
How you love yourself is how you teach others to love you.
Rupi kaur
These Soft Sourdough Rolls have it all (as far as rolls go). They have a sophisticated tenderness with some substance to them, not mushy, light with the perfect springiness.
It is hard to beat the fullness of pure sourdough flavor with just a hint of tang without being overly sour. However, you can always extend the rise time if you prefer a zestier flavor.
A fun project when you are cozy at home all day. They don’t take a lot of hands-on time, but they do need a bit of tending throughout the day. The whole process takes about 7-8 hours. So if you start them around 7 or 8 am you’ll have delicious fresh rolls for dinner.
We love adding wheat or rye flour, it really boosts up the flavor and gives a little more substance to the texture. Feel free to go all white bread flour for ultra-soft tender rolls.
For a faster project try Sourdough Biscuits or Sourdough English Muffins made with sourdough starter discard.
Table of Contents

Sourdough Roll Overview
- Feed and activate starter 8-12 hours before you begin. The evening before is perfect.
- Mix dough together. Rest 30 minutes to 1 hour.
- Stretch and Fold 3 rounds, 30 minutes apart. Proof dough 2 hours.
- Shape into rolls. Proof 2-3 hours. (or place in the refrigerator overnight)
- Bake at 350 for 25-30 minutes. Internal temperature is perfect at 190 F.
Ingredients In Sourdough Rolls
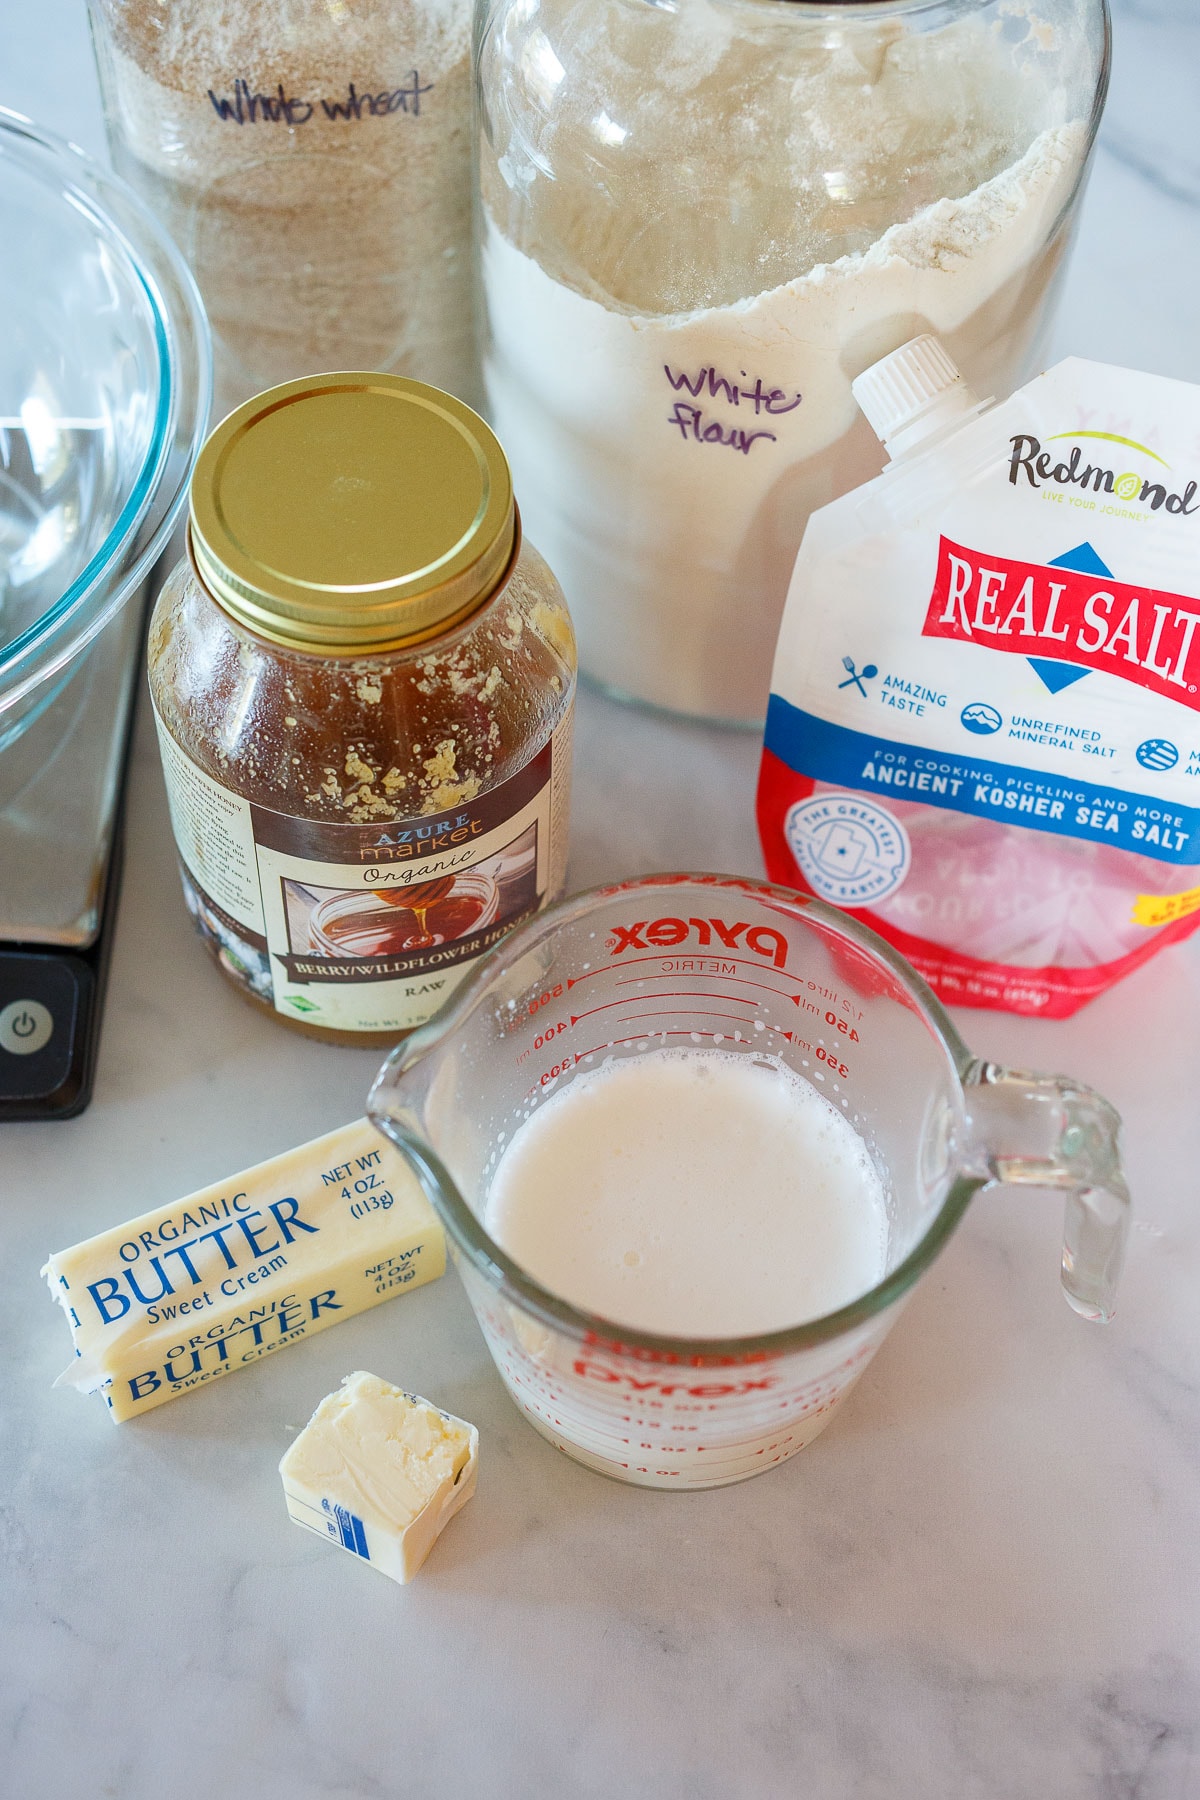
Ingredient Notes
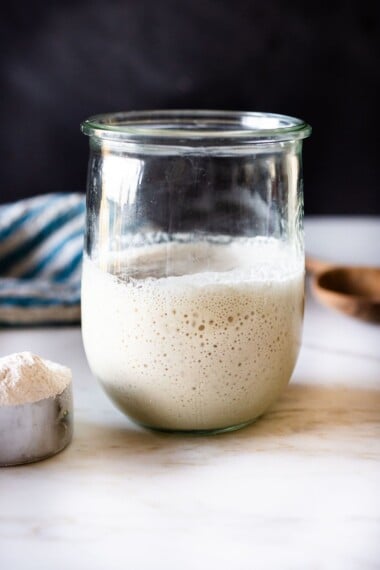
- active sourdough starter– get this going the night before
- whole milk or rich plant-based milk– you can really use any liquid, rich milk (or some sort) will make the rolls soft.
- rye flour– gives lovely flavor and texture, substitute with wheat or white bread flour
See the recipe card below for a full list of ingredients and measurements.
How To Make Sourdough Rolls
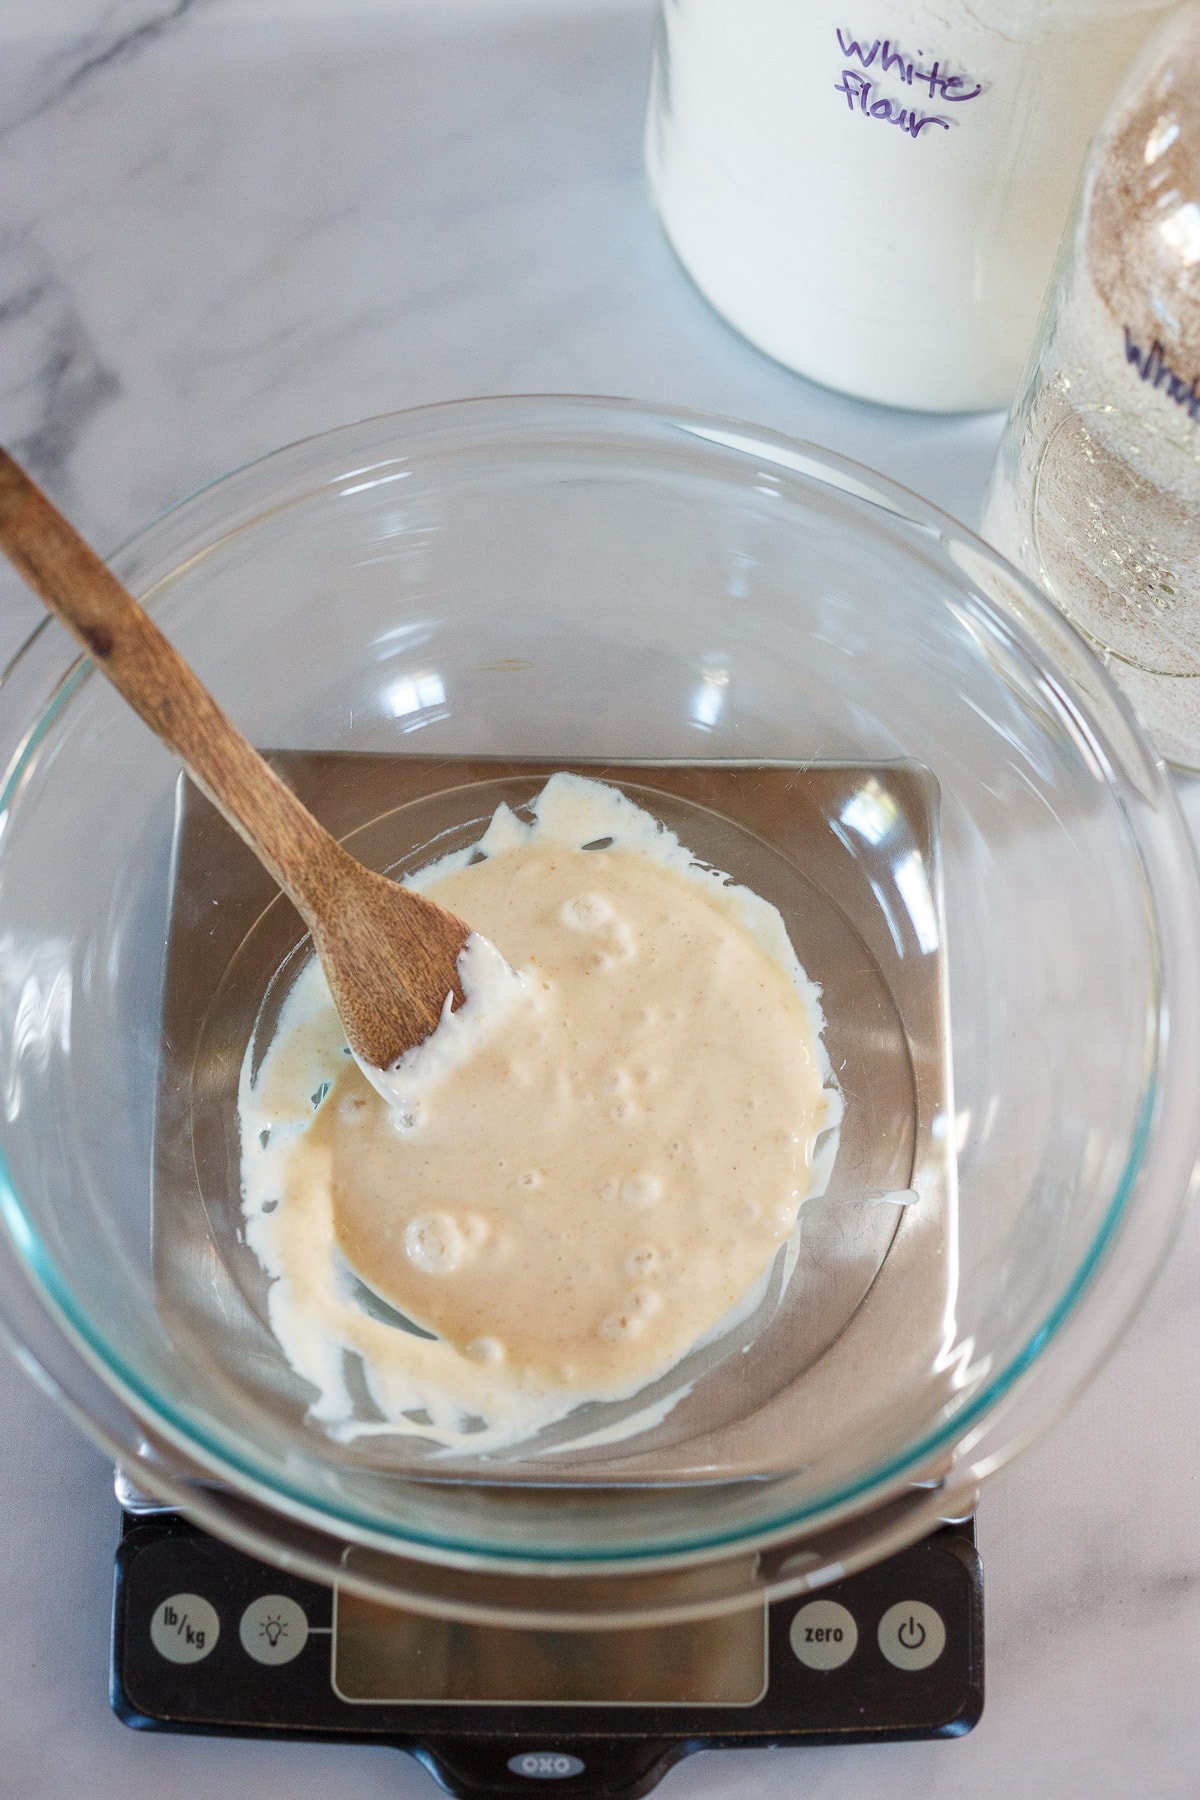
STEP ONE – Activate your starter the night before (or at least 12 hours ahead). Combine 15 grams of starter, with 50 grams water and 50 grams bread flour mix thoroughly. Loosely cover and leave out at room temperature.
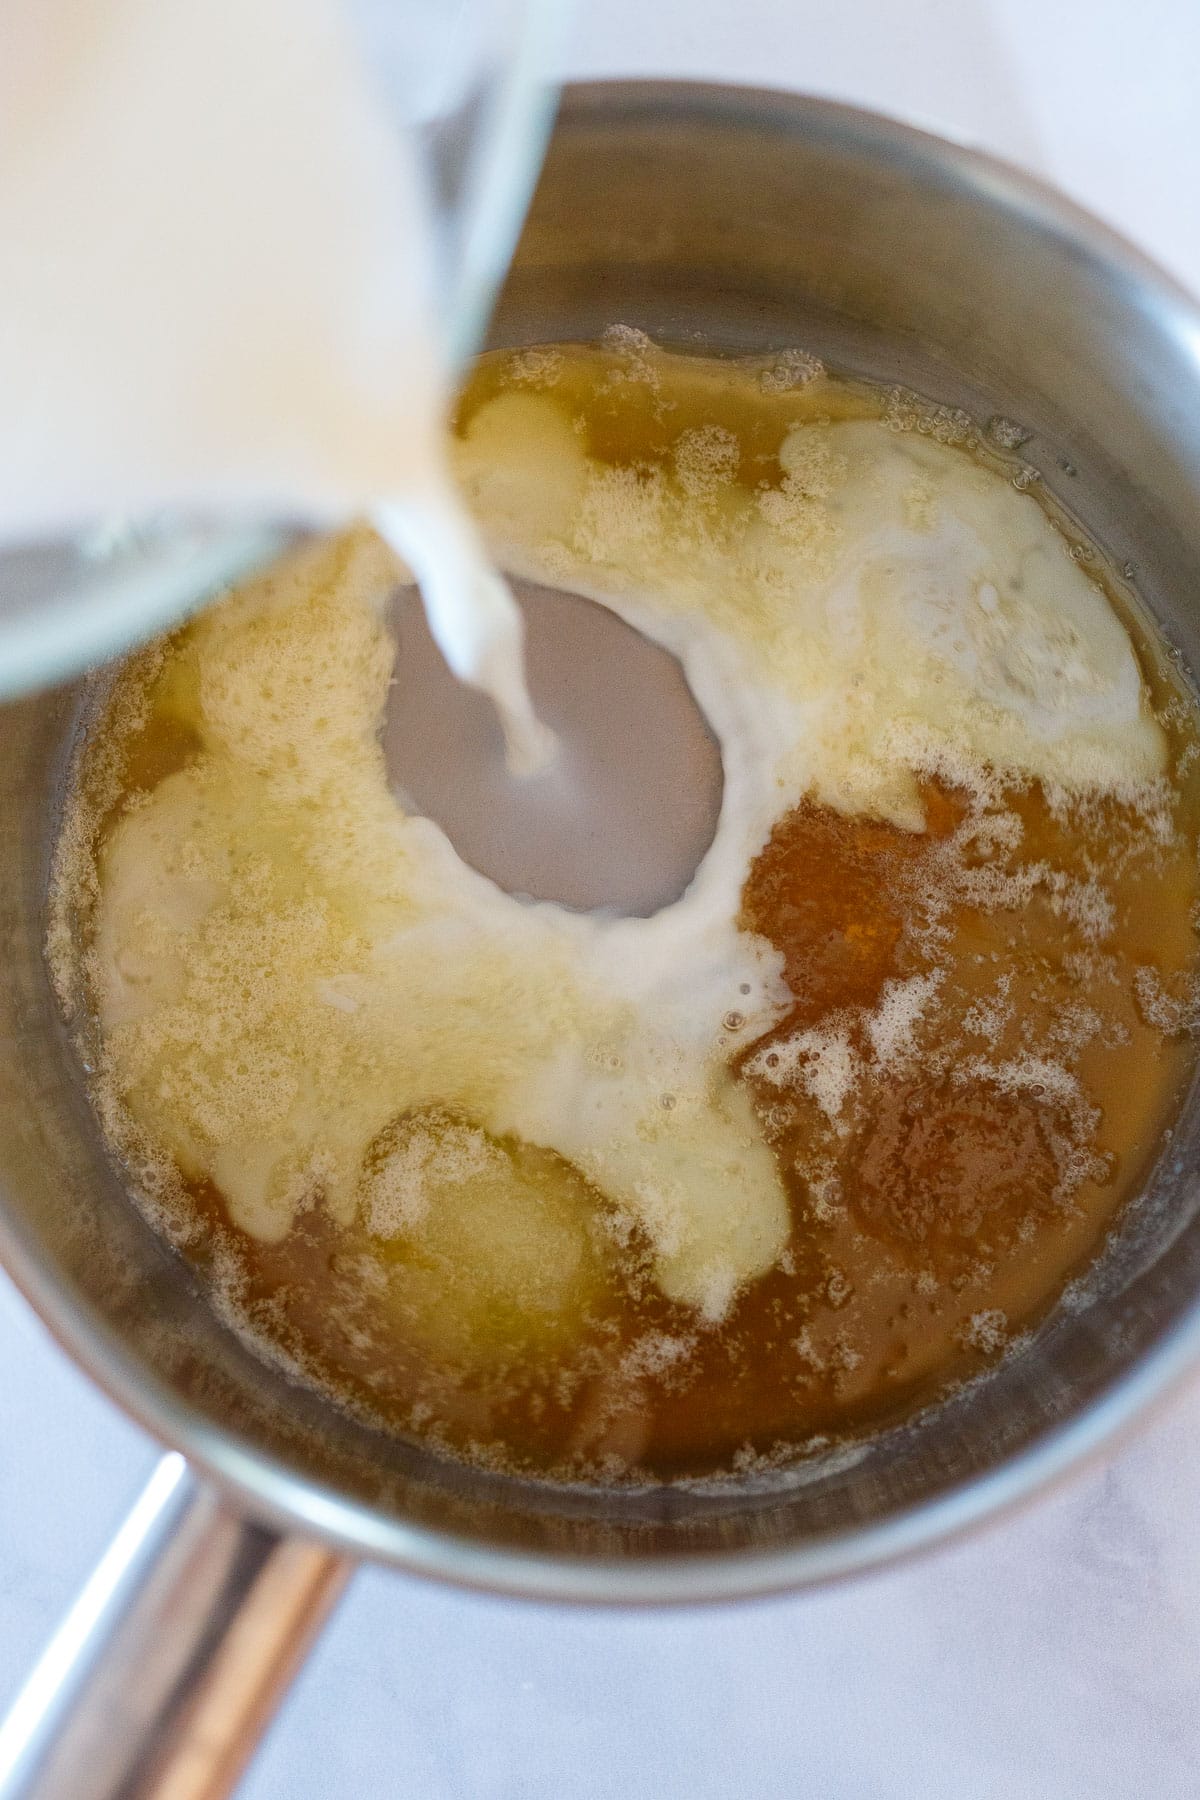
STEP TWO – In the morning in a small saucepan, melt butter, add salt, honey and milk. Turn heat off. The milk mixture should be warmed to about 95 F degrees.
If using olive oil instead of butter, simply just gently warm all ingredients together. This should only take a minute or two.
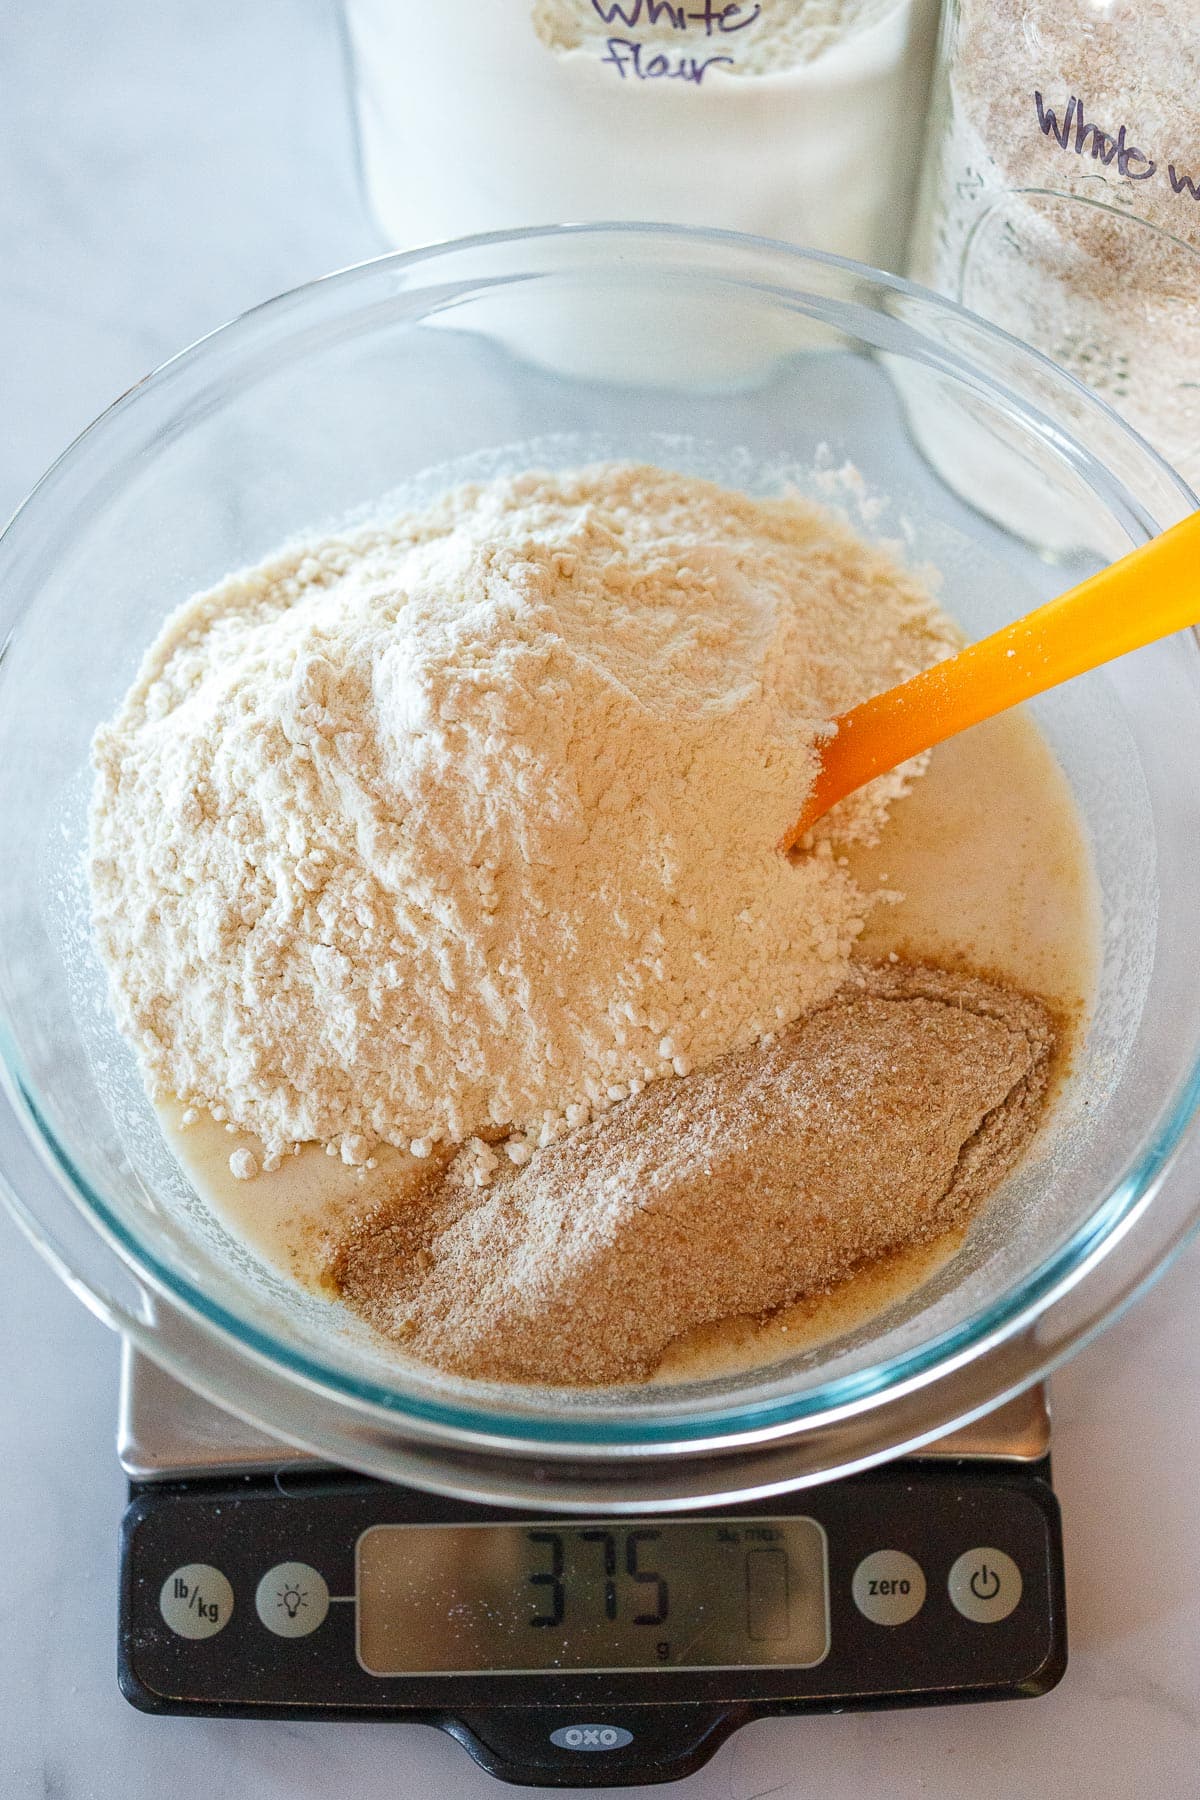
STEP THREE – Add milk mixture to a bowl and mix together with 100 grams of bubbly active starter, rye or wheat flour and white bread flour.
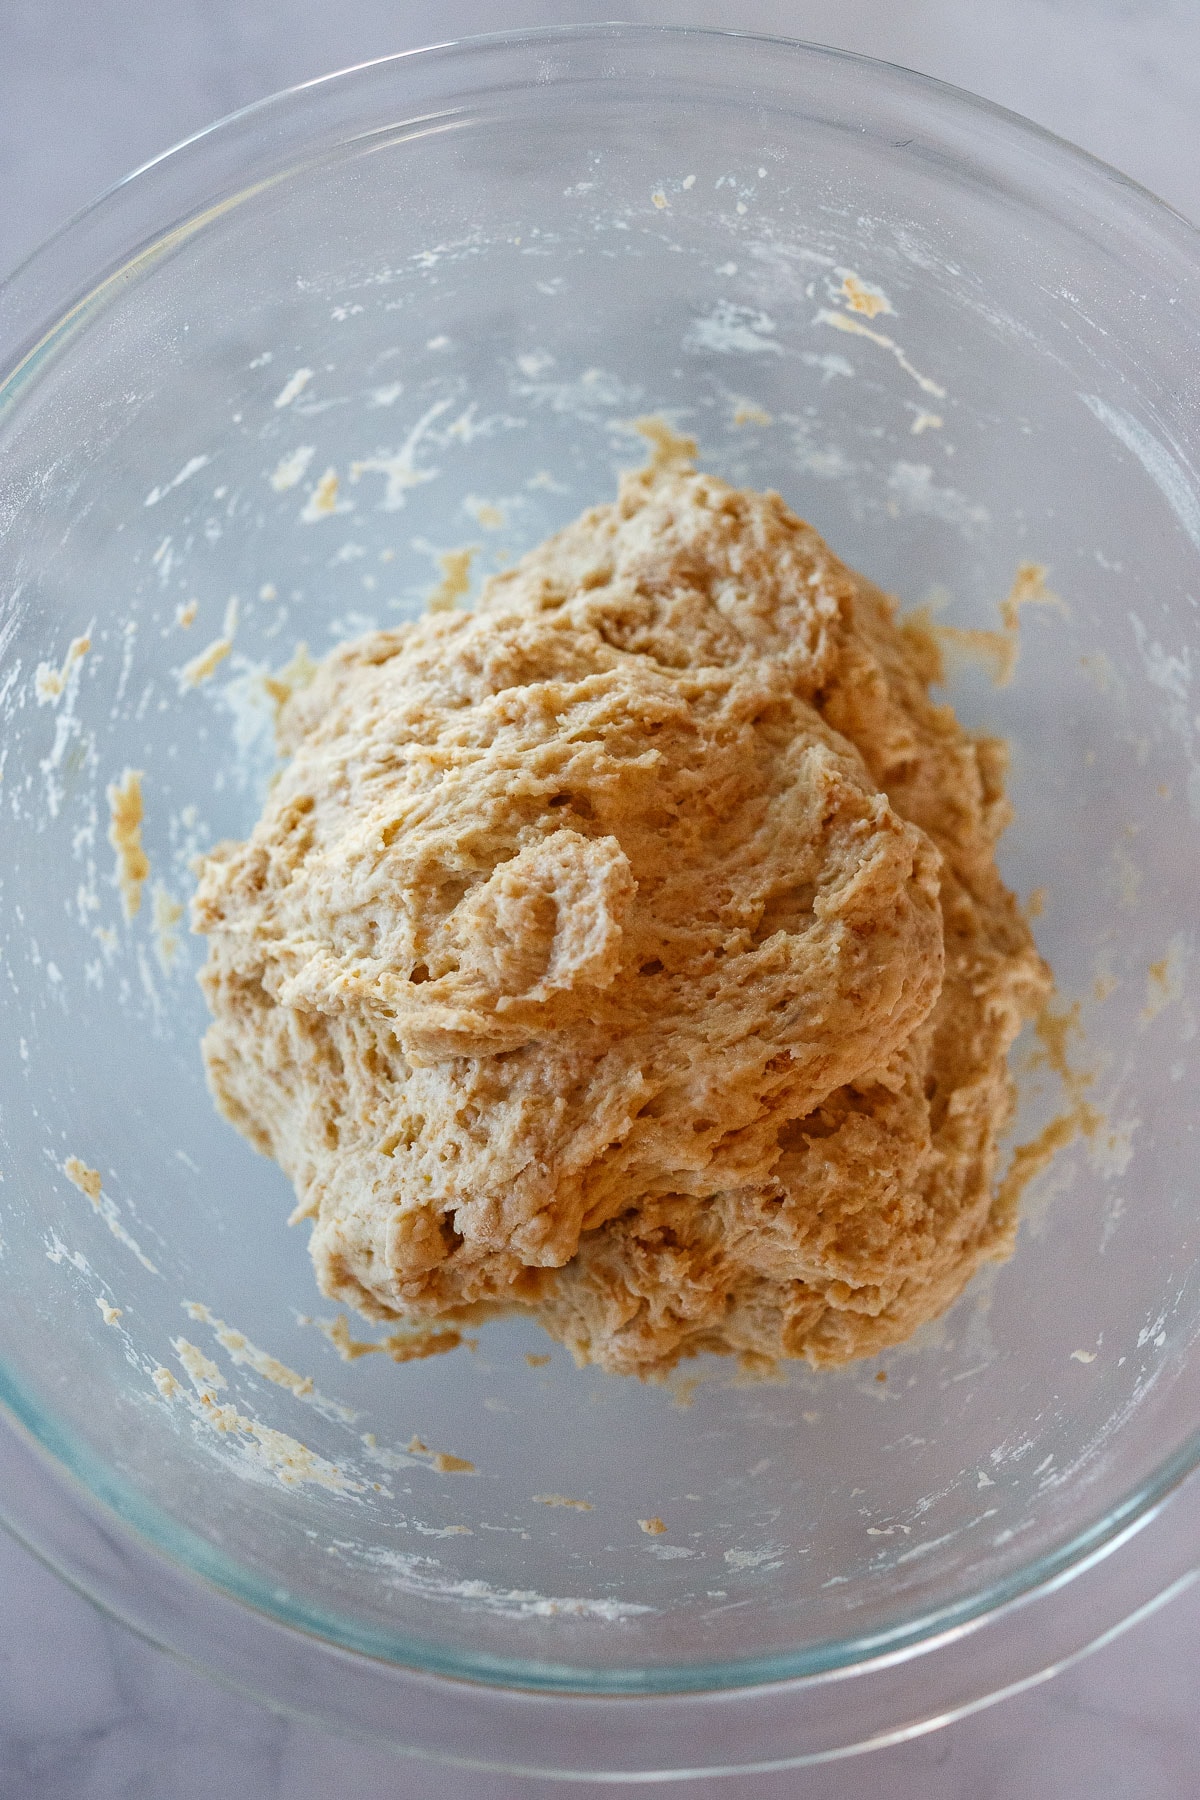
STEP FOUR – Mix thoroughly, cover the bowl with a towel and rest for 30-60 minutes to let the gluten strands form.
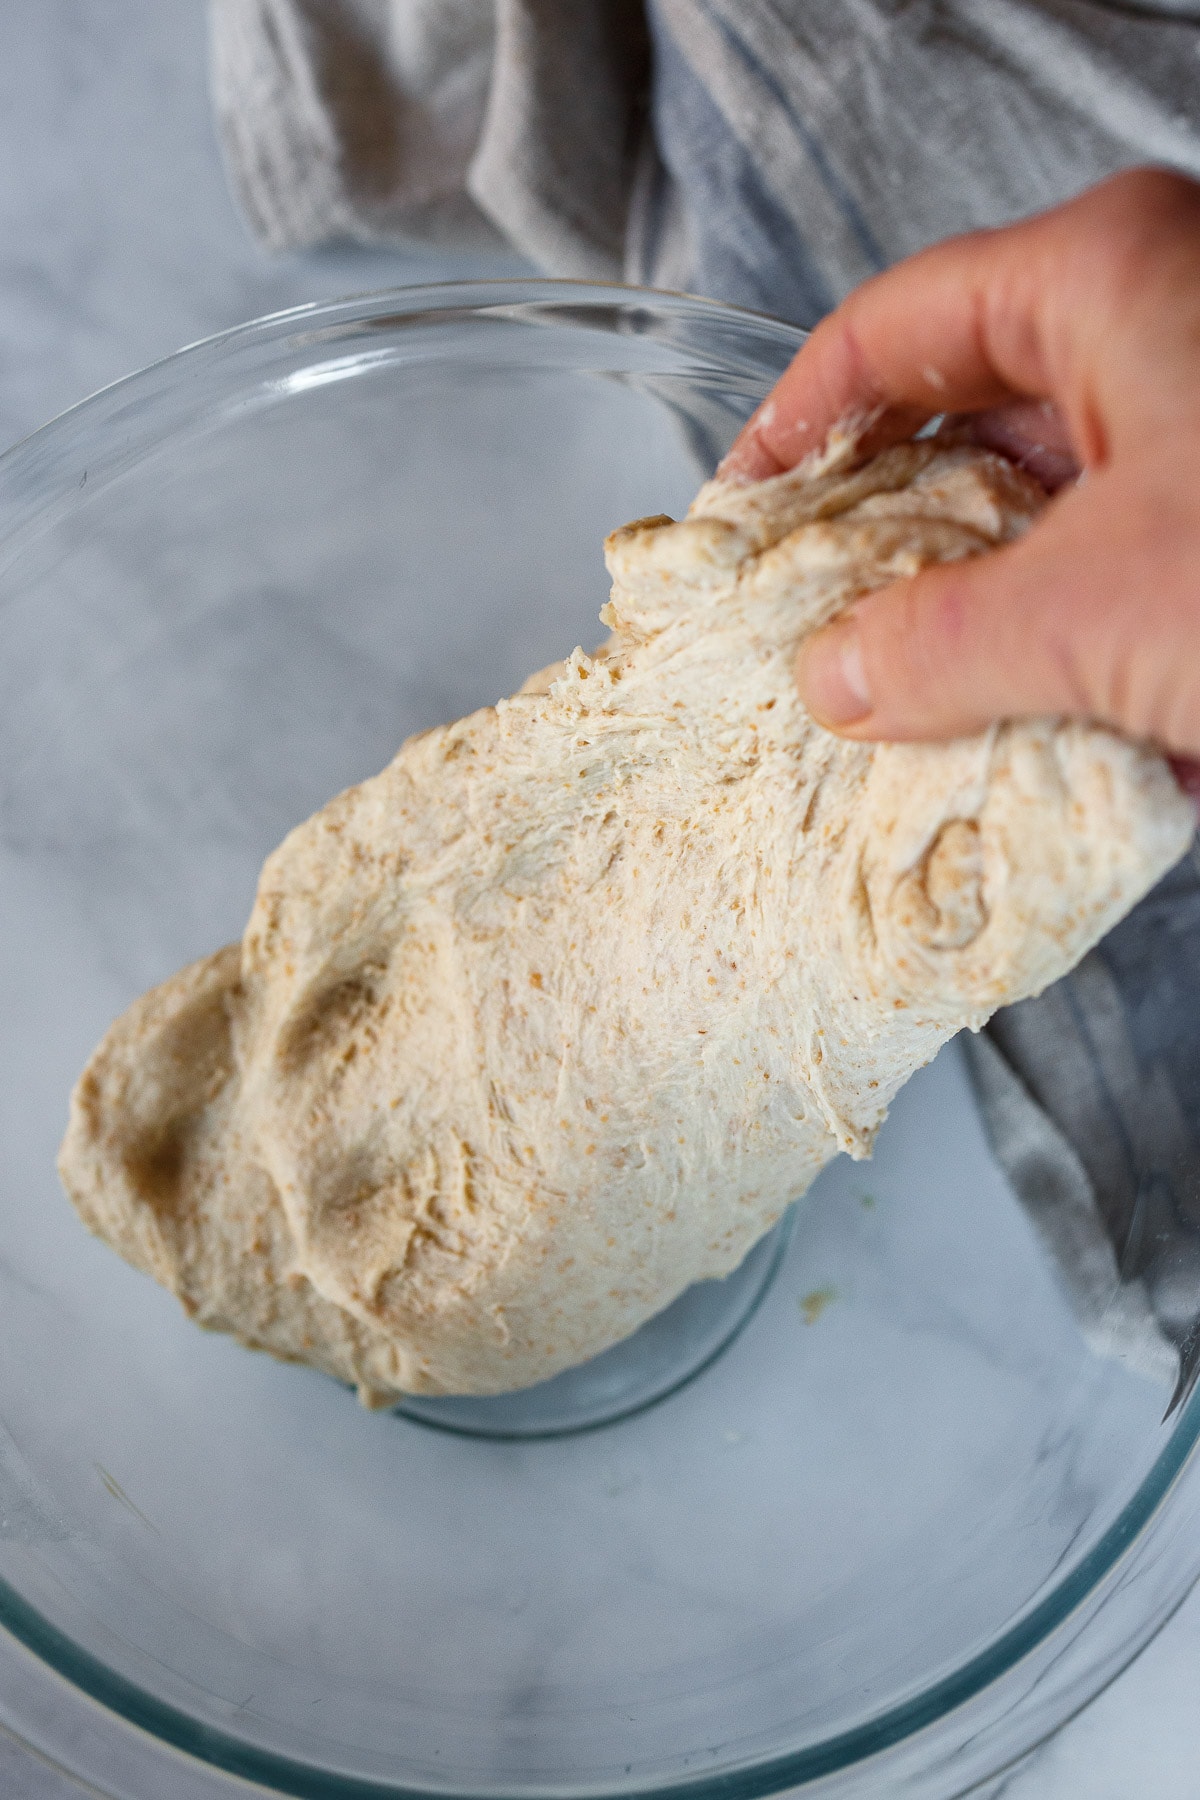
STEP FIVE – Stretch and fold 3 times, 30 minutes apart.
How To Stretch And Fold
- Get a little water on your hand and grab one side of the dough and stretch it out as far as you can without tearing.
- Fold the stretched dough over itself inside the bowl.
- Give the bowl a quarter turn and repeat the process until all four sides are done, rewetting your hand as needed. The dough will start out soft, and by the 4th quarter fold it will feel much firmer.
- Let rest for 30 minutes. Do 2 more rounds of stretch and fold.
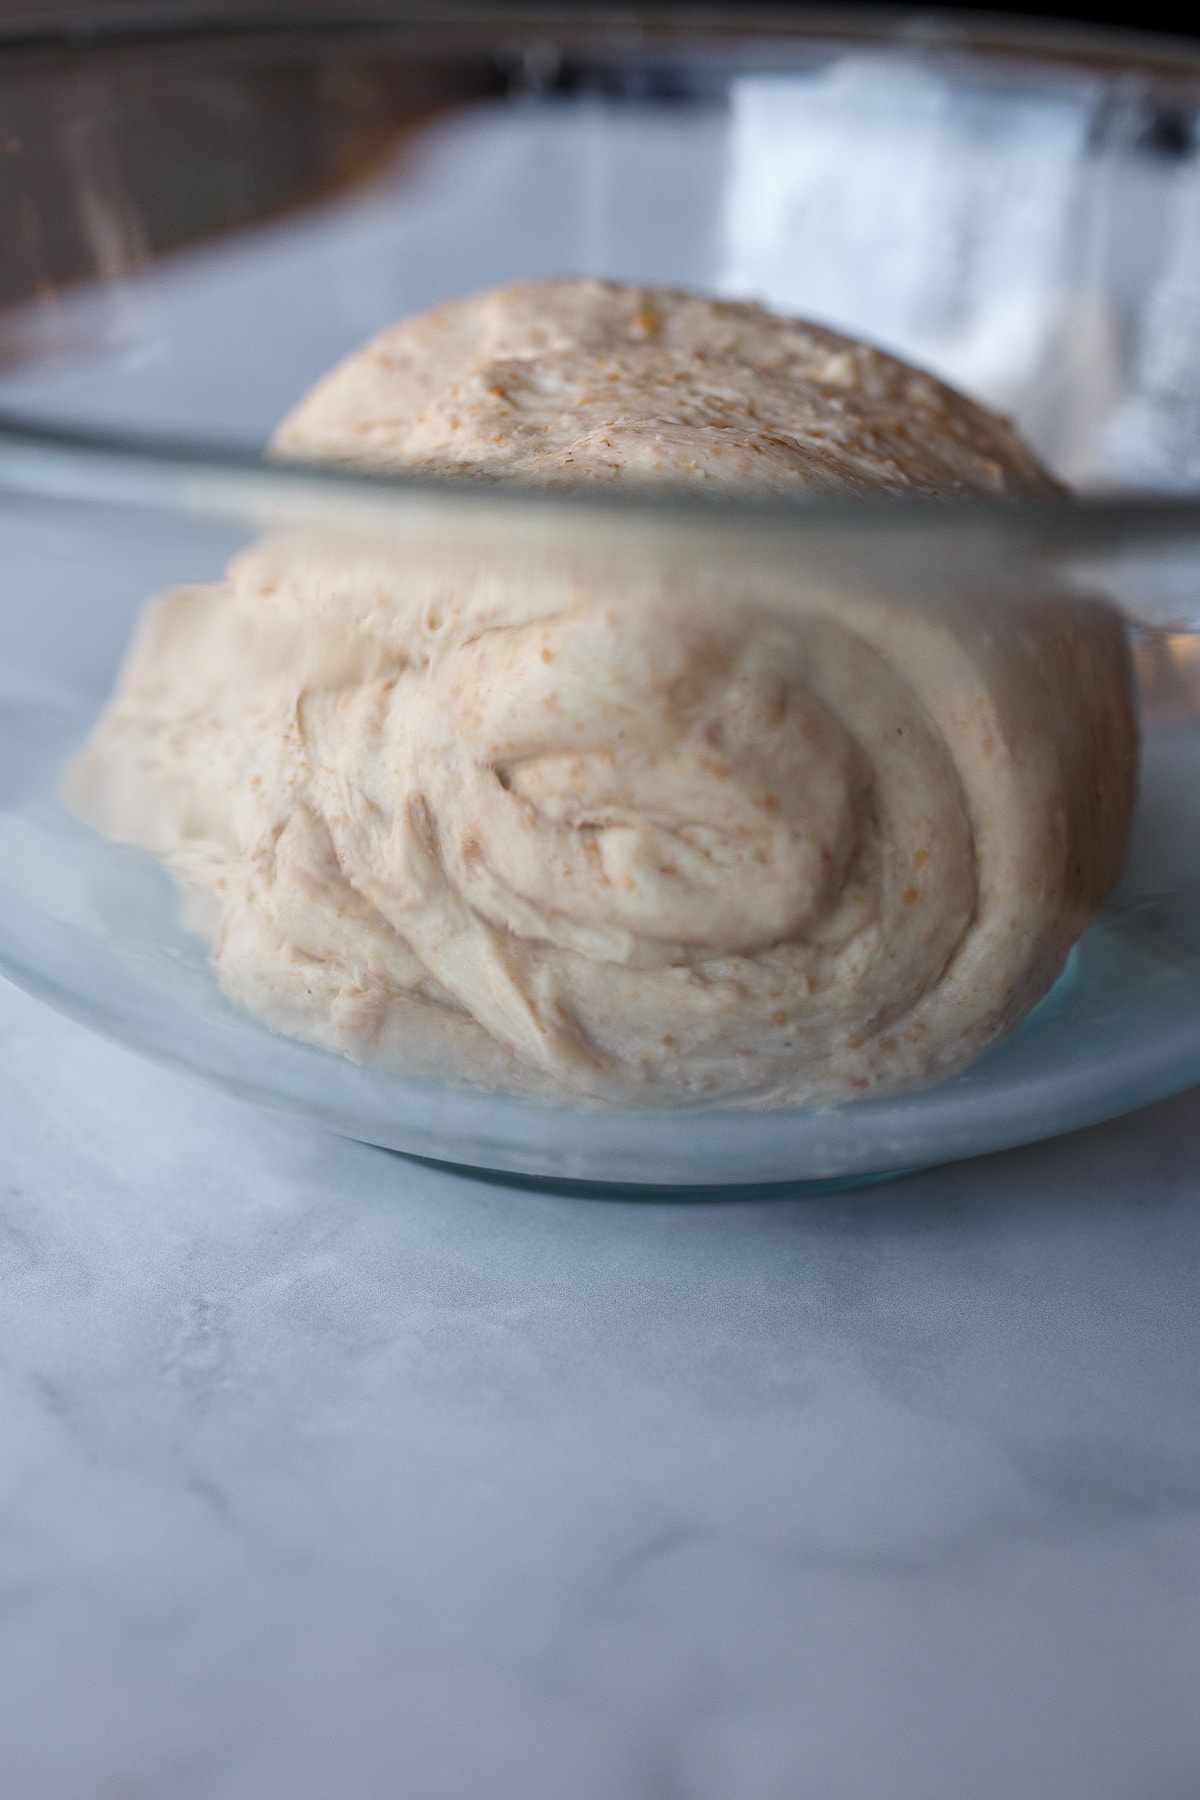
After the last round of stretch and fold, cover the bowl and let rest 3-4 hours at around 70 degrees F. (Allow more time for cooler temperatures and less for warmer). The dough will be raised and puffed up.
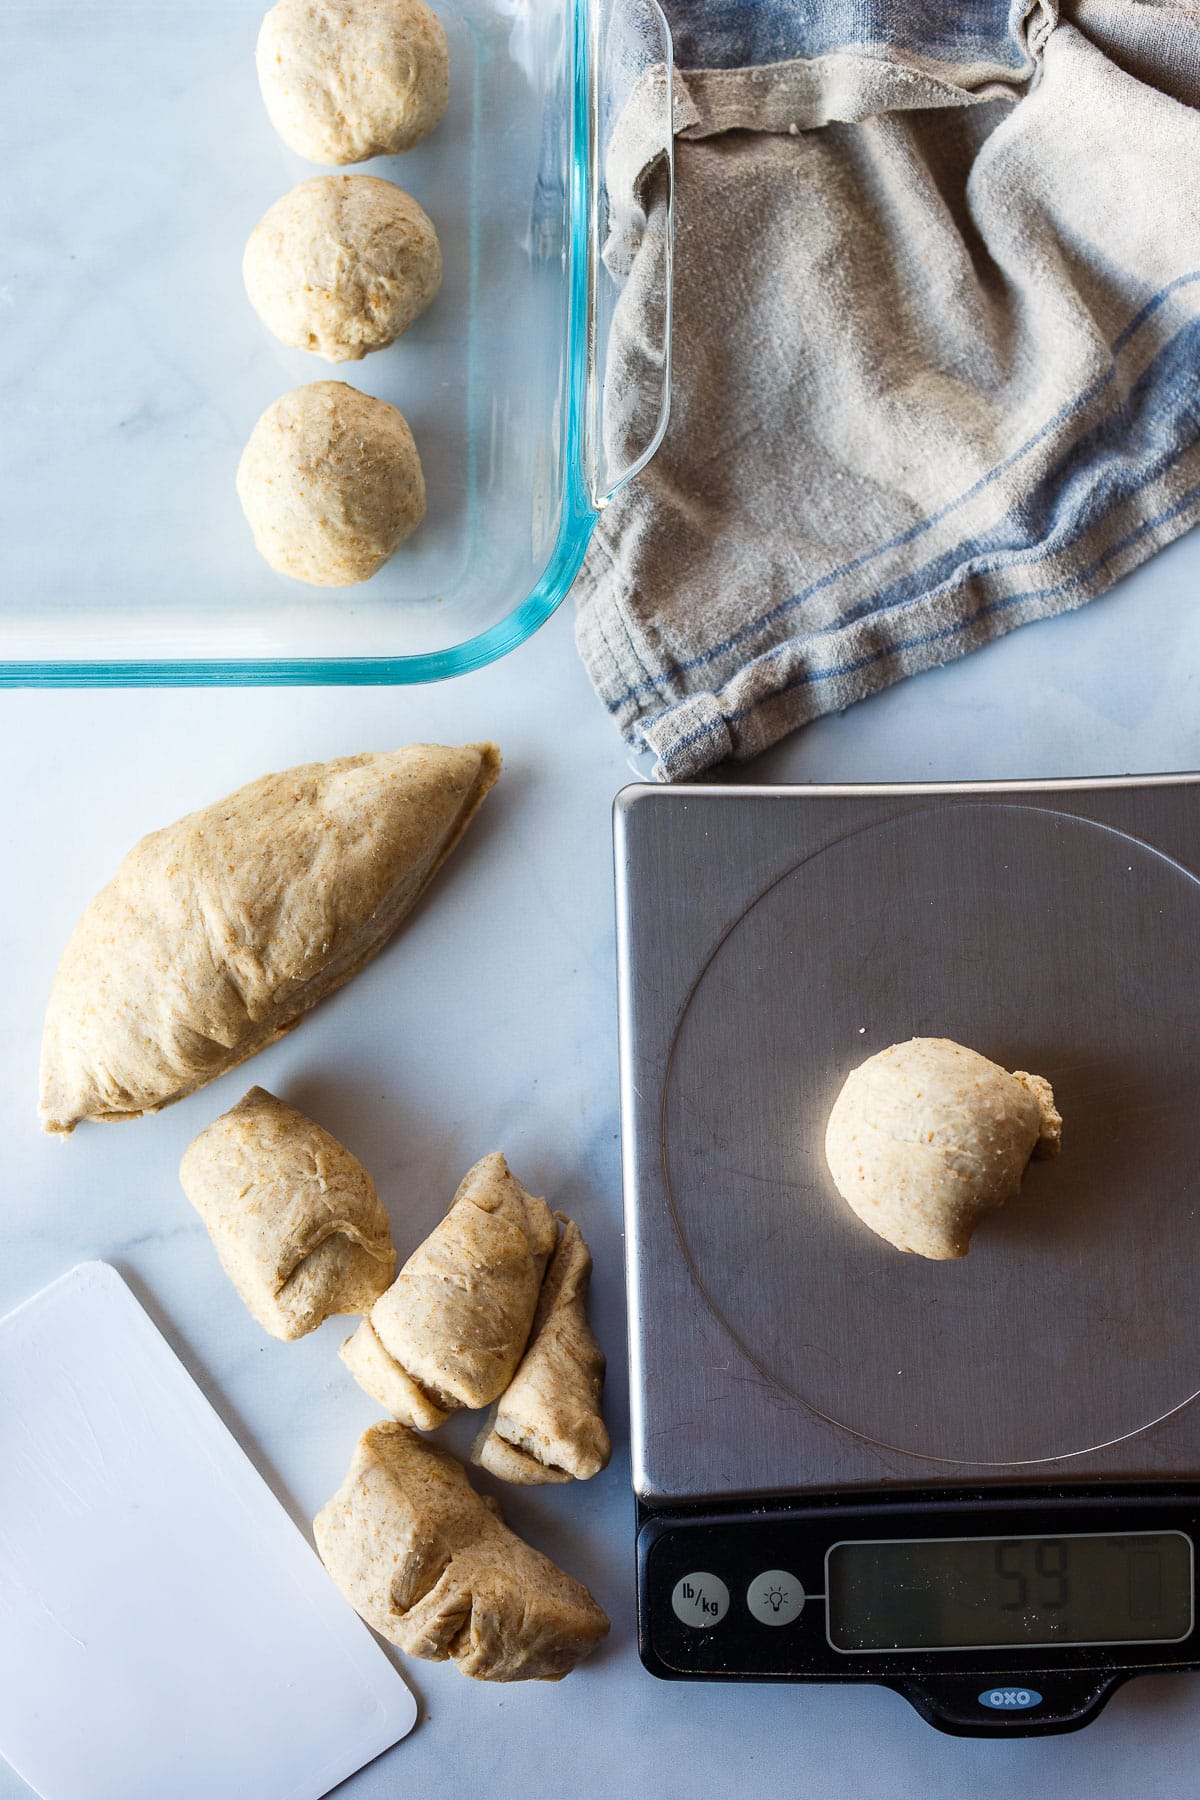
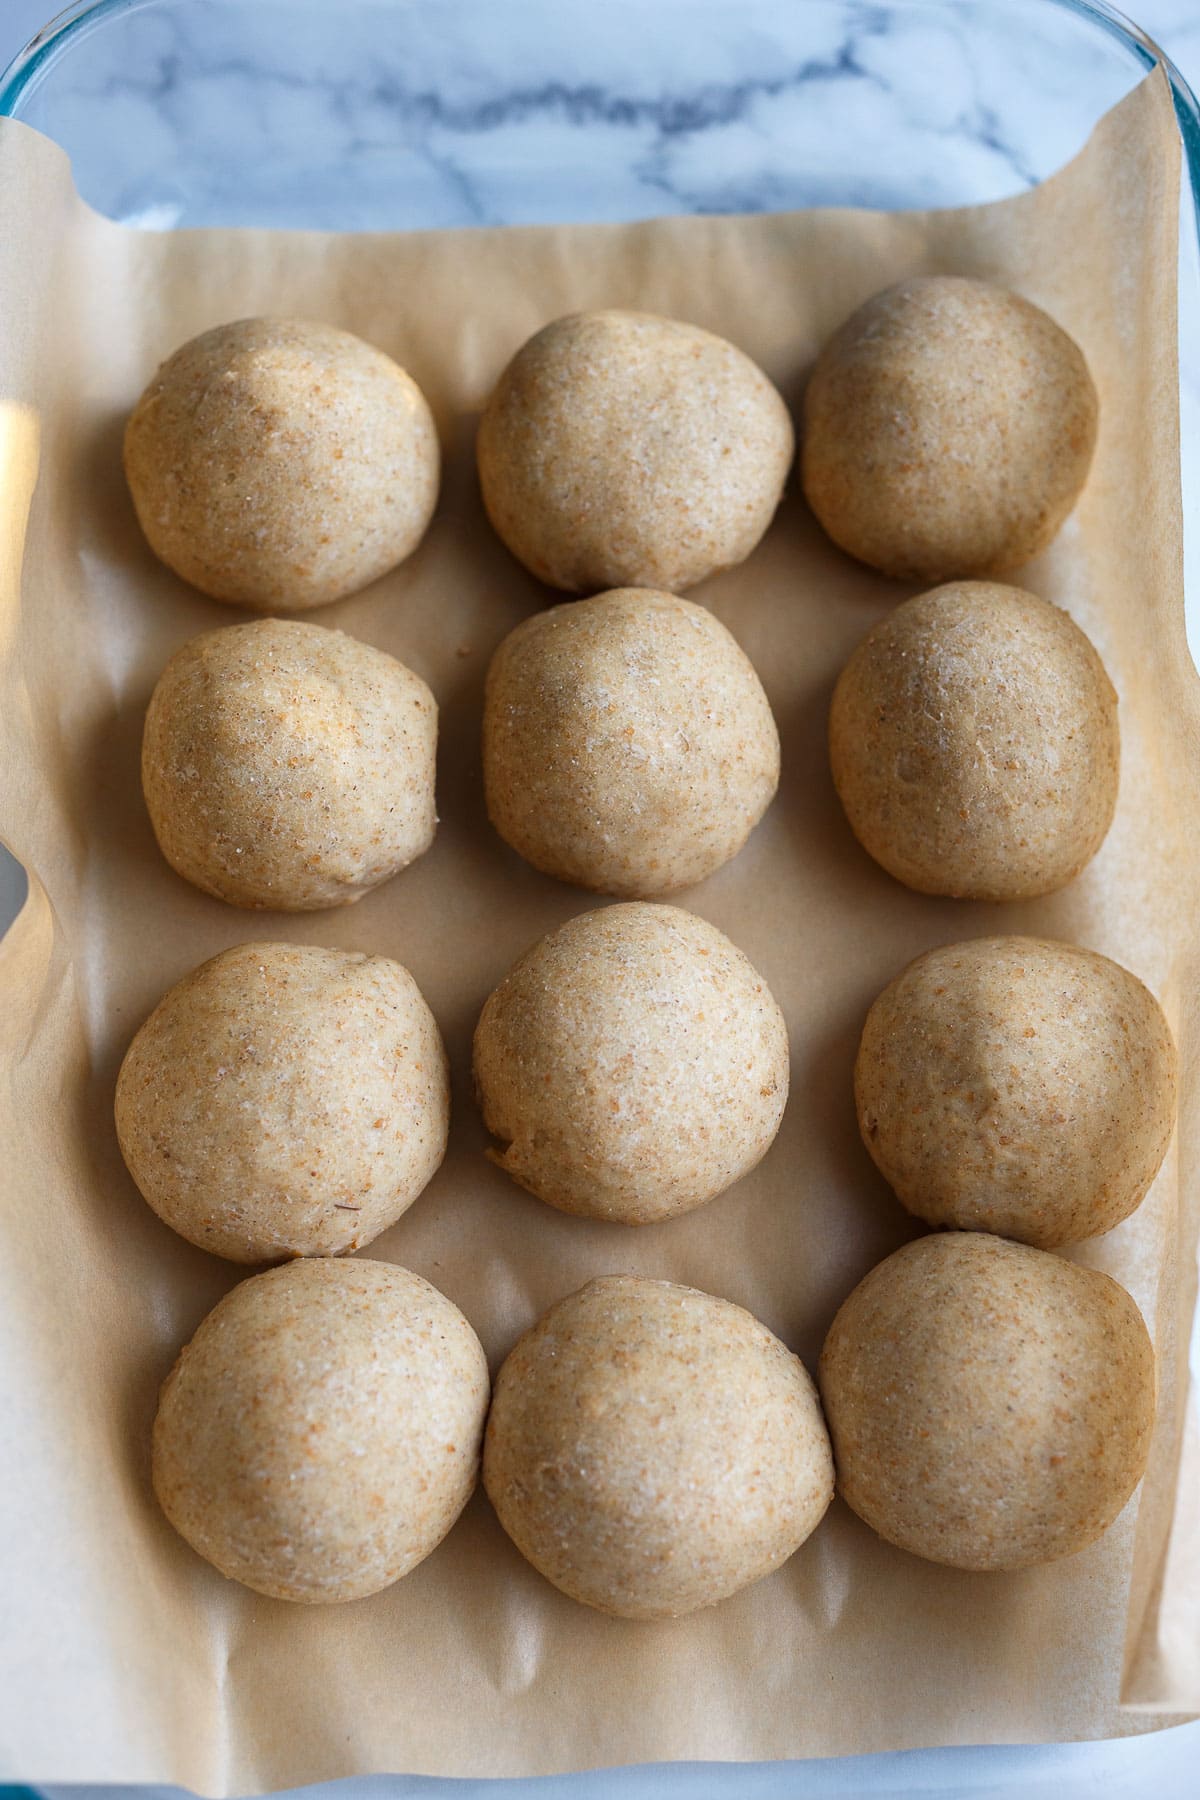
STEP SIX – Oil a baking pan or use parchment paper. Cut the dough in 12 equal pieces. If you want precise equal sized rolls, weigh the entire chunk of dough in grams, divide this by 12 and this will be your size per roll (somewhere around 60-65 grams).
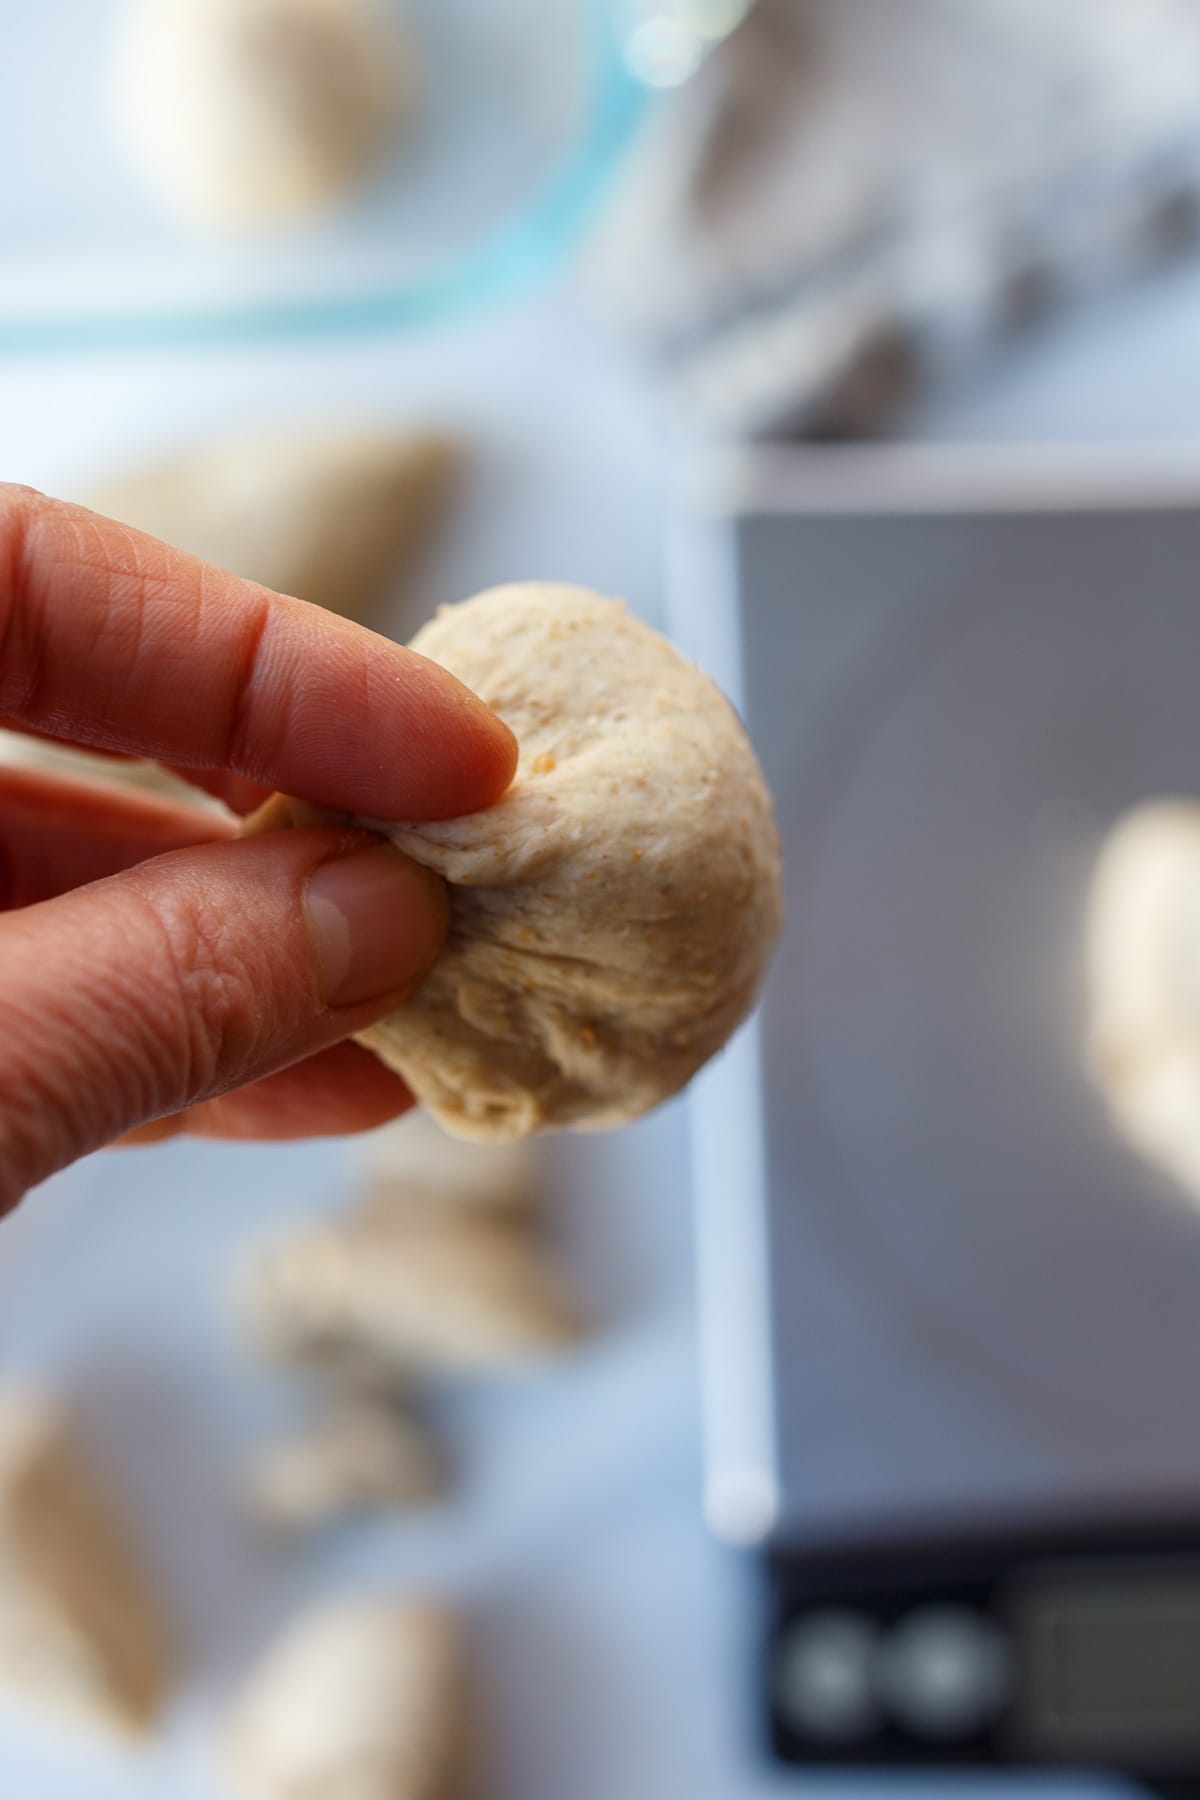
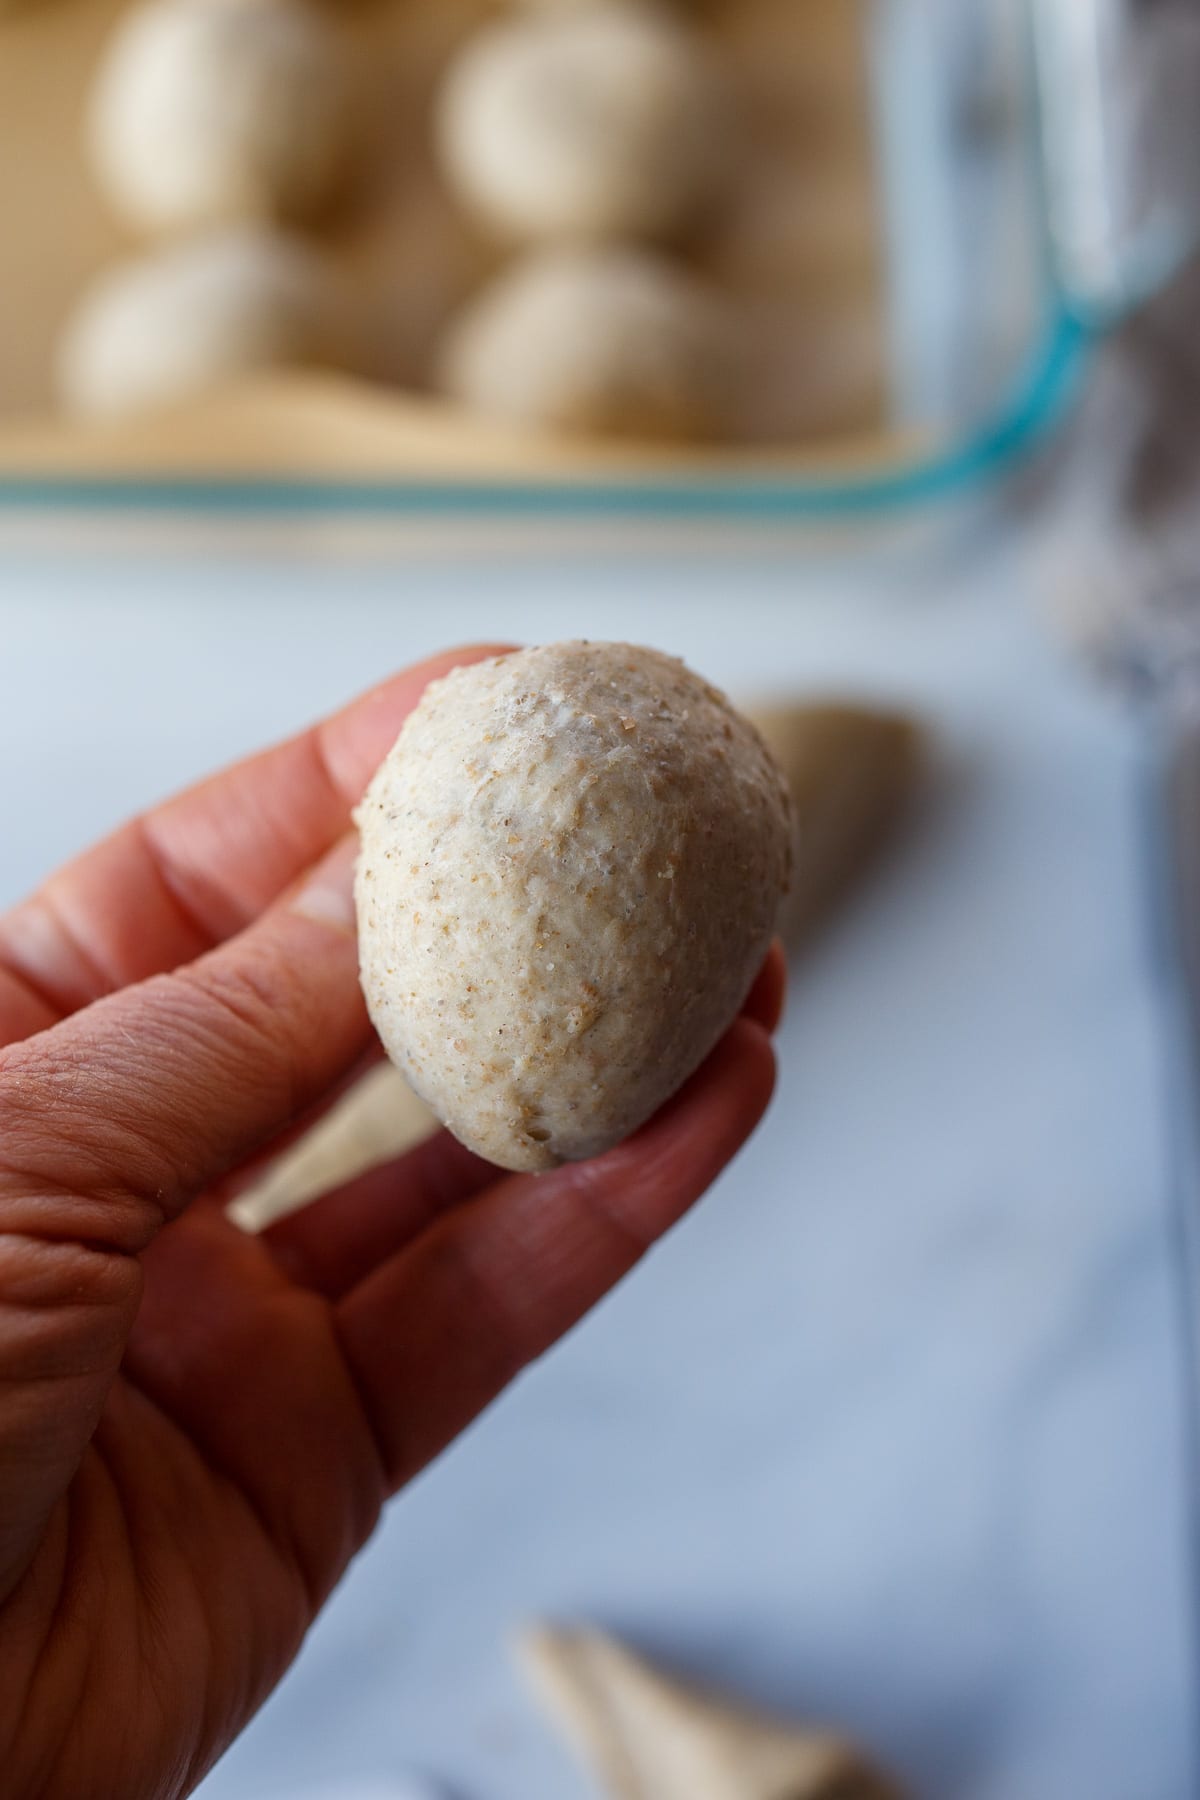
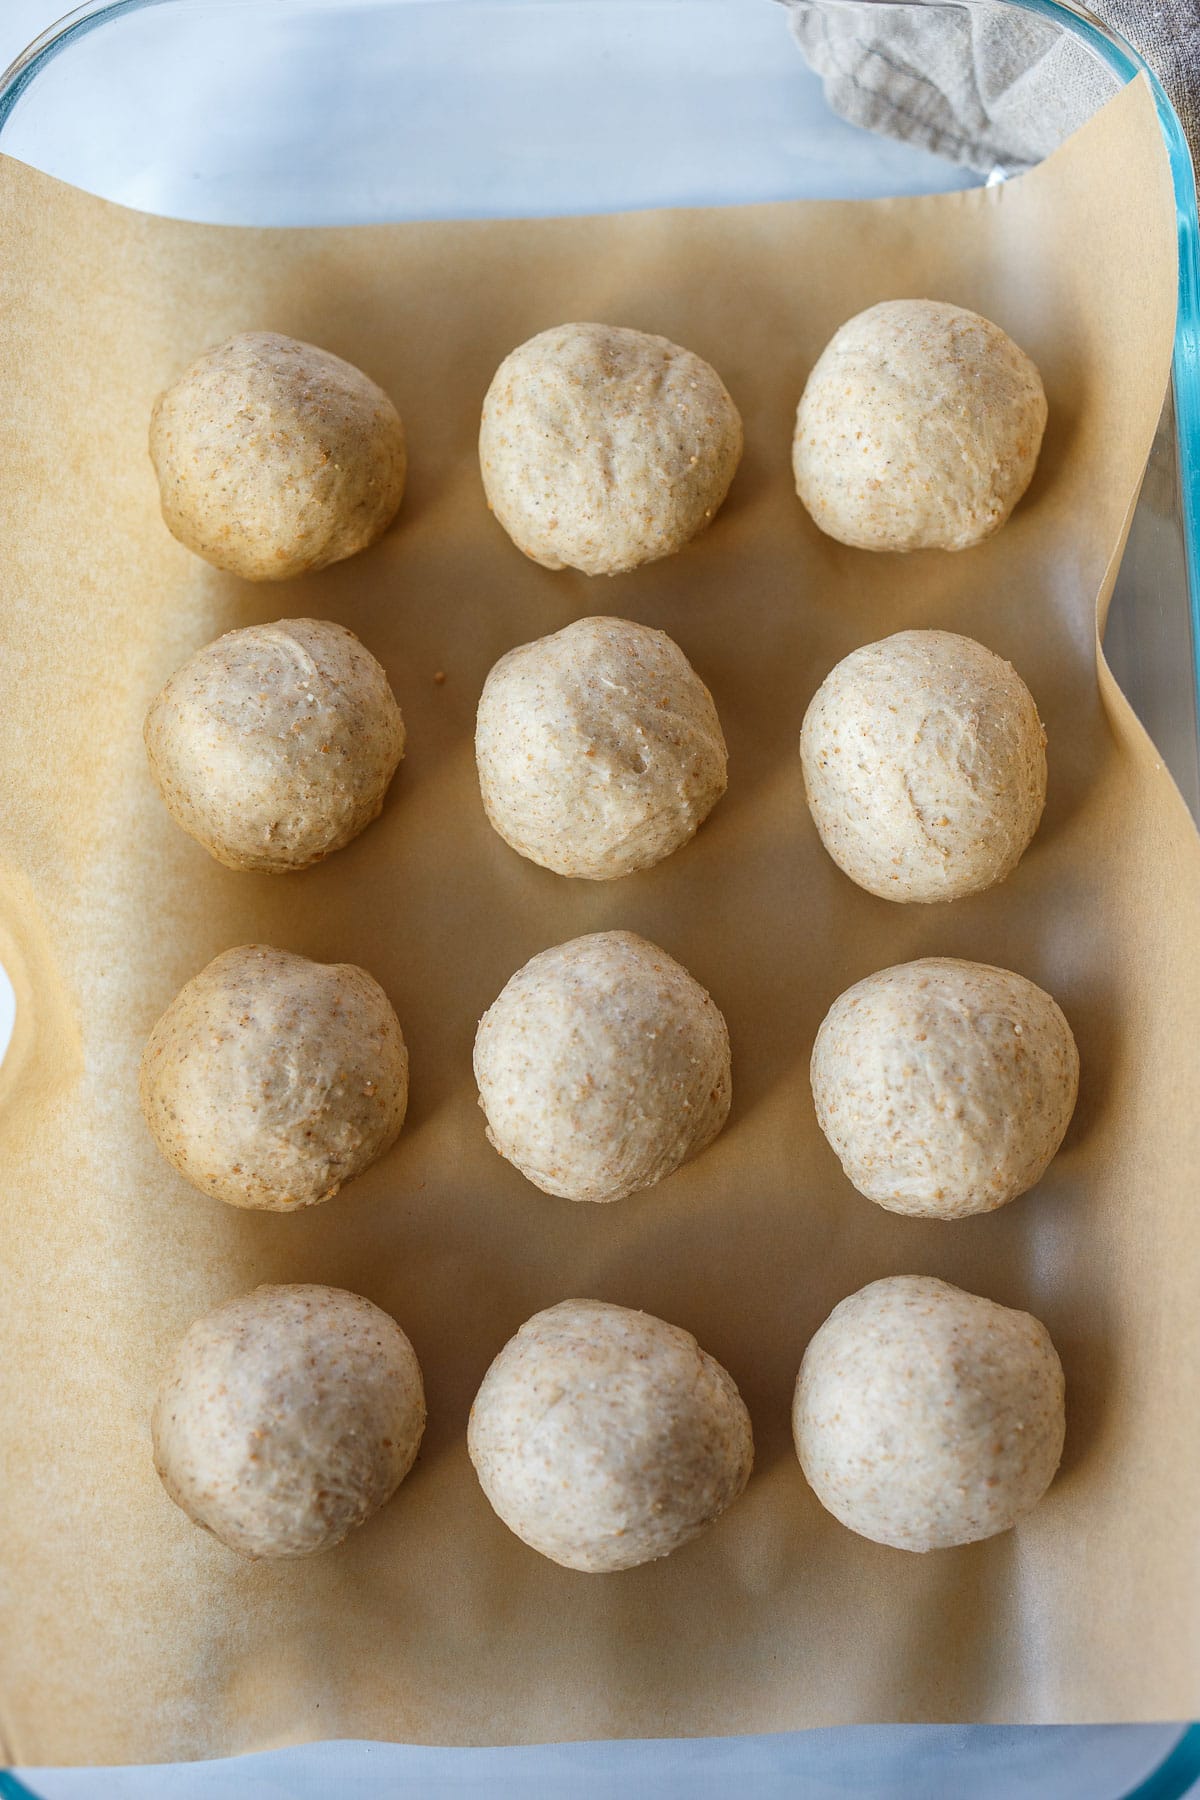
STEP SEVEN – Gather up the sides and pinch together at one end creating a smooth mound. Place on pan, seem side down. Cover and let rest around 3 hours (depending on the temperature in your kitchen).
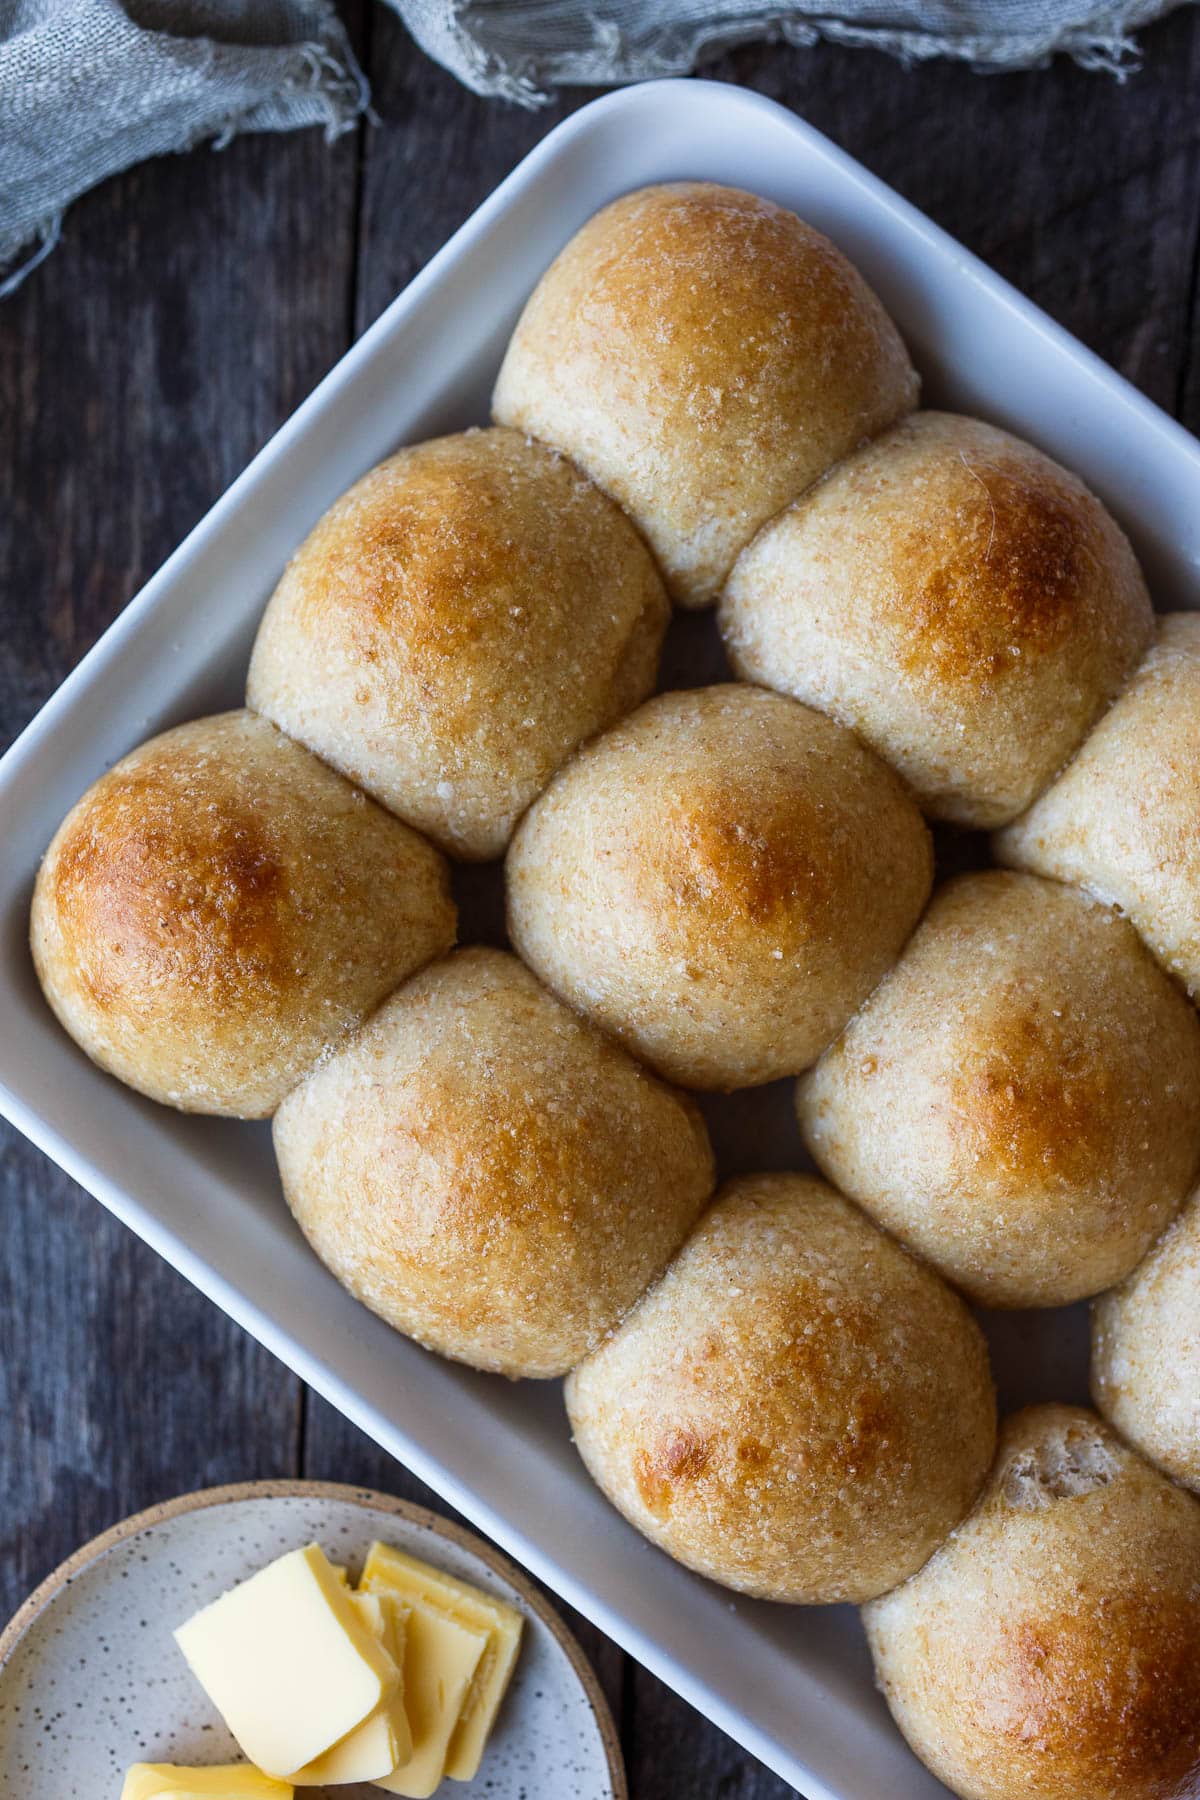
STEP EIGHT – Rolls should be puffed and close to doubled in size. Heat oven to 350 degrees F. Bake rolls 25-30 minutes. Check with a thermometer temperature should be around 190F. Remove from oven and place on a rack to cool. Brush with butter or olive oil (optional).
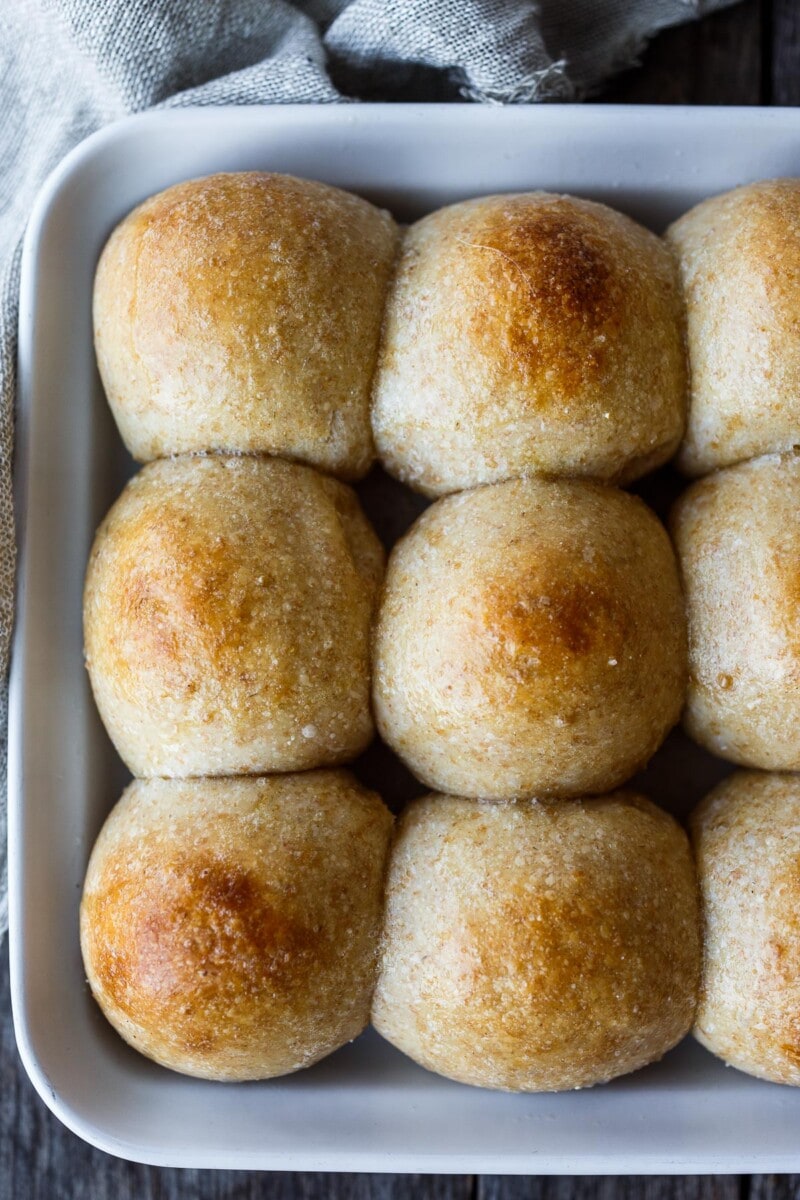
The more the rolls touch while they bake, the softer they will be. When I use a 9 x 13 pan I center the rolls more in the middle of the pan, there is space around the edges. Rolls pictured below were baked in an 8 x 11 pan. A round pan or cast iron skillet works well too.
Storage: Store baked rolls in a bread bag on the counter for 3 days. Freeze baked rolls in a sealed airtight container, or a freezer safe bag, for up to 3 months.
Reheat: Let rolls thaw completely and wrap loosely in foil. Bake at 325F for 10-15 minutes. For a crisp crust, open foil half way through.
Recipe faqs
Enriching the dough with milk (instead of water) and adding butter or oil will tenderize the dough and make the bread or rolls tender.
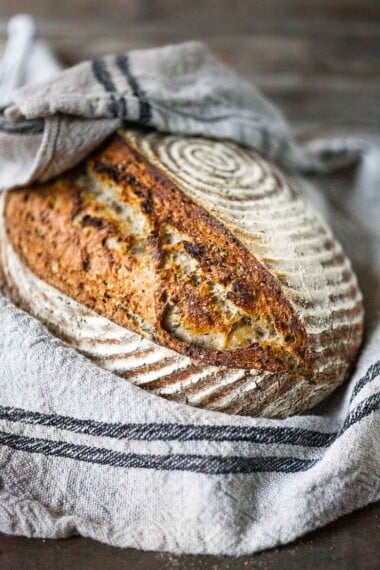
Bread made with natural sourdough starter is more nutritious, easier to digest, and has a lower glycemic index.
The internal temperature for soft tender sourdough rolls is 190 F degrees.
Ways To Enhance
- Enhance your rolls with fresh minced herbs mixed into the dough.
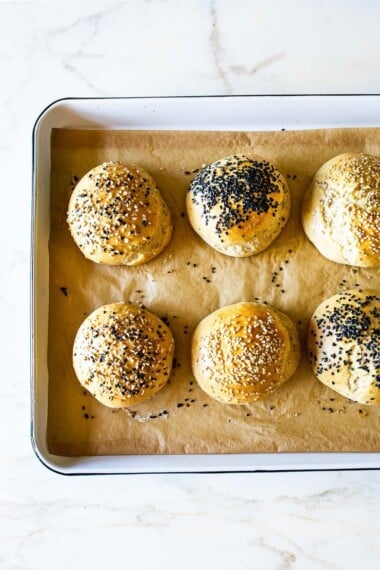
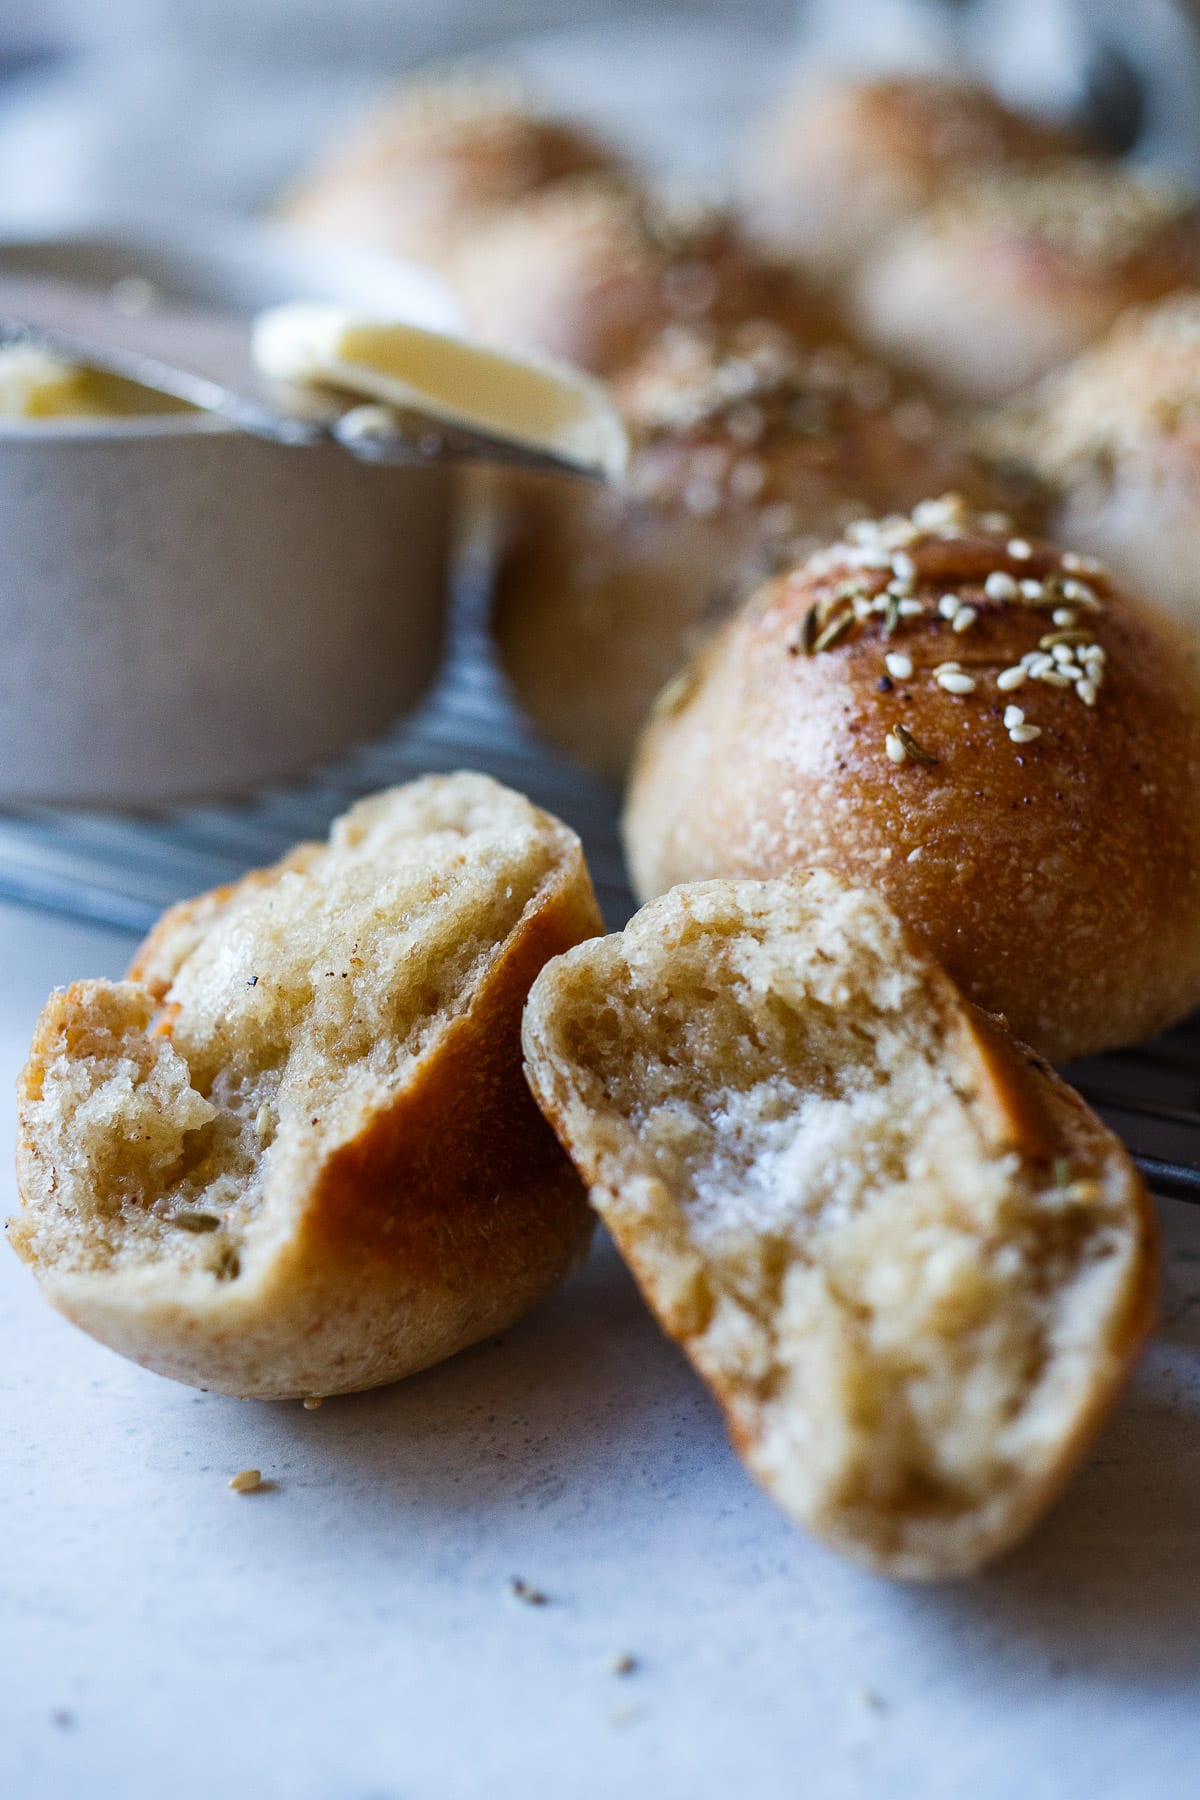
- Add seasonings and seeds to the tops of rolls just before baking, using an egg wash will help them adhere. We used sesame, fennel, sumac and pepper in the picture below.
More Sourdough Recipes You May Enjoy
We love these Sourdough Dinner Rolls! Hope you enjoy. 💛
Love this recipe? Please let us know in the comments and leave a 5-star ⭐️⭐️⭐️⭐️⭐️ rating below the recipe card.
Soft Sourdough Rolls Video
Soft Sourdough Rolls
- Prep Time: 8 hours
- Cook Time: 25 minutes
- Total Time: 8 hours 25 minutes
- Yield: 12 rolls 1x
- Category: sourdough
- Method: Baked
- Cuisine: American
- Diet: Vegetarian
Description
Flavorful, tender sourdough dinner rolls made with sourdough starter, no yeast. Make in one day or refrigerate overnight. They freeze well and are vegan-adaptable! Watch the video.
Ingredients
Starter
- 15 grams sourdough starter
- 50 grams water
- 50 grams bread flour
Rolls
- 2 tablespoon unsalted butter (substitute with olive oil)
- 2 tablespoons honey (or sugar)
- 1 teaspoon salt
- 1 cup milk (whole milk or rich plant based milk)
- 75 grams rye or whole wheat flour
- 300 grams white bread flour
Instructions
The night before
- Activate your starter the night before (or at least 12 hours) combine 15 grams starter, with 50 grams water and 50 grams bread flour mix thoroughly. Loosely cover and leave out at room temperature.
In the morning
- In a small sauce pan, melt butter, add salt, honey and milk. Turn heat off. Milk mixture should be just warmed. Add to a bowl and mix together with 100 grams of bubbly active starter, 75 grams of rye or wheat flour and 300 grams of white bread flour. Mix thoroughly, cover bowl with a towel and rest for 30-60 minutes to let the gluten strands form.
- Stretch and fold (see notes) 3 times, 30 minutes apart. After the last one, cover the bowl and let rest 3-4 hours at around 70 degrees F. (Allow more time for cooler temperatures and less for warmer). The dough will be raised and soft.
- Oil a baking pan (8×11 or 9×13-see notes) or use parchment paper. Cut the dough in 12 equal pieces. If you want precise equal sized rolls, weigh the entire chunk of dough in grams, divide this by 12 and this will be your size per roll (somewhere around 60-65 grams). Gather up the sides and pinch together at one end creating a smooth mound. Place on pan, seem side down. Cover and let rest around 3 hours, depending on the temperature of your kitchen. (At this point you can put them in the fridge for a slow rise overnight. Allow 2 hours at room temperature before baking)
- Rolls should be puffed and close to doubled in size. Heat oven to 350 degrees F. Bake rolls 20-30 minutes. Check with a thermometer temperature should be around 190F. Brush with butter or olive oil (optional).
Notes
How to Stretch and Fold-
- Get a little water on your hand and grab one side of the dough and stretch it out as far as you can without tearing.
- Fold the stretched dough over itself inside the bowl.
- Give the bowl a quarter turn and repeat the process until all four side are done. The dough will start out soft and by the 4th fold it will feel much firmer.
The more the rolls touch while they bake, the softer they will be. When I use a 9 x 13 pan I center the rolls more in the middle of the pan, there is space around the edges. Rolls pictured were baked in an 8 x 11 pan. A round pan or cast iron skillet works well too.
Storage: Store baked rolls in a bread bag on the counter for 3 days. Freeze baked rolls in a sealed airtight container, or a freezer safe bag, for up to 3 months. Reheat: Let rolls thaw completely and wrap loosely in foil. Bake at 325F for 10-15 minutes. For a crisp crust, open foil half way through.
Nutrition
- Serving Size: 1 roll
- Calories: 146
- Sugar: 4 g
- Sodium: 112.9 mg
- Fat: 2.5 g
- Saturated Fat: 1.3 g
- Trans Fat:
- Carbohydrates: 26.6 g
- Fiber: 1.3 g
- Protein: 4.5 g
- Cholesterol: 5.5 mg


These look amazing! I’m making them tomorrow for my Thanksgiving “practice run”. How can these be frozen? Freeze before or after baking? How to reheat to serve? I love your recipes!!! Thank you!
Bake the rolls and then freeze. Thaw and reheat at 325°F for 10 – 15 minutes. I added this info to the recipe!
Thank you!
you’re welcome!
Yum! After his first bite, my son said I should make these more often!
I am wondering if I should have used convection? After 35 mins the internal temp was 194 but they were a little pale. Maybe I should have brushed with milk first?
Sweet! So glad they were enjoyed. 🙂 Every oven is different- so as long as they turned out ok with a little more time. The milk does help brown.