Learn how to make ghee at home with this simple step-by-step method - all you need is butter and a little patience to create rich, golden ghee with a wonderfully nutty flavor. Video.

Making ghee at home is surprisingly simple and often more affordable than buying it. With just one ingredient - butter - you can create a rich, golden cooking fat with a long shelf life and a wonderfully nutty flavor.
While traveling through India, I fell in love with ghee. It turns out that not only does ghee have incredible flavor (deliciously nutty, grassy, and earthy) but it’s also soothing and nourishing to the body.
In Ayurveda, ghee is revered as a sacred and healing fat that nourishes the body, supports digestion (agni), and promotes overall vitality and longevity.
I find ghee is foundational to authentic Indian flavor, so I always try to have some on hand.
Why you’ll love this family favorite recipe!
Nutty Flavor. Ghee adds such a rich, nutty flavor to Indian dishes; it is hard to replicate! It differs from clarified butter, as it takes it one step further by browning the milk solids, giving it a deep, nutty flavor. Liquid Gold!
Ghee has a high smoke point. Because milk solids are removed, ghee won’t burn like butter can when used for sauteeing, pan-searing, or frying. As a chef, I love cooking with ghee because it makes sautéing a breeze!
It is lactose-free! What makes ghee especially beneficial is how the process of heating and straining the milk solids actually removes almost all of the lactose, making it lactose-free. This came in handy in our catering business with folks who had dairy sensitivities.
It is shelf-stable. Removing the milk solids also preserves the butter, allowing it to be shelf-stable for long periods of time (no refrigeration needed) an ancient technique practiced for thousands of years in India.
What is Ghee?
Ghee is the foundation of Indian cuisine- from Ayurveda to modern Indian cooking! It is cow’s butter that has been heated low and slow, then strained, to remove all the milk solids, caseins, and whey. Similar to clarified butter, it is taken one step further, which gives it a beautiful golden color, nutty flavor, and lovely earthy fragrance.
What you’ll need to make Ghee
Keep in mind that you will lose about 20% of the butter!
- Organic Butter. Buy the best butter you can afford. I prefer unsalted, grass-fed, organic butter. Keep in mind that because you are removing all the liquid from the butter, you will lose about 20% of the original amount. One cup of butter will yield a little over 3/4 of a cup of ghee.
- Equipment: A clean jar, cheesecloth for straining
How to make Ghee (step-by-step)
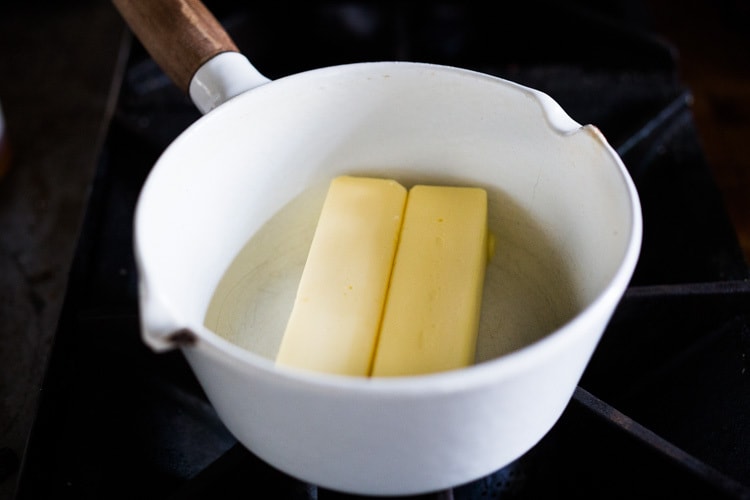
Step 1. Melt the butter in a heavy-bottomed skillet or pot over medium-low heat. The butter will start to separate, creating a milky white foam at the top.
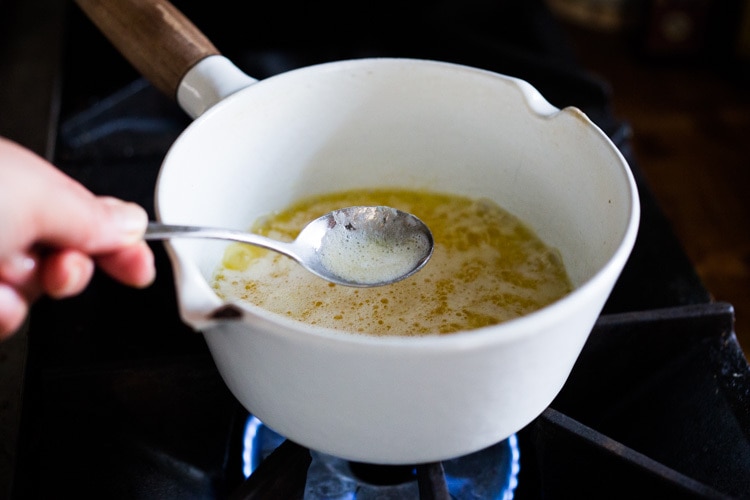
Step 2. Skim the foam off that rises to the top. The milky solids will sink to the bottom. You’ll begin to see a clear golden liquid in between. At this point, this is known as clarified butter. *But making ghee takes this a step further.
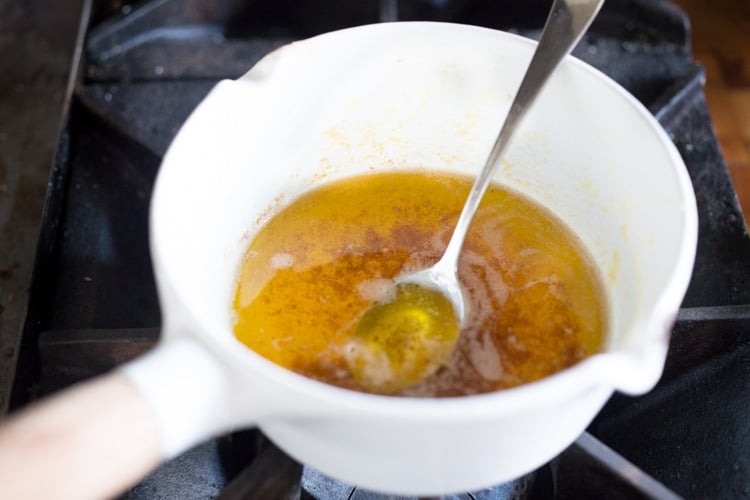
Step 3. Allow the ghee to cook a little further, toasting the solids on the bottom until they are golden brown. *This is where the delicious, nutty flavor comes from. The solids can go from a beautiful golden brown to burnt pretty quickly, so stay close to the stove during the last 5 minutes of cooking-we are aiming for a golden caramel color.
You’ll know it is done when the foamy bubbling slows down, and you have clear liquid, with the toasty-looking milk solids turning deep golden brown. Smell, it should have a nutty aroma.
Step 4. Strain. Once the milk solids are deep golden brown, turn off the heat, cool, and then strain the solids over a double-lined cheesecloth placed over a strainer to catch the remaining foam and solids.
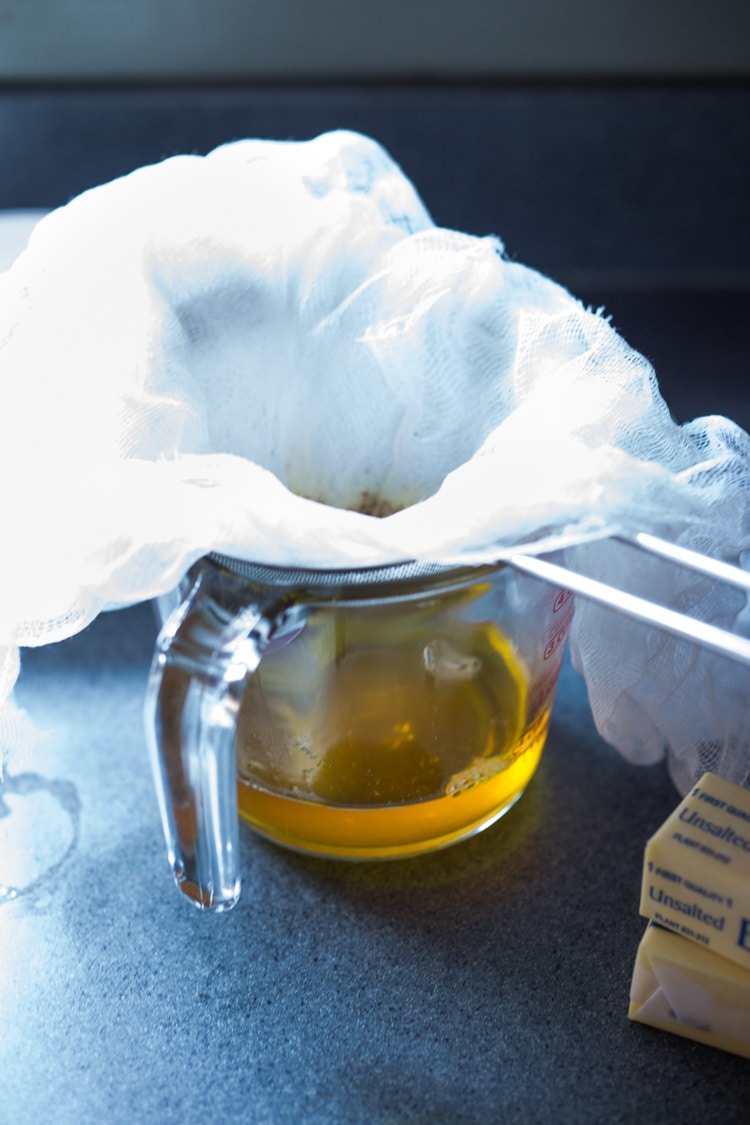
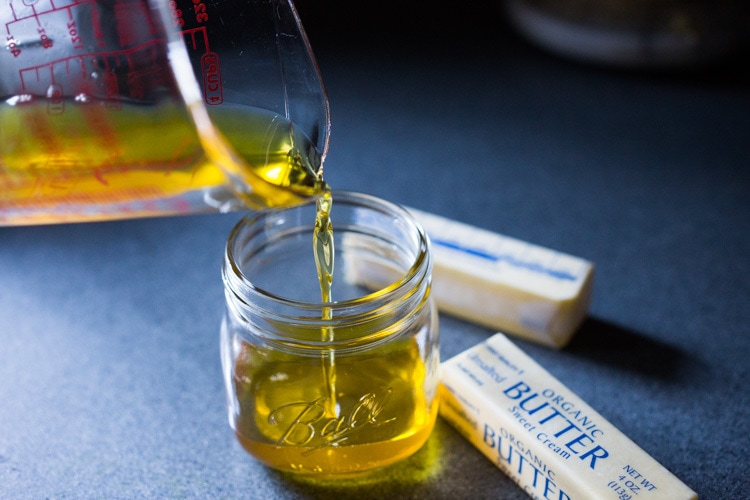
Step 5. Pour the strained warm ghee into a clean, sterilized, sealable jar. At this point, your homemade ghee is shelf-stable and will last months on the counter. Just be sure to use a clean utensil!
Common Ghee Mistakes (and How to Fix Them)
- Ghee smells burnt
The heat was too high. Next time, cook on low and watch closely during the final minutes. You want it to smell nutty and fragrant, not burned. - Ghee looks cloudy
Moisture or milk solids may remain. Reheat gently and strain again. - Ghee turned dark brown
The solids cooked too long. It's still usable, but the flavor will be stronger. - Ghee spoiled quickly
Moisture or contamination (from a dirty jar or spoon). Always use a clean jar and clean utensils!
Chef’s Tips
- Always sterilize the jar you plan to store it in, so there are no contaminants. Ensuring your jar is very clean is essential to preserving your ghee for extended periods.
- Always use a clean spoon or knife to scoop out your ghee to prevent unwanted bacteria.
- If you have dairy sensitivities, strain the ghee using a cheesecloth to remove all the milk solids.
How to Store Ghee
Store ghee on your kitchen counter (out of direct sunlight) or in a pantry for 2-3 months, or refrigerate it for up to a year if you prefer. It can also be frozen for 6 months.

Tips for Cooking with Ghee Butter
- Use less. You may need less ghee than, say, olive oil in a recipe; go light, add more as needed.
- Drizzle it. Ghee is like liquid gold, drizzle it over steamed veggies or popcorn!
- Season with it. Ghee has a wonderful flavor- nutty, deep and earthy and really enhances Indian dishes.
- Use it in baking. Ghee can be used in place of butter or coconut oil in most baked goods.
Ghee Recipe FAQs
Ghee is made with one ingredient – butter!
Because of ghee's high smoke point, it is often used to saute or fry foods. It is also widely used in Indian cuisine, adding rich flavor.
Ghee tastes wonderfully nutty, earthy and deep, imparting flavor to anything you use it in.
While ghee is still a saturated fat, the removal of all milk solids makes it easier to digest for those with dairy sensitivities.
This is debatable. In my humble opinion, grass-fed organic ghee is healthier than highly processed oils, but probably not as healthy as extra-virgin olive oil. It is a saturated fat.
Ghee may be more tolerable to those with dairy intolerances because all the milk fats are removed.
Benefits of Ghee
- High smoke point for cooking
- Long shelf life, with proper care.
- Rich, nutty flavor, elevating Indian food.
- Naturally lactose-free!
Watch How to make Ghee

Homemade Ghee Recipe
- Prep Time: 5
- Cook Time: 40
- Total Time: 45 minutes
- Yield: 1 cup 1x
- Category: ayurvedic recipes, butter, condiments, larder, pantry
- Method: stovetop
- Cuisine: Indian
- Diet: Vegetarian
Description
Learn how to make ghee at home with this simple step-by-step method - all you need is butter and a little patience to create rich, golden ghee with a wonderfully nutty flavor. *Keep in mind, if you start off with one cup of butter, you’ll end up with ¾ cup of ghee. Feel free to double the recipe; the cooking time will increase.
Ingredients
8 ounces organic, grass-fed unsalted butter (1 cup)
Instructions
- Heat the butter in a medium, heavy-bottomed pot over medium-low or low heat.
- Check every 10 minutes and skim the foam that rises to the surface with a spoon or slotted spoon. The more butter you are cooking the longer this process will take. When the milk solids drop to the bottom of the pan, you technically have “clarified butter”.
- Continue cooking until the solids turn deep golden brown like the color of brown sugar, and the butter will begin smelling nutty and earthy and get golden itself. During these last minutes, watch it like a hawk, it goes very quickly from deeply golden to burnt!
- Turn the heat off and let it cool for 3 minutes.
- Strain using 2 layers of cheesecloth over a strainer into a clean jar or pourable pitcher.
- Pour into a clean, sealable, sanitized jar, and store on the counter, or refrigerate if you prefer.
Notes
Storage: Ghee is shelf-stable and will keep 3-6 months on the counter, or 12 months in the fridge, if uncontaminated. It can also be frozen. Ghee will solidify slightly, especially in the colder months.
Yeild: 1 cup of butter will yield 3/4 to 4/5 cups of ghee.
Doubling: Feel free to double or triple the amount, noting that the more butter, the longer the ghee will take to cook.
Nutrition
- Serving Size: 1 tablespoon
- Calories: 102
- Sugar: 0 g
- Sodium: 1.6 mg
- Fat: 11.5 g
- Saturated Fat: 7.2 g
- Trans Fat:
- Carbohydrates: 0 g
- Fiber: 0 g
- Protein: 0.1 g
- Cholesterol: 30.5 mg


“Such a wholesome recipe! We sell pure ghee and raw honey at Ilhum Shop, and it’s great to see people using natural ingredients like these.”
Thanks!
I’ve made ghee a number of times using other recipes. Now I realize that I hadn’t been cooking it long enough for the milk solids to drop out. This was nutty tasting with a silky texture and quite easy to make.
So glad you gave it another try Karen!
I made this ghee again in preparation for an Indian feast. I was perplexed as to why it took so much longer to make than last time. I then realized that there is a discrepancy in the recipe- in one place it calls for 16 oz butter, in another place it calls for one cup. I used 16 oz this time, so it did take far longer (though it was still excellent).
Thanks Karen, you are right. I updated the recipe to read 8 ounces. Thanks for pointing this out.
Just something interesting – I made ghee with salted butter. After removing the foam, I tasted that foam. I swear nearly all the salt ends up there, it was sooooo salty!
That IS interesting!
I’ve been looking through sites & videos to get the definitive technique for ghee, and they vary greatly. *many* tell how to make clarified butter but call it ghee. Yours is the best I’ve found. To the point and factual! Thanks.
Thanks so much Judy!
Online, I really like RoseRed. She was a professor and gives all the information you will need. She gives info on how and why she does what she does. She even breaks down how the chemistry of things work. Really worth checking out.
This is so good and easy!! I just let it simmer on low for a couple of hours while I was doing other things. I agree about the economical aspect too – high quality ghee is so expensive! I got grassfed butter on sale and am so grateful for this recipe – pretty effortless and I saved a significant amount of money! I can’t wait to spread this onto my fresh, warm sourdough bread 😛
I am so glad you liked this ghee, Leanne. Yes, grass-fed ghee is really pricey and this is so easy to make, and much less expensive! I love how my kitchen smells when its simmering too. 🙂
Pretty simple. I didn’t use a strainer, just doubled the cheesecloth, put a rubber band around the neck of the jar to keep in place and poured the butter right in. Thanks!
Awesome Robin!
Perfect !
can i make ghee in my crockpot on low?
Interesting question Frances! I haven’t tried this but super curious if it would work- I love the idea of it!
I always make my ghee in the crockpot – 3-4 #, on low for 6-8. It’s perfect every time! I’ve also made it on high for 4 hours and that also works just as well.
Love this idea Virginia! Brilliant- thanks!
You just put in the crockpot and let it melt in there?. to on the stove at all?
Refused to pay $15 for 13oz jar at the store. Looked up the recipe, made 1 pound of butter into Ghee. Was very simple $4.00 investment. I used candy thermometer to keep eye on temp. I cooked on low burner setting, and casually kept an eye on it while doing other stuff in the kitchen. The milk fat started to rise about 100 Degrees F. I skimmed, and skimmed…. I adjusted temp to maintain at 220 (slight simmer) for about 5-6 minutes while milk solids turned color on bottom of pan. As stated, strained into clean jar….. my 1st attempt was so easy.
I was taught that preserving the shelf life of ghee also means ONLY scooping it out of the jar with thoroughly clean utensils, and I have seen mold form when that isn’t observed. Very sad when that happens!
I’ve never experienced that- but good to know!
Hello, love your recipes. Is this recipe with salted or unsalted butter? Thanks:)
Unsalted is best.
Followed recipe and it turned out perfectly. Looking forward to cooking with it.
well written and nice to know.
First batch completely burned! Noticed in the blog write up it says medium-low heat but the recipe says medium-high. I would definitely cook it on the lower heat option, my second batch turned out correctly!
The recommended cook time is way too long and the temperature was too high. I used a medium heat and only had it on the stove for 13 minutes, and by the time I was skimming the foam off the top it started to smell burnt. When I poured it out to cool it was solid black.
Oh dear, something is not right here, I’m so sorry about that. I will double-check the recipe.
I will never buy ghee again. This was so easy.
came out perfect.
thanks for the simple easy directions- turned out perfectly.
Hi Sylvia,
You brought a smile to my face when I saw this article. There are so many things we do just out of habit. I always go to the store to buy ghee and never thought of making my own. Your recipe seems pretty simple and I think it could save me a little money. I’ll give it a try. Thanks, Terry
Hi Terry, yes it would probably save money. Plus it is fun to make!Cheers!