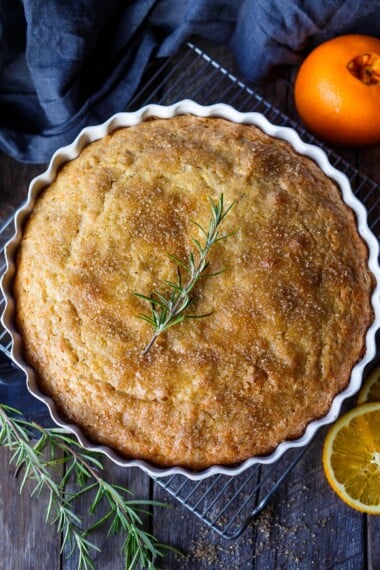
Inspired by the iconic recipe of San Sebastián, this Basque cheesecake recipe is light and airy with a deeply caramelized top, silky smooth center, and luscious notes of vanilla. Tested in our kitchen for consistent results, it’s a rustic yet elegant dessert, any home cook can master.
When I had my first bite of Basque Cheesecake, it changed how I thought about cheesecake entirely-imperfect, yet utterly perfect. As a chef and former restaurant owner, I’ve spent years testing this recipe, and I’ve fine-tuned this version to make it approachable for the home baker while preserving the authentic flavor and texture.
With hundreds of dessert recipes on the blog and a background in professional kitchens, I focus on techniques that build confidence and deliver results. This Basque Cheesecake bakes up beautifully without fuss-no crust, no water bath, no stress-just a golden, caramelized top and a silky center that will win over any crowd.
Why You’ll Love This
- Easy to make! The process to assemble this simple, yet impressive cheesecake takes less than 30 minutes. Easy to prep, just be careful not to over-mix!
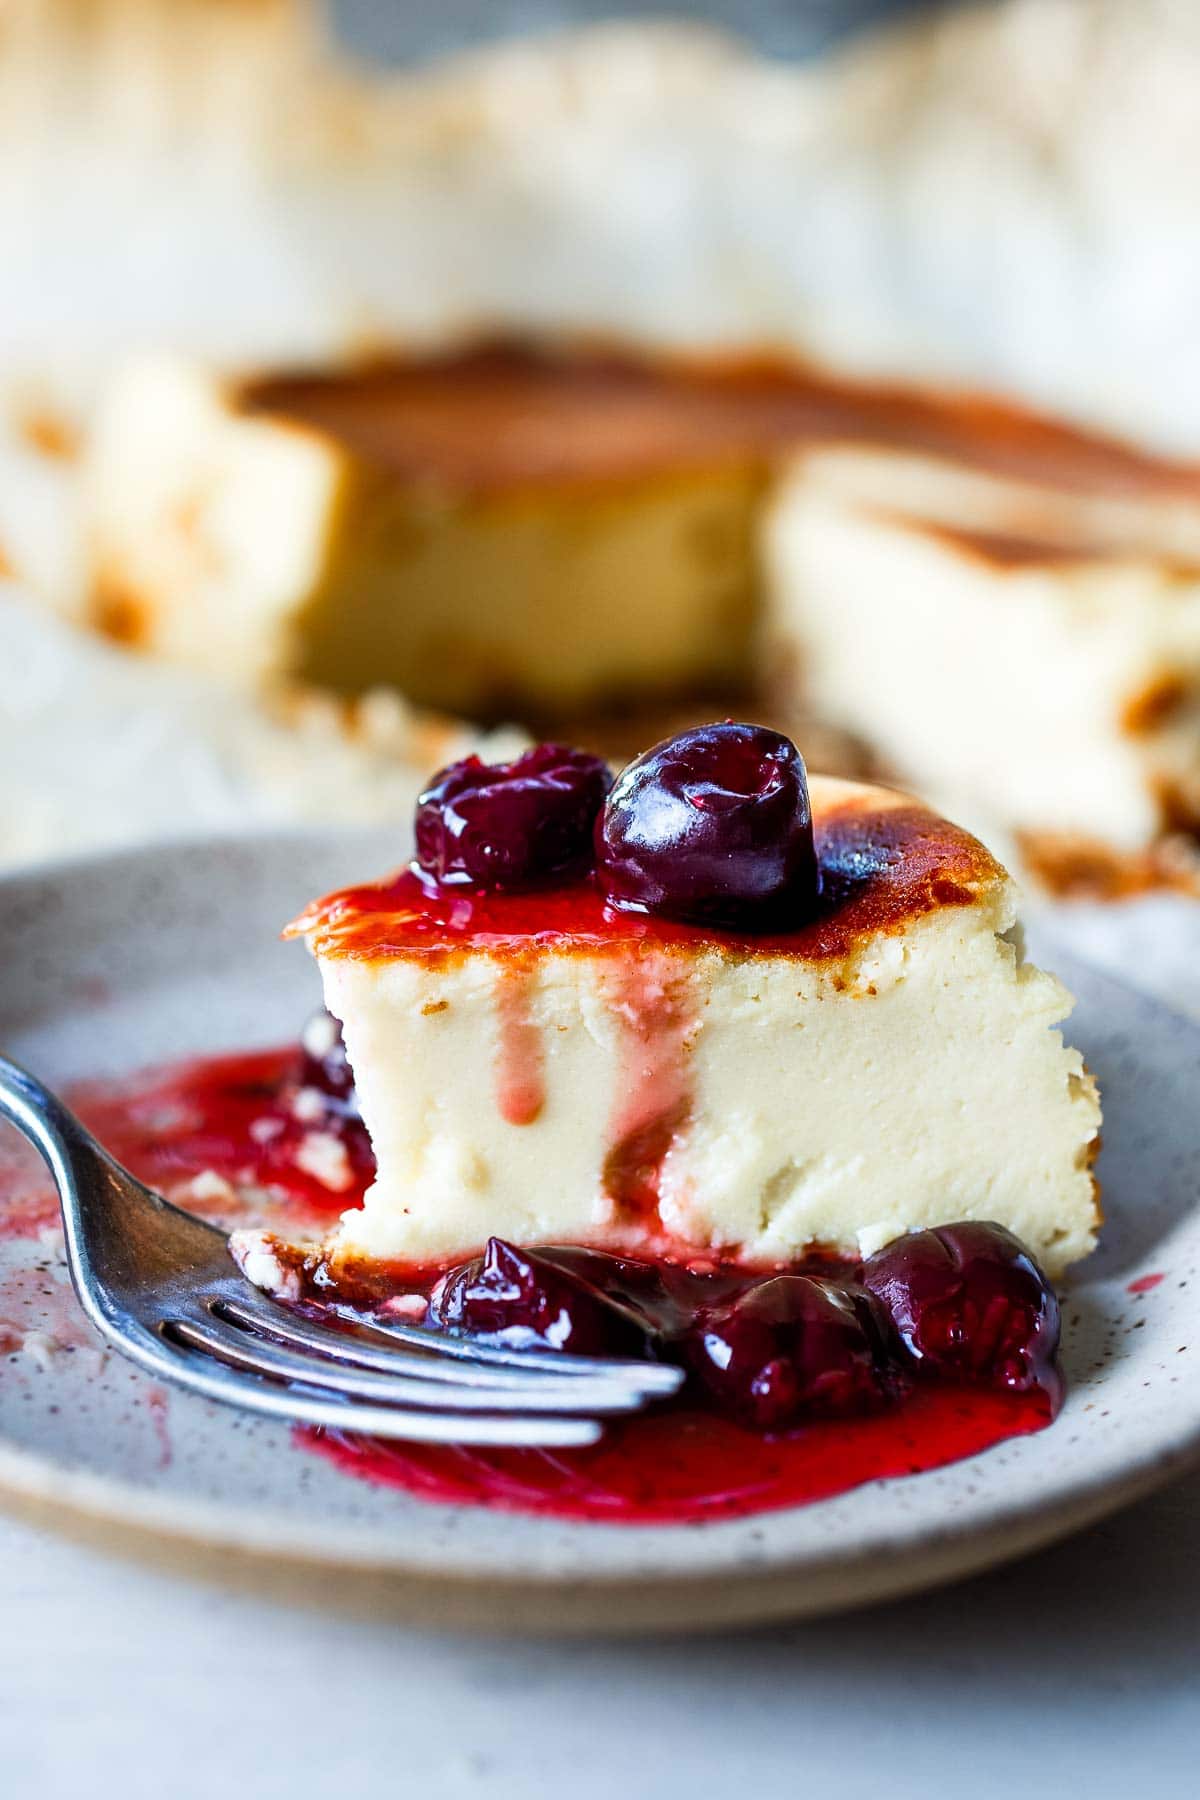
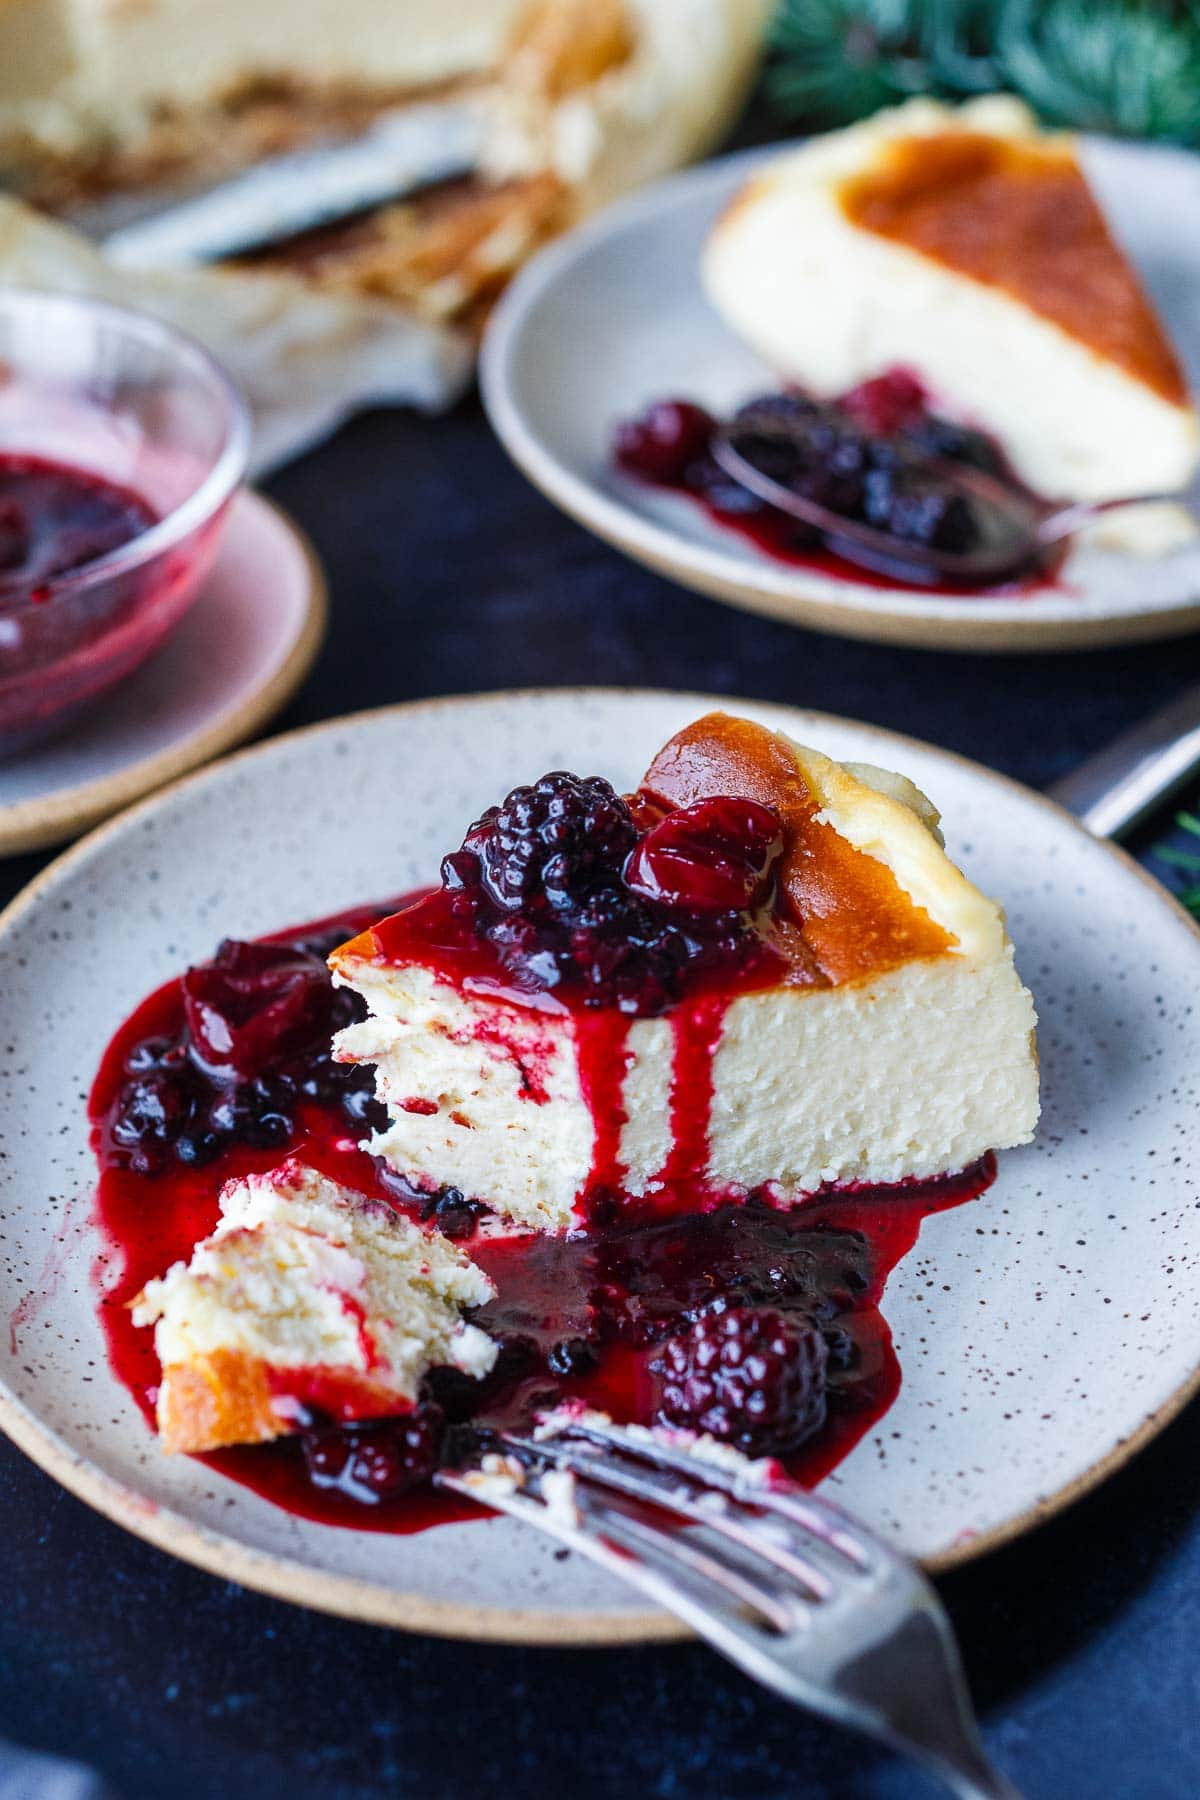
- Luscious texture, luxurious flavor. Without a crust, this velvety cheesecake is light and airy. The flavor is rich with vanilla and caramel. The top layer is golden and slightly burnt, resulting in a subtle bitter taste that complements the creamy, custard-like interior.
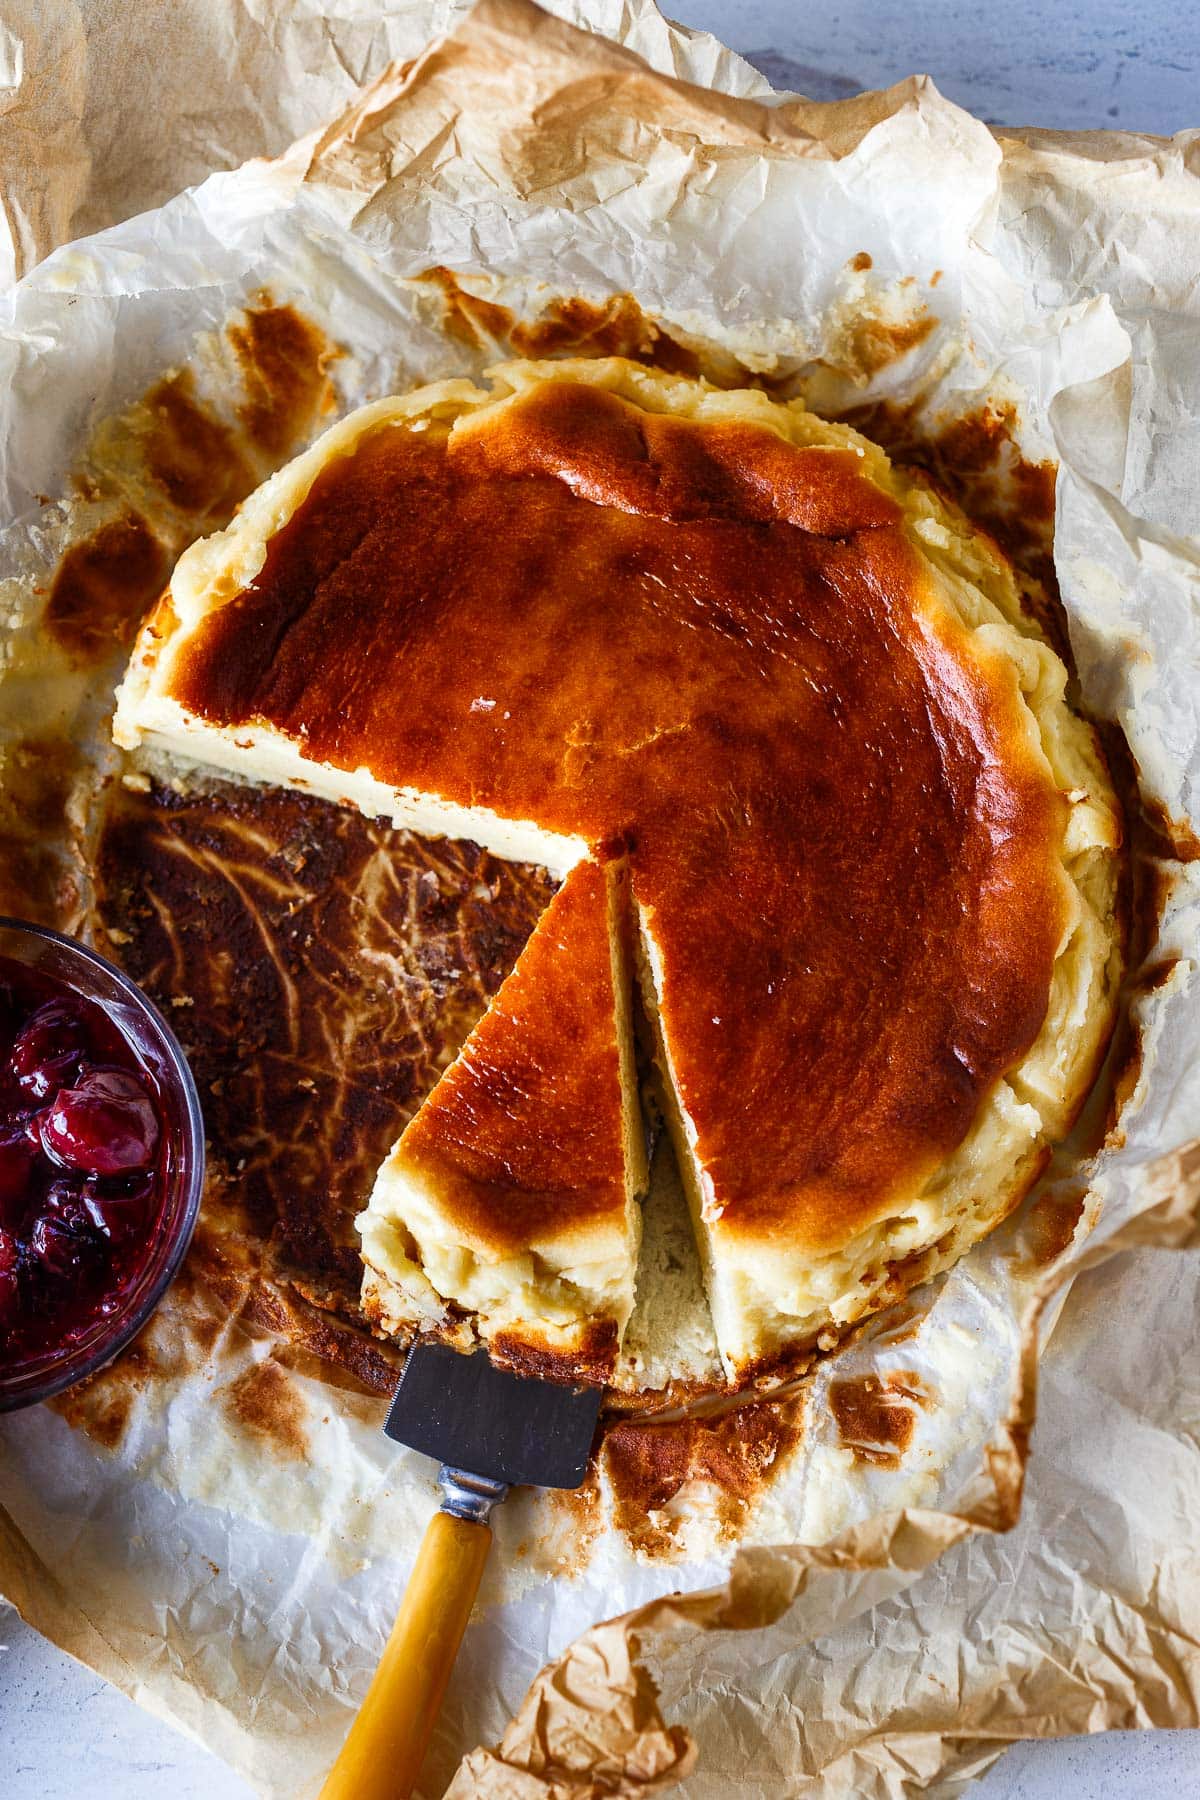
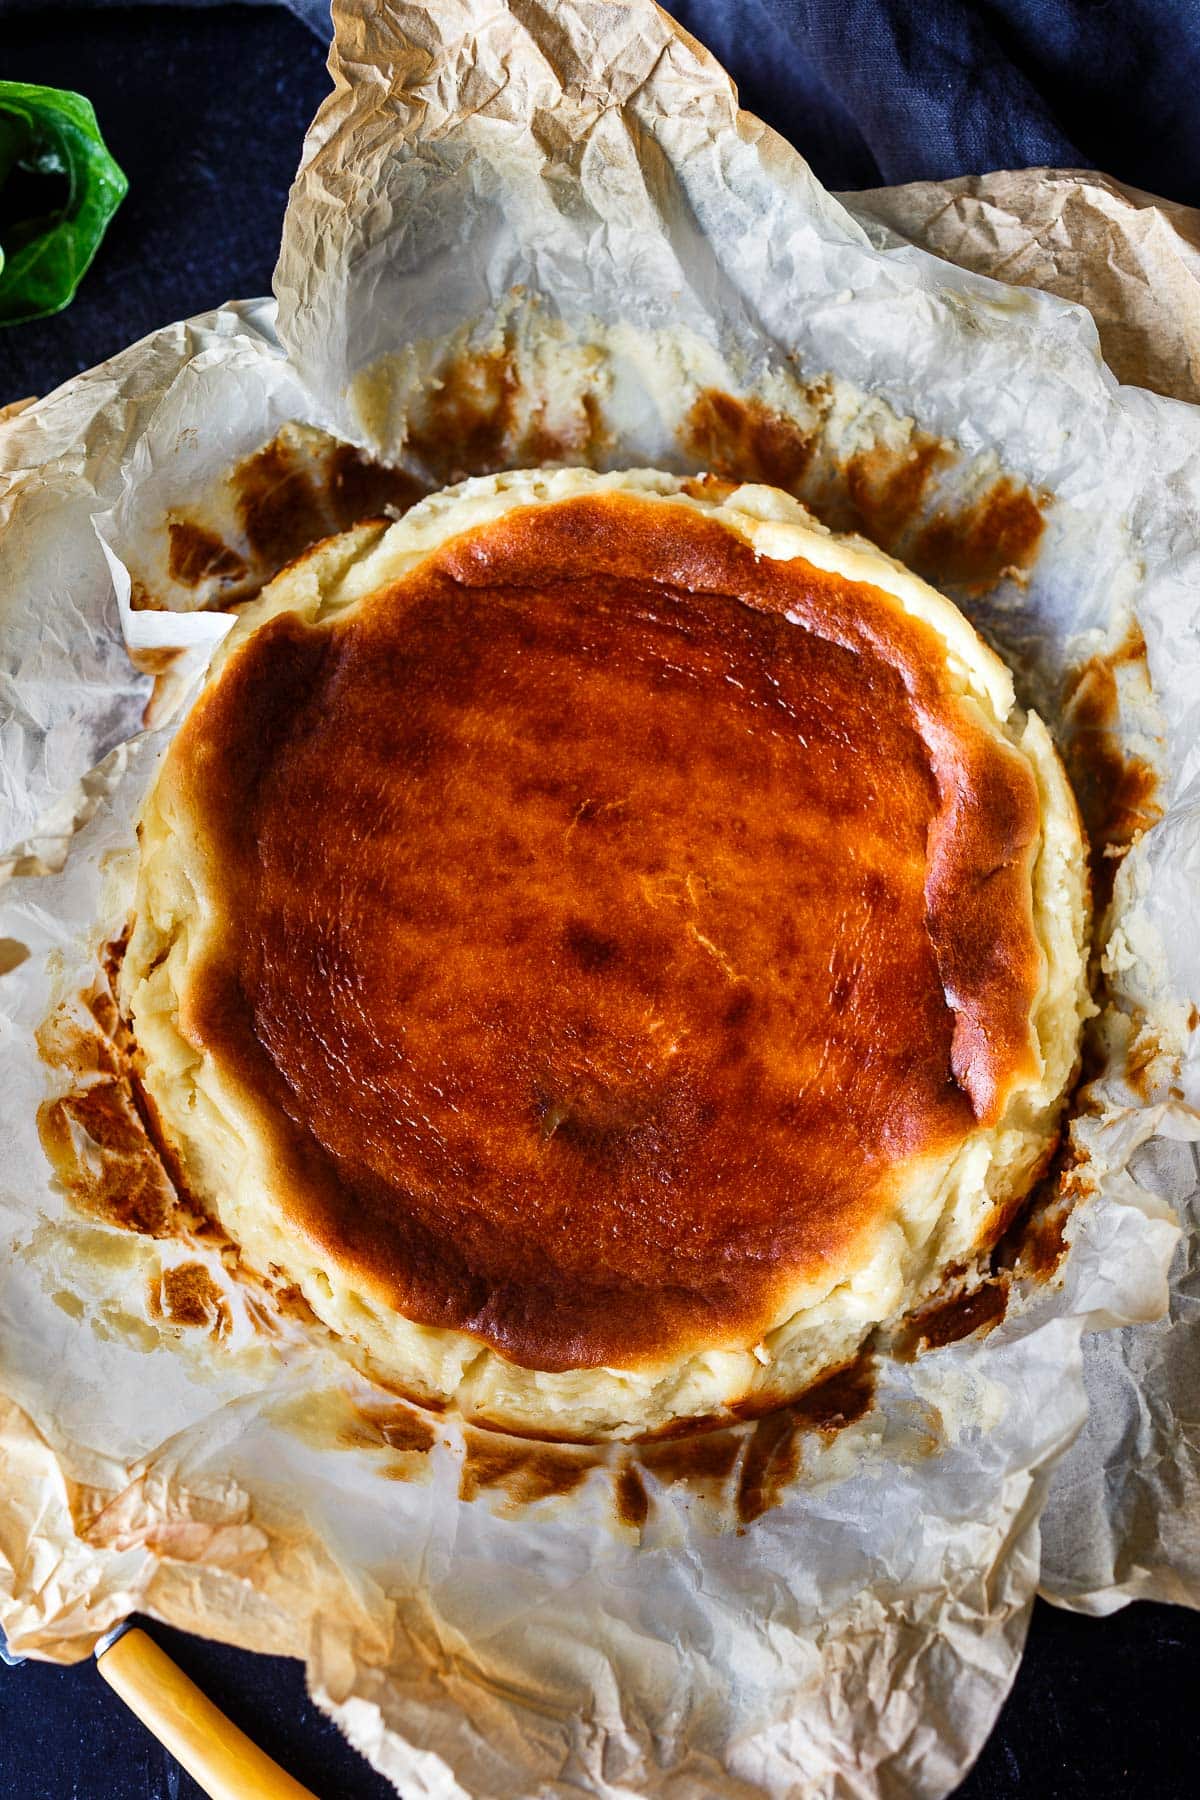
- Pure rustic charm. Served on crumpled parchment paper with its imperfect appearance, Basque Cheesecake is perfectly rustic, which makes it all the more appealing!
- Gluten-free adaptable. Use a gluten-free flour blend to make this cheesecake gluten-free!
What is Basque Cheesecake?
The Basque cheesecake, also known as Basque Burnt Cheesecake or Tarta de Queso, is a dessert characterized by its imperfect appearance and deeply burnt top. Its rustic charm comes from cooking at a higher temperature, allowing an upper “crust” to form naturally. This golden brown, nearly burnt top, develops a slight bitterness (in a good way!) that complements the rich custard-like interior of this amazing cheesecake. Think of the perfect match of coffee and cream.
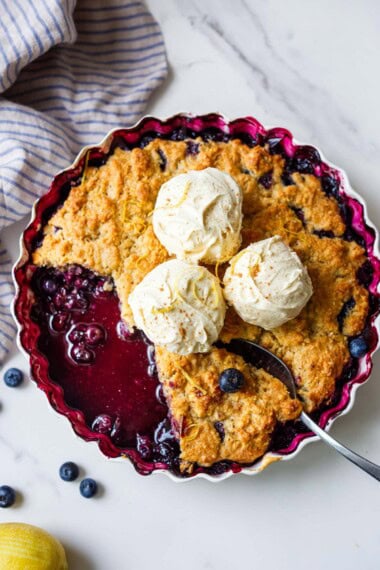
Traditionally, this San Sebastian dessert is enjoyed warm or at room temperature within a few hours of baking. No chill time is required! (Of course, you can chill it for a more traditional, dense, and creamy cheesecake texture.) Serve it the classic way, right on the parchment paper that it bakes in, pure and simple, with nothing added. That said, we find it to be quite refreshing when served with a fresh berry compote.
The Origin of Basque Cheesecake
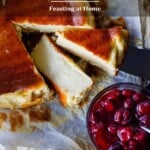
The iconic Basque Cheesecake originates from the renowned restaurant La Viña, located in the Basque region of Spain in San Sebastián. This coveted dessert has graced their menu since it was invented in the 1980s. Chef Santiago Rivera invented the original recipe. Typically served on parchment paper, the Basque cheesecake boasts a rich history and is beloved for its unique characteristics and delightful flavor.
Basque CHeeseCake Recipe Ingredients
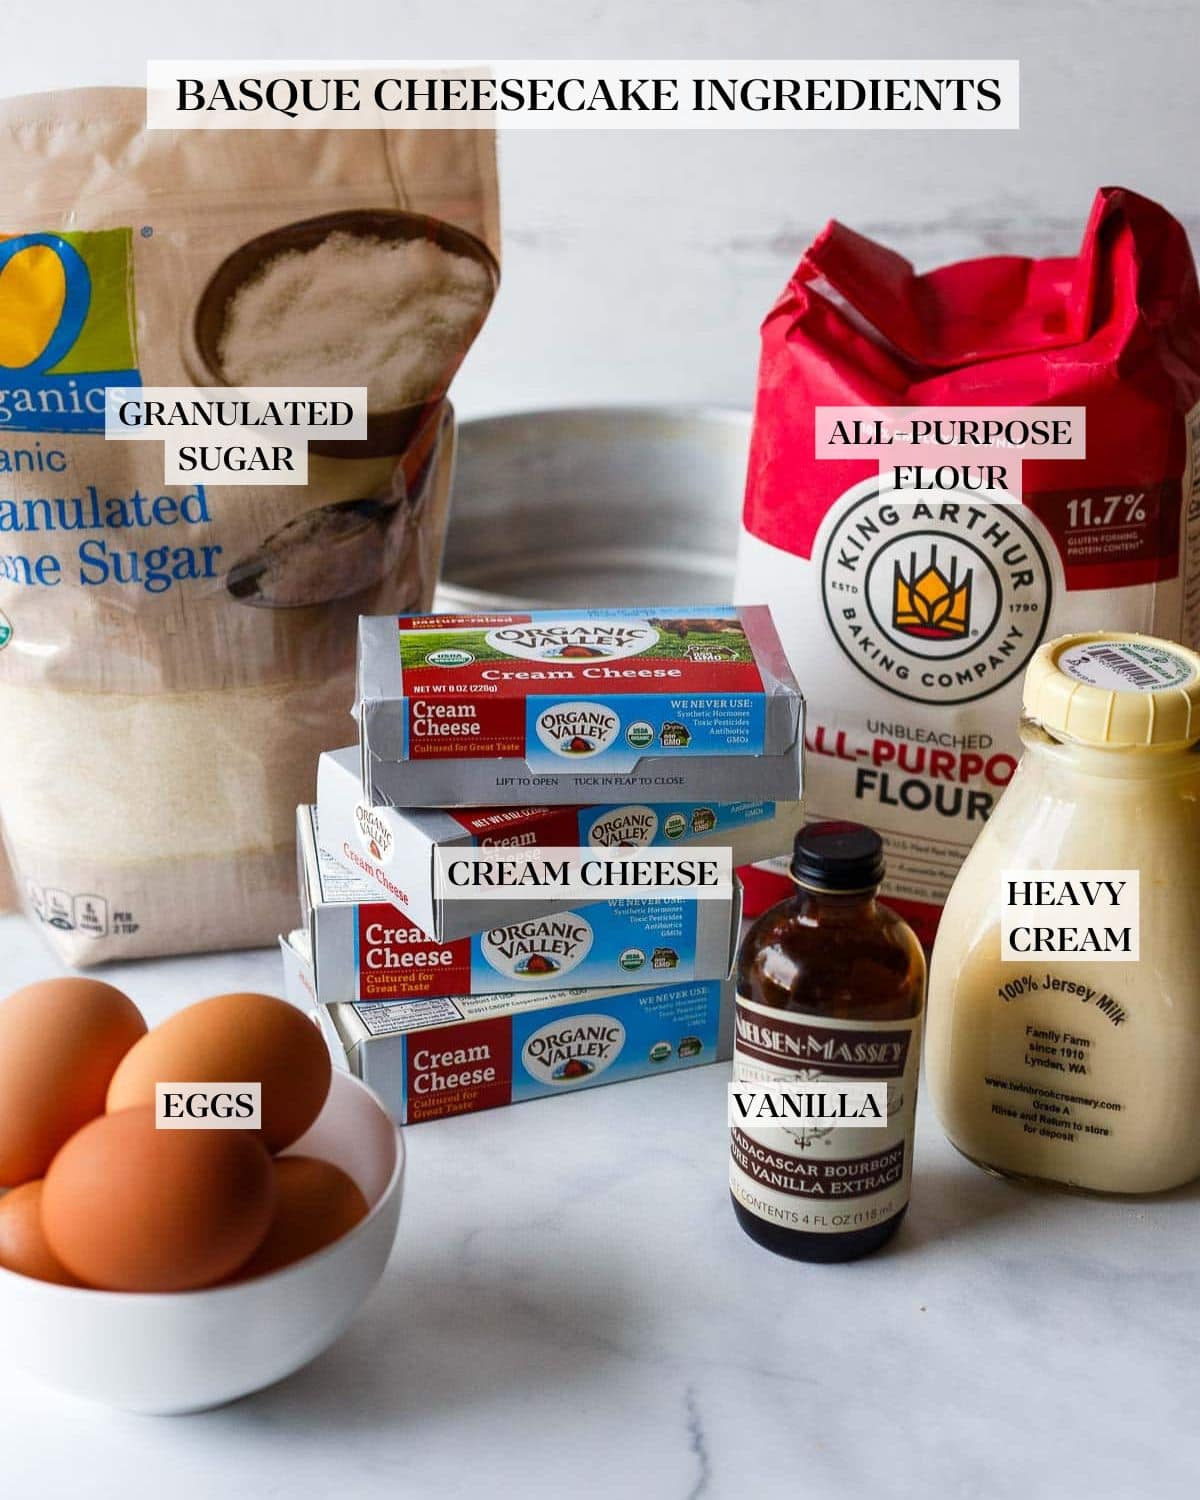
- Cream cheese: Use full-fat cream cheese with at least 30% fat. Low-fat or whipped cream cheese alters texture, leads to cracks, or gives a tangy flavor rather than a smooth, custardy taste.
- Large eggs: Use the freshest large eggs you can find! Older eggs may separate or react differently under heat.
- Heavy cream: Use heavy cream or whipping cream (36% fat), not milk or half-and-half. Cream provides richness and helps prevent curdling.
- Sugar: Sweetens the cheesecake, balancing the tanginess of the cream cheese. It also helps with the browning and caramelization of the top layer during baking. Regular sugar works best! Honey, maple syrup, or coconut sugar do not give the results we are going for.
- Flour: Helps to bind the ingredients together and provides structure to the cheesecake. It also contributes to the overall texture, making it slightly dense and giving it a cohesive consistency. Use all-purpose flour or a gluten-free flour blend.
- Salt: Enhances the flavors of the other ingredients, balancing the sweetness and adding a subtle savory note to the cheesecake. It helps prevent an overly sweet cheesecake.
- Vanilla extract: Infuses the cheesecake with warm and aromatic vanilla flavors, adding depth and complexity. It contributes to the cozy, inviting taste of the Basque cheesecake, complementing the creamy and slightly burnt top layer.
How to Make Basque Cheesecake
1. Preheat the oven to 450°F. You want the oven fully heated before baking the cheesecake.
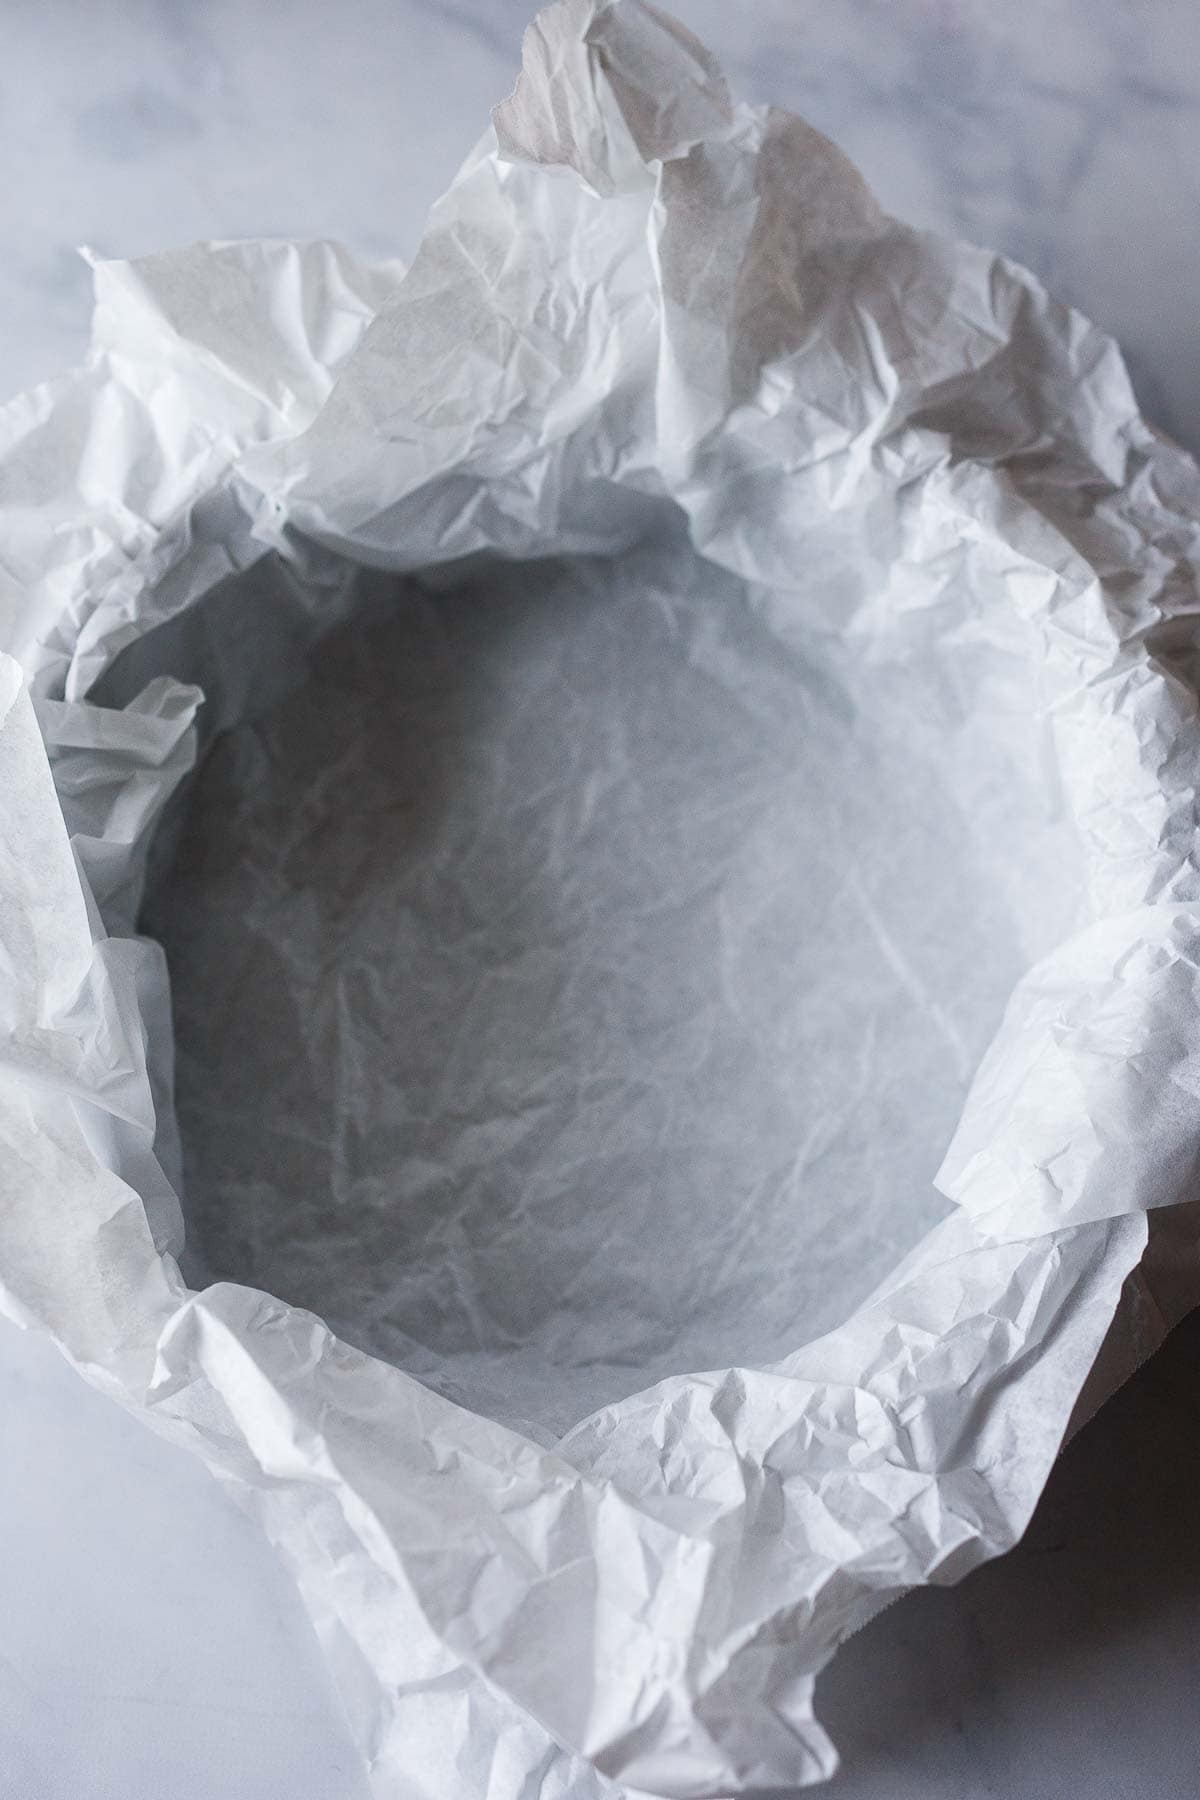
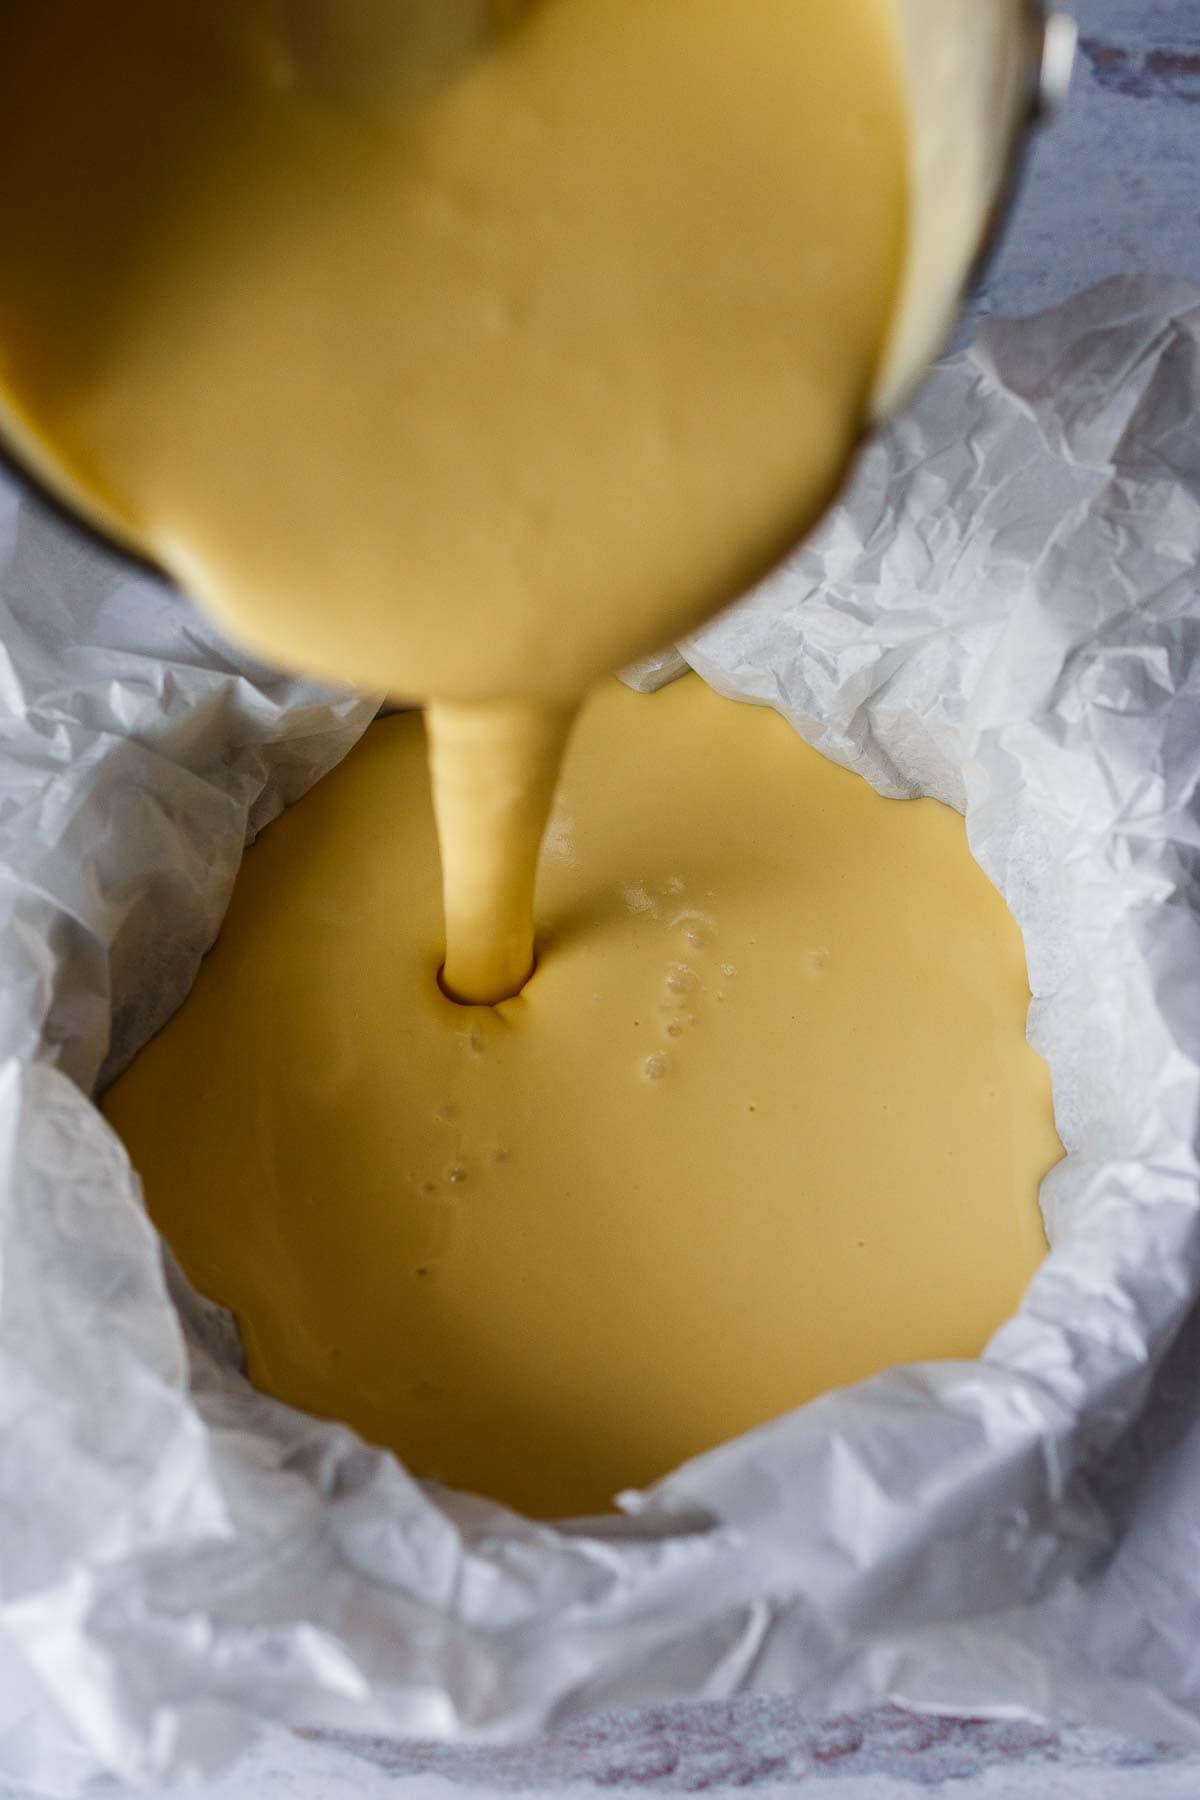
2. Prepare the pan: Crumple up the parchment paper and fit it into the pan. Don’t make it overly perfect, the rumples and creases keep the edges insulated to prevent them from getting overdone. Lightly spray or butter the parchment.
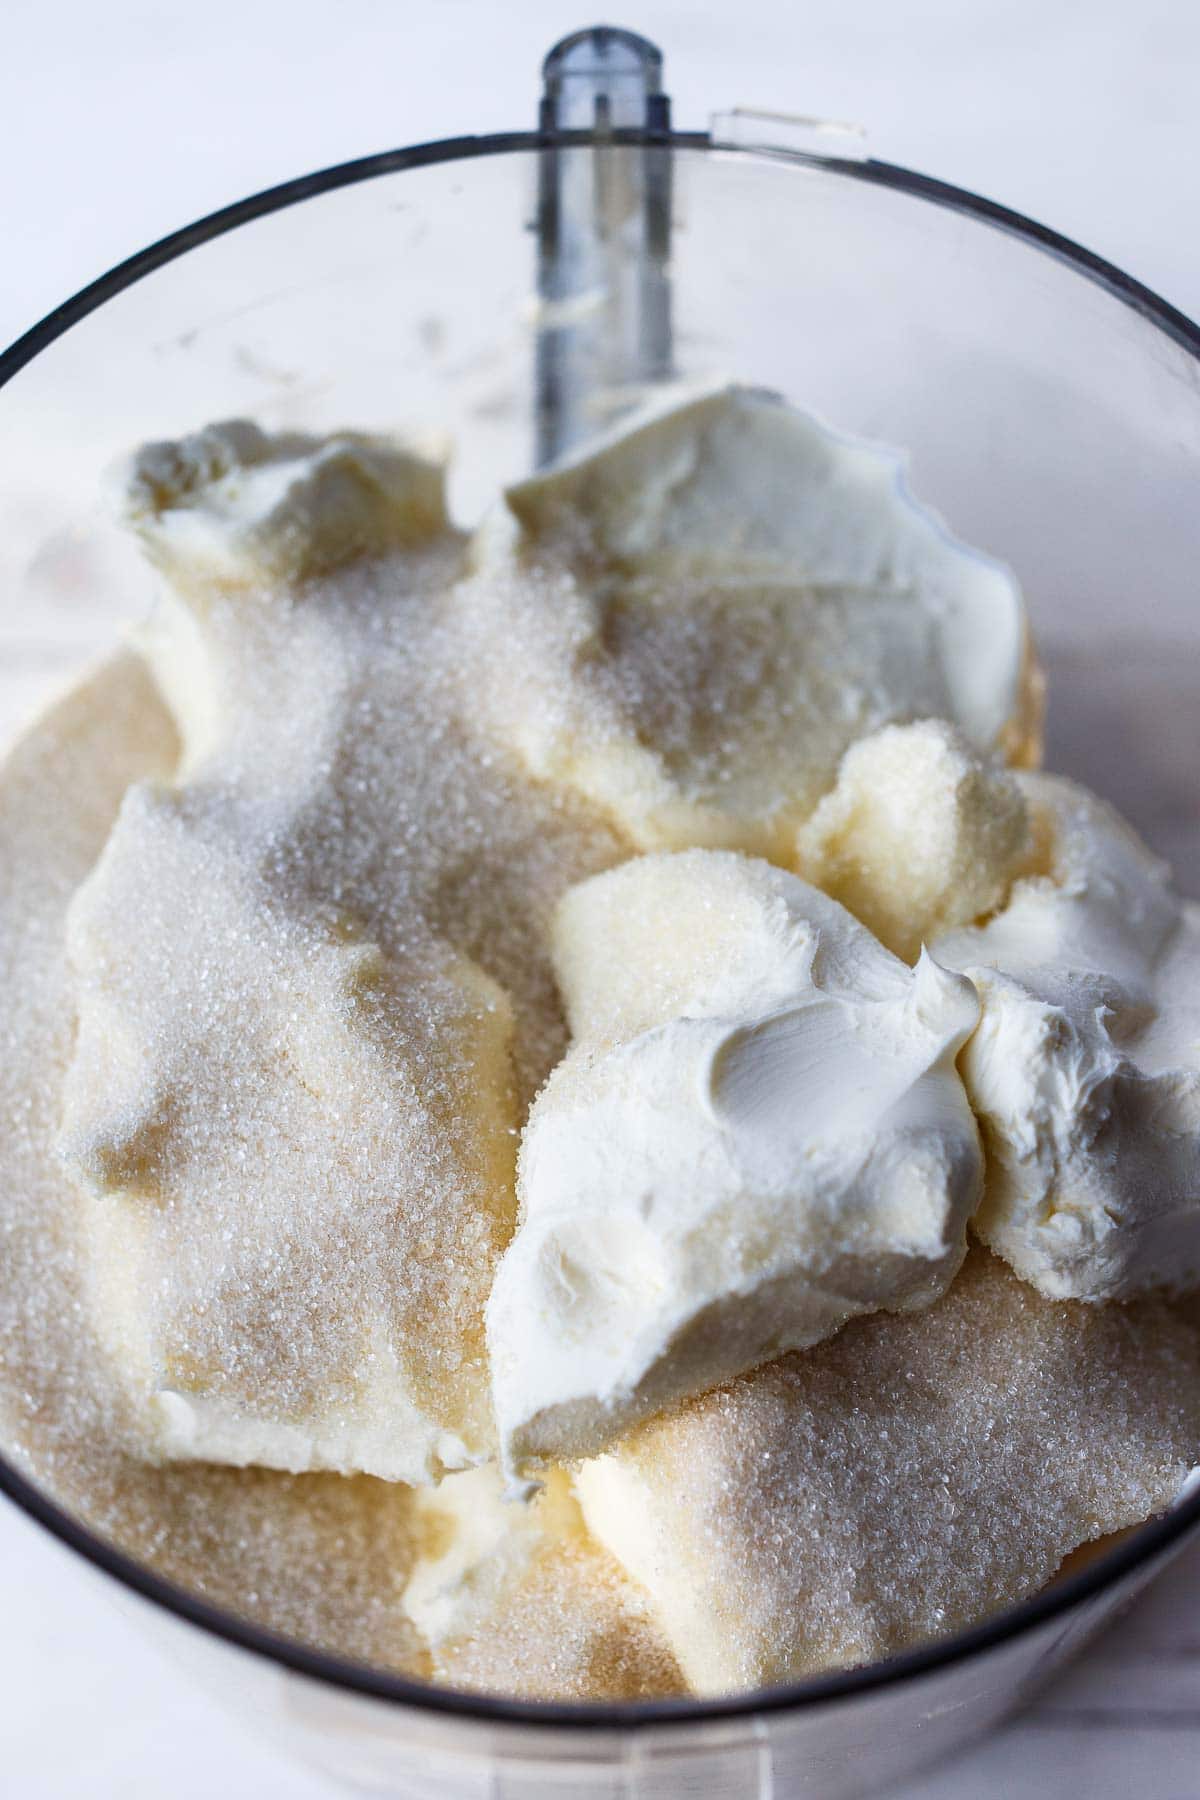
3. Make the batter: In a food processor or with a hand mixer, blend the cream cheese with the sugar just until smooth. You don’t want to over-mix. Be very cautious when pouring into the bowl of a stand mixer. There shouldn’t be lumps, and the mixture shouldn’t need a lot of mixing to get smooth.
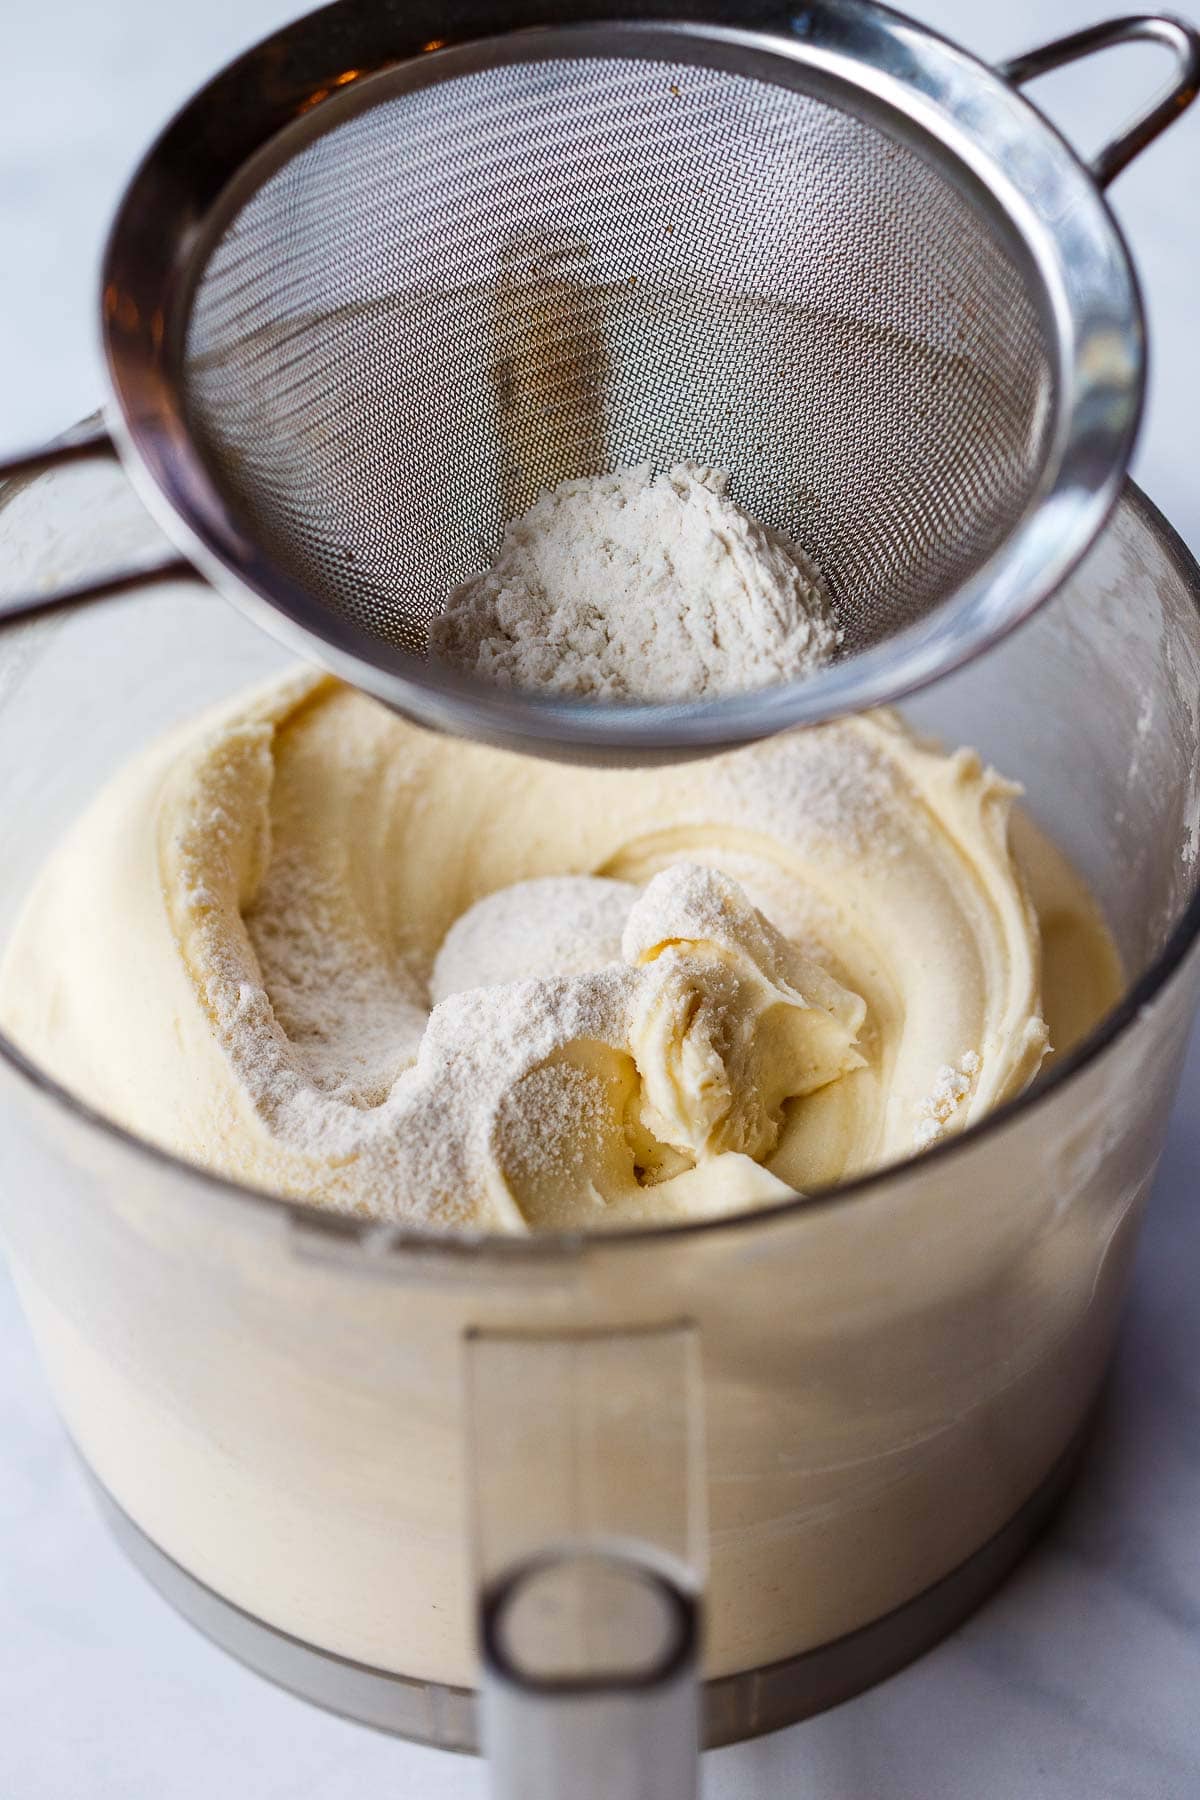
Sift the flour into the cream cheese. Pulse or mix at medium-low speed until just combined. Add the cream, vanilla, and salt and pulse a few times until just combined.
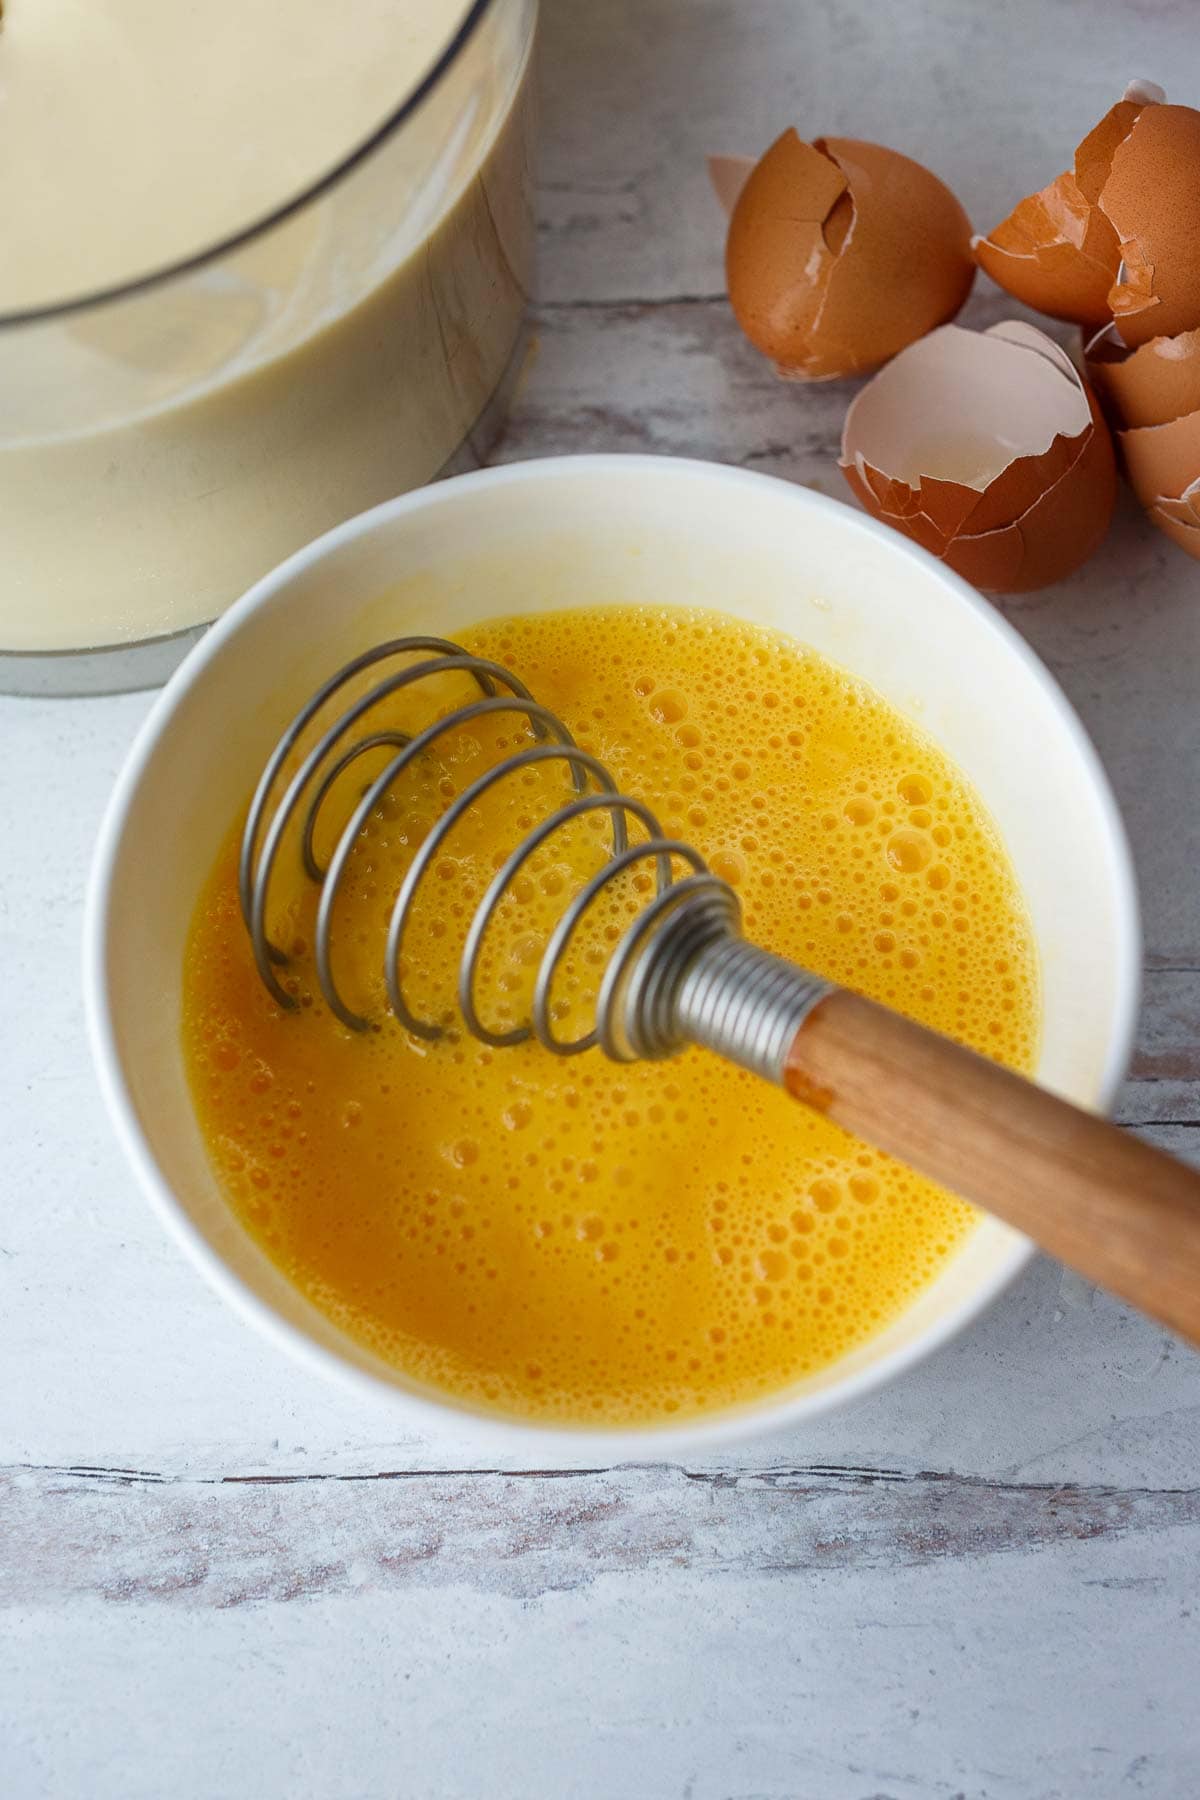
In a separate bowl, whisk the eggs and pour into the cream cheese mixture, mixing until just combined-avoid over-mixing. Over-mixing can affect the texture and cause cracks when it bakes.
4. Assemble: Pour the batter into the prepared cake pan and scrape down the sides of the bowl. Tap the pan down on the counter a few times to get rid of bubbles. Run a sharp knife or toothpick over the top, popping the small bubbles; this is purely for appearance.
5. Bake: Place on the middle rack of the oven, and turn the oven down to 425°F. Bake for 40-50 minutes. You want the center to have a good jiggle to it. Over-baking will result in a dry texture. Start checking at 40 minutes. The top should develop a dark, golden brown caramelization and will smell heavenly.
6. Cool: Remove from the oven and place on a wire rack to cool for 30 min or up to 2 hours. Serve warm or room temperature as is, or spoon some berry compote over the top!
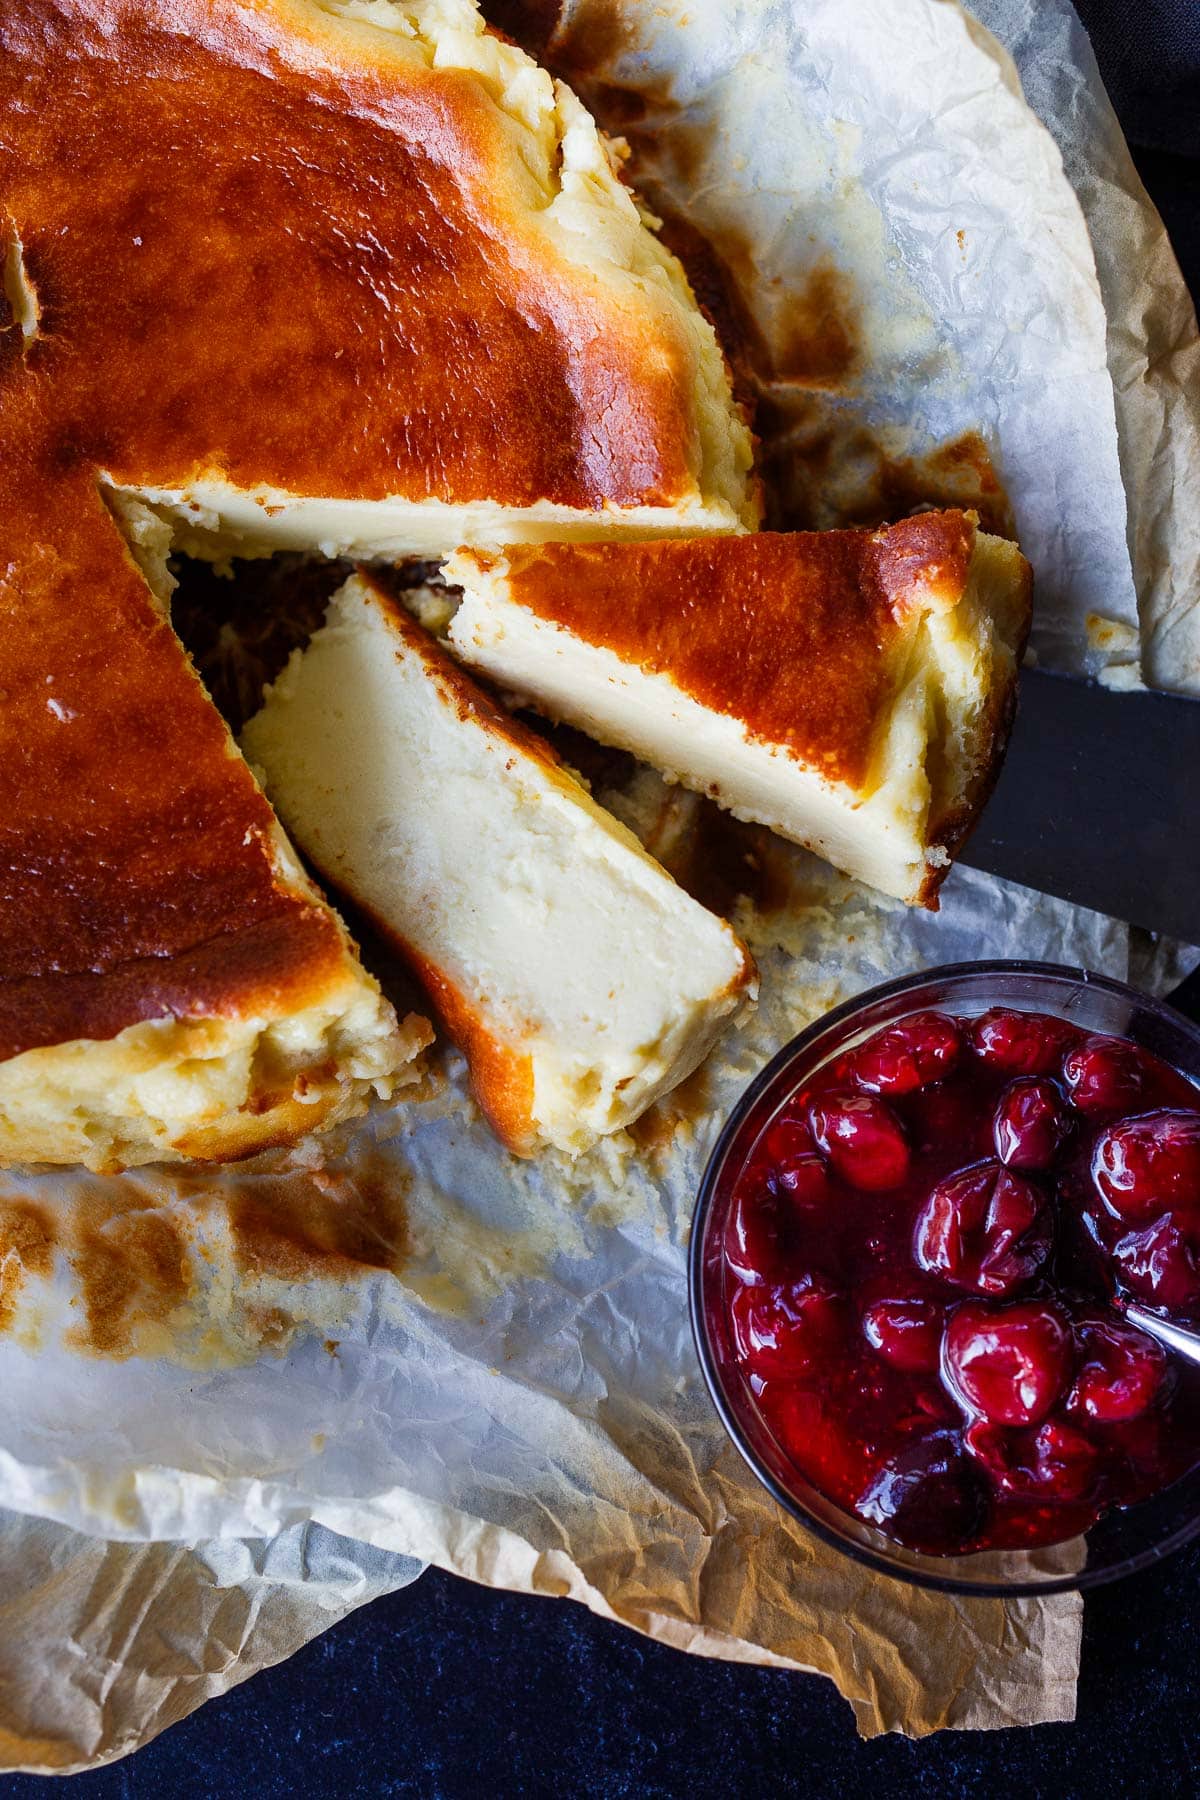
How to Slice Basque Cheesecake
- Cool: Allow the cheesecake to cool completely on a wire rack, then rest at room temperature for an hour before slicing. This helps the interior set.
- Use a clean knife: Use a large, sharp knife and wipe the blade clean between slices. Dip it in hot water and dry it off before each cut to help the knife glide cleanly through the custard without dragging.
- Cut slowly: Cut slowly and confidently from top to bottom, wiping off any residue after each slice to keep edges neat and clean.
- For extra polish: After slicing, you can rub a dry blade just inside the cut edge to clean up any side crumbs, if desired.
Chef’s Tips
- Use room temperature ingredients. Cold cream cheese or eggs may lead to over-mixing as you try to smooth out lumps. It’s much easier to achieve a silky, even batter when everything is at room temperature before you begin.
- Avoid dairy-free substitutions. Substitutes like vegan cream cheese or dairy-free milk will not yield the same results.
- Avoid over-mixing the batter. Over-mixing incorporates too much air, which can result in cracks or an overly eggy texture. Mix until just combined.
- Crumple your parchment paper. This isn’t just for looks! Crumpling the parchment paper helps the cheesecake fit snugly in the pan, while insulating the edges slightly, keeping them from over-baking while maintaining its rustic charm. Tip: Avoid overly thick sheets of parchment paper as they can insulate the cheesecake too much and interfere with caramelization. It should be baking weight.
- Bake it hot! A high initial oven temperature encourages a deep, burnished top (the Maillard reaction), which creates a bittersweet caramelized flavor that balances the creamy center.
- Watch for doneness. Check the cheesecake after 40 minutes-the center should have a good jiggle. If it’s firm throughout, it’s likely over-baked. Remember, it will continue to set as it cools.
- Serve at room temperature. Basque Cheesecake is traditionally served just-cooled or at room temperature. Chilling firms the texture, which some people love, but I prefer it with that warm, creamy center!
- Elevate with a simple topping. A spoonful of fresh berry compote, a drizzle of espresso caramel, or a sprinkle of flaky sea salt take it to the next level-though it’s perfect on its own, too!
Troubleshooting
- If it browns too quickly: Tent a sheet of aluminum foil or parchment paper above the cheesecake toward the end of baking.
- If the center is underdone after baking time: Lower the oven temperature to 200-225°F and continue baking for 5-10 more minutes, checking frequently.
- If the top is deeply burnt, but the interior is okay: You can gently peel off the very burnt layer (if thin) and serve the more golden underlay beneath.
- If cracks have formed: Don’t panic! A few natural cracks are normal. If you prefer a cleaner appearance, garnish with berries or a light dusting of powdered sugar.
Storage Suggestions
Basque cheesecake can be stored uncovered in the refrigerator for up to 3 days.
To freeze, wrap the cake tightly in plastic wrap, then a layer of foil, or use an airtight freezer-safe container. Store for 2-3 months. Thaw overnight in the fridge, then warm gently for 10-15 minutes in a 250°F oven.
What to Serve with Basque Cheesecake
- Berry compote-our go-to!
- Chocolate sauce or chocolate shavings
- Lemon zest
- Fresh fruit and whipped cream
- Espresso caramel
- Sprinkle of flaky sea salt
FAQs
Classic New York cheesecake is smooth and dense, whereas Burnt Basque Cheesecake is baked at a very high temperature resulting in a caramelized top with a rich and custardy interior.
The cheesecake will become eggy and dense if baked too long or too many eggs are used. To preserve the right taste and texture, be sure to check the cheesecake after 40 minutes. We also opt for fewer eggs in this recipe to cut back on the eggy flavor.
This is the result of over-mixing. Be careful not to beat the ingredients excessively.
Leftover cheesecake can be stored uncovered in the refrigerator for up to 3 days. Serve chilled, or bring it back to room temperature before serving.
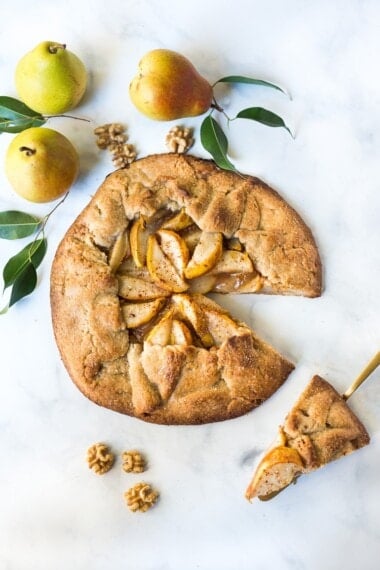
More Rustic Dessert Recipes

Love this burnt basque cheesecake recipe? Leave a 5-star ⭐️⭐️⭐️⭐️⭐️ rating on the recipe card!
After you try this Basque Cheesecake recipe, let us know how it turns out in the comments below. Your review will help other readers, too! Sign up here to join our community and receive our latest recipes and weekly newsletter! xoxo Sylvia

Basque Cheesecake Recipe
- Prep Time: 20 minutes
- Cook Time: 50 minutes
- Total Time: 1 hour 10 minutes
- Yield: 9” cheesecake 1x
- Category: dessert
- Method: baked
- Cuisine: Basque
- Diet: Gluten Free
Description
This crustless, burnt Basque Cheesecake recipe is light and airy with a caramelized top and luscious notes of vanilla. A rustic dessert that is easy to make.
Ingredients
- 9” springform pan
- parchment paper
- 4 pkg, 32 ounces cream cheese, at room temperature (see notes on brands)
- 4 large eggs (see notes)
- 1 1/2 cups heavy cream
- 1 1/4 cup sugar
- 1/4 cup flour, all-purpose flour or gluten-free flour blend
- 1/2 teaspoon salt
- 2 teaspoons vanilla extract
Instructions
- Preheat the oven to 450F degrees. You want the oven fully heated before baking the cheesecake. (This takes about 1/2 hour in my oven.)
- Prepare the pan: Crumple up the parchment paper and fit it into the pan. Don’t make it overly perfect, the rumples and creases keep the edges insulated to prevent them from getting overdone. Lightly spray or butter the parchment.
- Make the batter: In a food processor or with a hand mixer, blend the cream cheese with the sugar just until smooth. You don’t want to over-mix. Be very cautious if using a stand mixer. Sift the flour into the cream cheese. Pulse or mix until just combined. Add the cream, vanilla, and salt and pulse a few times until just combined.
- In a separate bowl whisk the eggs and pour into the cream cheese mixture mixing until just combined- avoid overmixing. Overmixing can affect the texture and cause cracks when it bakes.
- Assemble: Pour the batter into the prepared pan. Tap the pan down on the counter a few times to get rid of bubbles. Run a sharp knife or toothpick over the top popping the small bubbles, this is purely for appearance.
- Bake: Lower oven heat to 425F. Place on the middle rack and bake for 40-50 minutes; you want the center to have a good jiggle to it. Overbaking will result in a dry texture. Start checking at 40 minutes. The top should develop a dark golden brown.
- Remove from the oven and place on a wire rack to cool for 30 minutes. Serve warm, at room temperature or chilled.
Notes
Eggs: Many Basque cheesecake recipes call for 6-9 eggs, which we found a bit too eggy flavored, but the 4 large eggs seemed just right. Feel free to add more eggs, as it will make the filling loftier.
Cream cheese: We have successfully used Organic Valley and Philadelphia cream cheeses. Regular, full fat cream cheese is best for optimal flavor and texture.
Texture: when served warmed the texture is light and mousse-like. When chilled the texture is a more traditional dense and creamy cheesecake texture.
Storage: When it's at room temperature, put it in the fridge uncovered. It gets too moist if covered and messes up the browned top.
Achieving a brown top: Different ovens will brown at different rates. If it starts to get too dark, turn the oven down. If it is not browning enough when the cheesecake is close to done, you can put it under the broiler for a few minutes- keeping a close eye on it the entire time! It is best not to open the oven during the first 20 minutes of baking.
Tip: Err on the side of underbaking. You’ll lose the custardy texture if it is over-baked.
Nutrition
- Serving Size: 1/12th of cheesecake
- Calories: 261
- Sugar: 22.4 g
- Sodium: 172.8 mg
- Fat: 16.8 g
- Saturated Fat: 9.7 g
- Carbohydrates: 25.2 g
- Fiber: 0.1 g
- Protein: 4.3 g
- Cholesterol: 107.6 mg


I love the simplicity of this extra yummy cheesecake. A new classic for our family!
Glad you gave it a try Stephanie. Thanks for the review!
This is one of the many recipe that I love. Easy to make and spectacular. I won’t do the other Cheesecake they are to complicated. Thanks
Great to hear Claudia!
I made this last night and it was delicious. I did use a food processor but the cream cheese didn’t all smooth out since I didn’t want to over process. I sieved the batter into the pan. I did as instructed to preheat at 450 and dropped to 425 when I placed the pan in the oven. I checked it at 40” in and the top was barely browned. So I increased temp to 450 and baked for another 8” and checked the internal temperature to hit 155F. I turned on the broiler to char the top but I didn’t like how the broiling created charred bubbles. In the future, I’ll maybe increase the temp half way during baking to have a natural burnt top. Overall the taste was creamy and smooth and the burnt top adds a caramelized flavor. Thank you for the recipe!
Great Lani, glad you gave it a try! The cream cheese needs to be really soft before blending. Thanks for leaving a helpful review!
Would it be possible to use honey in place of some or all the sugar?
I have not tried this but it sounds yummy! I would think it would work, you could always add an extra egg just to make sure it isn’t too soft?
I made this cheesecake with honey instead of sugar, plus an extra 2 eggs, as recommended. It was so delicious, especially with the berry compote! It does need to be watched carefully as it bakes so the top doesn’t burn, but it’s otherwise surprisingly easy to make. Thanks so much for your help!!
Love that with just honey! Glad you enjoyed Melissa!
I love cheesecake and have made a lot of varieties. This is, by far, the best I’ve ever had. I’m looking forward to tasting it after it’s refrigerated. Out of the oven, it was light, airy, and a fluffy melt in your mouth texture. Definitely stealing this recipe! 😜
Yay, happy you enjoyed!
I’ve made loads of different Basque cheesecake recipes and this really is the best. Absolutely delicious!
So happy to hear this Andrea!
Made our birthday (cheese)cake dreams come true.
Used King Arthur GF flour and nailed the texture and brown-top. Paired with blueberry compote for some b-day flair… it was a rich and decadent success.
Yay! And happy birthday!
Can’t wait to try this. Would lemon work in place of vanilla?
Sure. Lemon juice and zest might be nice!
Delicious.
Awesome!
Wow! What a hit this was. It really was an easy, yet exciting dessert to make with the mantra ” do not over mix” at each step of the way. How can something with 4 pkg of cream cheese and heavy cream taste so light? who knows?, but it was a delicious ending to our new year’s eve dinner. I served it with a huckleberry lemon sauce from huckleberries picked this summer. I will be making this again for sure and I don’t normally do desserts! Thanks for the recipe and the tip to broil at the end if it wasn’t quite brown enough. That worked out perfectly.
Wonderful Cindy! Fresh frozen huckleberries sound just perfect!
This looks amazing! Could one use full fat ricotta cheese instead?
Thank you.
Haven’t tried it with this recipe but I love ricotta cake. I bet it would work!
Just made this and it was amazing!! We ate this in San Sebastian and this recipe is spot on. Loved it!!!
Awesome Debi! So glad you enjoyed!
Can you freeze this?
Should work fine.
Could you use something besides heavy cream?
I am sure you could experiment. We mostly stuck to the traditional ingredients so I don’t know for sure.